


Progressive Web Apps (PWAs) are Web applications that behave like native mobile applications. PWAs leverage Google technology to deliver an extremely engaging mobile experience. PWAs live within the Web browser and have the ability to work even if the device is offline. At the same time, PWAs exhibit the behavior that you've come to expect from native mobile apps: They support background content updating, push notifications, and more. More importantly, PWAs can be updated without needing to resubmit your applications to the app stores (both Apple and Google's).
In this article, I'll discuss one of the most interesting and important features of PWA: Push Notifications. I'll show you how to enable push notifications in your PWA application using Firebase Cloud Messaging (FCM). And, as a bonus, I'll show you how to host your PWA on Firebase Hosting, as well as how to host your REST API as a serverless app through Firebase Functions. Keep your seat belt on, as this is going to be a very fun (and exciting) journey!
Creating the Project
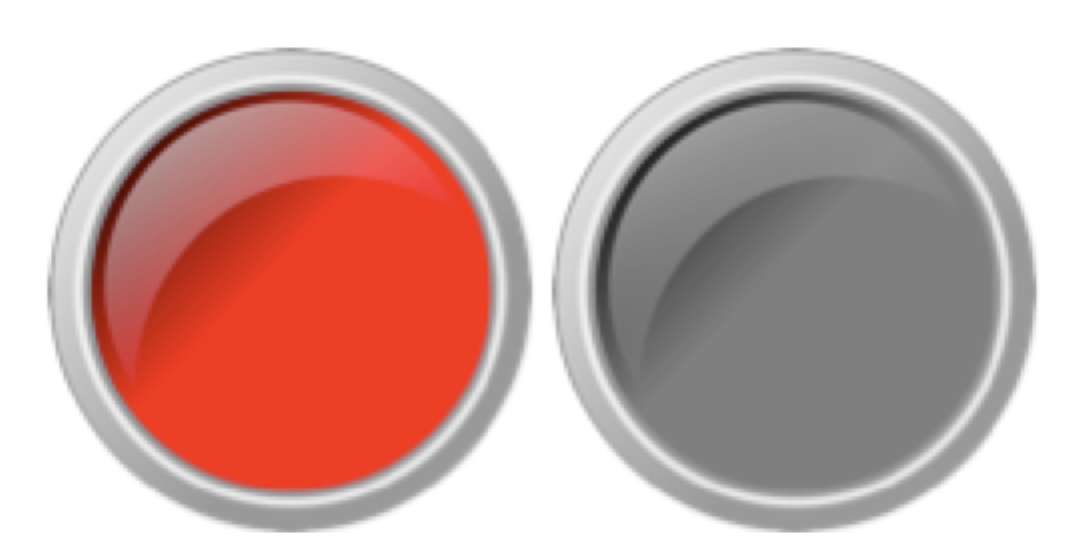
Let's first start by creating a new folder named PWAPUSH. This will be used to store the files for the PWA application. The first set of files to copy into this folder is button_on.png and button_off.png (see Figure 1). These images will be used to represent the status of the Web app's push notification: red to indicate that the push notification is ON and grey to indicate that the push notification is off.
Creating the Web Page
Next, create a file named index.html and save it in the PWAPUSH folder. Populate it with the content shown in Listing 1. The index.html page displays a line of text as well as the image of a button to represent the state of push notification.
Listing 1: Content of index.html
<!DOCTYPE html>
<html lang="en">
    <head>
        <meta charset="UTF-8">
        <meta name="viewport" content="width=device-width, initial-scale=1.0">
        <meta http-equiv="X-UA-Compatible" content="ie=edge">
        <title>Push Notification</title>
        <link rel="manifest" href="manifest.json">
    </head>
    <body>
        Tap to enable/disable Push Notification
        <div class="push">
            <img width="50px" class="image" src="button_on.png" alt="Push Notification" />
        </div>
        <script src="main.js"></script>
    </body>
</html>
Creating the Service Worker
The next step is to create the service worker for the PWA. Create a file named service-worker.js and save it in the PWAPUSH folder. Leave it empty for now.
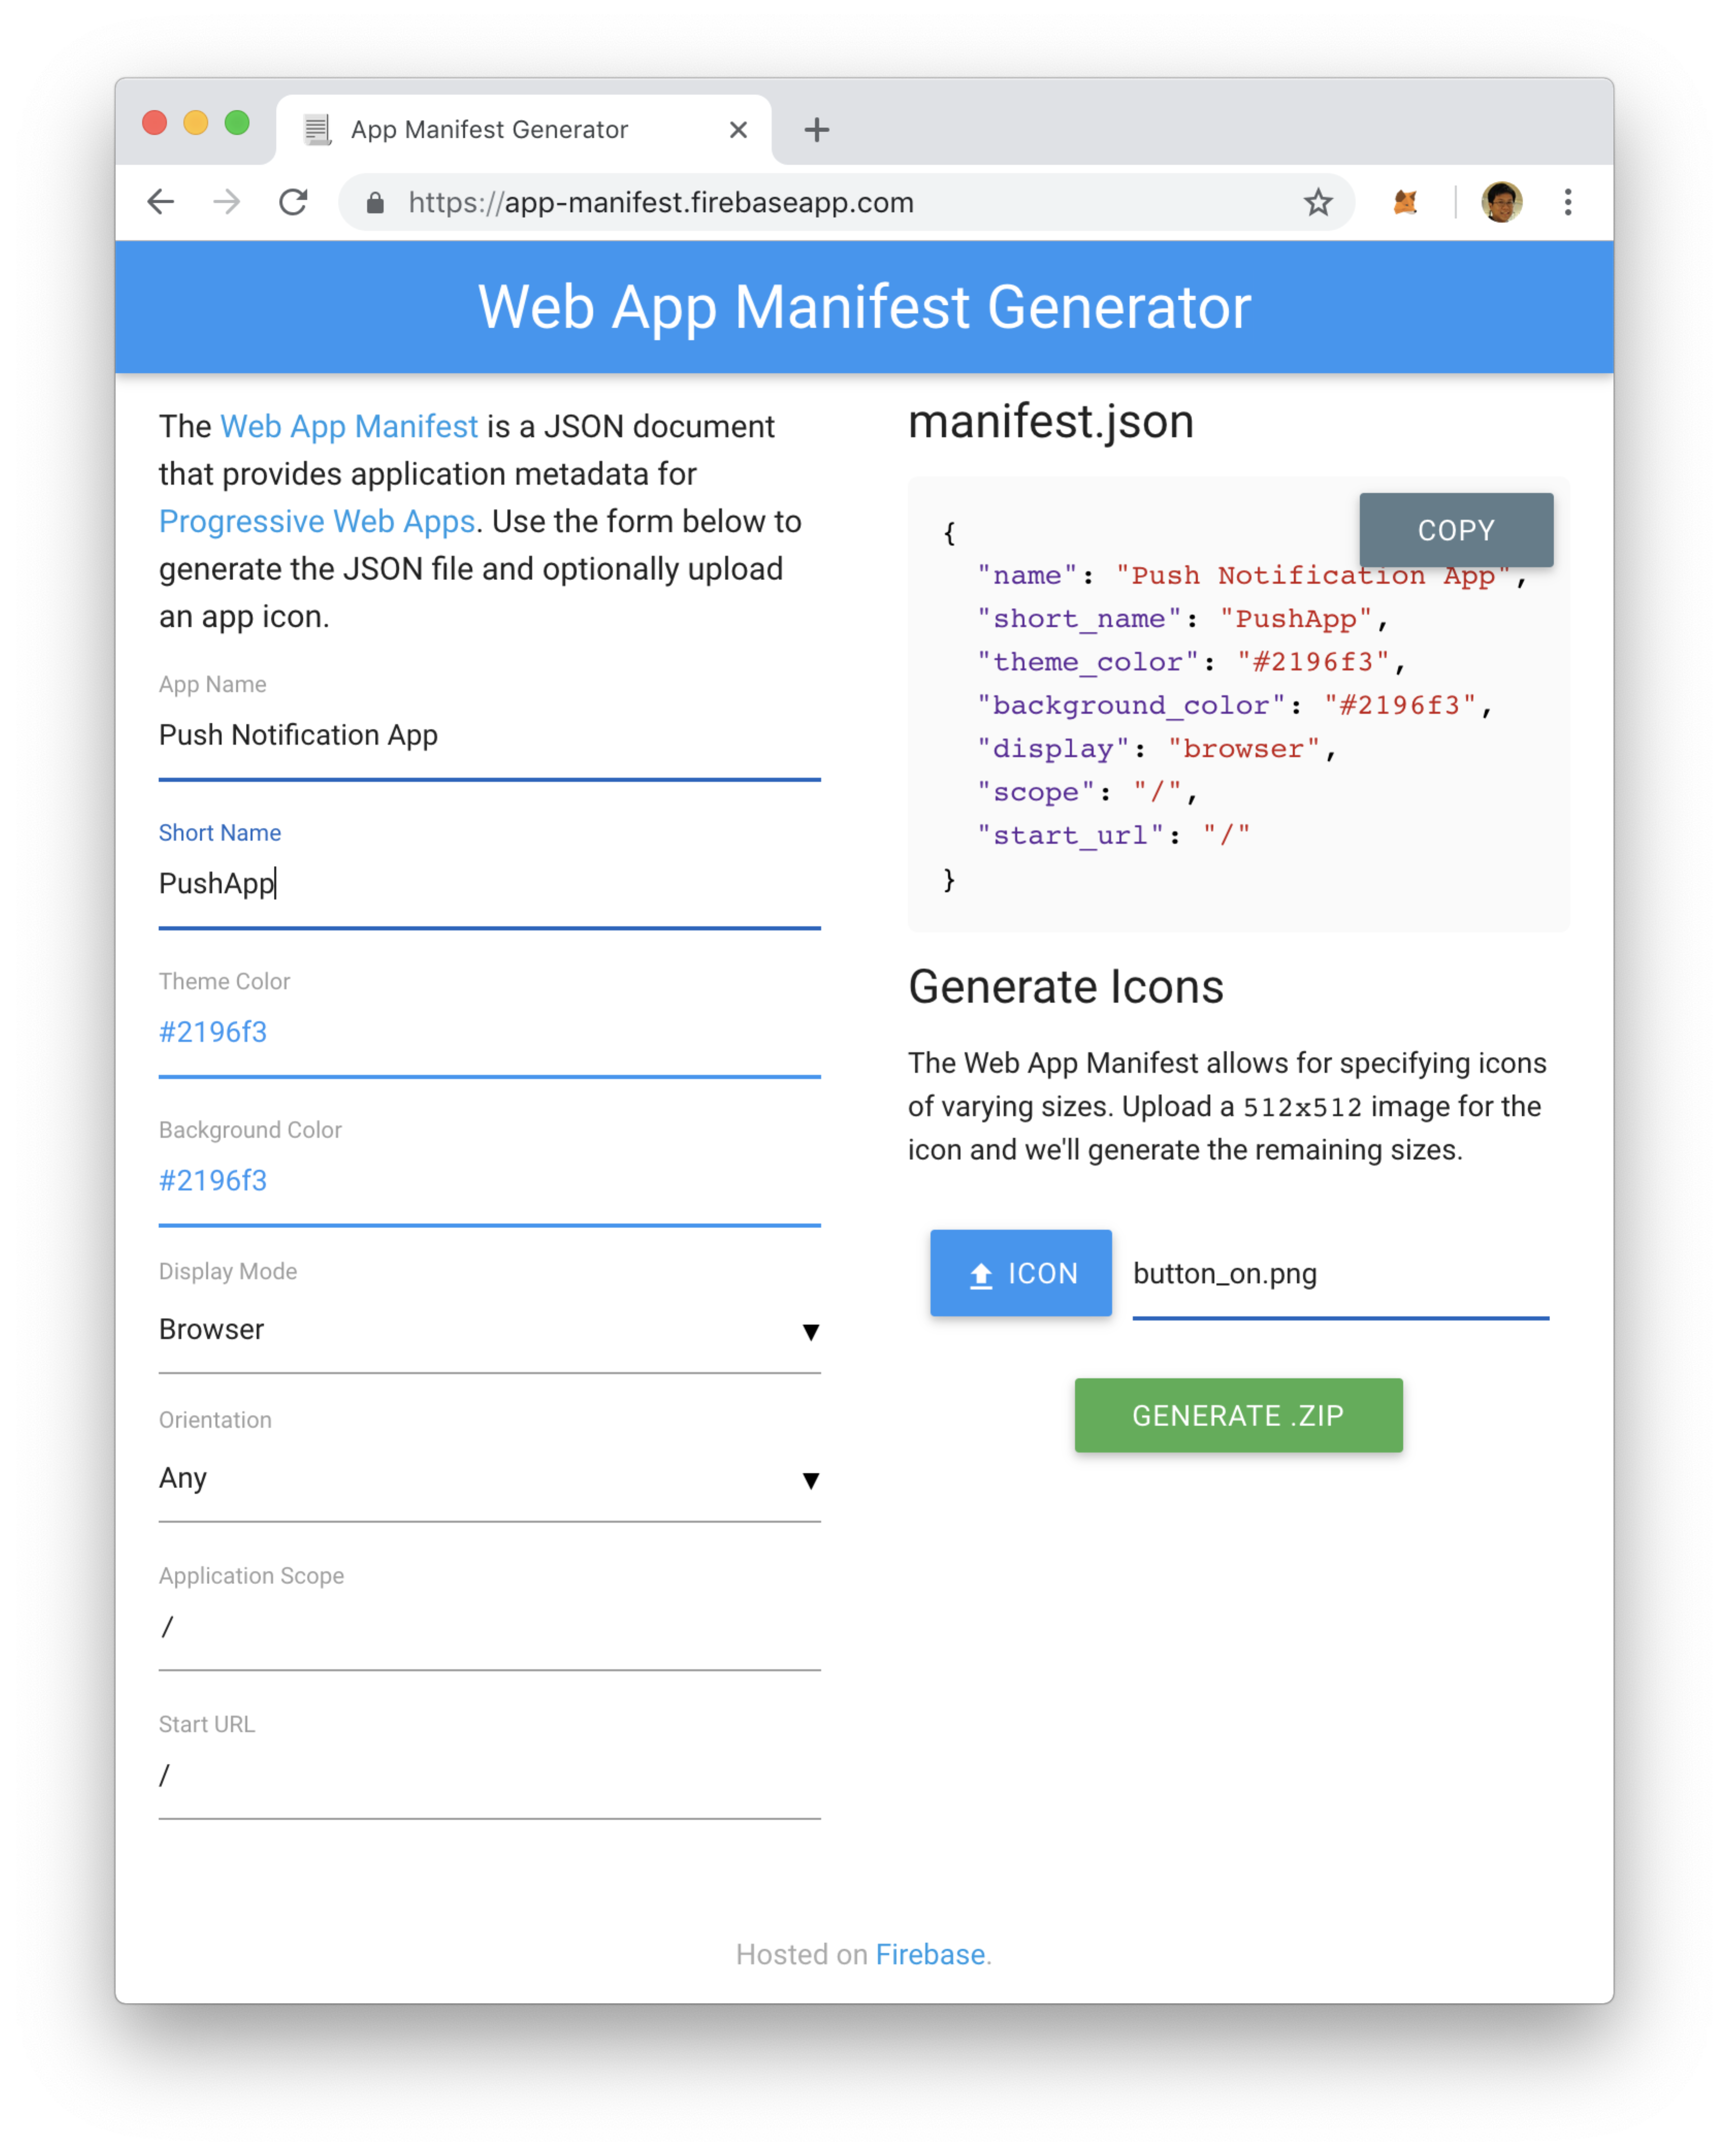
Using a Web browser, go to https://app-manifest.firebaseapp.com/ so that you can generate the Web App Manifest for your app. Fill in the information as shown in Figure 2 and then drag and drop the button_on.png image onto the ICON button. Once this is done, click the GENERATE .ZIP button.
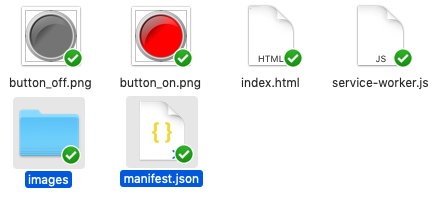
The App-images.zip file will now be downloaded. Unzip it and drag and drop its content (a file named manifest.json and a folder named images) onto the PWAPUSH application folder (see Figure 3).
Using Firebase Cloud Messaging for Push Notifications
To enable your Web app to receive push notifications, you're going to make use of Firebase. Firebase is a BAAS (Back-end As A Service). Today, most applications require back-end services, such as from a database server or Web server, in order to make the application useful. Rather than host your own back-end, you can turn to Firebase for a suite of back-end services, such as:
- Cloud Messaging (also known as push notifications)
- Database
- Hosting
- Machine learning
In this article, you'll learn how to:
- Host your Web application using Firebase Hosting
- Host your Web services using Firebase Functions
- Send push notifications using Firebase Cloud Messaging
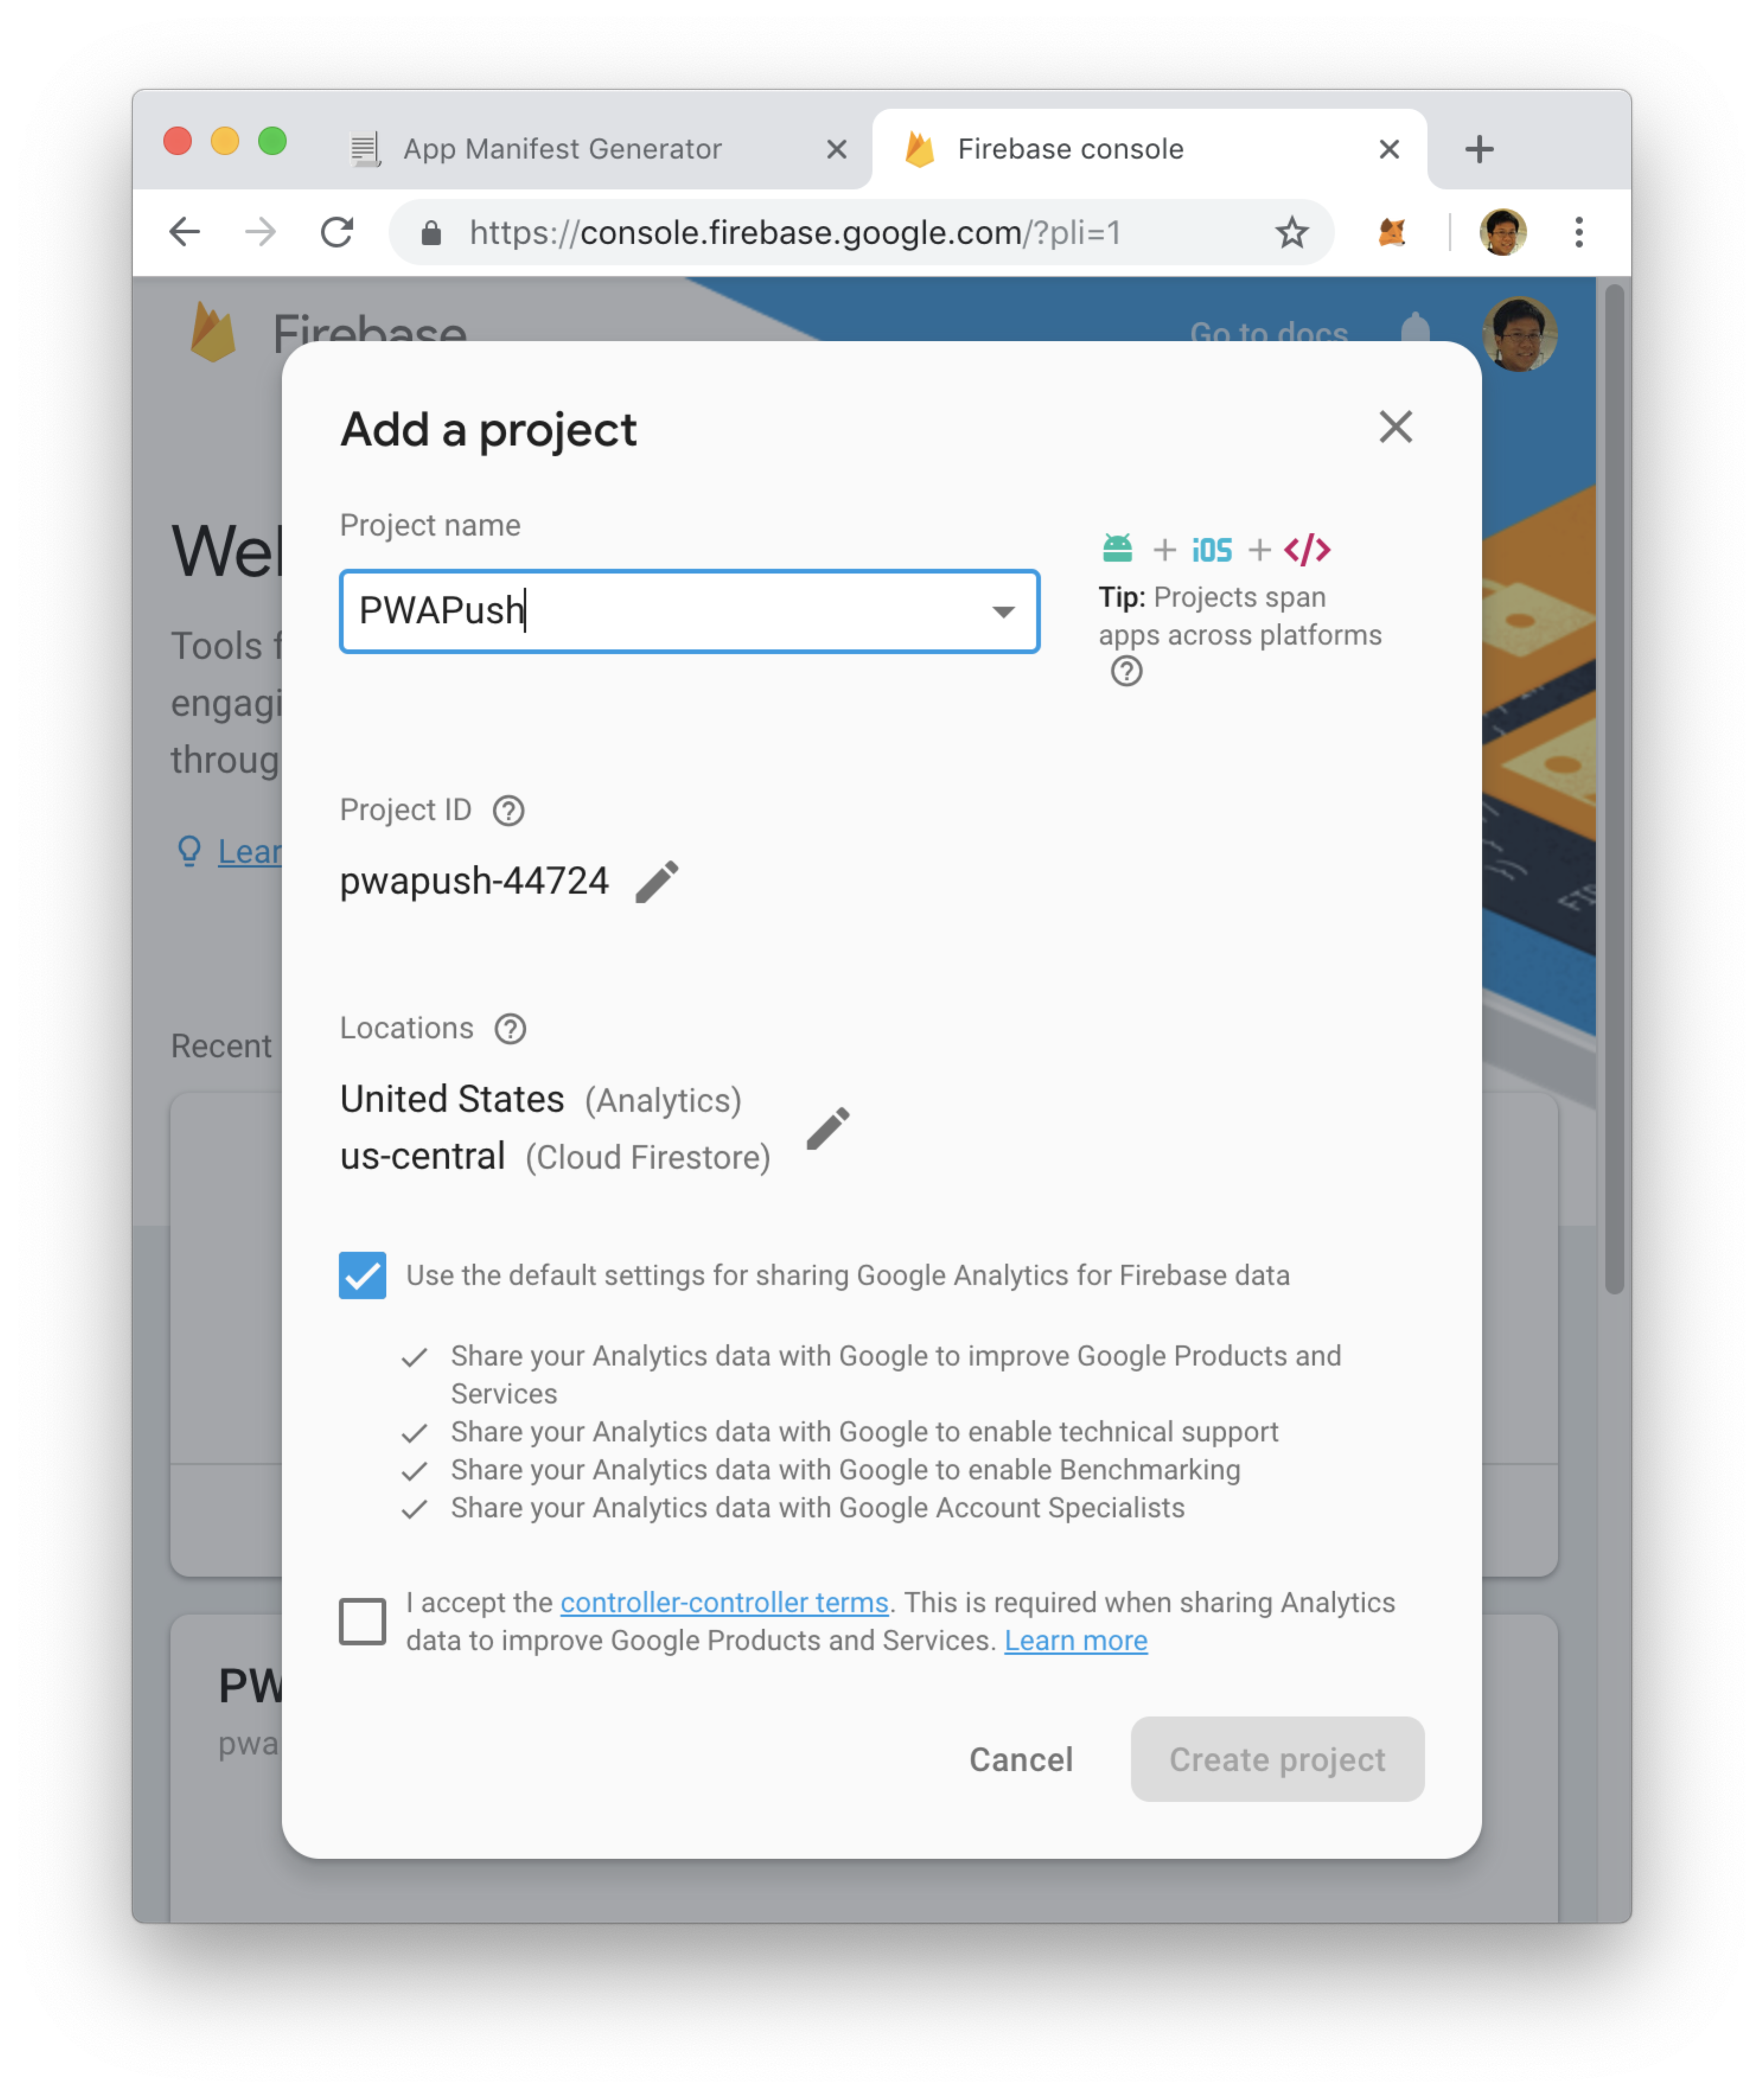
Using a Web browser, go to https://console.firebase.google.com and sign in using your Google account. Click the + icon to add a new project and give a name to the project. Click CREATE PROJECT (see Figure 4). Take note of the Project ID.
When the project is created, click CONTINUE. Click on the gear icon displayed next to the Project Overview item and select Project settings (see Figure 5).

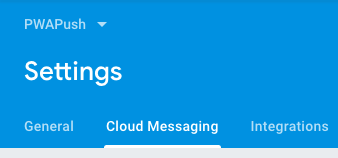
Then, click on the Cloud Messaging tab (see Figure 6).
Take note of the following information (you'll need it in the next step and in a later section):
- Server Key
- Sender ID
In the manifest.json file located in the PWAPUSH folder, add the following statement in bold (replace the SENDER_ID with the Sender ID you obtained from the previous step):
{
    "name": "Push Notification App",
    "short_name": "PushApp",
    "theme_color": "#2196f3",
    "background_color": "#2196f3",
    "display": "browser",
    "Scope": "/",
    "start_url": "/",
    "icons": [
    ...
    {
        "src": "images/icons/icon-512x512.png",
        "sizes": "512x512",
        "type": "image/png"
    }
    ],
    "splash_pages": null,
    "gcm_sender_id": "SENDER_ID"
}
Subscribing to Push Notifications
Create a file named main.js and save it in the PWAPush folder. Populate it as shown in Listing 2.
Listing 2: Content of main.js
//---register the Service Worker---
window.addEventListener('load', e => {
    if (!('serviceWorker' in navigator)) {
        console.log('Service worker not supported');
        return;
    }
    navigator.serviceWorker.register('service-worker.js')
    .then(function() {
         console.log('Service Worker Registered');
    })
    .catch(function(error) {
        console.log('Service Worker Registration failed:', error);
    });
});

//---Update the Push Notification Status---
function updatePushNotificationStatus(status) {
    pushElement.dataset.checked = status;
    if (status) {
        pushImage.src = 'button_on.png';
    }
    else {
        pushImage.src = 'button_off.png';
    }
}

function checkIfPushIsEnabled() {
    //---check if push notification permission has been denied by the user---
    if (Notification.permission === 'denied') {
        alert('User has blocked push notification.');
        return;
    }
    //---check if push notification is supported or not---
    if (!('PushManager' in window)) {
        alert('Sorry, Push notification is ' + 'not supported on this browser.');
        return;
    }
    //---get push notification subscription if serviceWorker is registered and ready---
    navigator.serviceWorker.ready
    .then(function (registration) {
        registration.pushManager.getSubscription()
        .then(function (subscription) {
            if (subscription) {
                //---user is currently subscribed to push---
            updatePushNotificationStatus(true);
            }
            else {
                //---user is not subscribed to push---
                updatePushNotificationStatus(false);
            }
        })
        .catch(function (error) {
            console.error(Error occurred enabling push ', error);
        });
    });
}

//---subscribe to push notification---
function subscribeToPushNotification() {
    navigator.serviceWorker.ready
    .then(function(registration) {
        if (!registration.pushManager) {
            alert('This browser does not ' + 'support push notification.');
            return false;
        }
        //---to subscribe push notification using pushmanager---
        registration.pushManager.subscribe(
        //---always show notification when received---
        { userVisibleOnly: true }
        )
        .then(function (subscription) {
            console.log('Push notification subscribed.');
            console.log(subscription);
            updatePushNotificationStatus(true);
        })
        .catch(function (error) {
            updatePushNotificationStatus(false);
            console.error('Push notification subscription error: ', error);
        });
    })
}

//---unsubscribe from push notification---
function unsubscribeFromPushNotification() {
    navigator.serviceWorker.ready
    .then(function(registration) {
        registration.pushManager.getSubscription()
        .then(function (subscription) {
            if(!subscription) {
                alert('Unable to unsubscribe from push ' + 'notification.');
                return;
            }
            subscription.unsubscribe()
            .then(function () {
                console.log('Push notification unsubscribed.');
                console.log(subscription);
                updatePushNotificationStatus(false);
             })
            .catch(function (error) {
                console.error(error);
            });
        })
        .catch(function (error) {
            console.error('Failed to unsubscribe push ' +'notification.');
         });
    })
}

//---get references to the UI elements---
var pushElement = document.querySelector('.push');
var pushImage = document.querySelector('.image');

//---event handler for the push button---
pushElement.addEventListener('click', function () {
    //---check if you are already subscribed to push notifications---
    if (pushElement.dataset.checked === 'true') {
        unsubscribeFromPushNotification();
    }
    else {
        subscribeToPushNotification();
    }
});

//---check if push notification is supported---
checkIfPushIsEnabled()
It contains the following:
- The
loadevent handler to register the service worker - The
clickevent handler to handle the user clicking on the button image - The
checkIfPushIsEnabled()function to check whether the user has previously blocked push notifications and if the browser being used supports push notification, and retrieves the push notification subscription ID if the application has previously subscribed to push notification - The
updatePushNotificationStatus()function to display the image of the button depending on the status of the push notification subscription - The
subscribeToPushNotification()function to subscribe the application to push notification - The
unsubscribeFromPushNotification()function to unsubscribe the application from push notification
You can now test the Web application and verify whether the application can subscribe to push notification. To run the Web application over HTTP, type the following commands in Terminal:
$ cd ~/PWAPUSH
$ npm install -g serve
$ serve
The above command installs a command-line Web server (serve) that allows you to serve your Web pages directly from any directory on your file system. Once you run the serve command, the current directory becomes the Web-publishing directory.
For this article, you need to install Node.js.
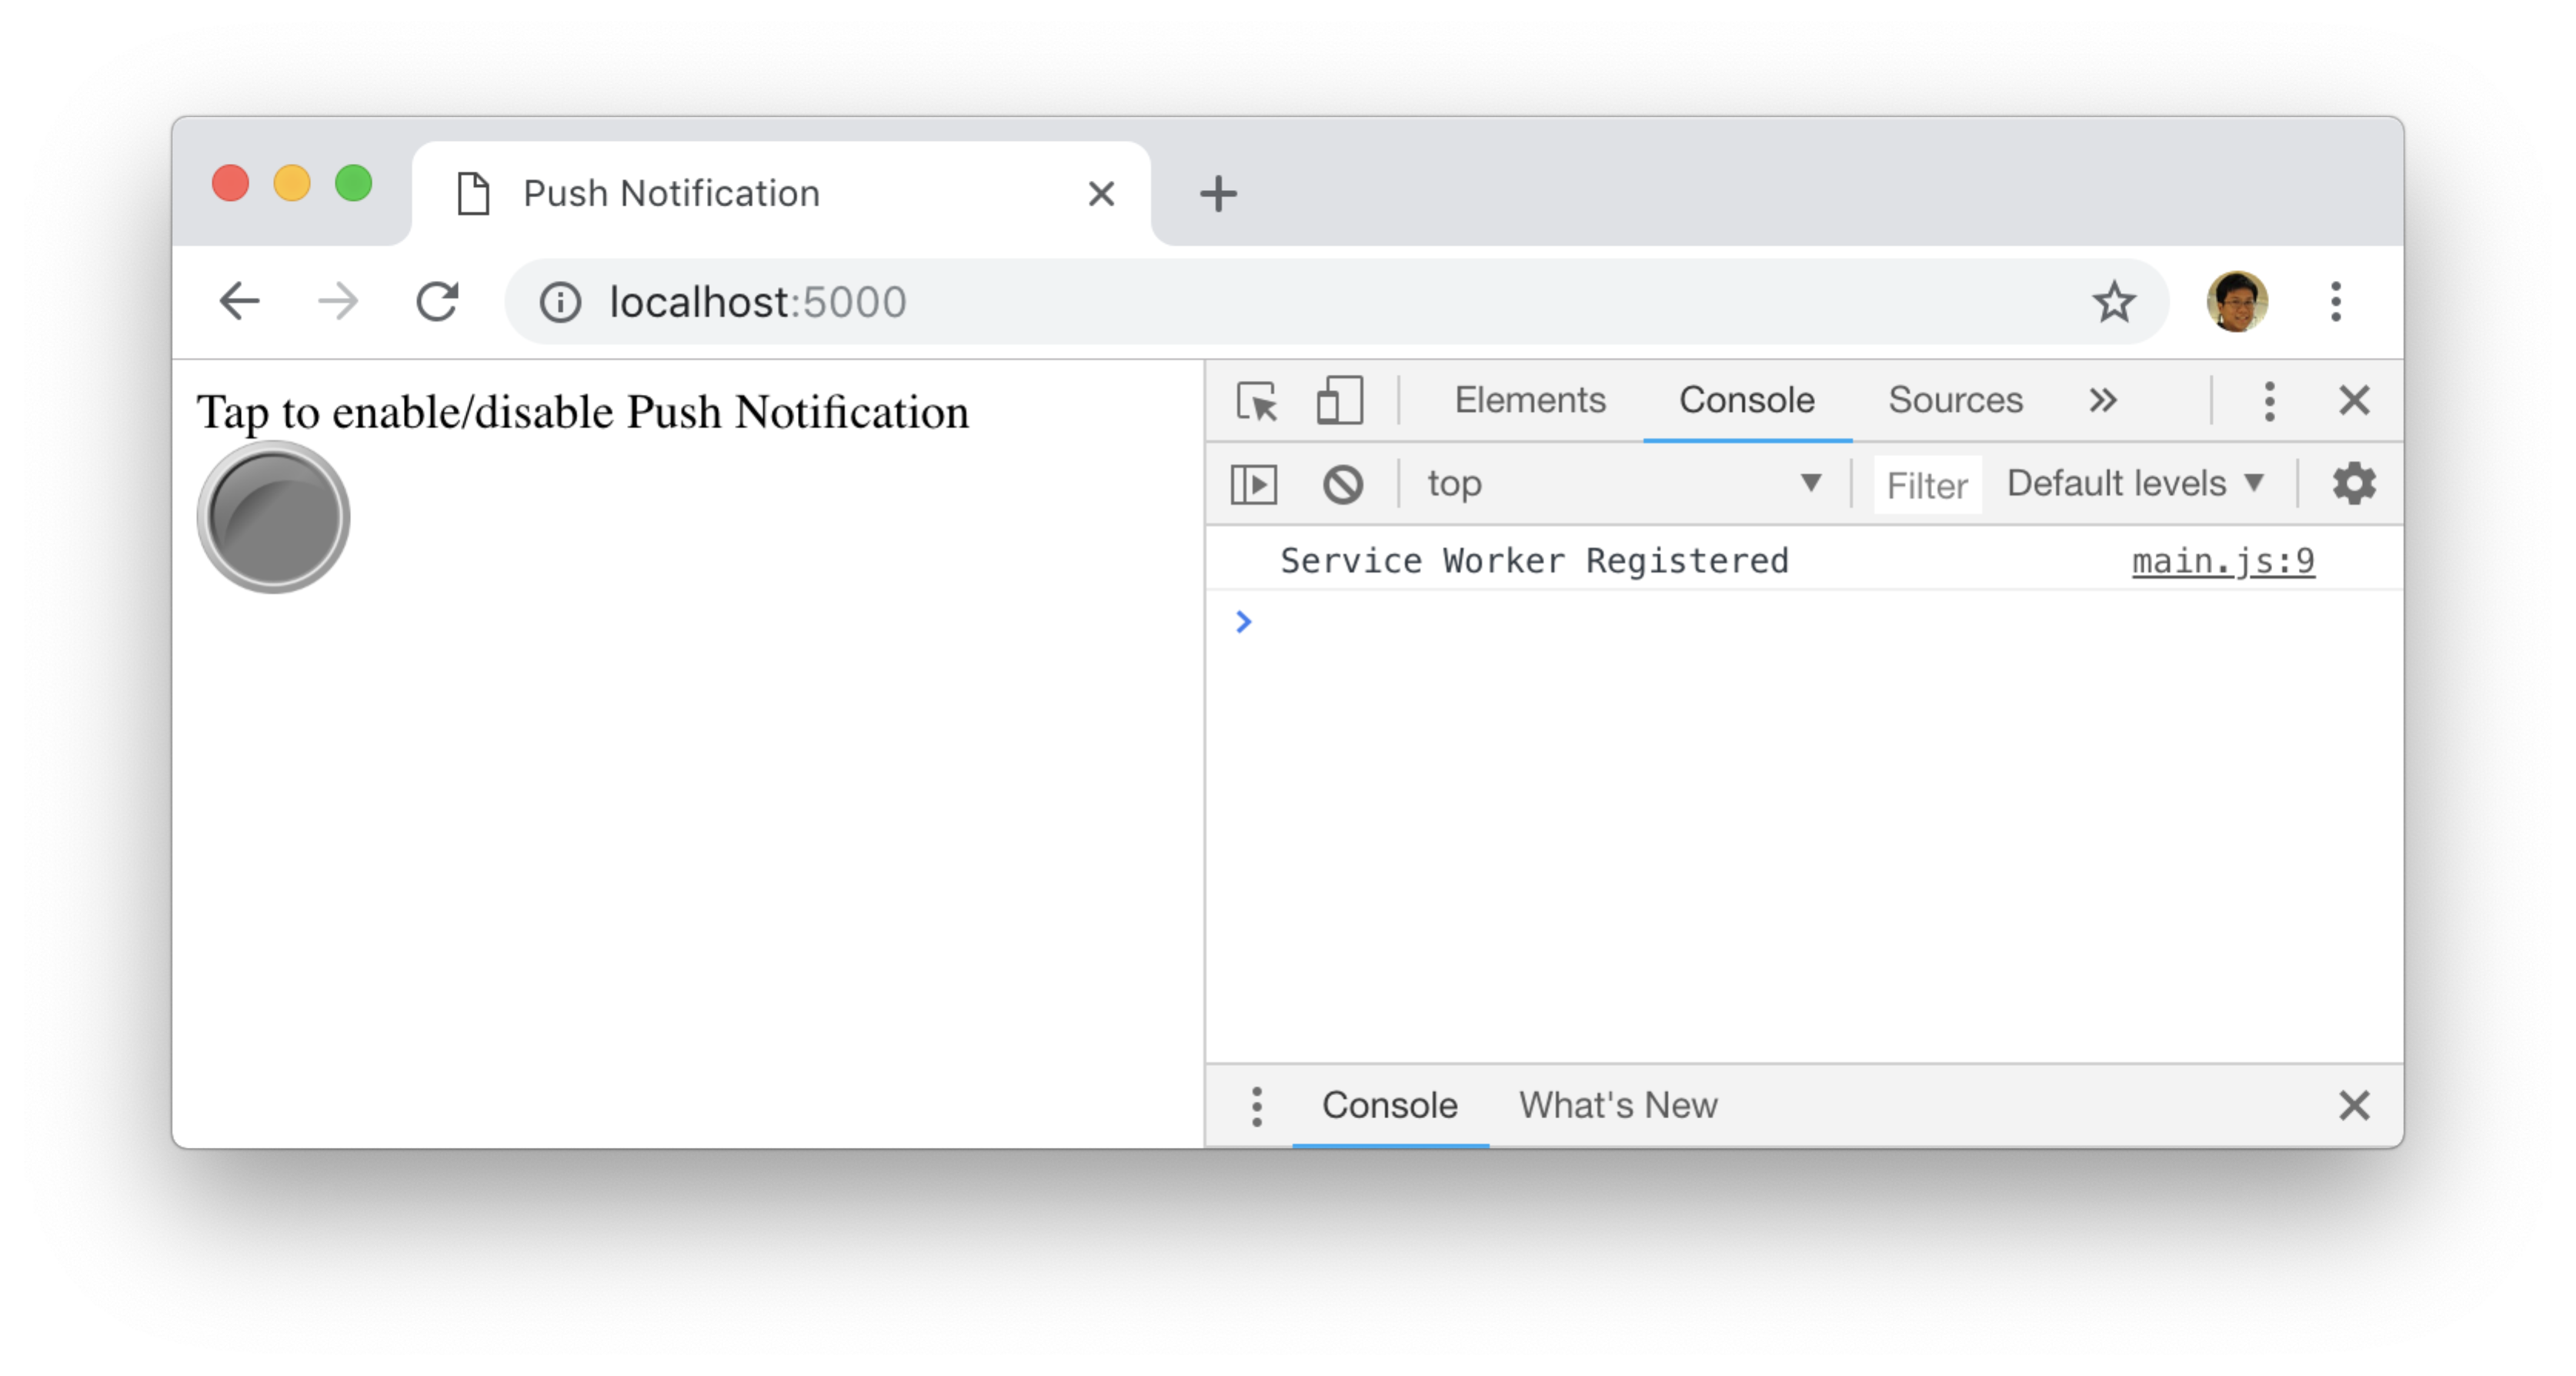
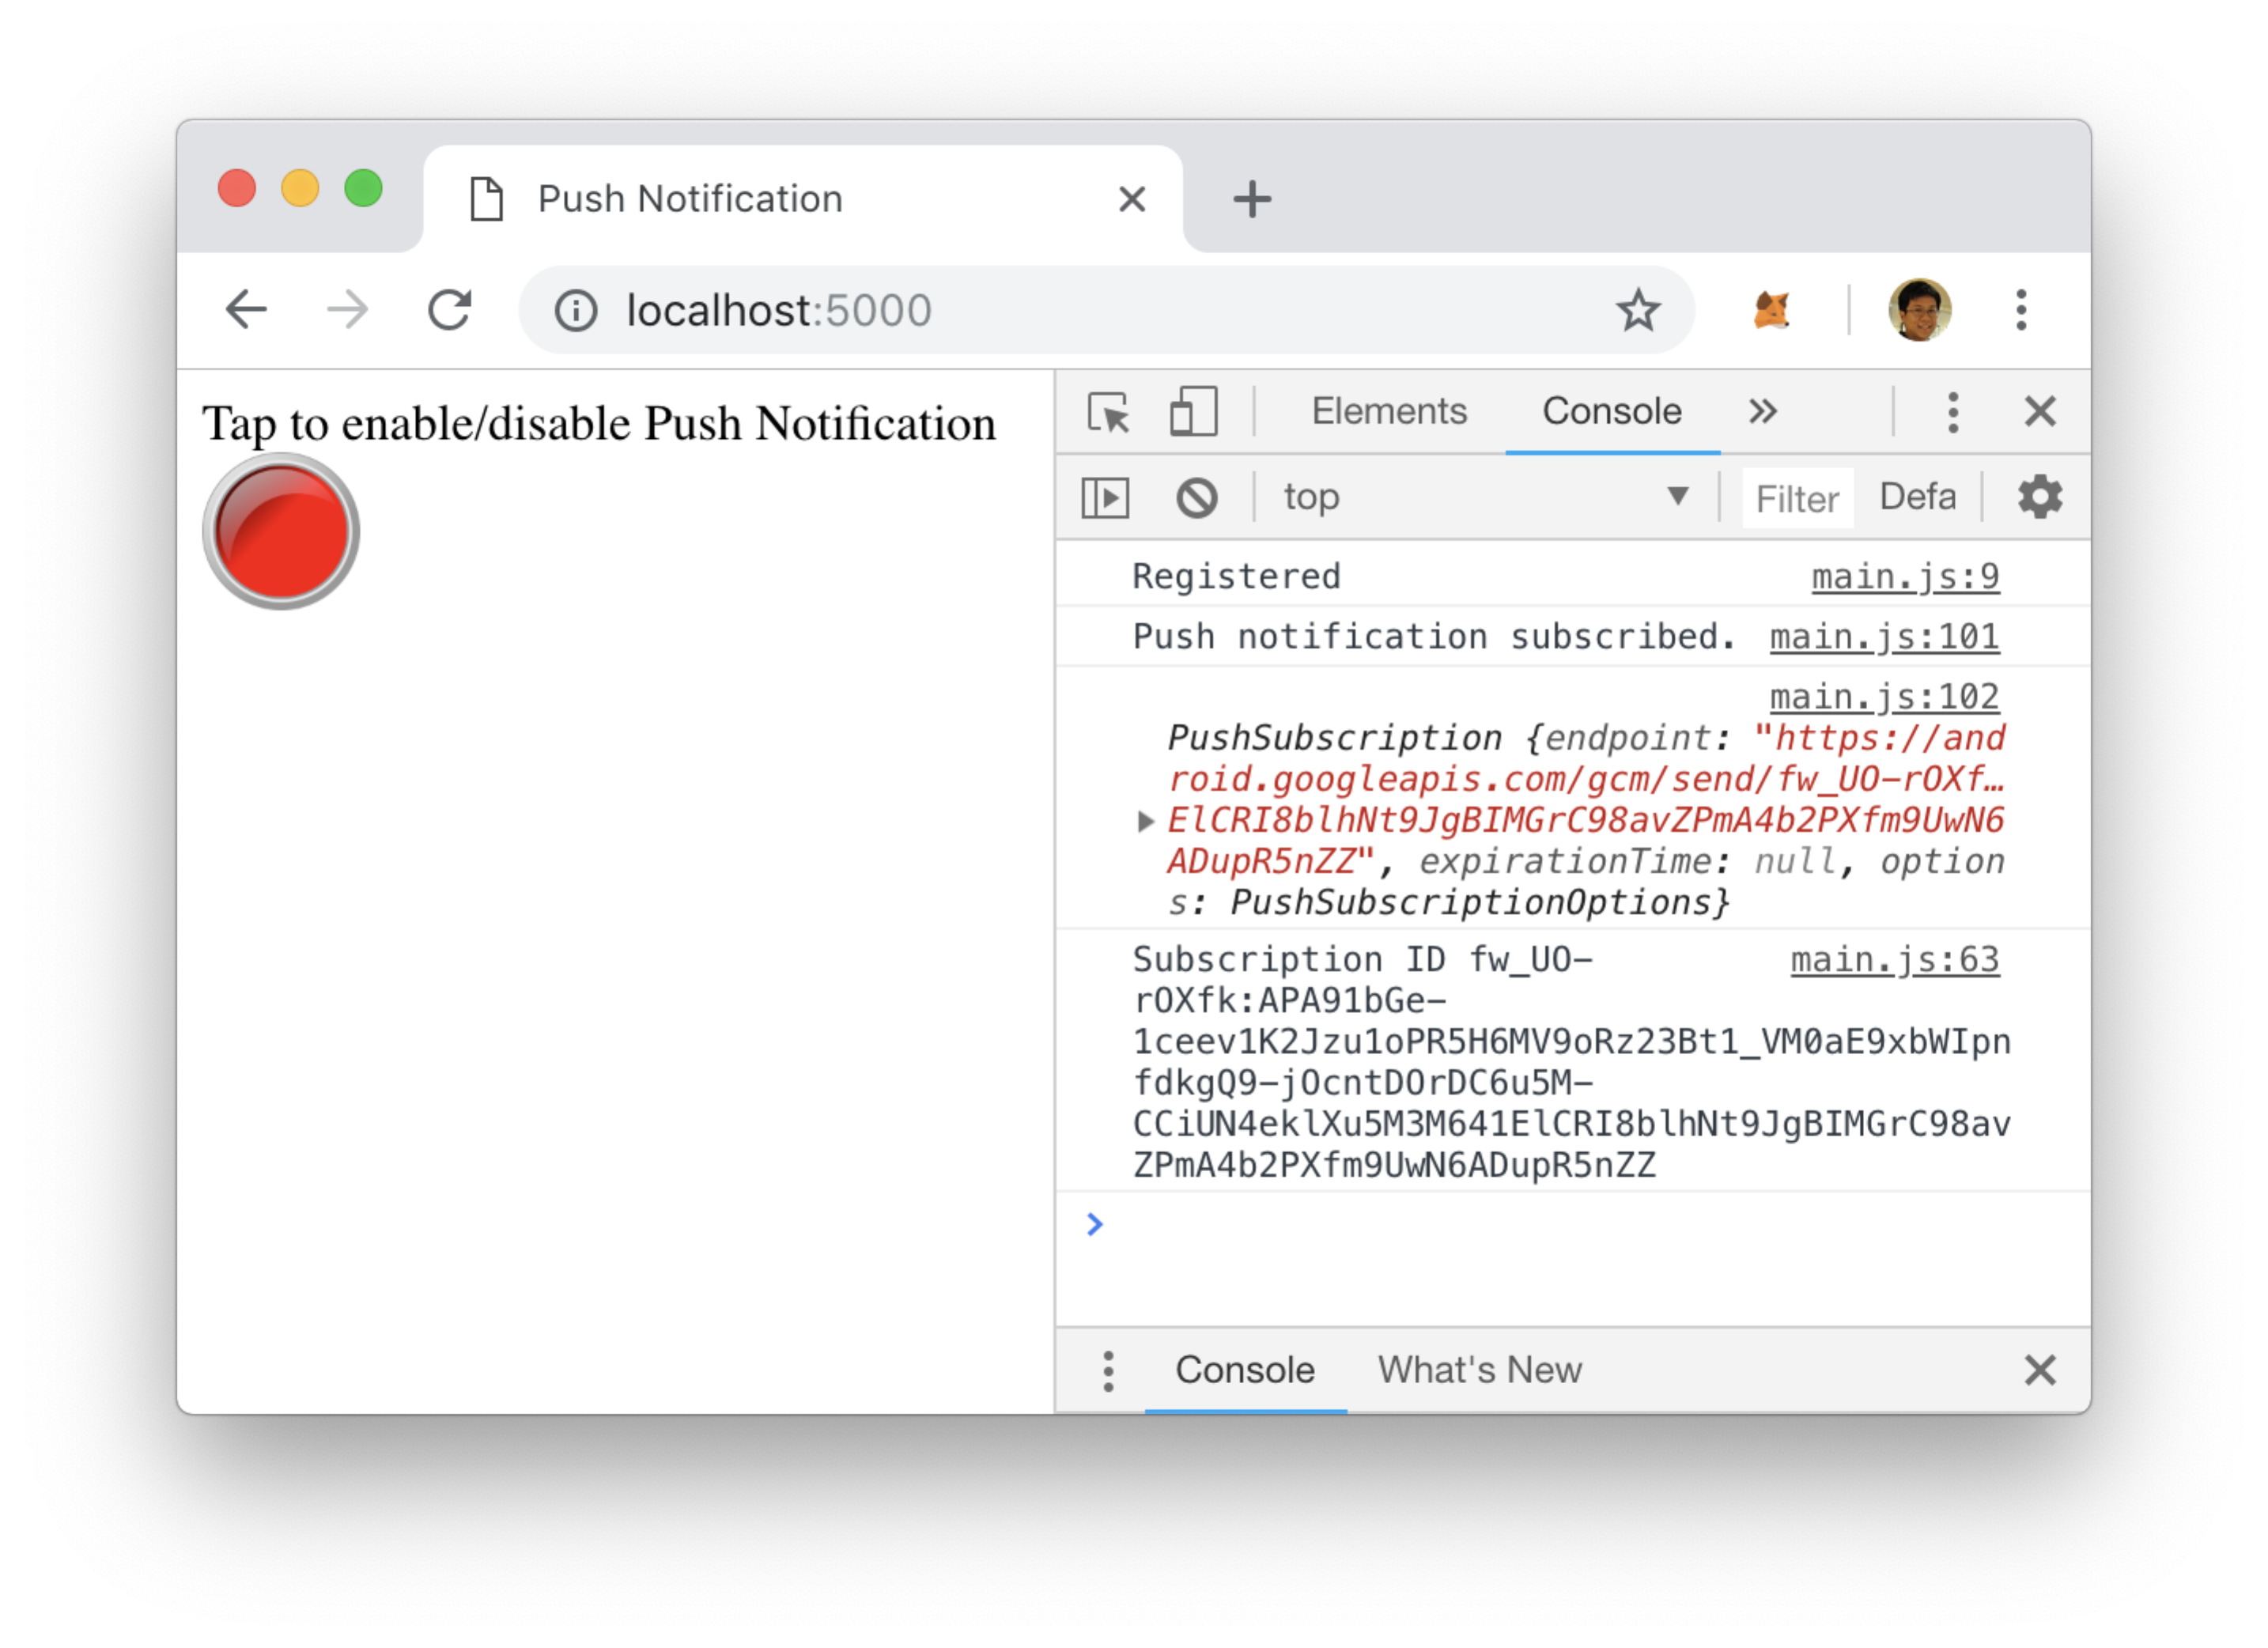
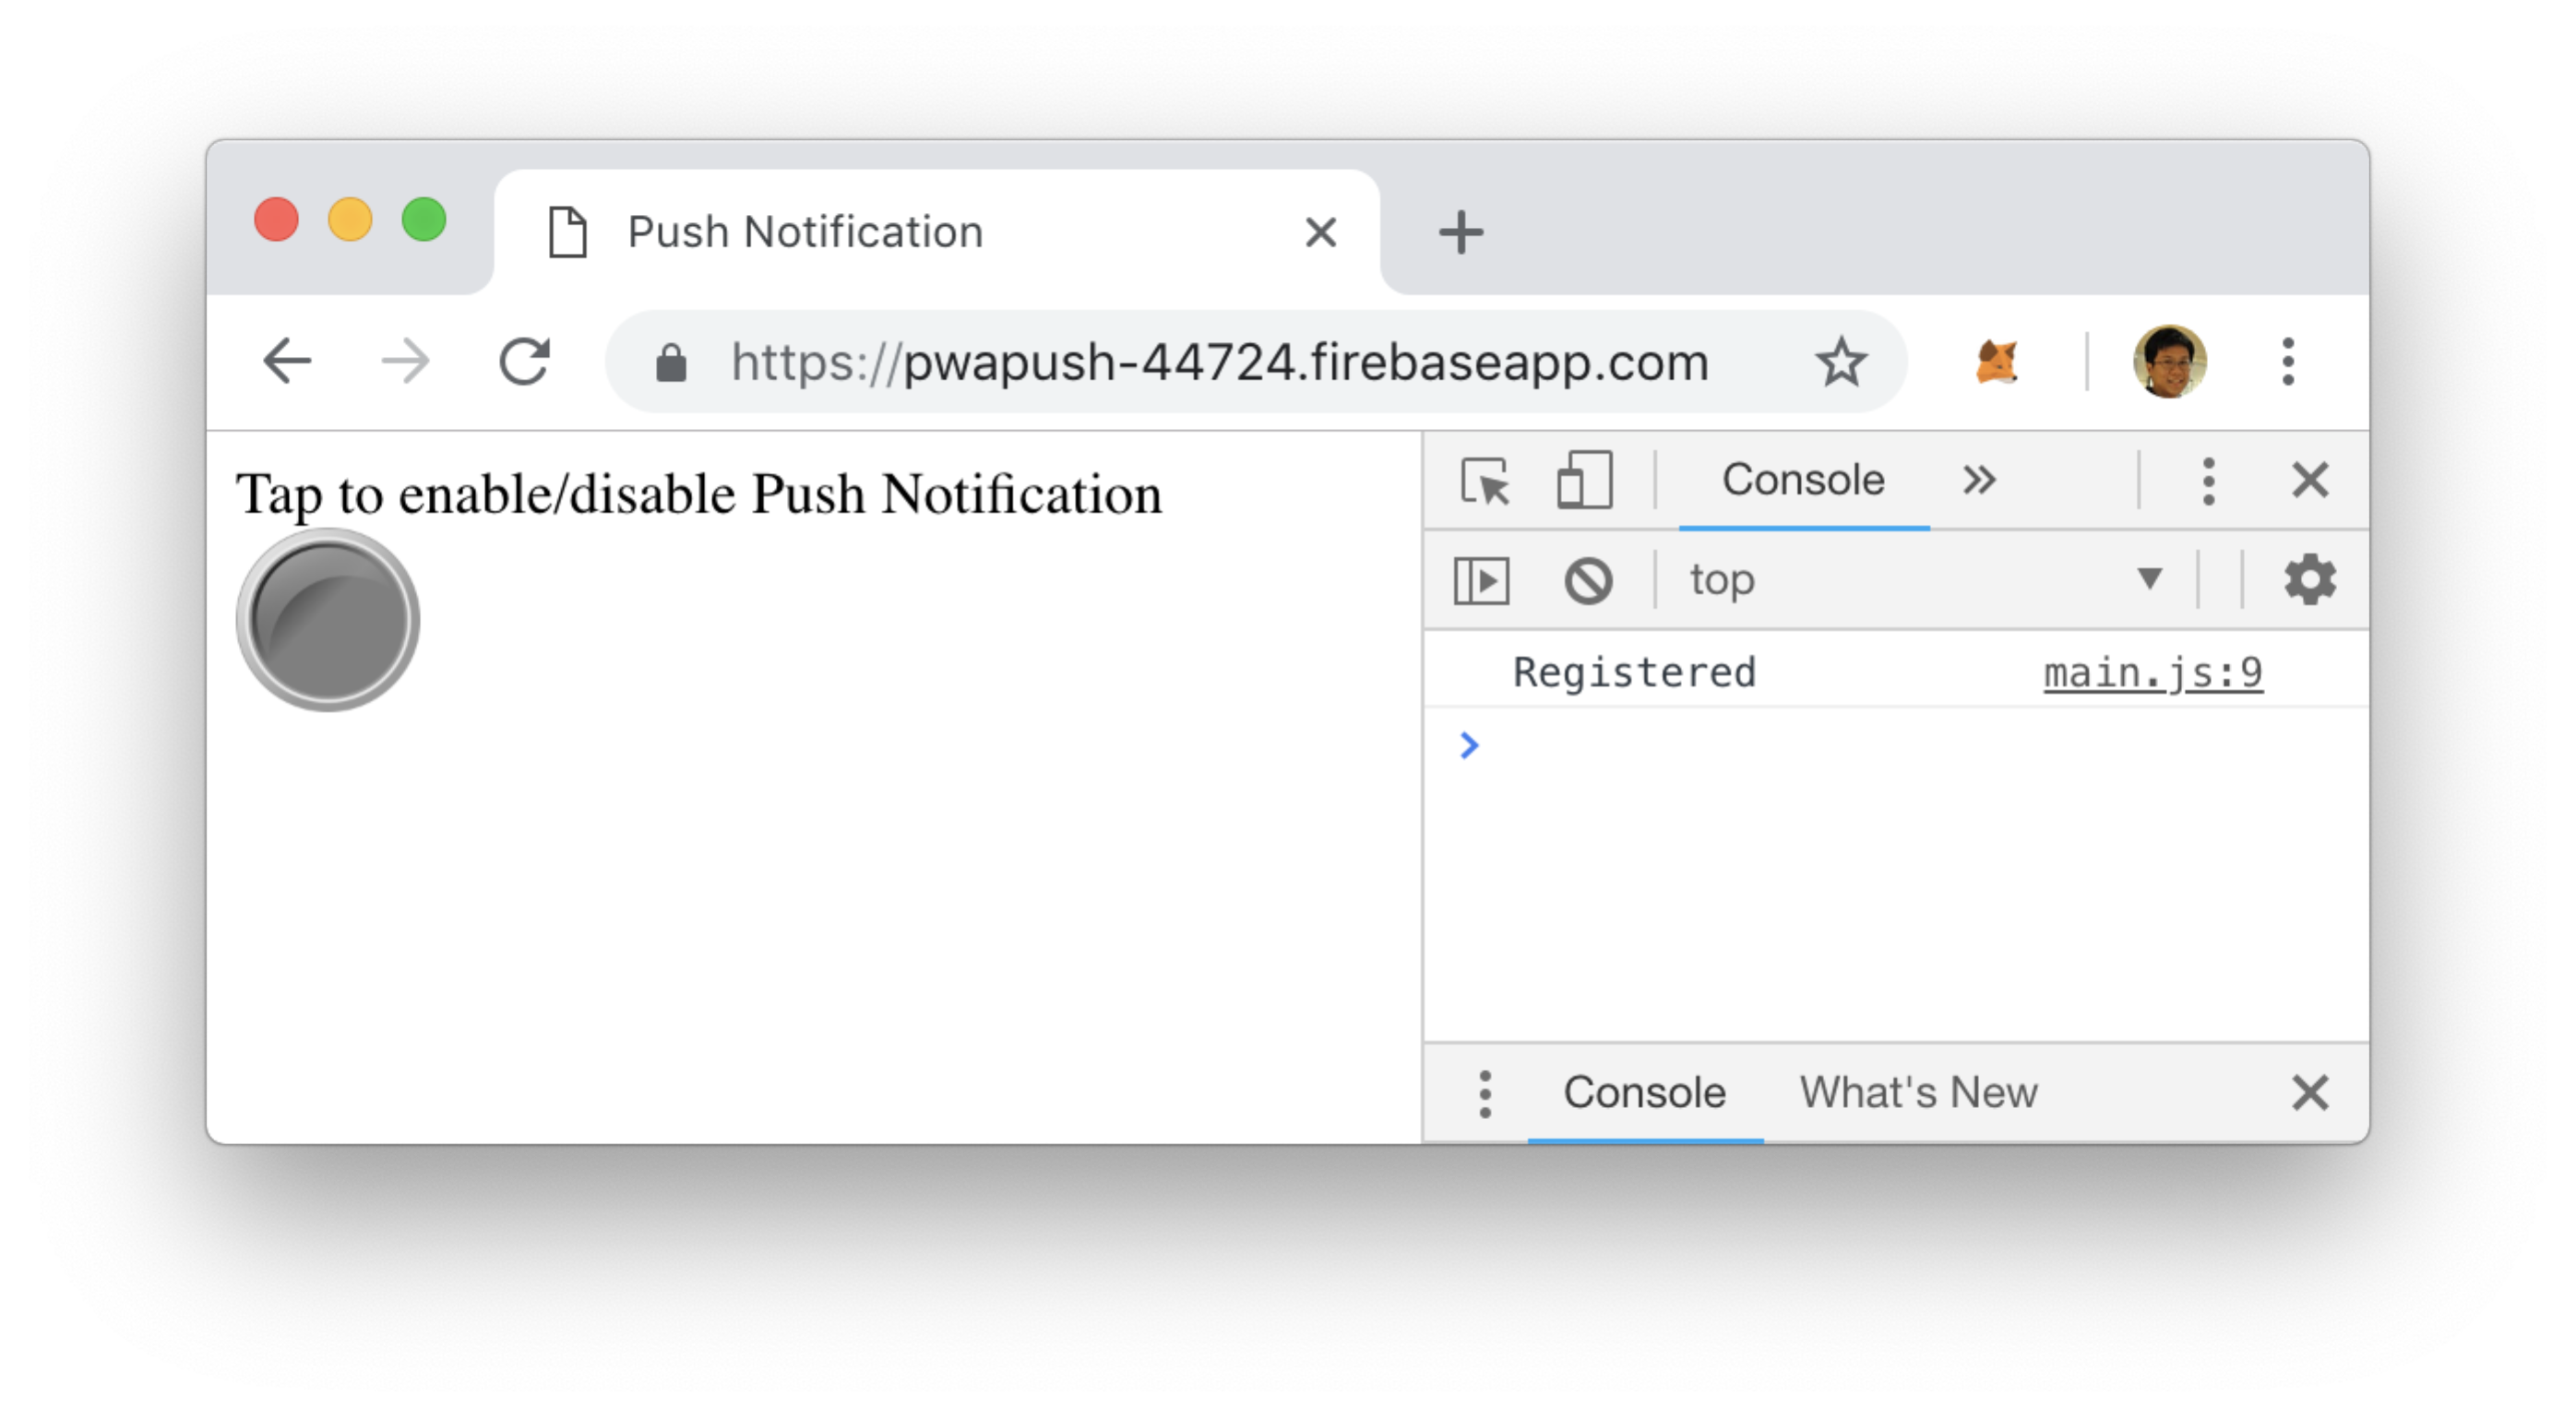
Using the Chrome browser, load the index.html page using the following URL: http://localhost:5000 (see Figure 7). Be sure to bring up the JavaScript Console (Option-Cmd-J).
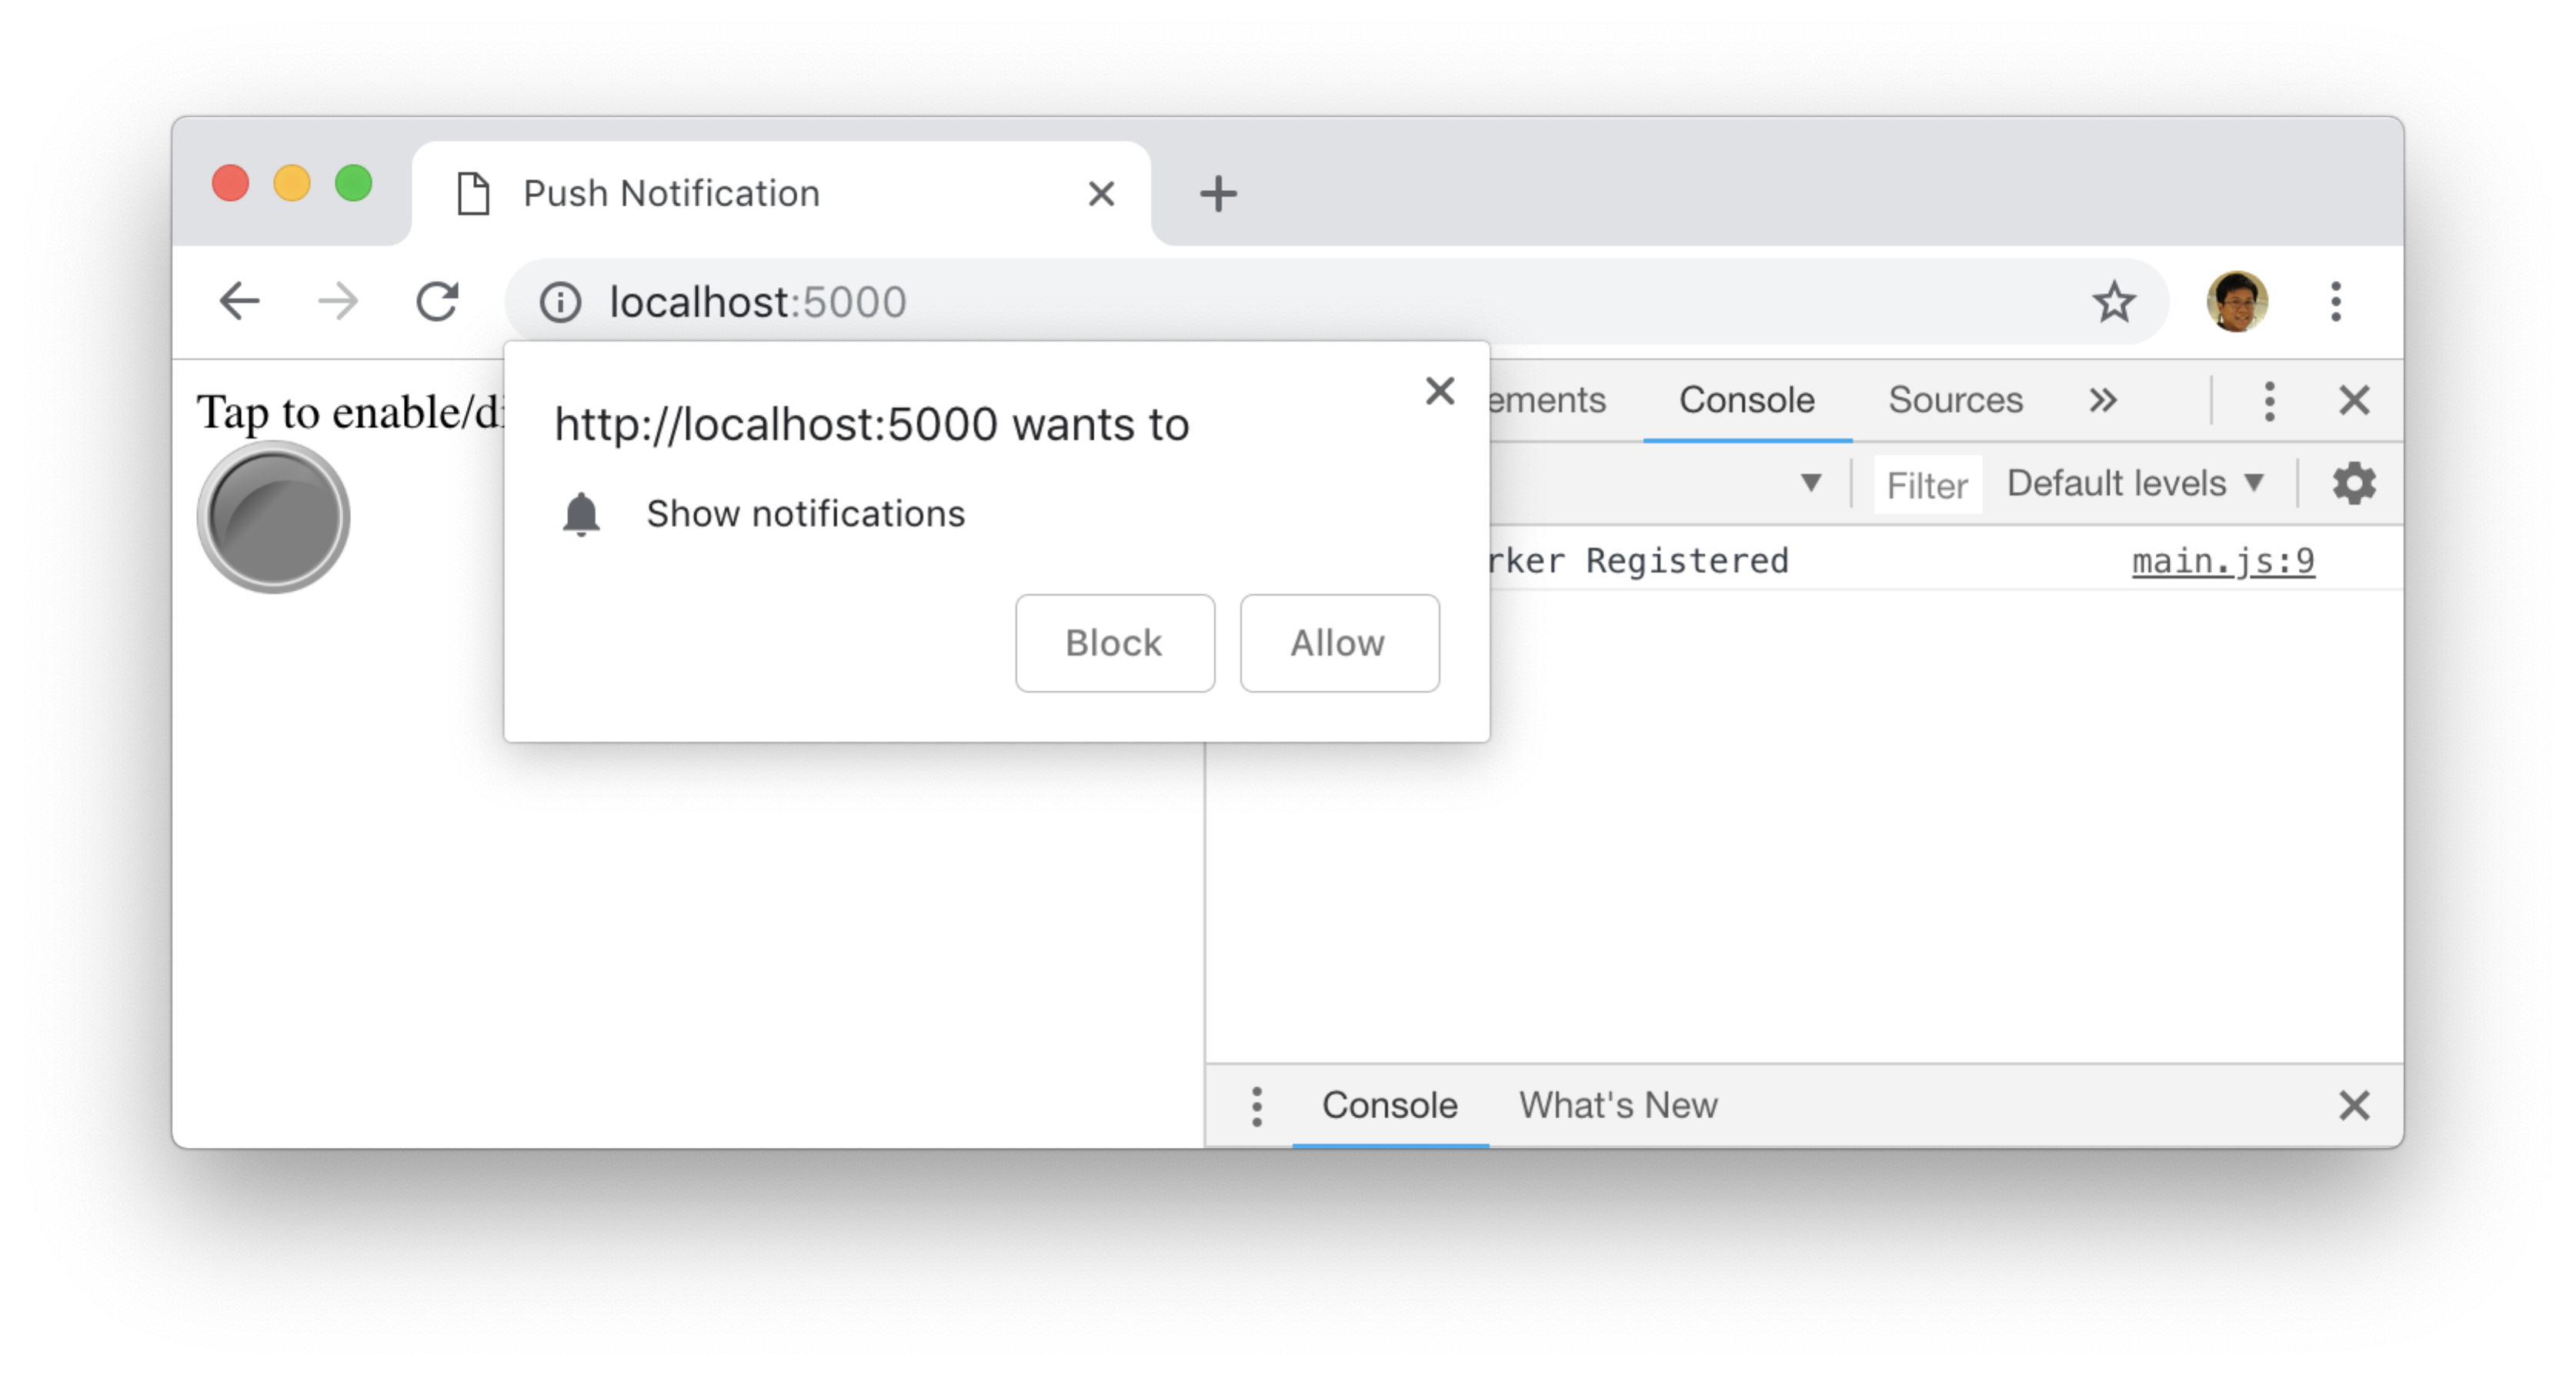
Click on the button and you'll see the popup as shown in Figure 8. Click Allow.
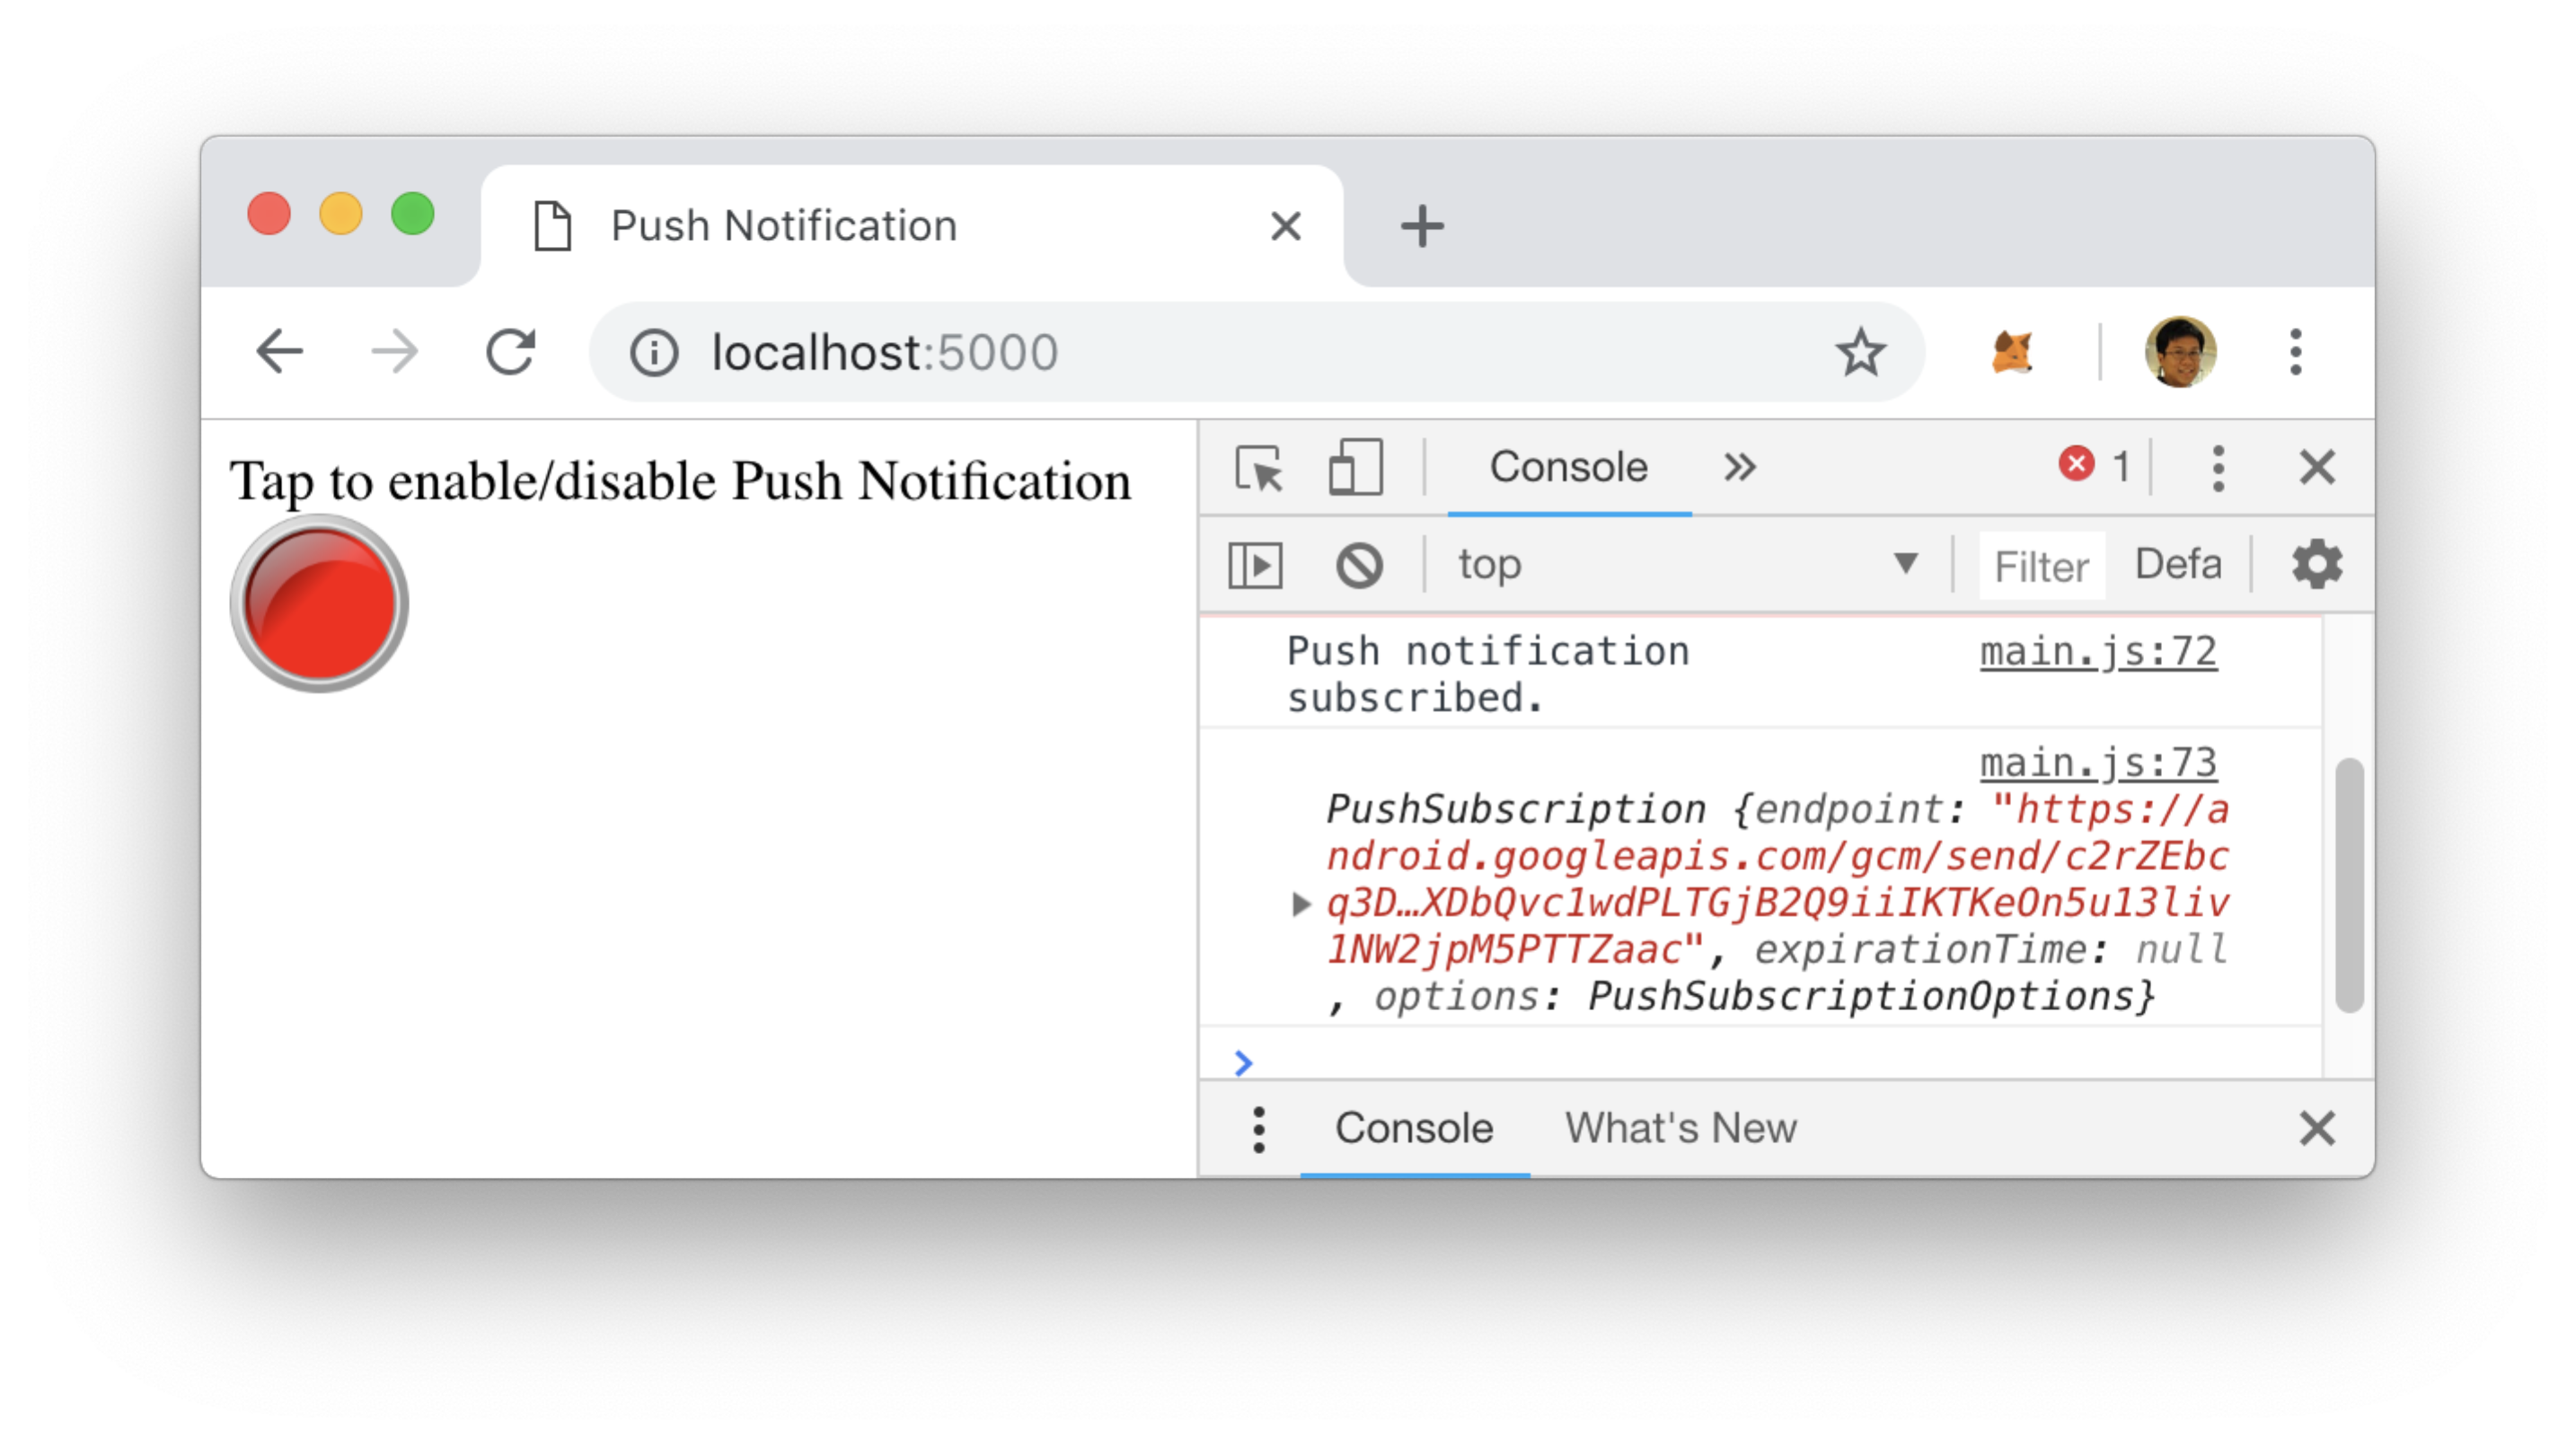
You should now see the subscription ID in the JavaScript Console (see Figure 9).
Creating the REST API to Save the Subscription IDs
When your app subscribes to push notifications, it gets a subscription ID. This subscription ID is used to uniquely identify the application so that Firebase Cloud Messaging can deliver a notification to the application. In order to deliver a push notification to the application, you need to save the subscription IDs. To do that, use Node.js to build a REST API for archiving the subscription ID obtained by the app.
Create a new folder named PUSHSERVER to save the files for the REST API. Create a new file named SubscriptionIDServer.js and save it in the PUSHSERVER folder. Populate it with the content shown in Listing 3.
Listing 3: Content of SubscriptionIDServer.js
var express = require('express');

//---returns an instance of the express server---
var app = express();

//---parse the body of the request and set the
// body property on the request object---
var bodyParser = require('body-parser');

app.use(bodyParser.json());
app.use(bodyParser.urlencoded({
    extended: true
}));

app.use(function (req, res, next) {
    res.setHeader('Access-Control-Allow-Origin', '*');
    res.setHeader('Access-Control-Allow-Headers', 'X-Requested-With,content-type');
    res.setHeader('Access-Control-Allow-Methods', 'GET,PUT,POST,DELETE');
    next();
})

//---the array to store all the subscriber IDs---
var subscribers = []

app.post('/subscribers/', function(req, res) {
    //---check that the regid field is there---
    if (!req.body.hasOwnProperty('subscriptionid')){
        res.statusCode = 400;
        res.send('Error 400: Post syntax incorrect.');
        return;
    }
    console.log(req.body.subscriptionid);
    subscribers.push(req.body.subscriptionid)
    res.statusCode = 200;
    res.send('SubscriptionID received');
});

app.delete('/subscribers/:id', function(req, res) {
    console.log(req.params.id)
    const index = subscribers.indexOf(req.params.id)
    if (index !== -1) {
        subscribers.splice(index,1)
    }
    res.statusCode = 200;
    res.send('SubscriptionID deleted');
});

app.listen(8080);
console.log('Rest Service Listening on port 8080');
For simplicity, you're saving the subscriber IDs to an array in the REST API; in the real world, you need to save this to a database such as Firestore.
The REST API has the following functionalities:
- You can add a subscription ID to the API by sending the subscription ID using the
POSTmethod via the URL/subscribers. - You can remove a subscription ID from the API by sending the subscription ID using the
DELETEmethod via the URL/subscribers/subscriptionID.
Before you run the REST API, you need to install two components:
- Express: a Node.js Web framework for building REST APIs.
- body-parser: extracts the entire body portion of an incoming request stream and exposes it on req.body.
$ cd ~/PUSHSERVER
$ npm install express
$ npm install body-parser
Once the components are installed, you can run the REST API using the following command:
$ node SubscriptionIDServer.js
You'll see the following
Rest Service Listening on port 8080
Sending the Subscription ID to the REST API
With the REST API up and running, it's time to modify the main.js file located in the PWAPUSH folder so that once the subscription is obtained, it can be sent to the REST API for archival. Similarly, when a user wants to unsubscribe from a push notification, the subscription ID must be removed from the REST API.
Add the needed statements to the main.js file, as shown in Listing 4.
Listing 4: Adding the functions to send subscription IDs to the REST API
...
function checkIfPushIsEnabled() {
...
}

//---extract the subscription id and send it
// over to the REST service---
function sendSubscriptionIDToServer(subscription) {
    var subscriptionid = subscription.endpoint.split('gcm/send/')[1];
    console.log("Subscription ID", subscriptionid);
    fetch('http://localhost:8080/subscribers', {
        method: 'post',
        headers: {
            'Accept': 'application/json',
            'Content-Type': 'application/json'
        },
        body: JSON.stringify(
            { subscriptionid : subscriptionid })
    });
}

//---extract the subscription id and send it over to the REST service---
function removeSubscriptionIDFromServer(subscription) {
    var subscriptionid = subscription.endpoint.split('gcm/send/')[1];
    console.log("Subscription ID", subscriptionid);
    fetch('http://localhost:8080/subscribers/' + subscriptionid, {
        method: 'delete',
        headers: {
            'Accept': 'application/json',
            'Content-Type': 'application/json'
        }
    });
}

//---subscribe to push notification---
function subscribeToPushNotification() {
    navigator.serviceWorker.ready
    .then(function(registration) {
        if (!registration.pushManager) {
            alert('This browser does not support push notification.');
            return false;
        }
        //---to subscribe push notification using pushmanager---
        registration.pushManager.subscribe(
            //---always show notification when received---
            { userVisibleOnly: true }
        )
        .then(function (subscription) {
            console.log('Push notification subscribed.');
            console.log(subscription);
            //------add the following statement------
            sendSubscriptionIDToServer(subscription);
           //---------------------------------------
           updatePushNotificationStatus(true);
        })
        .catch(function (error) {
            updatePushNotificationStatus(false);
            console.error('Push notification subscription error: ', error);
         });
    })
}

//---unsubscribe from push notification---
function unsubscribeFromPushNotification() {
    navigator.serviceWorker.ready
    .then(function(registration) {
        registration.pushManager.getSubscription()
        .then(function (subscription) {
            if(!subscription) {
                alert('Unable to unsubscribe from push notification.');
                return;
            }
            subscription.unsubscribe()
            .then(function () {
                console.log('Push notification unsubscribed.');
                console.log(subscription);
                //--------add the following statement--------
                removeSubscriptionIDFromServer(subscription);
                //-------------------------------------------
                updatePushNotificationStatus(false);
            })
            .catch(function (error) {
                console.error(error);
            });
        })
        .catch(function (error) {
            console.error('Failed to unsubscribe push notification.');
        });
    })
}
Once you have modified the main.js page, you can reload the page on the Chrome browser and click the push button again. Observe that the subscription ID is now printed in the JavaScript Console window (see Figure 10).
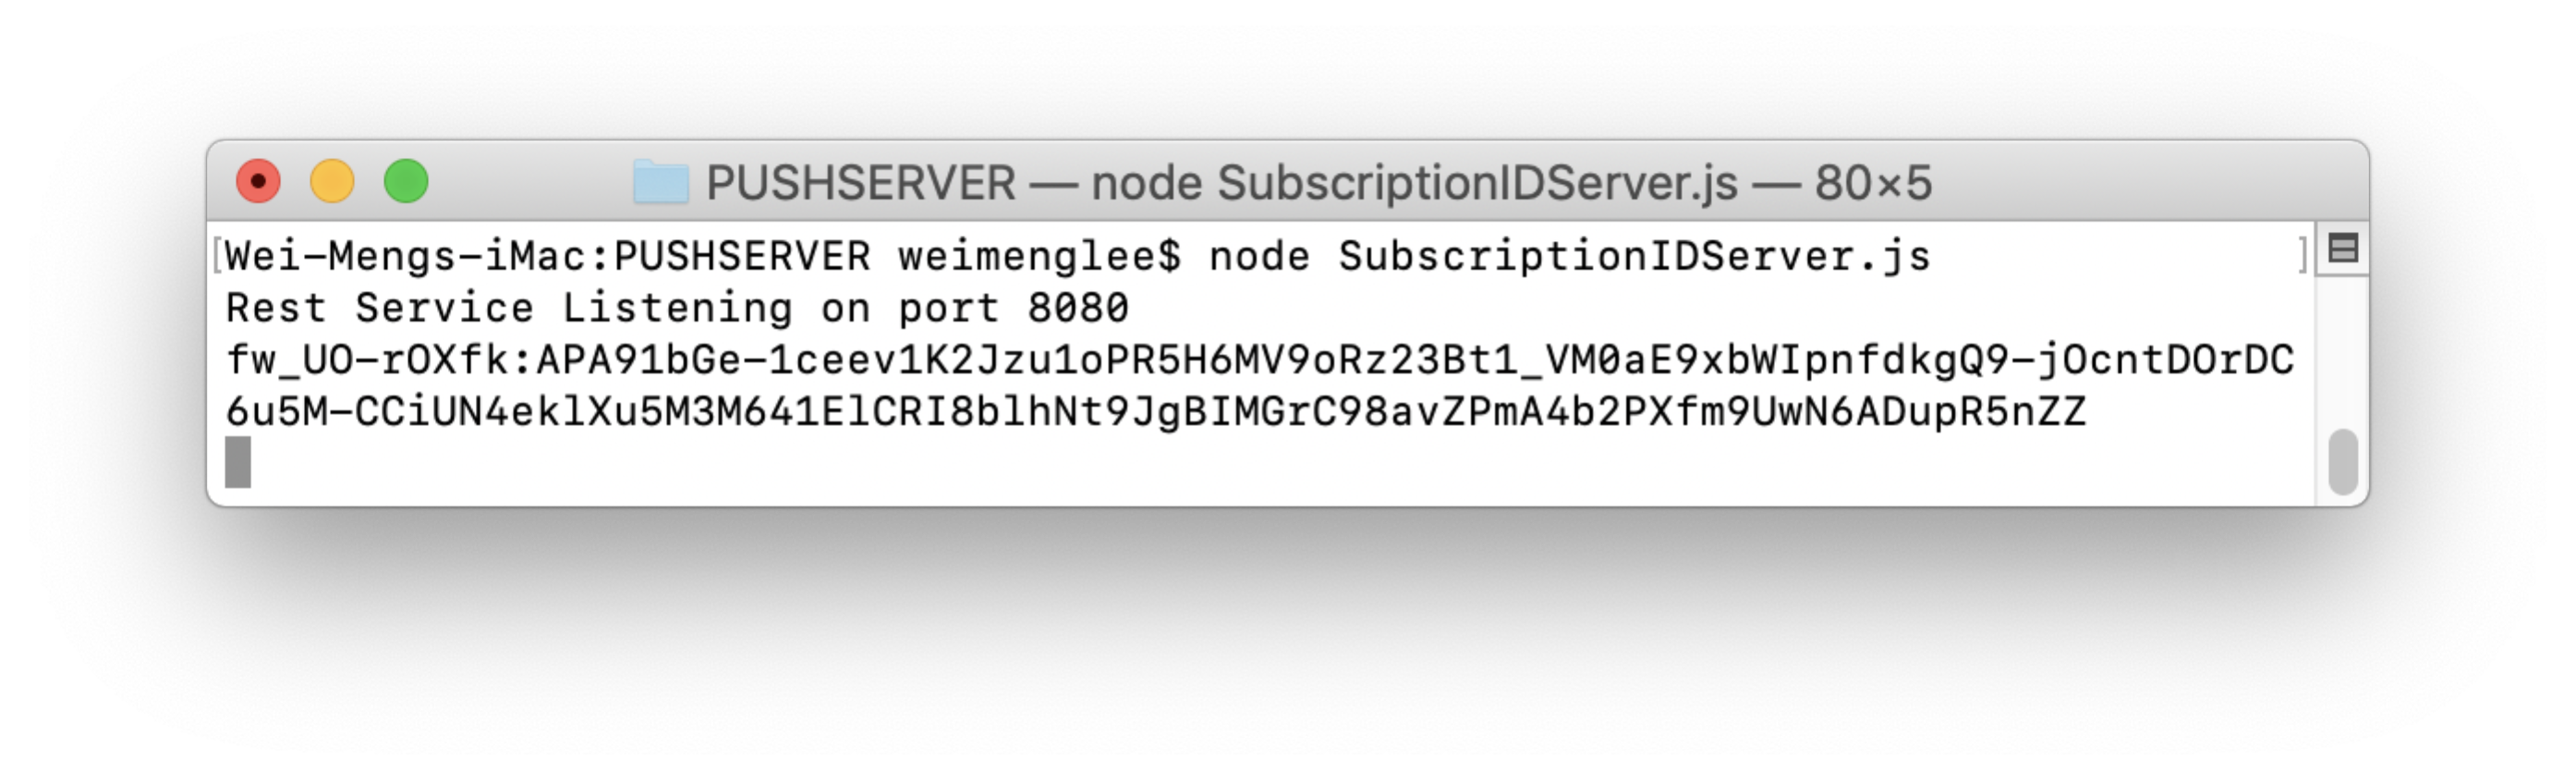
In the Terminal running the REST API, you should also see the subscription ID printed (see Figure 11). This proves that the subscription ID has been sent successfully to the REST API.
If you click the push button again, you should see the same subscription ID printed in the JavaScript console window and on the Terminal. This time, the subscription ID is removed from the REST API.
Sending Push Notifications Through Firebase Cloud Messaging
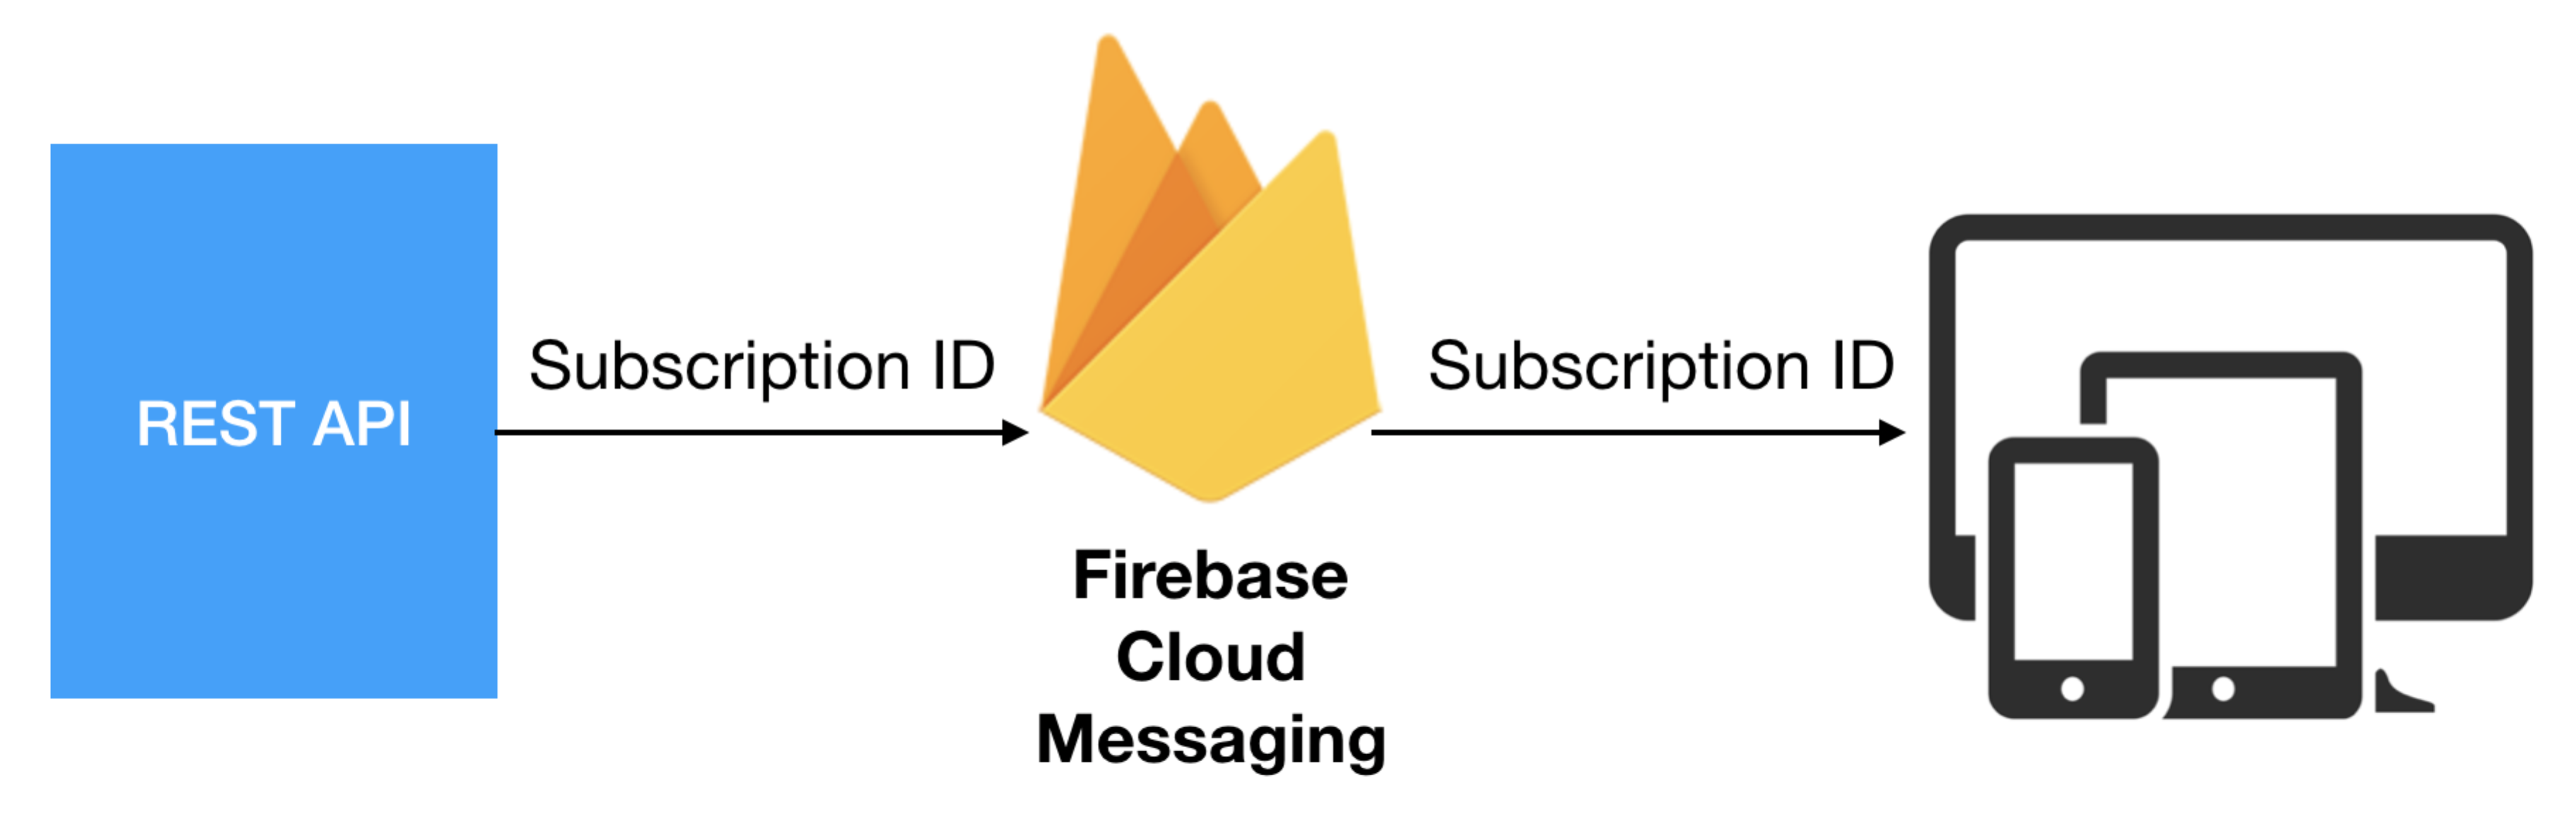
Great! So far, you've managed to save the subscription IDs to the REST API. It's now time to push a notification to the Web application. For this, you'll use Firebase Cloud Messaging (FCM). You'll use the REST API to push the message to the application through the FCM. The subscription ID will be used to identify which application to push the notification to. Figure 12 shows the flow.
To send an FCM push notification through Node.js, you can use the fcm-node module. To install this module, type the following command in Terminal:
$ cd ~/PUSHSERVER
$ npm install fcm-node
You can now modify the SubscriptionIDServer.js file as shown in Listing 5 so that it has a function to send push notifications.
Listing 5: Adding the code to send push notifications from the REST API
var express = require('express');

...

//---the array to store all the subscriber IDs---
var subscribers = []

var FCM = require('fcm-node');
//-------------------------------------------
//---replace [Server Key] with the Server Key you obtained earlier---
//-------------------------------------------
var serverKey = 'SERVER_KEY';
var fcm = new FCM(serverKey);

app.get('/push', function(req, res) {
    var message = {
        // for multiple recipients
        registration_ids: subscribers,
        // for single recipient
        // to: subscribers[0],
        collapse_key: 'your_collapse_key',
    };
    fcm.send(message, function(err, response){
        if (err) {
            console.log("Something has gone wrong!");
            console.log(err)
         } else {
                console.log("Successfully sent with response: ",
                response);
            }
    });
    res.sendStatus(200)
});

app.post('/subscribers/', function(req, res) {
...
});

app.delete('/subscribers/:id', function(req, res) {
...
});

app.listen(8080);
console.log('Rest Service Listening on port 8080');
To send an FCM message to multiple recipents, use the “registration_ids” key. To send to an individual recipient, use the “to” key.
Once the SubscriptionIDServer.js file is modified, restart it:
$ node SubscriptionIDServer.js
Receiving the Push Notifications
When a push notification is sent to the application, the service worker must be modified to receive it. So let's add the statements in Listing 6 that appear in bold to the service-worker.js file.
Listing 6: Receiving push notifications in the service worker
self.addEventListener('push', function(event) {
    console.info('Event: Push');
    var title = 'Breaking News';
    var body = {
        'body': 'Click to see the latest breaking news', 'tag': 'pwa',
        'icon': './images/48x48.png'
    };
    event.waitUntil(self.registration.showNotification(title, body)
    );
});

self.addEventListener('notificationclick', function(event) {
    //---access data from event using event.notification.data---
    console.log('On notification click: ', event.notification.data);
    var url = './breaking.html';

    //---close the notification---
    event.notification.close();

    //---open the app and navigate to breaking.html
    // after clicking the notification---
    event.waitUntil(
        clients.openWindow(url)
    );
});
Basically, you added an event listener for the push event. This event is fired whenever the application receives a push notification. When this event is fired, you call the registration.showNotification() function to display a notification on your computer. For simplicity, you will hard-code the message to display to the user. In real life, you can use this event to make a call to your back-end to retrieve the details of the notification. In service workers, the waitUntil() function tells the browser that work is ongoing until the promise settles, and it shouldn't terminate the service worker if it wants that work to complete.
When the user clicks on the notification, the notificationclick event fires. In this example, your code in the service worker will launch the breaking.html page.
Finally, create a new file named breaking.html and save it to the PWAPUSH folder. Populate it as follows:
<!DOCTYPE html>
<html lang="en">
    <head>
        <meta charset="UTF-8">
        <meta name="viewport"
            content="width=device-width,
            initial-scale=1.0">
        <meta http-equiv="X-UA-Compatible"
            content="ie=edge">
        <title>Breaking News</title>
    </head>
    <body>
        Breaking News...
    </body>
</html>
Testing the Application
You can now finally test the application. Refresh the index.html page on the Chrome browser and make sure you click the push button until it becomes red. This is to ensure that the subscription ID of the application is saved on the REST API.
In a new Terminal window, type the following command:
$ curl -v http://localhost:8080/push
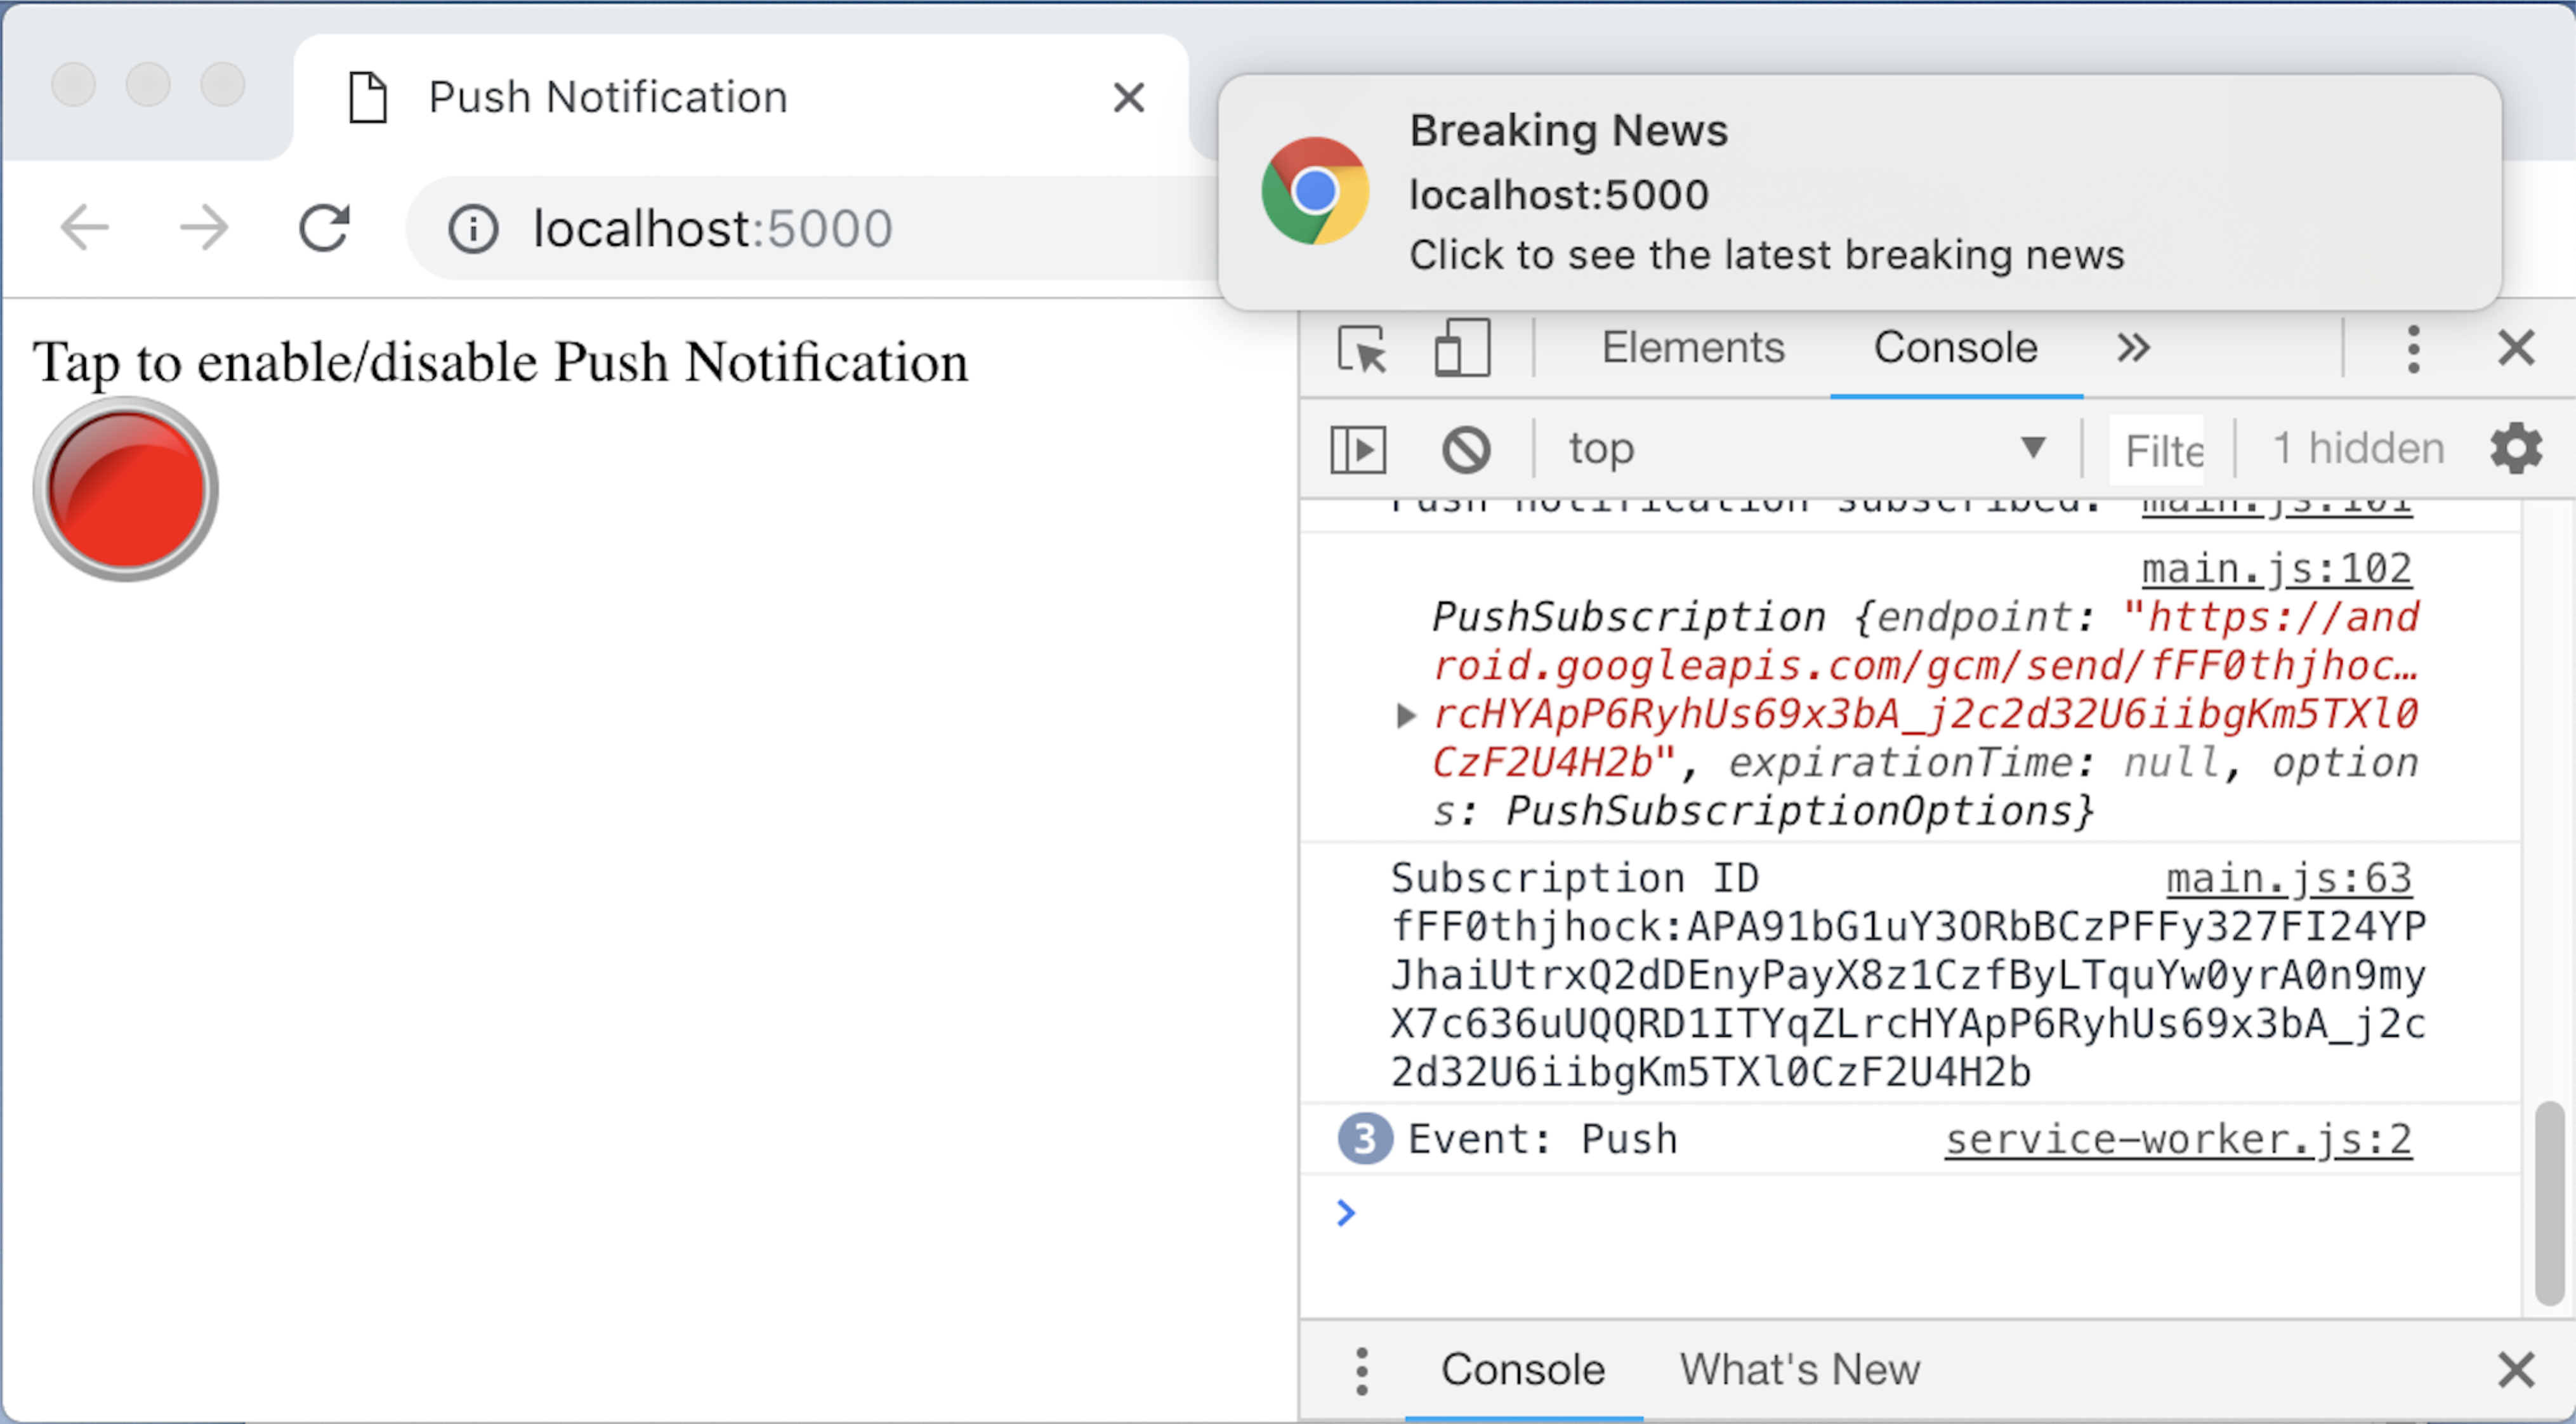
This causes the REST API to send a push notification via FCM. You should now see a notification displayed on your computer (like Figure 13).
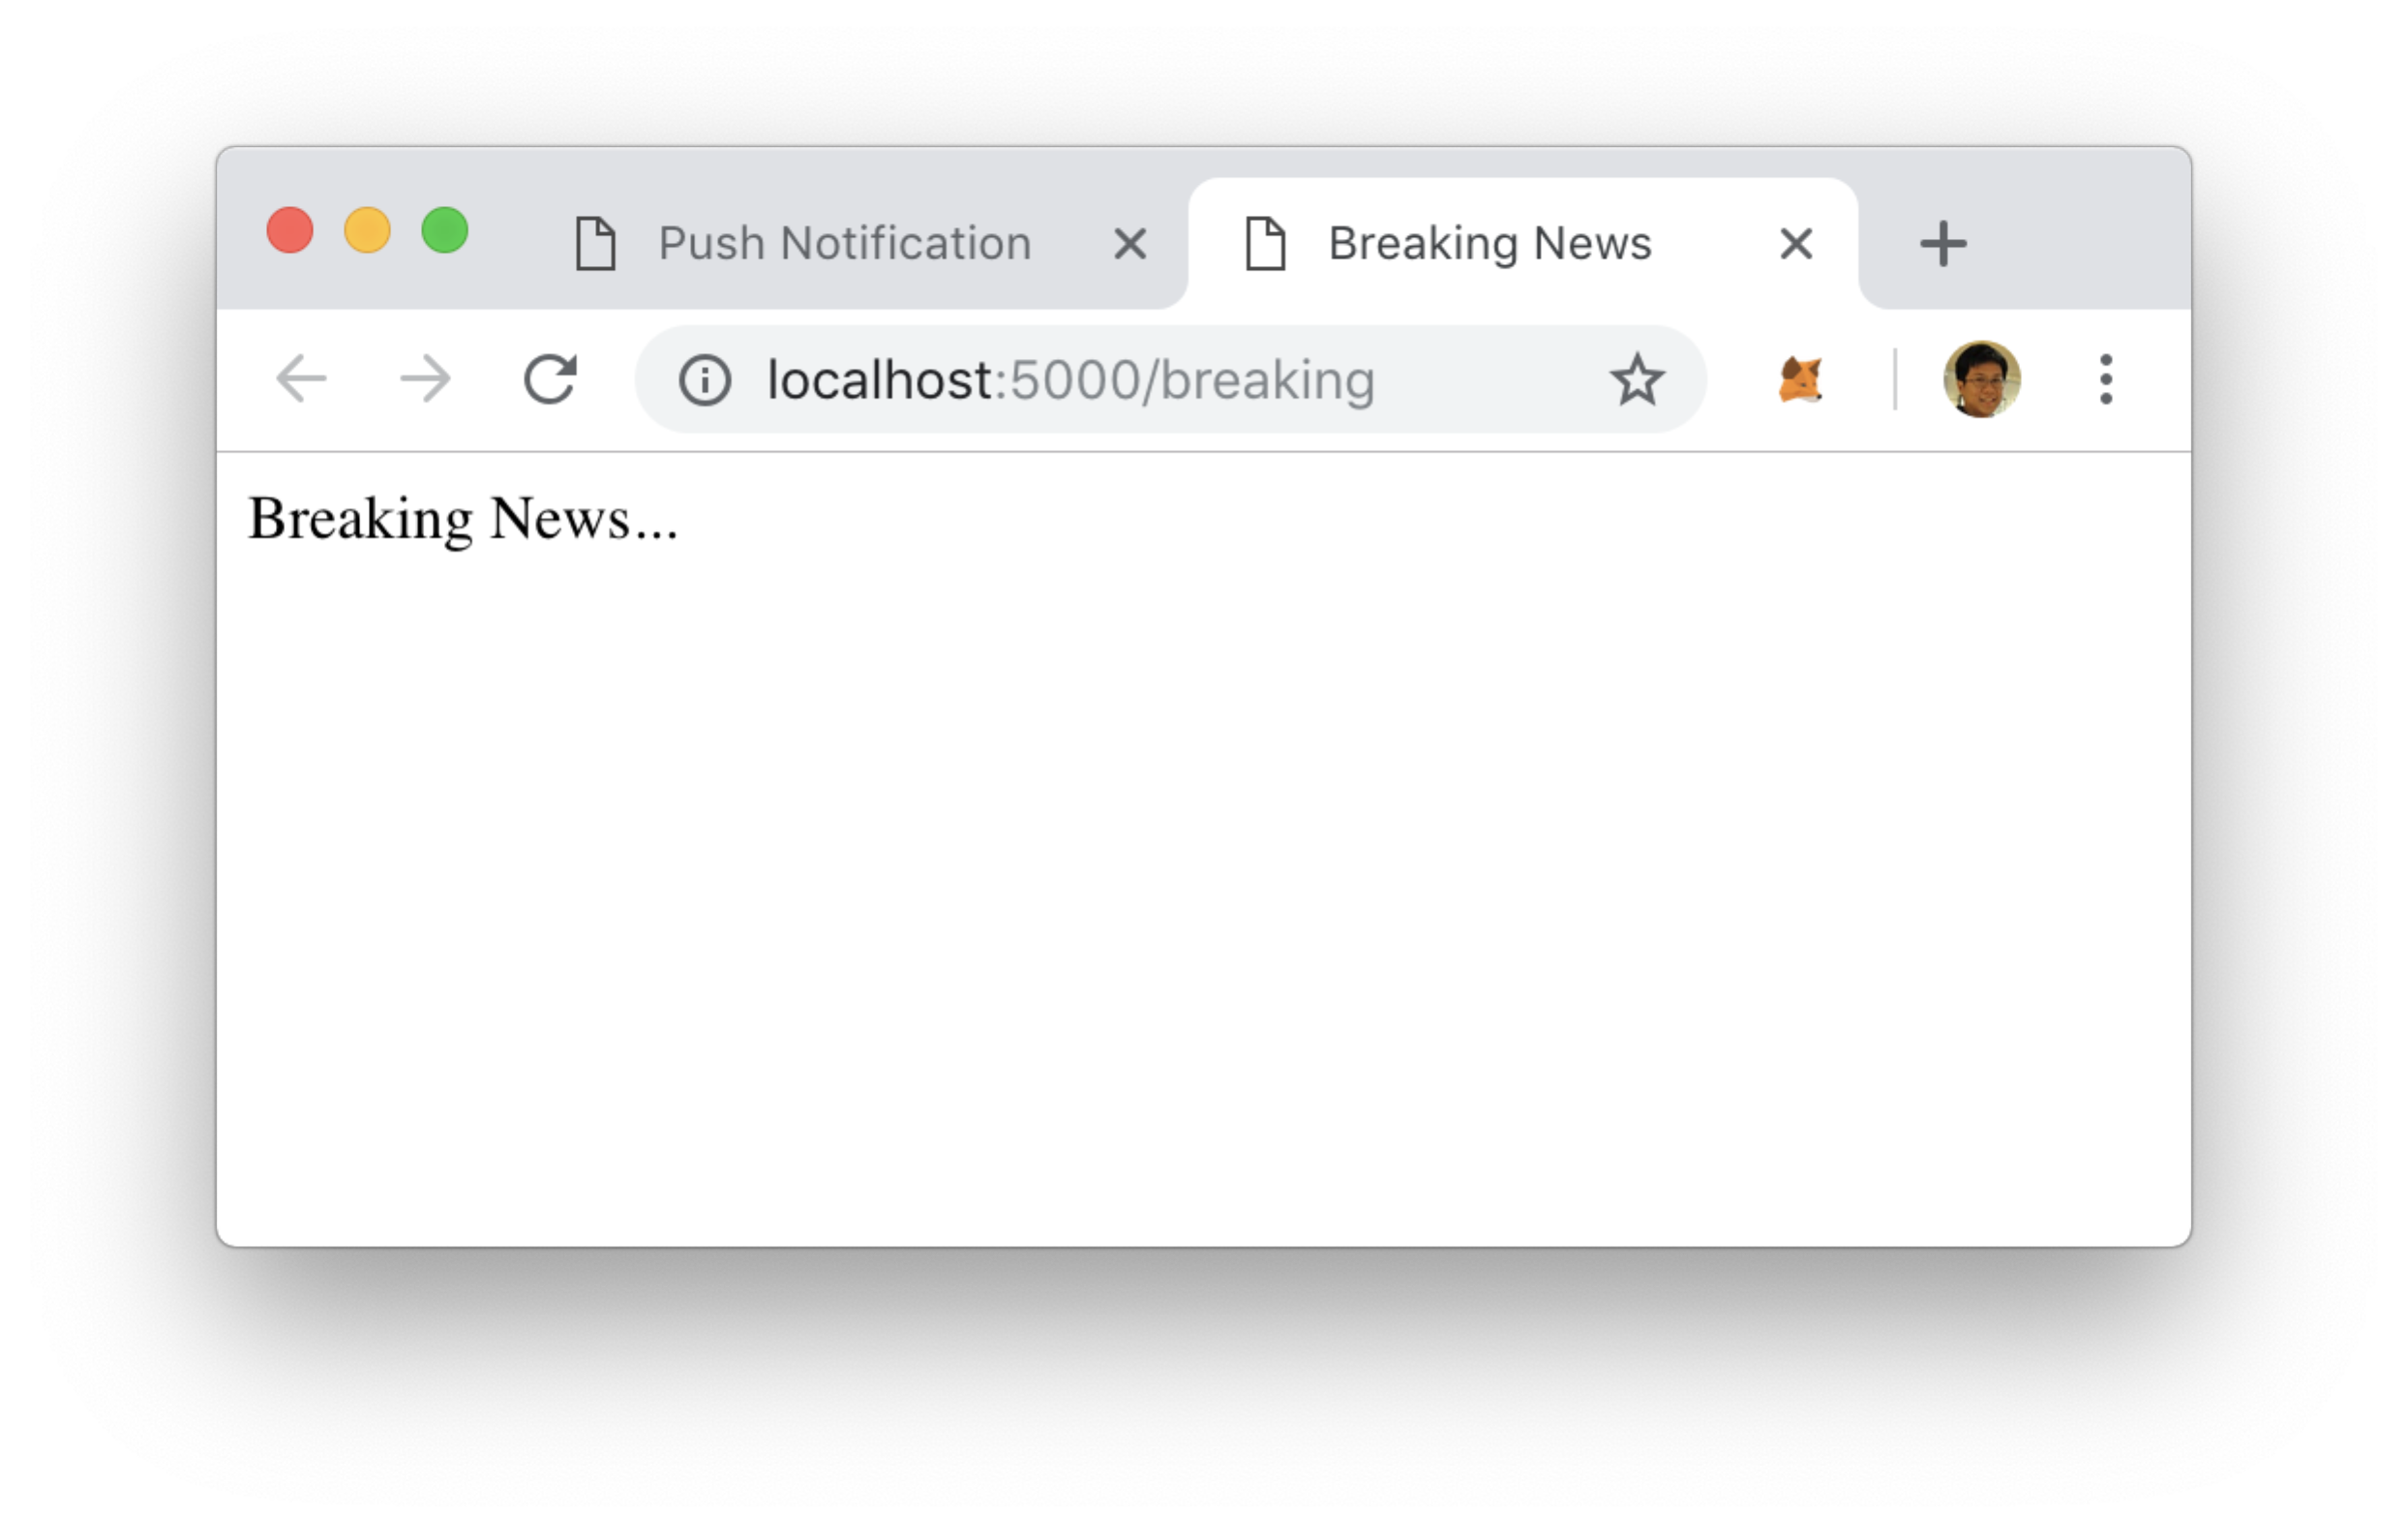
Clicking the notification displays a new page (see Figure 14).
Hosting the Web Application and REST API Using Firebase Hosting and Functions
Until this point, you've been hosting the Web application and REST API locally on your computer. A better idea would be to host them on a real Web server so that the application can be used by anyone.
In the following sections, you will do the following:
- Host the Web application using Firebase Hosting
- Host the REST API using Firebase Function
Hosting Using Firebase Hosting
Let's first host the Web application using Firebase Hosting. Create a new folder named FirebaseHosting. This will be used to store all the files that will be uploaded and hosted by Firebase Hosting.
Type the following commands in Terminal:
$ cd ~/FirebaseHosting
$ npm install -g firebase-tools
$ firebase init
You will see a bunch of text. Move the cursor until you've selected the Hosting: Configure and deploy Firebase Hosting sites option. Then, press Space and press Enter.
Next, select the name of the Firebase project (the Project ID) that you created earlier when you registered for Firebase. In my case, the project name is PWAPush (pwapush-44724). Select the project name and then press Space and press Enter.
You will next be asked to enter a folder name to store your project files. Press Enter to use the default name of public. The Firebase tool will now create a folder named public.
Next, you will be asked if you want to configure the app as a single-page app. Type No and press Enter.
The FirebaseHosting folder now has the following items created for you:
- A firebase.json file
- A public folder, which contains the following files:
- 404.html file
- index.html file
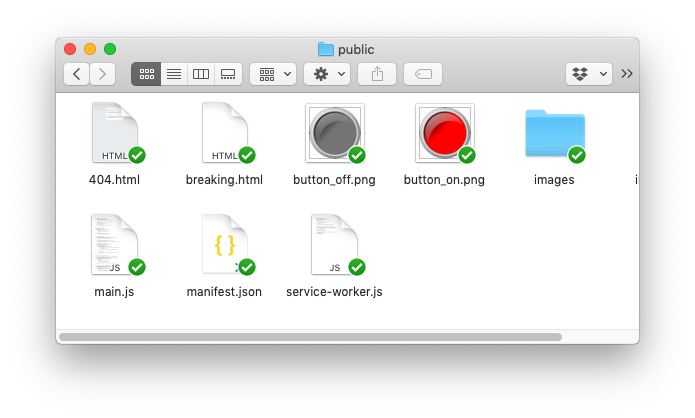
Copy all the files in the PWAPUSH folder into the PWAPUSH/public folder, overwriting the index.html created by Firebase. The content of the public folder should now be as shown in Figure 15.
You're now ready to deploy the content of the public folder to Firebase Hosting. Type the following commands in Terminal:
$ cd ~/FirebaseHosting/public
$ firebase deploy
At the end of the deployment, you'll see the following:
Project Console: https://console.firebase.google.com/project/pwapush-44724/overview
Hosting URL: https://pwapush-44724.firebaseapp.com
The Hosting URL is the location of your hosted website.
For Windows users, if you get an error pertaining to
$RESOURCE_DIRduring Firebase deployment, edit thefirebase.jsonfile and make the following changes:npm –prefix %RESOURCE_DIR% run lint
You're now ready to test the application that's hosted on Firebase Hosting. Using Chrome, load the page as shown in Figure 16.
Note the use of https:// by Firebase Hosting. This is one of the nice features of Firebase Hosting, where you don't need to configure SSL for your site.
Hosting Using Firebase Functions
Now that the Web application is deployed to Firebase Hosting, it's time to deploy the REST API to Firebase Functions. Firebase Functions lets you automatically run back-end code in response to events triggered by HTTPS requests. Your code is stored in Google's cloud and runs in a managed environment. There's no need to manage and scale your own servers. The application that you host on Firebase Functions is known as a serverless app.
To get started with Firebase Functions, type the following command in Terminal:
$ cd ~/FirebaseHosting
$ firebase init functions
You'll be asked what language you'll be using. Select JavaScript. You'll also be asked if you want to use ESLint to catch probable bugs and enforce style. Enter Yes and press Enter.
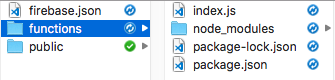
Next, enter Yes to install dependencies with npm. Once the installation is complete, The FirebaseHosting folder should have the functions folder with the files, as shown in Figure 17.
The index.js file is going to contain your REST API code in JavaScript. It's going to be very similar to the SubscriptionIDServer.js file that you created earlier. The key difference is that you no longer need to use the express module to listen at a particular port number. Instead, you use the firebase-functions module and call the functions.https.onRequest() function to handle incoming HTTP events. Populate the index.js file as shown in Listing 7.
Listing 7: Content of the index.js file
const functions = require('firebase-functions');

var express = require('express');

//---returns an instance of express server---
var app = express();

//---parse the body of the request and set the
// body property on the request object---
var bodyParser = require('body-parser');

app.use(bodyParser.json());
app.use(bodyParser.urlencoded({
    extended: true
}));

app.use(function (req, res, next) {
    res.setHeader('Access-Control-Allow-Origin', '*');
    res.setHeader('Access-Control-Allow-Headers', 'X-Requested-With,content-type');
    res.setHeader('Access-Control-Allow-Methods', 'GET,PUT,POST,DELETE');
    next();
})

//---replace this with a database in real-life app---
var subscribers = []

var FCM = require('fcm-node');

//---------------------------------------------
//---replace Server Key with the Server Key you obtained earlier
var serverKey = 'Server_Key';
//---------------------------------------------

var fcm = new FCM(serverKey);

app.post('/subscribers/', function(req, res) {
    //---check that the regid field is there---
    if (!req.body.hasOwnProperty('subscriptionid')){
        res.statusCode = 400;
        res.send('Error 400: Post syntax incorrect.');
        return;
    }
    console.log(req.body.subscriptionid);
    subscribers.push(req.body.subscriptionid)
    res.statusCode = 200;
    res.send('SubscriptionID received');
});

app.delete('/subscribers/:id', function(req, res) {
    console.log(req.params.id)
    const index = subscribers.indexOf(req.params.id)
    if (index !== -1) {
        subscribers.splice(index,1)
    }
    res.statusCode = 200;
    res.send('SubscriptionID deleted');
});

app.get('/subscribers', function (req, res) {
    res.send(subscribers)
})

app.get('/push', function(req, res) {
    var message = {
        // for multiple recipients
        registration_ids: subscribers,
        // for single recipient
        // to: subscribers[0],
        collapse_key: 'your_collapse_key',
    };

    fcm.send(message, function(err, response){
        if (err) {
            console.log("Something has gone wrong!");
            console.log(err)
        } else {
            console.log("Successfully sent with response: ",
            response);
        }
    });
    res.sendStatus(200)
});

exports.app = functions.https.onRequest(app);
For simplicity, in this example you'll use an array to store the subscription IDs. However, note that for serverless apps, content of an array is not persistent and you should use a database for storage in real life applications.
Next, you need to install the dependencies needed by your serverless app. Type the following commands in Terminal:
$ cd ~/FirebaseHosting/functions
$ npm install express --save
$ npm install body-parser --save
$ npm install fcm-node --save
The above commands install all the modules needed by index.js and at the same time update the dependencies in the package.json file.
Add the needed statements to the firebase.json file located in the FirebaseHosting folder:
{
    "hosting": {
        "public": "public",
        "rewrites": [
            {
                 "source": "/**",
                 "function": "app"
            }
        ],
        "ignore": [
            "firebase.json",
            "**/.*",
            "**/node_modules/**"
        ]
    },
    "functions": {
        "predeploy": [
            "npm --prefix \"$RESOURCE_DIR\" run lint"
        ]
    }
}
The final step is to deploy the content of the functions folder to Firebase Functions. Type the following commands in Terminal:
$ firebase deploy
At the end of the deployment, you should see the following:
Project Console: https://console.firebase.google.com/project/pwapush-2c8aa/overview
Hosting URL: https://pwapush-44724.firebaseapp.com
The Hosting URL is the location of your hosted Node.js application. Now that the REST API is hosted on Firebase Functions, you need to update your main.js file so that the subscription ID is sent to the app on Firebase Functions instead of localhost. In the main.js file located in the FirebaseHosting/public folder, make the modifications shown in Listing 8.
Listing 8: Modifying the main.js file in the FirebaseHosting/public folder
...
//---extract the subscription id and send it over to the REST service---
function saveSubscriptionID(subscription) {
    var subscriptionid = subscription.endpoint.split('gcm/send/')[1];
    console.log("Subscription ID", subscriptionid);
    fetch('https://pwapush-44724.firebaseapp.com/subscribers', {
        method: 'post',
        headers: {
            'Accept': 'application/json',
            'Content-Type': 'application/json'
        },
        body: JSON.stringify(
            { subscriptionid : subscriptionid })
    });
}

//---extract the subscription id and send it over to the REST service---
function deleteSubscriptionID(subscription) {
    var subscriptionid = subscription.endpoint.split('gcm/send/')[1];
    console.log("Subscription ID", subscriptionid);
    fetch('https://pwapush-44724.firebaseapp.com/subscribers/' +
    subscriptionid, {
        method: 'delete',
        headers: {
            'Accept': 'application/json',
            'Content-Type': 'application/json'
        }
    });
}
...
You can now redeploy the main.js file by typing the following commands In Terminal:
$ cd ~/FirebaseHosting/public
$ firebase deploy
Testing the Application
You can now retest the application that's hosted on Firebase Hosting. Restart Chrome and clear all the data (Chrome > Clear Browsing Data…). Then, load the index.html page using the new URL: https://pwapush-44724.firebaseapp.com.
Make sure to click the push button once to unsubscribe and one more time to subscribe. This is to ensure that the subscription ID gets saved into the newly hosted serverless REST API.
To send a push notification, type the following command in Terminal:
$ curl -v
https://pwapush-44724.firebaseapp.com/push
You should now receive a notification on your computer. To check the subscription ID that's stored on the serverless app, use the following command:
$ curl -v
https://pwapush-44724.firebaseapp.com/
subscribers
You should see something like this:
["ffsDvGfKqik:APA91bFrshZktJFR5pNYYykdszg0Qq75IJwWdmG6xqnk_NmEkFkUoYEMQjbTXCDIuzDL8-
2XaLPZEMnjngiJcWUsdtGzsJKE9FHz9qvpc-pFv28ulPKavs8ReaftnAGah-6kA7P9ziB0"]
Testing the Application on an Android Device
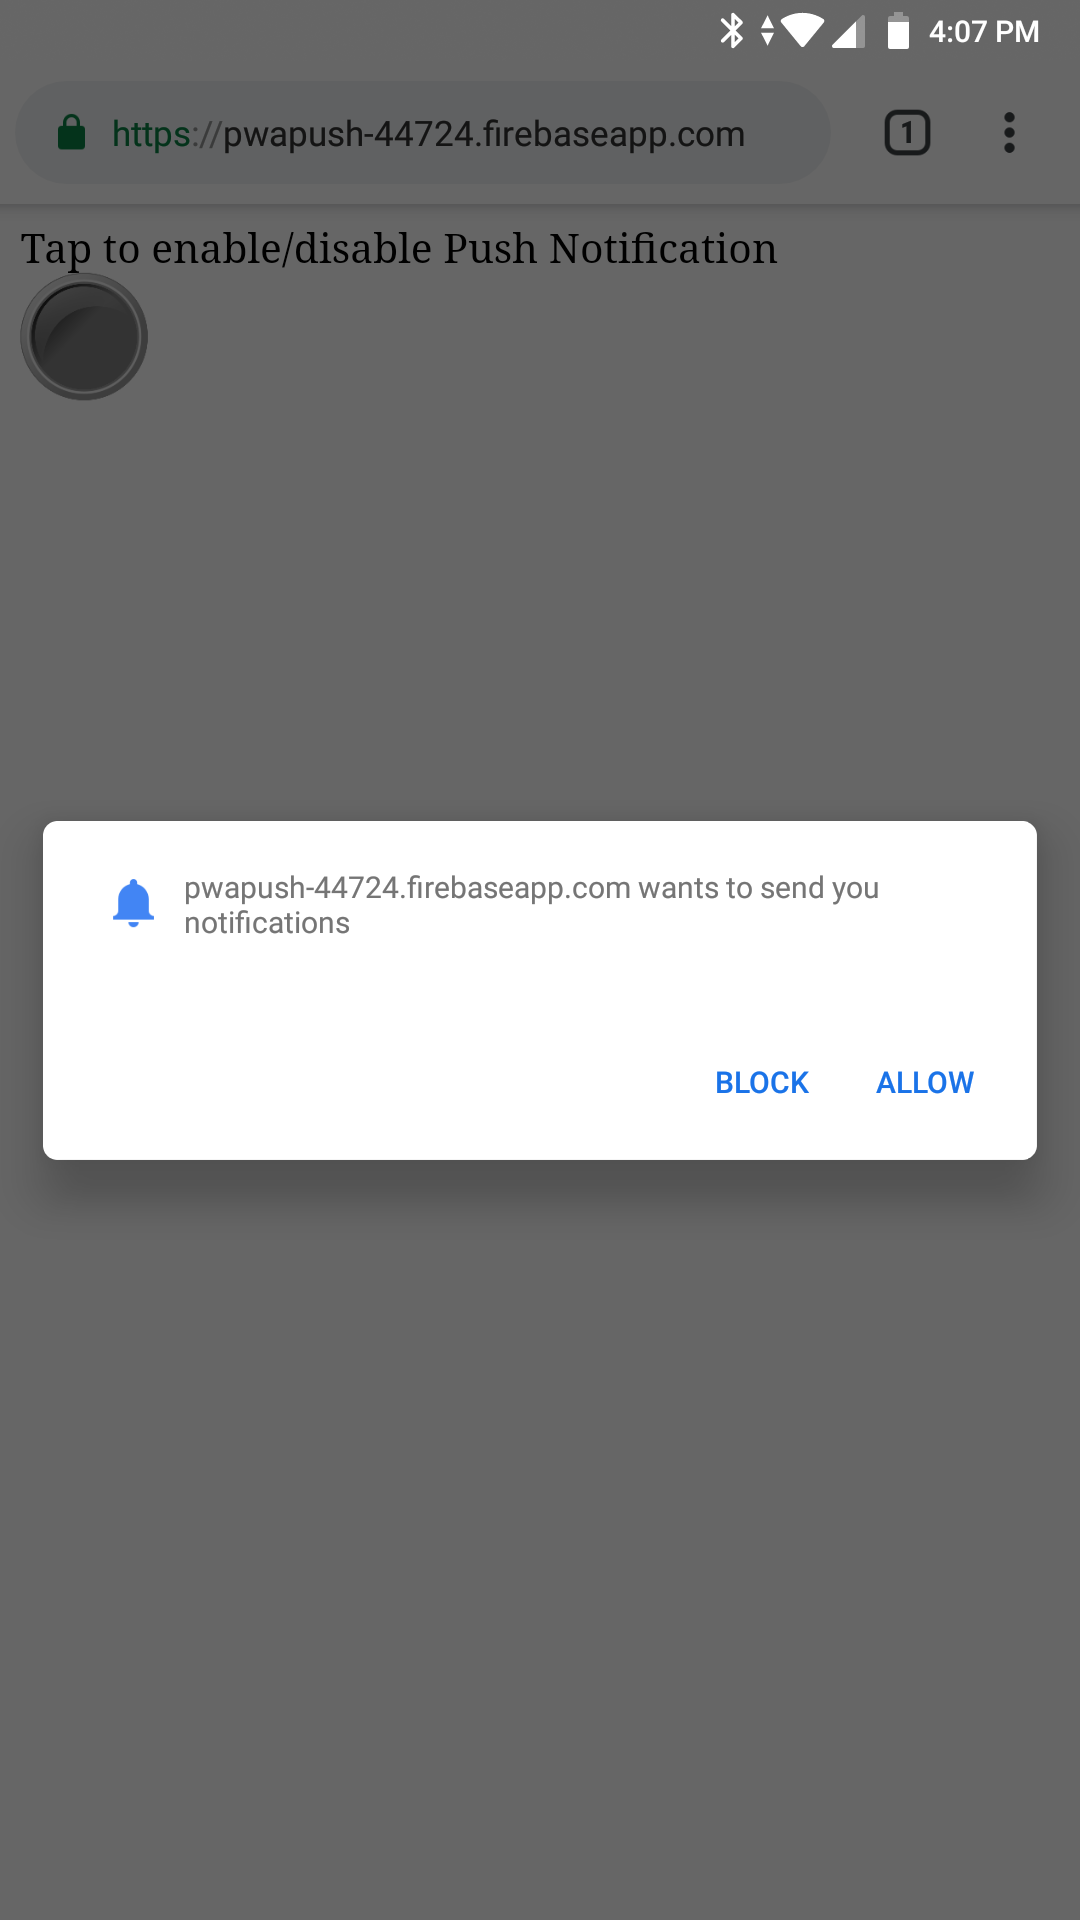
So far, you've been testing the application on the Chrome browser on the desktop. The same application will also work on an Android device. Using an Android device, you can launch Chrome and type the following URL: https://pwapush-44724.firebaseapp.com. When you tap on the button, you will be prompted to allow push notifications (see Figure 18).
When a notification is received, you'll see the notification as shown in Figure 19.
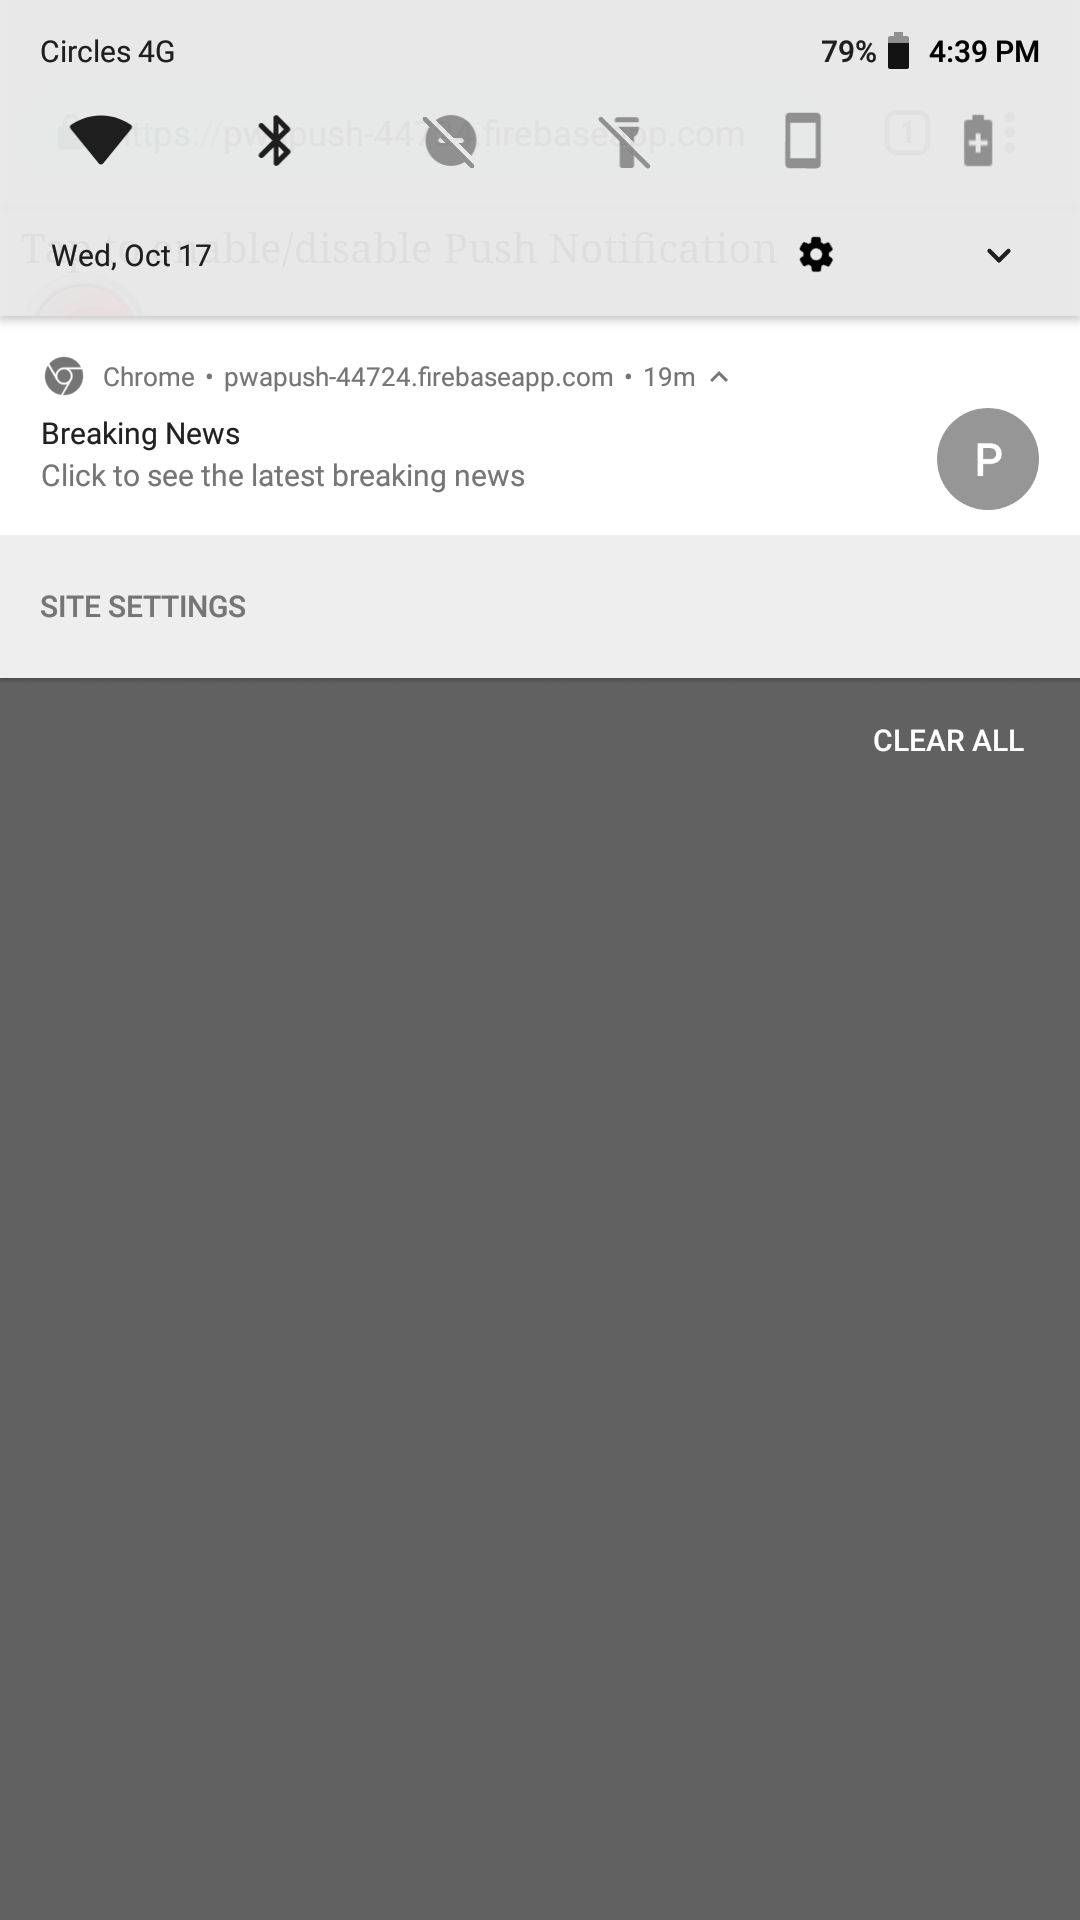
Tapping on the notification displays the breaking.html page.
Adding the Application to the Home Screen
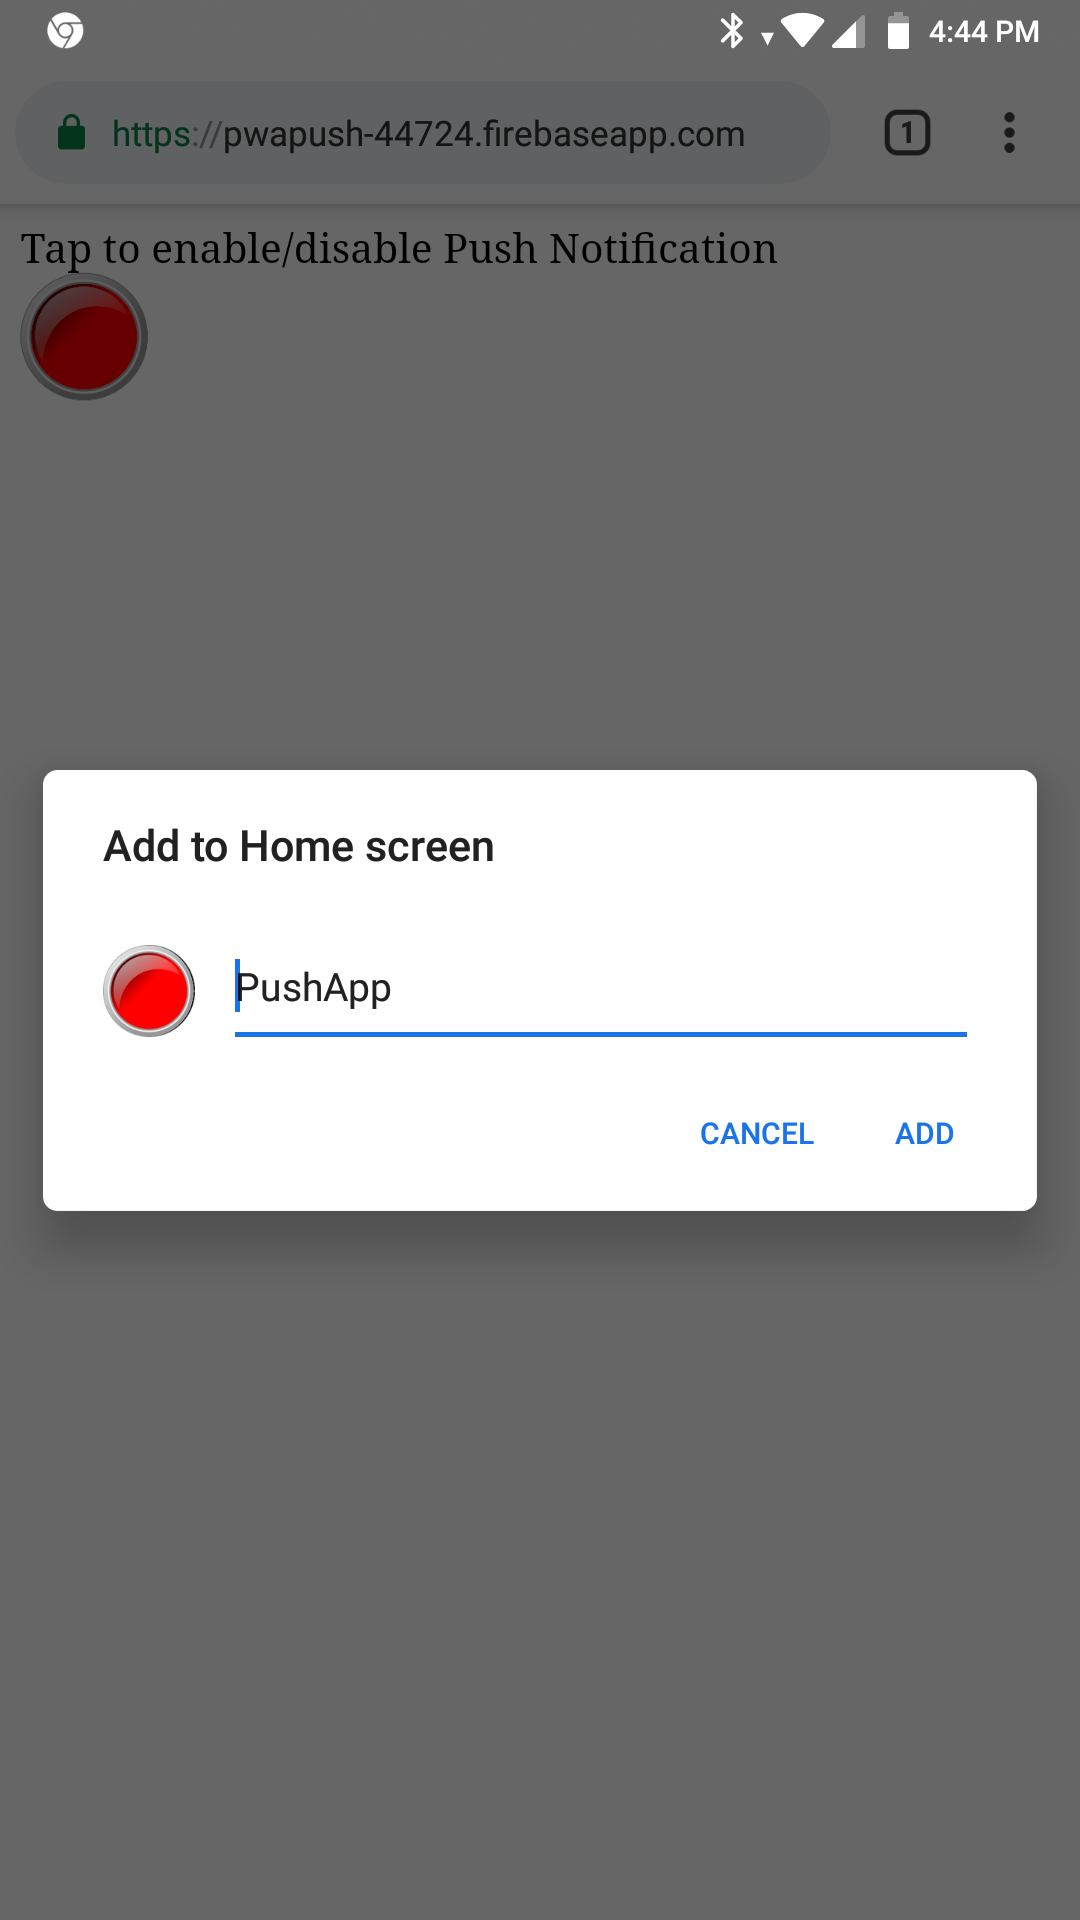
You can add the application icon to your Home Screen in Android. Click on the hamburger icon at the top right corner of the Chrome app and tap on Add to Home screen. You'll see the prompt, as shown in Figure 20. Click ADD to add the app icon to the Home Screen.
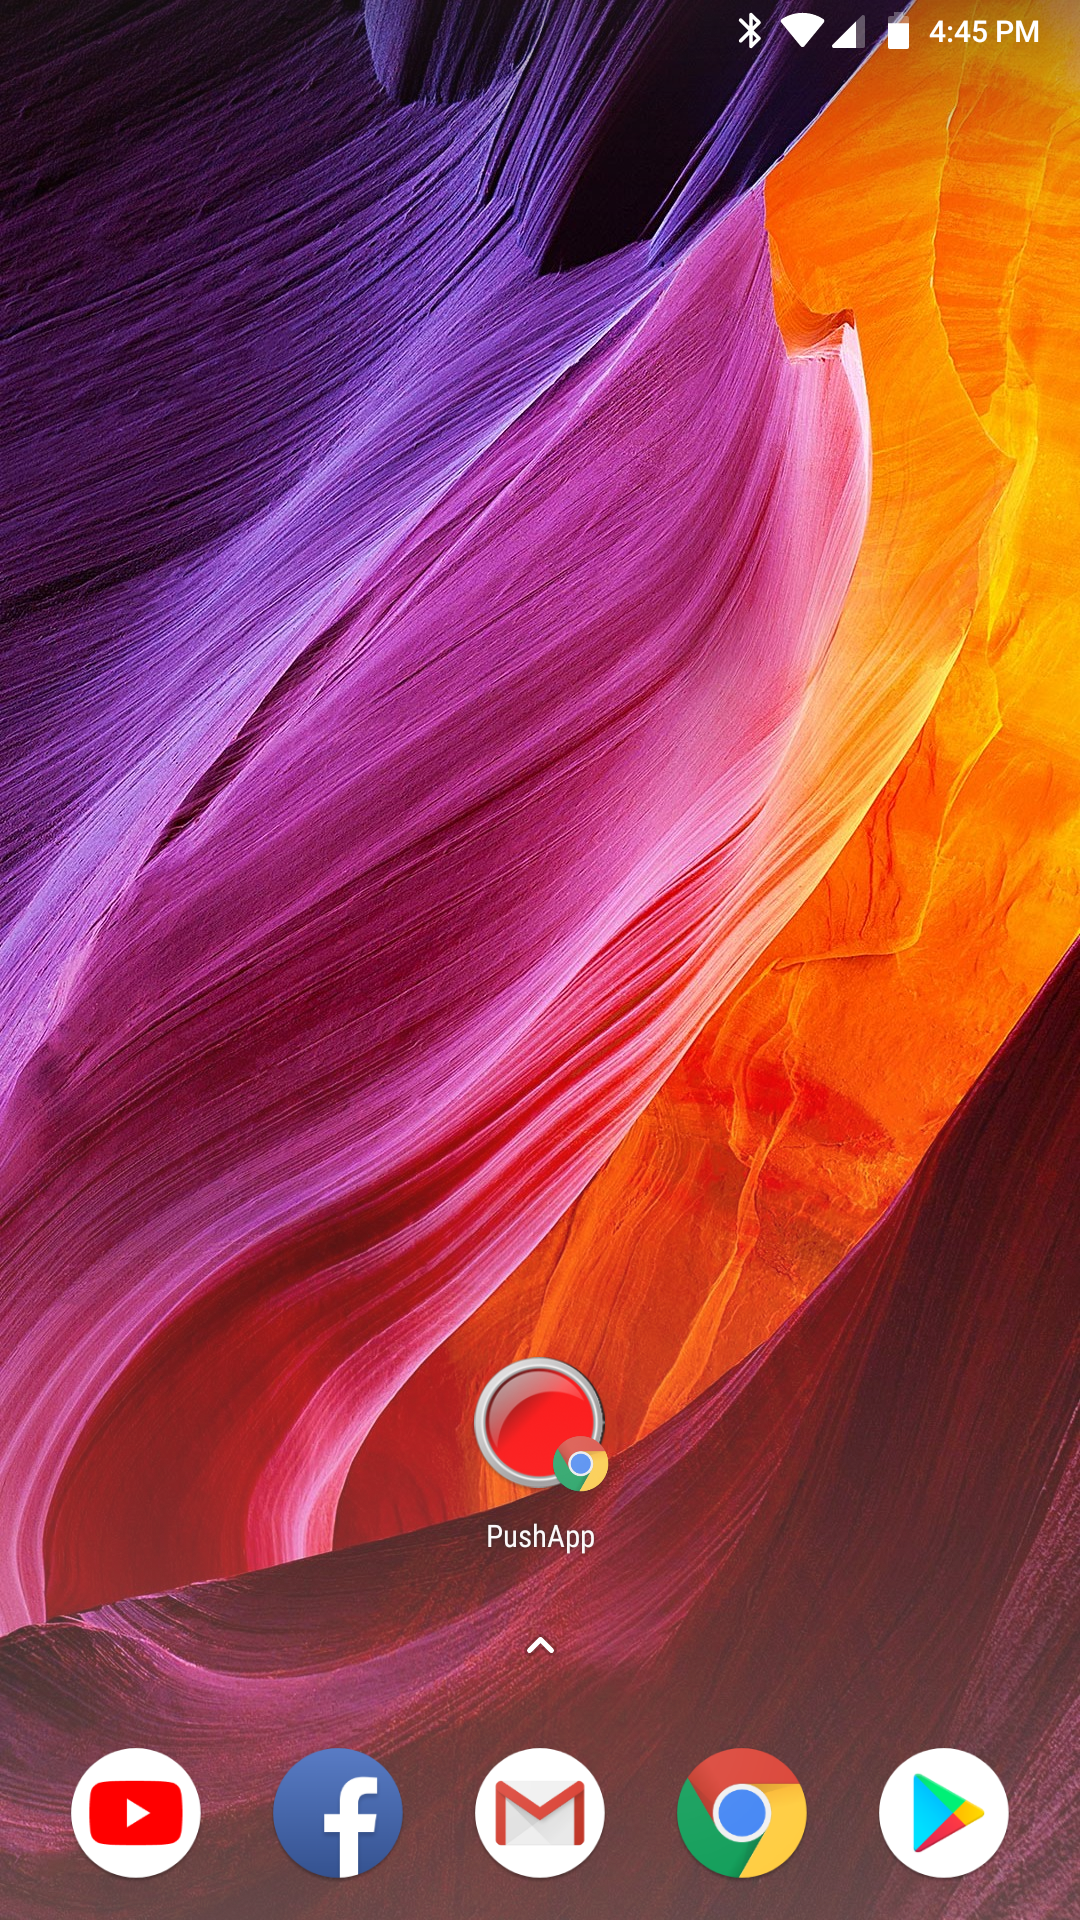
In the next dialog, tap ADD AUTOMATICALLY. An icon is added to the Home screen (see Figure 21).
Summary
In this article, I covered a lot of ground. I first discussed how to enable push notification on a PWA, and then discussed how to build a REST API to save the list of subscription IDs. I then covered how to use Firebase Cloud Messaging to deliver push notifications to applications. When all of these were done, I migrated the app and the REST API onto the Firebase Hosting and Firebase Functions, respectively. Doing this allows you to delegate the back-end tasks to Firebase. Finally, you also learned how to test the app on an Android device and how to save the app icon onto the Home Screen of the Android device.
