


In the third part of this series, I introduced Passport.js module and implemented User Authentication with NestJS, Passport.js, and JWT to secure the To Do REST API endpoints.
Related Articles
- NestJS Step-by-Step (Part 1))
- NestJS Step-by-Step (Part 2))
- Nest.js Step-by-Step: Part 3 (Users and Authentication))
This article covers how you can connect an Angular front-end app with a NestJS back-end API. NestJS is no different than any other back-end technology in delivering REST APIs that are accessible by front-end apps including Angular, React,JS, Vue.JS, and other front-end frameworks.
I used Angular CLI to build an Angular v8 app. The app uses Bootstrap 4 for the layout and styling. By the end of the article, you will build something similar to what you see in Figure 1:

The application consists of:
- A Login component for users to login to the app
- A Home component to welcome users
- A Todo Home component acting as a landing page to display todo items and Tasks
- A Todo Create component allowing the user to create a new todo list item
- A Todo List component to list all available todo lists in the database
- A Task Create component allowing the user to create a new task under a specific todo list item
- A Task List component to list all available tasks under a specific todo list item
NestJS is no different from any other back-end technology for building and providing REST APIs.
You'll be able to add new todo and task items, as well as delete existing items. I've left editing a todo list item and task item as an exercise to practice with Angular and NestJS.
Create Angular App
Start by creating a new Angular v8 app using the Angular CLI. Make sure you install the latest version of the Angular CLI using the following command:
npm install -g @angular/cli
Now that the Angular CLI is installed, let's create an application by following the steps:
- Navigate to the folder on your computer that holds the back-end NestJS source code.
- Side by side, issue the following command to create a new Angular app:
ng new todo-client
The Angular CLI prompts you with a set of questions to better customize the experience for your own needs and requirements. My answers to those questions are listed here:
- Would you like to add Angular routing? Yes
- Which stylesheet format would you like to use? SCSS
Right after that, the CLI starts generating the files and folders needed and installs the relevant NPM packages.
Now that the application is created, navigate inside the directory and make sure it has been generated successfully. Run the command:
ng serve --open
The command starts an internal Webpack Web server to serve the application and opens the browser automatically for you. You should be seeing something similar to Figure 2:
Great! The app is up and running.
Let's add the Authentication module to the application.
Add Auth Library
The Auth source code hosts all the components and services required by the application. Angular CLI offers two options to isolate your code:
- An Angular module
- An Angular library
With both, the Auth module lives in an isolated and self-contained environment. A library is more like a mini-app containing a module file, component, service, TypeScript config files, and above all, the public-api.ts TypeScript file. The public-api.ts file is used to specify all the library items that you wish to export and make visible and accessible to other libraries or modules in the application.
For this article, I've decided to make use of Angular Libraries.
Let's create the Auth Library by issuing the following command:
ng generate library auth
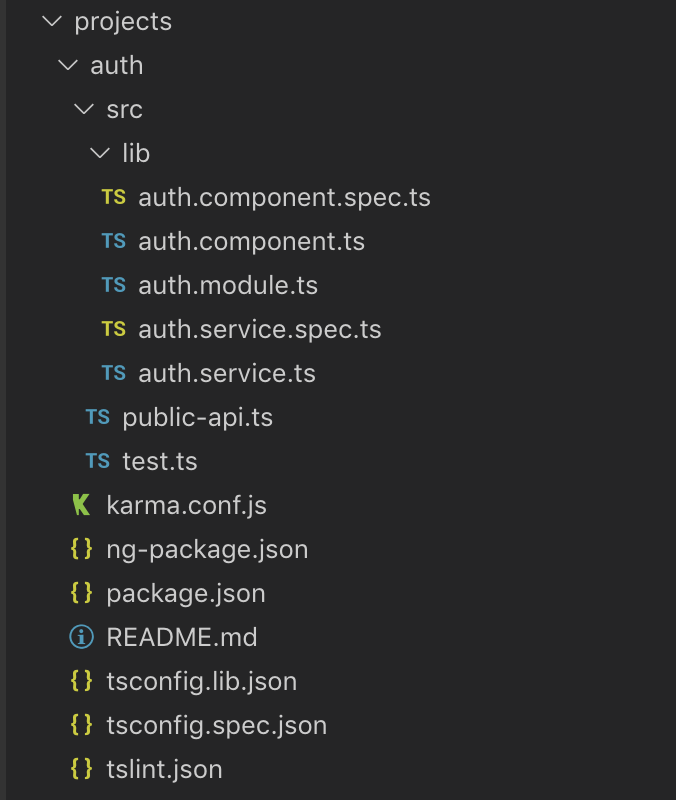
This command creates a new library named auth inside a folder located under the root-level projects folder. The Angular CLI places all libraries under this root-level projects folder. The Auth library generates an Auth module that can be imported by the main application module. Figure 3 shows the content of Auth library that you've just created:
Add Auth Service
The Auth service hosts the logic required to login and logout a user from the application. Start by generating a new service by running the command:
ng generate service services/auth --project=auth
The command scaffolds a new auth.service.ts file inside the services folder inside the auth library. Listing 1 defines the login() function.
Listing 1: Login method
login(username: string, password: string)
{
    return this.http.post<any>('/auth/login', { username, password }).pipe(map(user > {
        if (user && user.accessToken) {
            localStorage.setItem('currentUser', JSON.stringify(user));
            this.currentUserSubject.next(user);
        }
        return user;
    }));
}
The code initiates a POST /auth/login request to the back-end REST API passing over the username and the password that the user has entered on the login form. If the back-end server successfully authenticates the user and returns a valid accessToken (JWT), the function:
- Stores the user details including the JWT inside LocalStorage
- Populates a private currentUserSubject with the user details
The service defines the currentUserSubject as a BehaviorSubject<ApplicationUser> instance. At any moment of time, you can reactively query this variable to return the currently authenticated user.
In addition, the service defines a public property named currentUserValue to hold the value of the currentUserSubject at any moment of time. Shortly, you will see how to make use of this property inside the Auth Guard.
To logout a user, the Auth service defines this function:
logout() {
    localStorage.removeItem('currentUser');
    this.currentUserSubject.next(null);
}
The function removes the user details from the LocalStorage and also resets the user details inside the currentUserSubject.
Add Auth Guard
The Auth guard decides if a user can access a requested Route. Depending on whether the user is authenticated or not, the Auth guard responds accordingly. Start by generating a new guard by running the following command:
ng generate guard auth --project=auth
This command prompts you with a question: Which interfaces do you want this new guard to implement?
- CanActivate
- CanActivateChild
- CanLoad
These are three different guard strategies that you can implement in Angular depending on the use case. For this application, I've chosen the CanActivate option.
Listing 2 defines the Auth Guard. The CanActivate interface implementation starts by accessing the AuthService currentUserValue property.
- If this property holds a valid user, it returns true. This means that you need to allow the user to access the Route.
- Otherwise, redirect the user to the Login page and prevent them from accessing the current Route.
You will see shortly how to make use of this guard when you define the application routes.
Listing 2: Auth service
import { Injectable } from '@angular/core';
import {  ActivatedRouteSnapshot,  RouterStateSnapshot,  CanActivate,  Router} from '@angular/router';import { AuthService } from './services/auth.service';
@Injectable({ providedIn: 'root'})

export class AuthGuard implements CanActivate {
    constructor(private router: Router, private authService: AuthService) {}
    canActivate(route: ActivatedRouteSnapshot, state: RouterStateSnapshot) {
        const currentUser = this.authService.currentUserValue;
        if (currentUser) {
            // logged in so return true
            return true;
        }

        this.router.navigate(['/login'], { queryParams: { returnUrl: state.url } });

        return false;
    }
}
Add Login Component
The user logs into the application using a Login page. This page communicates with the back-end API to authenticate the user, generate a new JWT and return results to the calling application. Start by generating a new Angular component by running the following command:
ng generate component components/login
--project=auth --skipTests
This command scaffolds a new Login Angular component inside the components folder. In addition, the command declares this component at the Auth Module level.
Listing 3 defines the HTML template of the Login component. The component defines a form with two fields: username and password. This form is data-bound to the loginForm that you will define shortly inside the code-behind of this template. In addition, it adds error/validation UI to notify the user in case they enter a wrong username format or they miss entering one of the two fields. The template also adds a Submit button to allow the user to login to the application.
Listing 3: Master page
<div class="container my-3">
  <div class="row text-center mb-5">
    <div class="col-md-12 bg-light p-3">
      <h2>Login</h2>
    </div>
  </div>
  <div class="row">
    <div class="col-md-6 offset-md-3">
      <form [formGroup]="loginForm" (ngSubmit)="onSubmit()" autocomplete="off">
        <div class="form-group">
          <label for="usernam">Username</label>
          <input type="text" class="form-control" id="username" formControlName="username" placeholder="Username" />
          <div *ngIf="submitted && f.username.errors">
            <small *ngIf="f.username.errors.required" class="form-text text-muted">Username is required</small>
          </div>
        </div>
        <div class="form-group">
          <label for="password">Password</label>
          <input type="password" class="form-control" id="password" placeholder="Password" formControlName="password" />
          <div *ngIf="submitted && f.password.errors">
            <small *ngIf="f.password.errors.required" class="form-text text-muted">Password is required</small>
          </div>
        </div>
        <div *ngIf="error" class="my-3">
          <small class="form-text text-muted">{{ error | json }}</small>
        </div>
        <button type="submit" class="btn btn-primary">Submit</button>
      </form>
    </div>
  </div>
</div>
Listing 4 defines the TypeScript code of the Login component.
Listing 4: Login component
import { Component, OnInit } from '@angular/core';
import { FormGroup, FormBuilder, Validators } from '@angular/forms';
import { ActivatedRoute, Router } from '@angular/router';
import { first } from 'rxjs/operators';
import { AuthService } from '../../services/auth.service';

@Component({ templateUrl: 'login.component.html', styleUrls: ['login.component.css']})

export class LoginComponent implements OnInit {
    loginForm: FormGroup;
    submitted = false;
    returnUrl: string;
    error: string;

    constructor(private formBuilder: FormBuilder, private route: ActivatedRoute, private router: Router, private authService: AuthService) {}

    ngOnInit() {
        this.loginForm = this.formBuilder.group({
            username: ['bhaidar', Validators.required],
            password: ['@dF%^hGb03W~', Validators.required]
        });

        // reset login status
        this.authService.logout();

        // get return url from route parameters or default to '/'
        this.returnUrl = this.route.snapshot.queryParams.returnUrl || '/';
    }

    get f() {
        return this.loginForm.controls;
    }

    onSubmit() {
        this.submitted = true;

        // stop here if form is invalid
        if (this.loginForm.invalid) {
            return;
        }

        this.authService.login(this.f.username.value, this.f.password.value)
            .pipe(first())
            .subscribe(data => {
                this.error = '';
                this.router.navigate([this.returnUrl]);
            }, error => {
                this.error = error;
            });
    }
}
- It starts by creating the
loginForminstance and defining the fields under this form. In this case, only two fields are defined: username and password. - It then logs out the user just in case there was still an active session from previous logins.
- Then it stores the
returnUrlin a private variable to use later to redirect the user upon a successful login.
When the user tries to access a protected page and the Auth Guard redirects him to the Login page, it also appends to the Login page URL a query string named returnUrl to preserve the original page URL that the user was trying to access.
When the user submits the login form, Angular executes the onSubmit() function. This function starts by:
- Making sure the form is valid.
- It then calls the
AuthService.login()function passing to it the username and password entered by the user. - If the back-end successfully validates the credentials and authenticates the user, the function then redirects the user back to the
returnUrlpage. - Otherwise, the component displays the user-friendly errors returned from the back-end API.
Add JWT Interceptor
In part three of this series, I secured the back-end REST API endpoints with JWT (JSON Web Tokens). This means that for every request you send to any of the secured API endpoints, you need to pass over a valid JWT in the request Header so that the back-end can verify your identity and allow you to continue accessing the API.
For this reason, I'll add and implement an Angular Interceptor that will perform a lookup prior to sending any request to the server. It checks if there is a valid user record stored in the Auth Service, extracts the token from the record, and adds a Bearer Authentication Header token onto the request. This is exactly what the back-end REST API is expecting to properly verify and authenticate the user request.
Listing 5 defines the JWT Interceptor.
Listing 5: JWT Interceptor
import { HttpInterceptor, HttpRequest, HttpHandler, HttpEvent, HTTP_INTERCEPTORS} from '@angular/common/http';
import { Observable } from 'rxjs';
import { Injectable } from '@angular/core';
import { AuthService } from './auth.service';
@Injectable()
export class JwtInterceptor implements HttpInterceptor {
constructor(private authService: AuthService) {}
intercept(request: HttpRequest<any>, next: HttpHandler): Observable<HttpEvent<any>> {
// add authorization header with jwt token if available
const currentUser = this.authService.currentUserValue;
if (currentUser && currentUser.accessToken) {
request = request.clone({
setHeaders: {
Authorization: 'Bearer ${currentUser.accessToken}'
}
});
}
return next.handle(request);
}
}
export const jwtInterceptorProvider = { provide: HTTP_INTERCEPTORS, useClass: JwtInterceptor, multi: true};
- An Angular interceptor implements the
HttpInterceptor. - It implements a single function named
intercept(request: HttpRequest<any>,next: HttpHandler): Observable<HttpEvent<any>>. - The Angular infrastructure passes to the intercept() function the current HTTP Request and the
nexthandler in the pipeline (could be another interceptor). - The function then accesses the
currentUserValueproperty on the Auth Service. - If the property has a valid user and a valid access token, it clones the current request and sets the
Authorizationheader to aBearer {JWT}string. - Finally, it returns a call to the
next.handle(request)so that other handlers in the request pipelines are executed all the way to reach the back-end REST API.
The last line in the listing defines an Angular Provider for this interceptor. You'll provide this interceptor in the App main module. This way, you ensure that any request the application sends to the back-end REST API has an Authorization header set properly.
Angular provides an extendible request pipeline that allows you to define and implement Request Interceptors that can act on a request before sending it over to the back-end server and after receiving a response from the same server.
Add Error Interceptor
The back-end REST API returns a 401 Unauthorized response when it can't verify and authenticate a user. It also returns other types of responses including 400 Bad Request, 403 Forbidden and others. The front-end application needs a way to capture the “bad” response from the back-end REST API and act.
For instance, if the back-end REST API returns a 401 Unauthorized response, this means that the application is requesting a secured API endpoint while the user is not logged in to the application (no Authorization Header) on the request. In this case, the front-end app should redirect the user to the Login page to authenticate themselves with the back-end REST API.
I'll add and implement a new Angular Interceptor to handle the error responses from the back-end REST API properly.
Listing 6 defines the ErrorInterceptor class.
Listing 6: Error Interceptor
import { Injectable } from '@angular/core';
import { HttpInterceptor,  HttpRequest,  HttpHandler,  HttpEvent,  HttpErrorResponse,  HTTP_INTERCEPTORS} from '@angular/common/http';
import { Observable, throwError } from 'rxjs';
import { catchError } from 'rxjs/operators';
import { AuthService } from './auth.service';

@Injectable()

export class ErrorInterceptor implements HttpInterceptor {
    constructor(private authService: AuthService) {}

    intercept(request: HttpRequest<any>, next: HttpHandler): Observable<HttpEvent<any>> {
        return next.handle(request).pipe(catchError((err: HttpErrorResponse) => {
            if (err.status === 401 && !window.location.href.includes('/login')) {
                // auto logout if 401 response returned from api
                this.authService.logout();
                location.reload();
            }

            const error = err.error.error || err.error.message || err.statusText;
            alert(error);
            return throwError(error);
        }));
    }
}

export const errorInterceptorProvider = { provide: HTTP_INTERCEPTORS,  useClass: ErrorInterceptor,  multi: true};
- This interceptor hooks into the response payload.
- If the response HTTP Status Code is 401 and the user is not on the Login page, it's likely that the user isn't authenticated or a token has expired. In this case, the interceptor redirects the user back to the Login page.
- Any other error received from the back-end REST API is properly handled and stored inside a variable named error.
- The current interceptor simply alerts the error to the user. You can be fancier and use some Bootstrap 4 classes and styles to render a better Popup or Modal dialog to show the errors to the user.
- Finally, the interceptor throws the errors to signal to the Angular infrastructure that the response was not okay.
The last line in the listing defines an Angular Provider for this interceptor.
Seed User Data
This article won't touch on building a registration page for the application. Instead, I'll create and seed a user record into the back-end database to test the application.
Navigate to the server folder of this application, where the back-end REST API source code exists, and run the following command:
ts-node ./node_modules/typeorm/cli.js
-f ormconfig.json migration:create -n
SeedUserRecord
This command uses the TypeORM CLI to create an empty migration file. Listing 7 shows the file contents.
Listing 7: TypeORM migration
import { MigrationInterface, QueryRunner } from 'typeorm';

export class SeedUserRecord1565812987671 implements MigrationInterface {
    async up(queryRunner: QueryRunner): Promise<any> {}
    public async down(queryRunner: QueryRunner): Promise<any> {}
}
The up() function() runs when the migration is running. The `down()`` function runs when rolling back a migration.
Let's replace the content in this file with the one in Listing 8.
Listing 8: Seed User migration
import { MigrationInterface, QueryRunner } from 'typeorm';
import { UserEntity } from '../users/entity/user.entity';

export class SeedUserRecord1565812987671 implements MigrationInterface {
    public async up(queryRunner: QueryRunner): Promise<any> {
        const userRepo = queryRunner.manager.getRepository(UserEntity);
        const user = userRepo.create({
            username: 'bhaidar',
            password: '@dF%^hGb03W~',
            email: '<a href="mailto://bhaidar@gmail.com">bhaidar@gmail.com</a>',
        });

        await userRepo.save(user);
    }

    // tslint:disable-next-line: no-empty  public async down(queryRunner: QueryRunner): Promise<any> {}
}
I've implemented the up() function as follows:
- The code uses the
queryRunner.managerobject to get access to a Repository instance for the UserEntity. - It then creates a new User entity record.
- Finally, it saves the new entity into the database.
To run the migration and seed your database with a new user record, run the following command:
npm-run-all -s -l clean build:server && ts-node
./node_modules/typeorm/cli.js -f ormconfig.json
migration:run
The command cleans any previous builds of the back-end REST API source code, it then builds and transpiles the TypeScript code to proper JavaScript code and finally runs the migration.
It's very important to use the queryRunner.manager object as you guarantee that this migration will use the same Transaction instance that runs all the migrations rather than creating a new sub-transaction.
If this confuses you, refer to part two of this series and read about NestJS and databases.
Build Application Layout
Let's quickly build the layout of the application and set up some routes so that you can start testing things like the Login page. Navigate back to the Angular application.
Master Component
Generate a new Angular Master component by running this command:
ng generate component shared/master --skipTests
--inlineTemplate --inlineStyle
The command scaffolds a new MasterComponent class and places the HTML template together with the TypeScript code and CSS styling in a single file. Replace the content of this component with the code in Listing 9.
Listing 9: Master page
import { Component, OnInit } from '@angular/core';
import { AuthService } from 'projects/auth/src/public-api';
import { Router } from '@angular/router';
@Component({
selector: 'app-master',
template: `<div class="navbar navbar-expand-lg navbar-light bg-light shadow fixed-top">
<div class="container">
<a class="navbar-brand" href="#">
<i class="fas fa-tasks"></i>&nbsp;Todozz
</a>
<button class="navbar-toggler" type="button"
data-toggle="collapse" data-target="#navbarResponsive"
aria-controls="navbarResponsive" aria-expanded="false"
aria-label="Toggle navigation">
<span class="navbar-toggler-icon"></span>
</button>
<div class="collapse navbar-collapse" id="navbarResponsive">
<ul class="navbar-nav ml-auto">
<li class="nav-item" routerLinkActive="active">
<a class="nav-link" [routerLink]="['/']">Home</a>
</li>
<li class="nav-item" routerLinkActive="active">
<a class="nav-link" [routerLink]="['/todo']">Todo</a>
</li>
<li *ngIf="loggedIn" class="nav-item" routerLinkActive="active">
<a class="nav-link" (click)="logout()" href="">Logout</a>
</li>
</ul>
</div>
</div>
</div>
<section class="py-5 mt-5">
<div class="container">
<router-outlet></router-outlet>
</div>
</section>`})
export class MasterComponent implements OnInit {
public loggedIn = false;
constructor(private readonly authService: AuthService, private readonly router: Router ) {}
ngOnInit() {
this.loggedIn = !!this.authService.currentUserValue;
}
public logout(): void {
this.authService.logout();
this.router.navigate(['/login']);
}
}
The component defines a Bootstrap navigation bar that displays the brand name of the application and links to the Home page, Todo page, and a button to log out from the application. Depending on whether the user is logged-in or not, the log out button hides or shows. This logic is handled inside the code of this component.
Home Component
Let's also add a Home component to act as a landing page for the application. Generate the new component by running the following command:
ng generate component shared/home --skipTests –
inlineTemplate --inlineStyle
The command scaffolds a new HomeComponent class and places the HTML template together with the TypeScript code and CSS styling in a single file. Replace the content of this component with the code in Listing 10. The component is fairly simple and displays a message to the user.
Listing 10: Home page
import { Component, OnInit } from '@angular/core';

@Component({
    selector: 'app-home',
    template: `<div class="row text-center">
                 <div class="col-md-12">
                   <h2 class="">Welcome to Todozz App!</h2>
                   <p>Here you can manage your Todo Lists in a breeze!</p>
                 </div>
               </div>`})

export class HomeComponent implements OnInit {
    constructor() {}
    ngOnInit() {}
}
Add Routing
Now let's configure the application routing. Navigate to the /src/app/app-routing.module.ts file and replace the content of that file with the code in Listing 11.
Listing 11: Routes
import { NgModule } from '@angular/core';
import { Routes, RouterModule } from '@angular/router';
import { LoginComponent } from 'projects/auth/src/public-api';
import { MasterComponent } from './shared/master/master.component';
import { HomeComponent } from './shared/home/home.component';

const routes: Routes = [
                         {
                           path: '',
                           component: MasterComponent,
                           children: [
                                       {
                                         path: '',
                                         component: HomeComponent
                                       },
                                     ]
                         },
                         {
                           path: '',
                           children: [
                                       {
                                         path: 'login',
                                         component: LoginComponent
                                       }
                                     ]
                         },
                         {
                           path: '**',
                           redirectTo: ''
                         }
                       ];

@NgModule({
    imports: [RouterModule.forRoot(routes)],
    exports: [RouterModule]
})

export class AppRoutingModule {}
This routing module defines three main routes:
- A route to the Home component
- Another route to the Login page
- A catch-all route that redirects the user to the Home component
Test App
Let's give it shot and run the following command:
ng serve --open
This command builds the Angular app and opens a browser instance to start browsing the app, as you see in Figure 4.
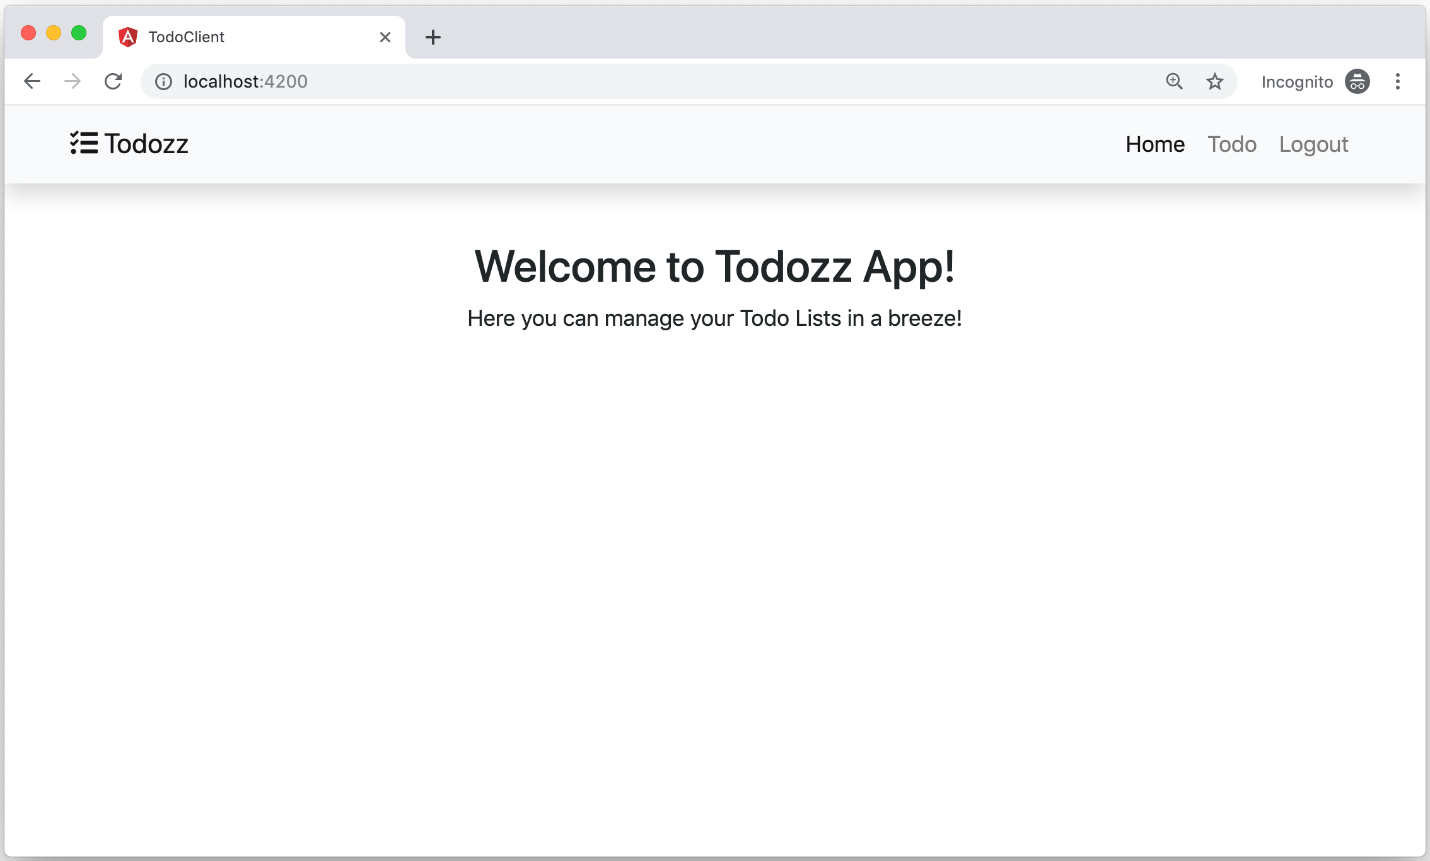
This is the application layout so far.
Test Login
Let's make use of the Auth Guard to test out the Login page. Replace the content of the /src/app/app-routing.module.ts file with the content in Listing 12.
Listing 12: Routes with Auth guard
import { NgModule } from '@angular/core';
import { Routes, RouterModule } from '@angular/router';
import { LoginComponent } from 'projects/auth/src/public-api';
import { MasterComponent } from './shared/master/master.component';
import { HomeComponent } from './shared/home/home.component';

const routes: Routes = [
                         {
                           path: '',
                           component: MasterComponent,
                           canActivate: [AuthGuard],
                           children: [
                                       {
                                         path: '',
                                         component: HomeComponent
                                       },
                                     ]
                         },
                         {
                           path: '',
                           children: [
                                       {
                                         path: 'login',
                                         component: LoginComponent
                                       }
                                     ]
                         },
                         {
                           path: '**',
                           redirectTo: ''
                         }];

@NgModule({
    imports: [RouterModule.forRoot(routes)],
    exports: [RouterModule]
})

export class AppRoutingModule {}
To test the Login page, you need to run the back-end NestJS app. Navigate to the server folder where the NestJS app is hosted and run the following commands in two different terminal command windows:
npm run run:services
This command starts up the Docker container that is hosting the PostgreSQL database for this application.
npm run start:dev
This command starts the NestJS application in development mode. Back to the front-end application, at the root folder, create a new proxy.conf.json file. Replace its content with the content in Listing 13.
Listing 13: Proxy config file
{
  "/api": {
    "target": "http://localhost:4000",
    "secure": false
  },
  "/auth": {
    "target": "http://localhost:4000/auth/",
    "secure": false,
    "pathRewrite": {
      "^/auth": ""
    }
  }
}
Angular uses the proxy configuration settings to redirect requests to the back-end and to the correct port where the NestJS app is running.
Now run the application once again by issuing the following command:
ng serve --proxy-config proxy.conf.json --open
The command runs the app by using the proxy configuration file. The application detects that you're not authenticated and logged in so it redirects you to the Login page like that in Figure 5.
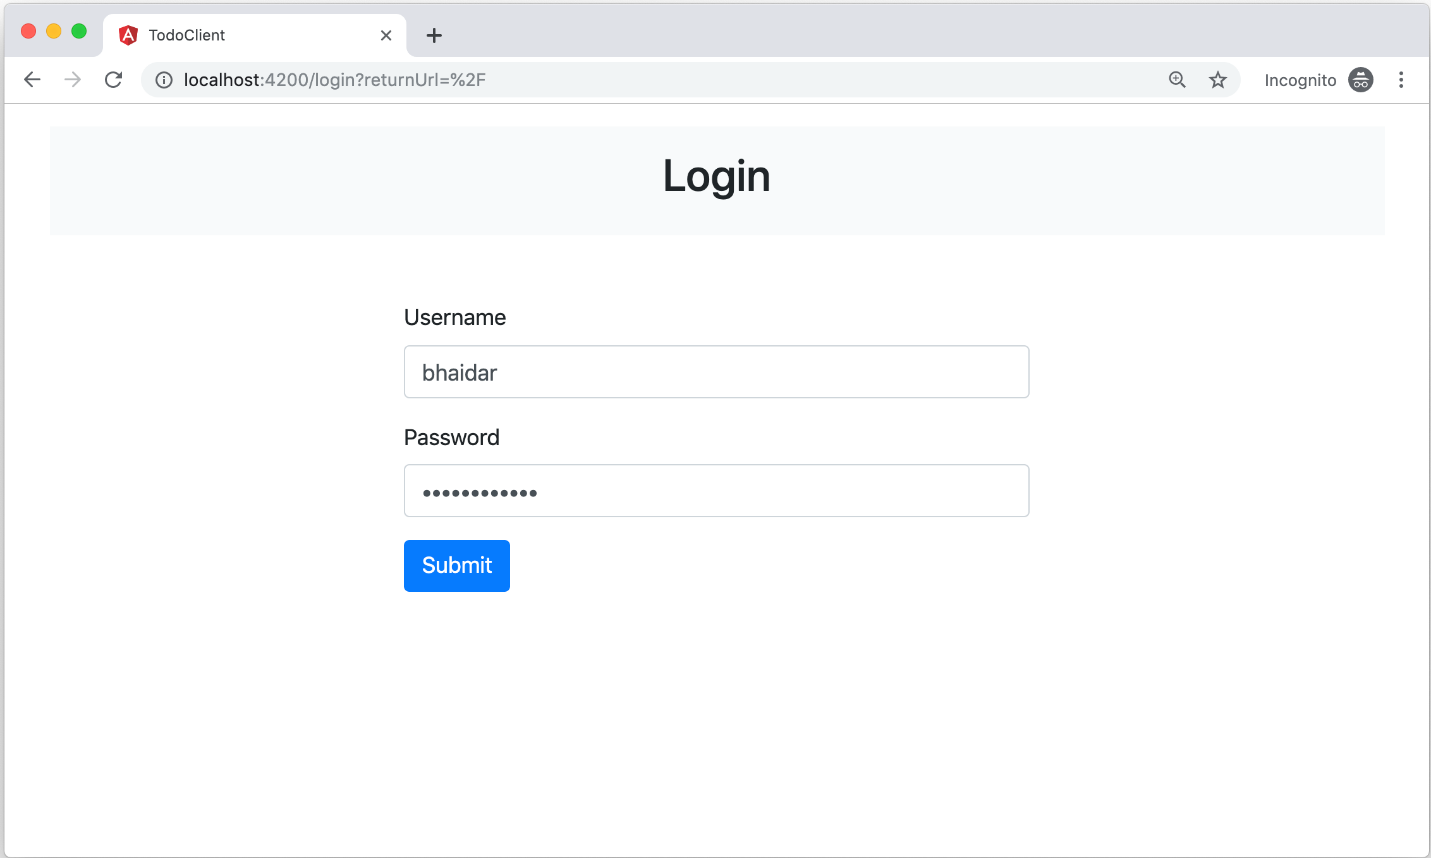
You enter your details and hit the Submit button. If the back-end REST API can successfully verify you, the application redirects you to the Home page once again.
Let's go back to the back-end REST API source code and remember how you've implemented the login logic there. When you enter your details on the Login page, the application sends a POST /auth/login request to the back-end REST API. It also appends the username and password data into the payload of the request.
On the back-end REST API level, NestJS chooses the corresponding Controller and Action to handle this request. In this case, the login action that you've defined on the AuthController class. It's responsible to receive all back-end requests to either log in or register a new user. You may refer back to part three of this series to learn more about user authentication.
@Post('login')

public async login(@Body() loginUserDto: LoginUserDto): Promise<LoginStatus> {
    return await this.authService.login(loginUserDto);
}
The login action expects an instance of LoginUserDto containing the username and password. The action then delegates its task to the login function that the AuthService defined in Listing 14.
Listing 14: Authlogin() action
async login(loginUserDto: LoginUserDto):

Promise<LoginStatus> {
    // find user in db
    const user = await this.usersService.findByLogin(loginUserDto);

    // generate and sign token
    const token = this._createToken(user);

    return {
        username: user.username,
        ...token,
    };
}
This function starts by:
- Querying the database for a user given its username
- Creating a new signed JWT when the user exists
- Returning an object containing the username and the signed token
Then, it's the role of the AuthController.login action to return the response back to the front-end app.
As you know, the JwtInterceptor intercepts the response, extracts the user details including the JWT, and stores the data inside LocalStorage. The next time the user initiates a new request to the server, the front-end application retrieves the JWT and attaches it to the existing request.
Let's add more features and build the Todo module next.
Add Todo Library
Let's scaffold a new library to host the source code for the Todo module. Run the following command to generate the new library:
ng generate library todo
This new library introduces a new module hosted inside todo.module.ts.
Todo Home Component
Let's add the landing component of this library by running the command:
ng generate component todo-home --project=todo –
skipTests --inlineStyle --inlineTemplate
This command generates the TodoHomeComponent. Replace the content of this component with the content in Listing 15.
Listing 15: Todo Home component
import { Component, OnInit } from '@angular/core';

@Component({
    selector: 'lib-todo-home',
    template: `<div class="row my-2">
                 <div class="col-md-6">
                   <div class="row">
                     <div class="col-md-12 bg-light py-3 text-center">
                       <h5>Todo Lists</h5>
                     </div>
                   </div>
                   <div class="row">
                     <div class="col-md-12 my-2"></div>
                   </div>
                 </div>
                 <div class="col-md-6">
                   <div class="row">
                     <div class="col-md-12 bg-light py-3 border-left border-3 border-primary text-center">
                       <h5>Tasks</h5>
                     </div>
                   </div>
                   <div class="row">
                     <div class="col-md-12 my-2">
                       <router-outlet></router-outlet>
                     </div>
                   </div>
                 </div>
               </div>`,
    styles: [ `.border-3 { border-width: 3px !important; }`  ]
})

export class TodoHomeComponent implements OnInit {
    constructor() {}
    ngOnInit() {}
}
Navigate to the Todo link on the home page and see the results in Figure 6.
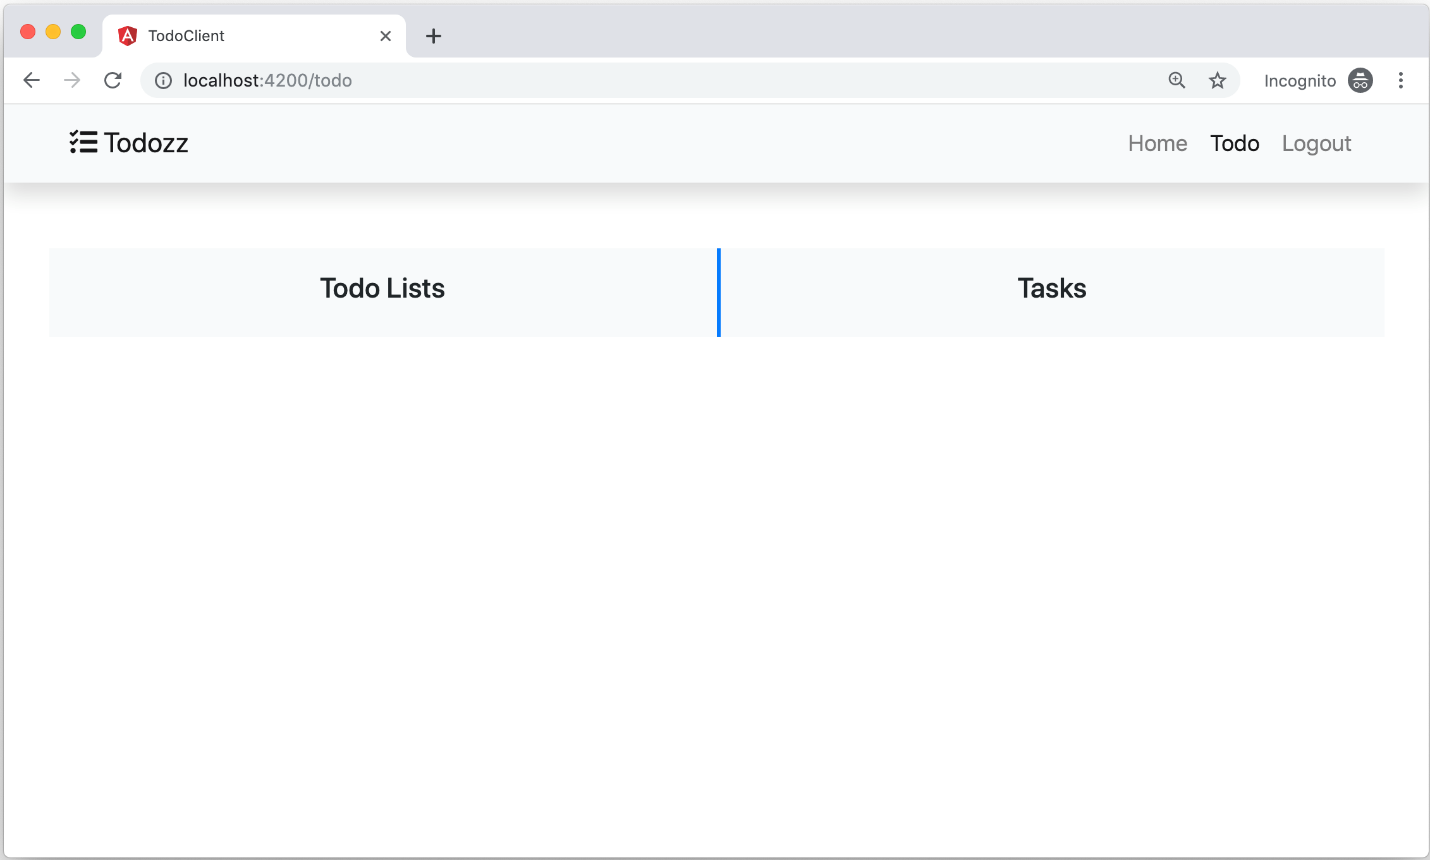
The component splits the screen into two sections. The first hosts the Todo lists and the second hosts the Tasks under each Todo list.
Todo Create Component
Generate a new Todo Create component by running the following command:
ng generate component components/todo-create –
project=todo --skipTests --inlineStyle –
inlineTemplate
The command above creates a new TodoCreateComponent inside the components folder in the todo library. Replace the content of this file with the content in Listing 16.
Listing 16: Todo Create component
import { Component, OnInit, EventEmitter, Output } from '@angular/core';
import { DoAction } from 'projects/app-common/src/public-api';

@Component({
    selector: 'lib-todo-create',
    template: `<div class="row my-2 mb-4">
                 <div class="col-md-8 offset-md-2">
                   <input [(ngModel)]="todo" (keyup.enter)="OnEnter()" class="form-control" placeholder="Type a Todo and hit (Enter)" />
                 </div>
               </div>`
})

export class TodoCreateComponent implements OnInit {
    public todo = '';
    @Output()  public action: EventEmitter<DoAction> = new EventEmitter();
    constructor() {}
    ngOnInit() {}
    public OnEnter() {
        this.action.emit({
            type: 'add-todo',
            spayload: this.todo
        });
        this.todo = '';
    }
}
The component is fairly simple. It defines a Textbox allowing the user to enter a new Todo List name and hit Enter to save the Todo List in the database.
The component listens to the Enter key on the Textbox and then emits an Output action containing the type of add-todo and a payload of the name of the Todo List itself. It emits this action to the outside world, that a new Todo List name has been entered. You will see shortly how to make use of this Output action to store the new Todo List in the database.
Todo List Component
Generate a new Todo List component by running the following command:
ng generate component components/todo-list –
project=todo --skipTests --inlineStyle –
inlineTemplate
The command creates a new TodoListComponent inside the components folder in the todo library. Replace the content of this file with the content in Listing 17.
Listing 17: Todo List component
import { Component, OnInit, Input, Output, EventEmitter } from '@angular/core';
import { Todo } from '../../models/todo.model';
import { DoAction } from 'projects/app-common/src/public-api';

@Component({
    selector: 'lib-todo-list',
    template: `<div *ngIf="!todos?.length; else show">No todos yet!</div>
               <ng-template #show>
                 <div class="list-group">
                   <div *ngFor="let todo of todos; let i = index; trackBy: trackByFn" class="todos">
                     <div class="action">
                       <button (click)="doAction(todo)" class="btn btn-danger btn-lg" title="Delete {{ todo?.name }}">
                         <i class="fa fa-trash"></i>
                       </button>
                     </div>
                     <div class="todo">
                       <a href="#" [routerLink]="['tasks', todo.id]" routerLinkActive="list-group-item-primary" class="list-group-item list-group-item-action">
                         ({{ i + 1 }}) {{ todo?.name }}
                       </a>
                     </div>
                   </div>
                 </div>
               </ng-template>`,
    styles: [`.todos { display: flex; justify-content: center; }
              .todos .todo { flex-grow: 1; flex-shrink: 0; max-width: 90%; }
              .todos .action { margin-right: 5px; }`]
})

export class TodoListComponent implements OnInit {
    @Input() public todos: Todo[];
    @Output()  public action: EventEmitter<DoAction> = new EventEmitter();
    constructor() {}
    ngOnInit() {}
    public trackByFn(index: number, item: Todo) {
        return index;
    }
    public doAction(todo: Todo): void {
        this.action.emit({
            type: 'delete-todo',
            payload: todo });
    }
}
The component receives as input an array of all Todo List items to display to the user. It uses Bootstrap 4 list-group styles to display all the items.
The component emits an Output action containing the type of delete-todo and a payload of the Todo List item itself. It emits this action to the outside world once the user clicks to delete a single Todo List item. It passes over the corresponding list item the user is trying to delete.
Finally, the component places a router-outlet component under the Tasks section. When the user clicks on a single Todo List item, the application renders the Tasks page for this Todo List item inside the router-outlet allowing the user to view both the TodoList Items and Tasks under the Todo List item side by side.
Todo Component
Now let's generate the TodoComponent that will host both the TodoCreateComponent and TodoListComponent.
ng generate component components/todo –
project=todo --skipTests --inlineStyle –
inlineTemplate
The command above creates a new TodoComponent inside the components folder in the todo library. Replace the content of this file with the content in Listing 18.
Listing 18: Todo component
import { Component, OnInit } from '@angular/core';
import { Observable, BehaviorSubject } from 'rxjs';
import { switchMap, tap } from 'rxjs/operators';
import { DoAction } from 'projects/app-common/src/public-api';
import { Todo } from '../models/todo.model';
import { TodoService } from '../services/todo.service';
import { Router } from '@angular/router';

@Component({
    selector: 'lib-todo',
    template: `<lib-todo-create (action)="doAction($event)"></lib-todo-create>
               <lib-todo-list [todos]="todos$ | async" (action)="doAction($event)"></lib-todo-list>`
})

export class TodoComponent implements OnInit {
    public todos$: Observable<Todo[]>;
    private refresh$ = new BehaviorSubject<any>('');

    constructor(private readonly router: Router,private readonly todoService: TodoService  ) {}

    ngOnInit() {
        this.todos$ = this.refresh$.pipe(switchMap(() => this.todoService.findAll()));
    }

    public doAction({ type, payload }: DoAction): void {
        switch (type) {
            case 'add-todo':
                this.createTodo(payload);
                break;
            case 'delete-todo':
                this.deleteTodo(payload);
                break;
            default:
                console.log('Unknown action type');
        }
    }

    private createTodo(todo: string): void {
        this.todoService.create({ name: todo })
                        .subscribe(() => this.refresh$.next(''));
    }

    private deleteTodo(todo: Todo): void {
        if (confirm('Are you sure you want to delete this item?')) {
            this.todoService.delete(todo.id).subscribe(() => {
                this.refresh$.next('');
                this.router.navigate(['/todo']);
            });
        }
    }
}
This component listens to the Output actions of both components as follows:
<lib-todo-create (action)="doAction($event)"></lib-todo-create>
<lib-todo-list [todos]="todos$ | async" (action)="doAction($event)"></lib-todo-list>
The TodoComponent defines the todos$ observable that passes it over to the TodoListComponent by means of an Async Pipe. Whenever this observable changes, the TodoListComponent receives a new fresh array of Todo Items to display and render to the user.
As a recap, the TodoCreateComponent emits the add-todo action while the TodoListComponent emits the delete-todo action. The TodoComponent handles both actions inside the doAction($event) function in Listing 18.
If the action emitted is of type add-todo, the function calls another function named createTodo() together with the payload of the action. If the action emitted is of type delete-todo, the function calls another function named deleteTodo() together with the payload of the action.
The createTodo() function, in turn, calls the `TodoService.create()`` function, passing to it a Todo model object as follows:
private createTodo(todo: string): void {
    this.todoService.create({ name: todo }).subscribe(() => this.refresh$.next(''));
}
The deleteTodo() function, in turn, calls the TodoService.delete() function passing to it the ID of the Todo List object:
private deleteTodo(todo: Todo): void {
    if (confirm(`Are you sure you want to delete this item?`)) {
        this.todoService.delete(todo.id).subscribe(() => {
            this.refresh$.next('');
            this.router.navigate(['/todo']);
        });
    }
}
The code navigates the user back to the /todo page after a successful deletion of a Todo List item. This is directly related to the existence of an internal router-view component, as you will see shortly.
You define the /todo/src/lib/models/todo.model.ts as:
export interface Todo {
    id?: string;
    name: string;
    createdOn?: Date;
}
The TodoService in Listing 19 wraps a few calls to the back-end REST API via the HttpClient**lass. For instance, the service defines the `create()`` function like so:
public create(todo: Todo): Observable<Todo> {
    return this.http.post<Todo>(this.baseUrl, todo, httpOptions).pipe(catchError(this.handleError));
}
The function sends a POST request to the back-end REST API, passing along a request payload containing the Todo List object and some options. It finally handles any errors generated out of this call to a dedicated function named handleError() defined in the service in Listing 19.
Listing 19: Todo service
import { Injectable } from '@angular/core';
import { HttpHeaders,  HttpClient,  HttpErrorResponse} from '@angular/common/http';
import { Observable, throwError } from 'rxjs';
import { Todo } from '../models/todo.model';
import { catchError, map } from 'rxjs/operators';

const httpOptions = {
    headers: new HttpHeaders({
        'Content-Type': 'application/json'
    })
};

@Injectable({providedIn: 'root'})

export class TodoService {
    private baseUrl = 'api/todos'; // URL to web api
    constructor(private readonly http: HttpClient) {}

    public create(todo: Todo): Observable<Todo> {
        return this.http.post<Todo>(this.baseUrl, todo, httpOptions).pipe(catchError(this.handleError));
    }

    public findAll(): Observable<Todo[]> {
        return this.http.get<Todo[]>(this.baseUrl, httpOptions).pipe(map((results: any) => results.todos), catchError(this.handleError));
    }

    public delete(id: string): Observable<{}> {
        const url = `${this.baseUrl}/${id}`;

        // DELETE api/todos/42-5c-...
        return this.http.delete(url, httpOptions).pipe(catchError(this.handleError));
    }

    private handleError(error: HttpErrorResponse) {
        if (error.error instanceof ErrorEvent) {
            console.error('An error occured:', error.error.message);
        } else {
            console.log(`Backend returned code ${error.status}, body was: ${error.status}`);
        }
    return  throwError(`Something bad happened; please try again later.`);
    }
}
The service defines the httpOptions variable as follows:
const httpOptions = {
    headers: new HttpHeaders({
        'Content-Type': 'application/json'
    })
};
The remaining components related to Task management have similar implementation to these components. I'll leave it to you to go and check the source code accompanying this article to see their implementations.
Test Todo
Back to Listing 15 (see above), find the following section inside the TodoHomeComponent:
<div class="row">
    <div class="col-md-12 my-2"></div>
</div>
Replace it with the following:
<div class="row">
  <div class="col-md-12 my-">
    <lib-todo></lib-todo>
  </div>
</div>
Now the TodoHomeComponent hosts the TodoComponent inside it. Let's add the corresponding routes to the application so that you can navigate to the Todo components. Open the /src/app/app-routing.module.ts file and replace its content as in Listing 20.
Listing 20: Final routes
import { NgModule } from '@angular/core';
import { Routes, RouterModule } from '@angular/router';
import { LoginComponent } from 'projects/auth/src/public-api';
import { MasterComponent } from './shared/master/master.component';
import { HomeComponent } from './shared/home/home.component';
import { AuthGuard } from 'projects/auth/src/lib/auth.guard';
import { TodoHomeComponent, TaskComponent } from 'projects/todo/src/public-api';

const routes: Routes = [
                         {
                           path: '',
                           component: MasterComponent,
                           canActivate: [AuthGuard],
                           children: [
                                       {
                                         path: '',
                                         component: HomeComponent
                                       },
                                       {
                                         path: 'todo',
                                         component: TodoHomeComponent,
                                         children: [
                                                     {
                                                       path: 'tasks/:id',
                                                       component: TaskComponent
                                                     }
                                                   ]
                                       }
                                     ]
                         },
                         {
                           path: '',
                           children: [
                                       {
                                         path: 'login',
                                         component: LoginComponent
                                       }
                                     ]
                         },
                         {
                           path: '**',
                           redirectTo: ''
                         }];

@NgModule({
    imports: [RouterModule.forRoot(routes)],
    exports: [RouterModule]
})

export class AppRoutingModule {}
Run the Docker container, back-end REST API, and Angular app and check the results in Figure 7:

You can see both TodoCreateComponent and TodoListComponent rendered on top of each other. Start playing around by adding new Todo List items or deleting existing ones. Assuming that I've implemented the rest of the Task components, if you click on any of the Todo List items, you should see the Tasks management screen as in Figure 8:
You've got a new Tasks screen that is similar to that of the Todo Lists to add new tasks or delete existing ones.
When you enter a new Todo List item and hit the Enter key, the application sends a POST /api/todos request together with a request payload that contains the Todo List item. The back-end REST API receives the request and handles it via the TodoController.create action. Listing 21 shows the body of the TodoController.create action.
Listing 21: TodoController create() action
@Post()
@UseGuards(AuthGuard())

async create(@Body() createTodoDto: CreateTodoDto, @Req() req: any,): Promise<TodoDto> {
    const user = req.user as UserDto;
    return await this.todoService.createTodo(user, createTodoDto);
}
You have decorated the create() action with the @UserGuards(AuthGuard()) decorator. This decorator ensures that the AuthGuard runs before the code executes this action.
The AuthGuard, if you've been through part three of this series, shows you that it will look for a JWT inside the request Authorization header and verify it. Upon a successful verification of the user, the create() action executes and returns a response to the front-end app.
You can find the source code of this article and the rest of this series in this repo: https://github.com/bhaidar/nestjs-todo-app.
Conclusion
This is the final part in this series on learning NestJS Step-by-Step. I've introduced a front-end application written in Angular to connect to the back-end REST API. You can see how easy it is to connect the two. There's nothing different from any other front-end application or other technology, like ASP.NET Core or PHP.
NestJS is a large framework and covers so much more than I can fit into a four-part series. I recommend that you always check the rich documentation website they offer, as it is always up to date and includes further details that could be useful while developing and using the NestJS framework.
