


In the May/June 2021 issue of CODE Magazine, I wrote an article called “Can You Keep a Secret? Azure Can!” showing you how to store a connection string with its secrets in Azure Key Vault and then use Azure Managed Identities with .NET Core to let your application access that while debugging locally in Visual Studio or Visual Studio Code. The best part is that you don't have to be a security or SysOps guru to do this. The clear evidence is that I was able to pull it off!
That's all well and good for debugging applications in your IDE, but when it's time to deploy your app, you can take this secret sharing even further. If you're using Azure SQL for your database and your application is running in Azure, it's possible (and easy) to have an Azure Managed Identity to authenticate and access your database. The services are all part of the same ecosystem and they know how to share among themselves.
In this article, I'll begin with the application as I left off in the earlier article, and walk you through deploying it and removing all secrets from the connection string. In the end, it's simply a matter of a leveraging a new feature of the SQLClient API to use Managed Identity for authentication.
I think this option is much easier than how we had to leverage Managed Identity authentication with EF Core prior to this new feature, which was by using EF Core Interceptors. Interceptors are a great feature, but in this particular case, the new workflow is much simpler.
As a non-security person, going directly to the new workflow continued to confuse me. However, walking pragmatically through the steps truly helped me understand what I was doing, why I was doing it, and eased me into having a much deeper comprehension of Azure Managed Identity than I originally thought I wanted to be bothered with. I can no longer claim ignorance, which was, honestly, more a matter of fear of failure than anything else. I want to help my fellow “OMG please don't make me learn security stuff” developers adopt this new area of expertise as well.
Even as we remove the need for storing the secrets of the connection string, there are plenty of other secrets that you may want to continue storing in the Key Vault. Here, I'll consider the rest of the details of the connection string important enough to keep it in the Key Vault and not embed it in the application code.
A Quick Overview of Where We're Starting
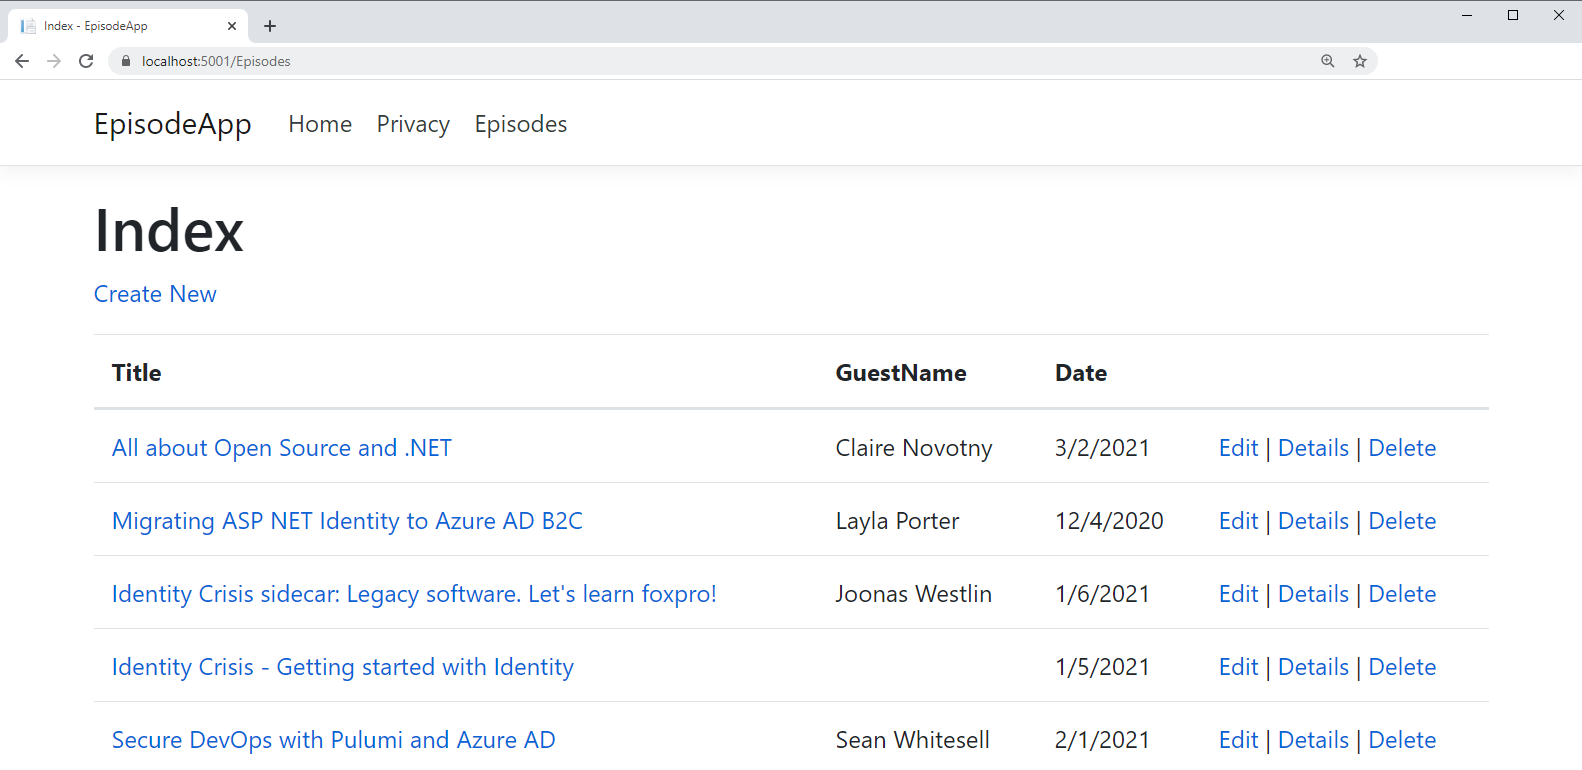
The application I built in the previous article was to maintain a list of episodes of “The 425 Show,” a Twitch stream run by the Identity Developer Advocacy team.
The ASP.NET Core Razor Pages application (Figure 1) uses EF Core to interact with its data.
I started out with a SQL Server LocalDB on my computer and its connection string tucked into appsettings.json. Then I moved the connection string into Azure Key Vault and using the Azure.Identity SDK for accessing secrets (a combination of Azure.Identity and Azure.Extensions.AspNetCore.Configuration.Secrets NuGet packages) I told my application to look for the connection string in Azure Key Vault. One of the critical characteristics was that these APIs are able to read the credentials with which I had signed into Visual Studio. Those are the same credentials tied to the account I use to sign into my Azure Subscription. I also told my Key Vault that those same credentials could be used to read the secrets in Key Vault. While debugging, the API was able to quietly read and then pass those credentials to Azure, access the key Vault, read the stored connection string, and then pass it back to the application, which then used the connection string to read my local database.
It may seem pretty silly to store this in Azure - the connection string to my local database, and a LocalDb at that doesn't even require a user ID or password - so that Visual Studio could locally debug my application. But that was just Step 1. I then changed that connection string to point to an Azure SQL Server and added in the user ID and password required to access the SQL Server.
And at the end of that article, I could debug my app in Visual studio and have it seamlessly read the connection string from Azure Key Vault (thanks to the Azure.Identity SDK) and then use that connection string to access the database. Figure 2 shows the interaction between the app being debugged in Visual Studio and the Azure resources.
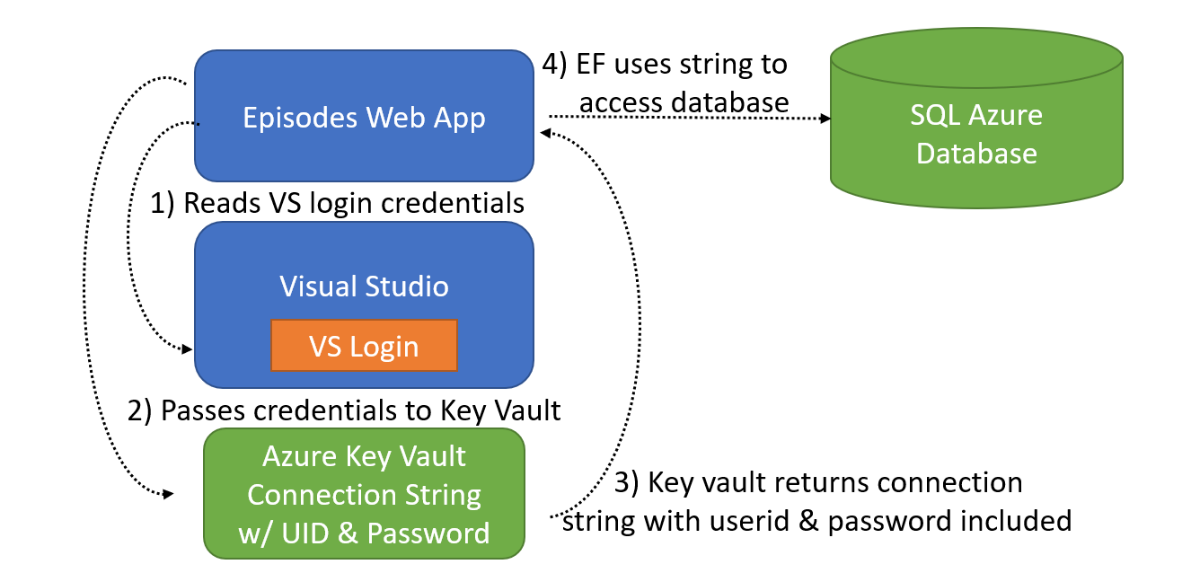
I still have secrets stored in the Key Vault. The connection to the database is not so precious, but the user ID and password certainly are. As I publish the app, I can leverage Managed Identity to remove even those secrets from the connection string and double-down on the security of my database.
How to Wire Up the App and the Database
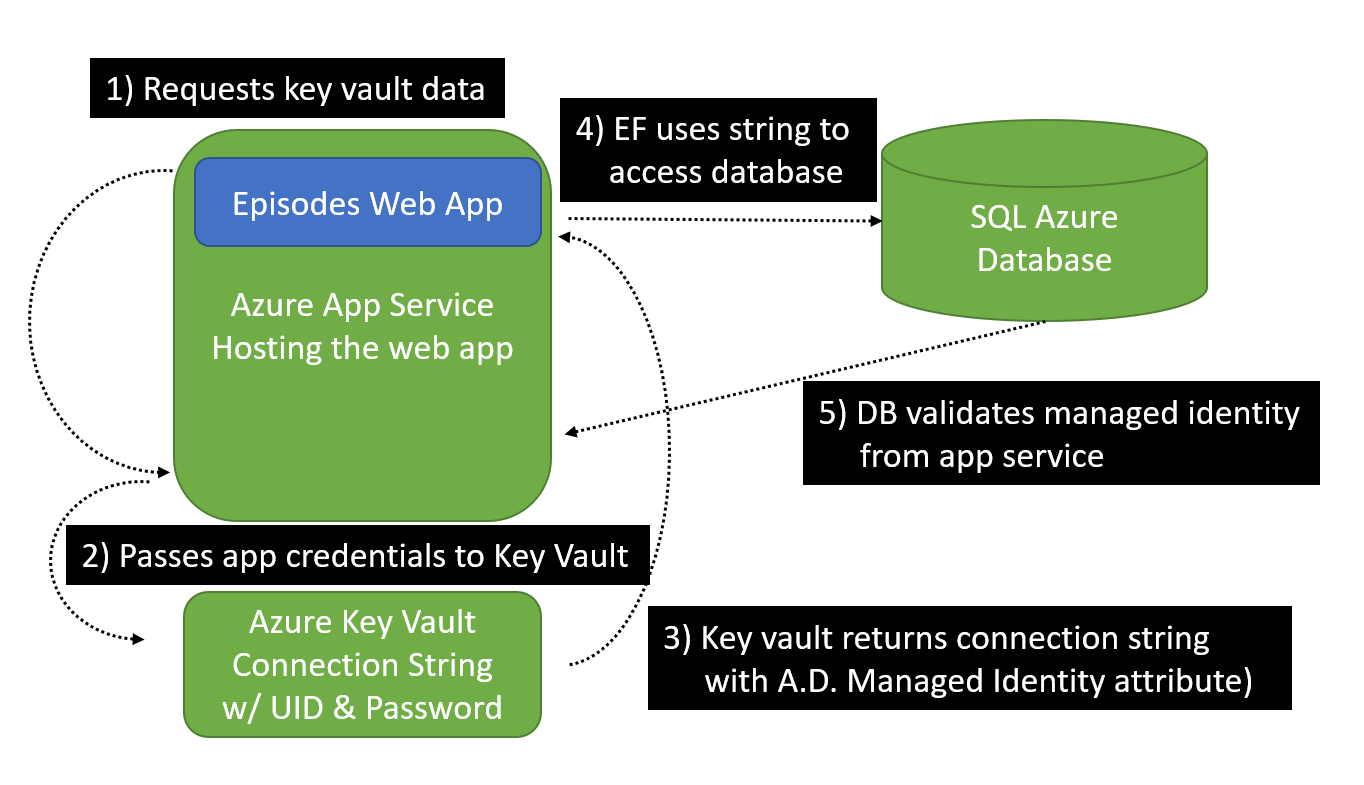
To be clear, Azure Key Vault won't be responsible for allowing the deployed app to access the database. I'll still use a Managed Identity to read the connection string from the key vault (Steps 1-3 in Figure 3) and then I'll also be using managed identity to provide permissions for the app to talk to the database (Steps 4 and 5 in Figure 3).
First, you'll need to publish the Web app to an Azure Application Service. You can right-click on a project in Visual Studio, choose Publish, and walk-through publishing to Azure. I'm choosing a Linux app service because my application is .NET Core. If you want a more detailed walkthrough on publishing ASP.NET Core apps to Azure, check out the Microsoft doc's QuickStart document at https://docs.microsoft.com/en-us/azure/app-service/quickstart-dotnetcore. Note that if you're using a free subscription, Azure App Service is always free and a small single Azure SQL database is free. Key Vault is not free. But for testing in a tiny scenario like this demo, it's nominal. My US East-based subscription is $0.03USD per 10,000 transactions.
If you're not familiar with publishing ASP.NET Core apps to Azure, you might find it interesting that the publish wizard discovers and notes the connection string name in the startup configuration.
My code for setting up the EpisodesContext in the startup class specifies “EpisodesContext” as the connection string name.
services.AddDbContext<EpisodesContext>
(options =>options.UseSqlServer
    (Configuration.GetConnectionString
        ("EpisodesContext")));
As I left the application in the earlier article, the value of that connection string (which points to my Azure SQL database and contains the user ID and password) is in the Azure Key Vault and nowhere to be found in the application code.
Two Critical Changes You Need to Start with for SQL Server
Before embarking on wiring up the published application to use Managed Identity for accessing the Key Vault and the database, there are two important changes you'll need to make. Of course, I didn't make them in advance and ended up scratching my head for a while until I realized that I needed to perform these tasks, so let's get them out of the way up front.
First, note that as I'm writing this in early May 2021, the Managed Identity support in the SqlClient API is very new. It was introduced in Microsoft.Data.SqlClient 2.1.0. But it's still so new that the current version of EF Core (5.0.5) doesn't yet have a dependency on it. EF Core will bring in version 2.0.1, which doesn't have the Managed Identity support. Perhaps by the time you are reading this, EF Core will depend on the relevant version.
If not, you'll need to add a package reference into your app for the new version of SqlCLient. Again, as I write this article, that happens to be 2.1.2. I've added this to my csproj file:
<PackageReference Include="Microsoft.Data.SqlClient" Version="2.1.2" />
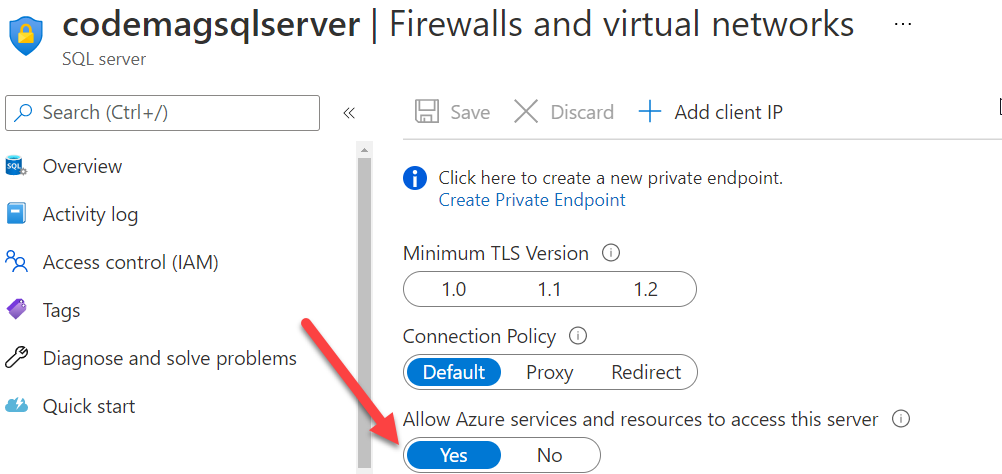
The second critical change is a setting in the Azure SQL Server that hosts your database. Because I was only debugging the application from my local computer, I'd added a firewall rule for my own IP address to be allowed through to the database. But now I'll have an application within the Azure ecosystem accessing it. By default, all Azure SQL Servers are locked down, so you need to explicitly tell the server to allow other Azure services to be able to access the server. Then further authentication is used to access the database.
To enable this, I returned to the firewall settings of the SQL Server and “flipped” the switch to Yes to allow Azure services and resources to access the server, as you can see in Figure 4.
Allowing the App Service's Managed Identity to Access Other Services
The app won't work right away after it's deployed. That's because it was depending on the account I used to sign in to Visual Studio. It was this account that was configured to access Key Vault.
Instead, I need to tune the security and lock things down so that the Key Vault and database are very clearly tied to an Azure Managed Identity tied to the Episodes Azure WebApp.
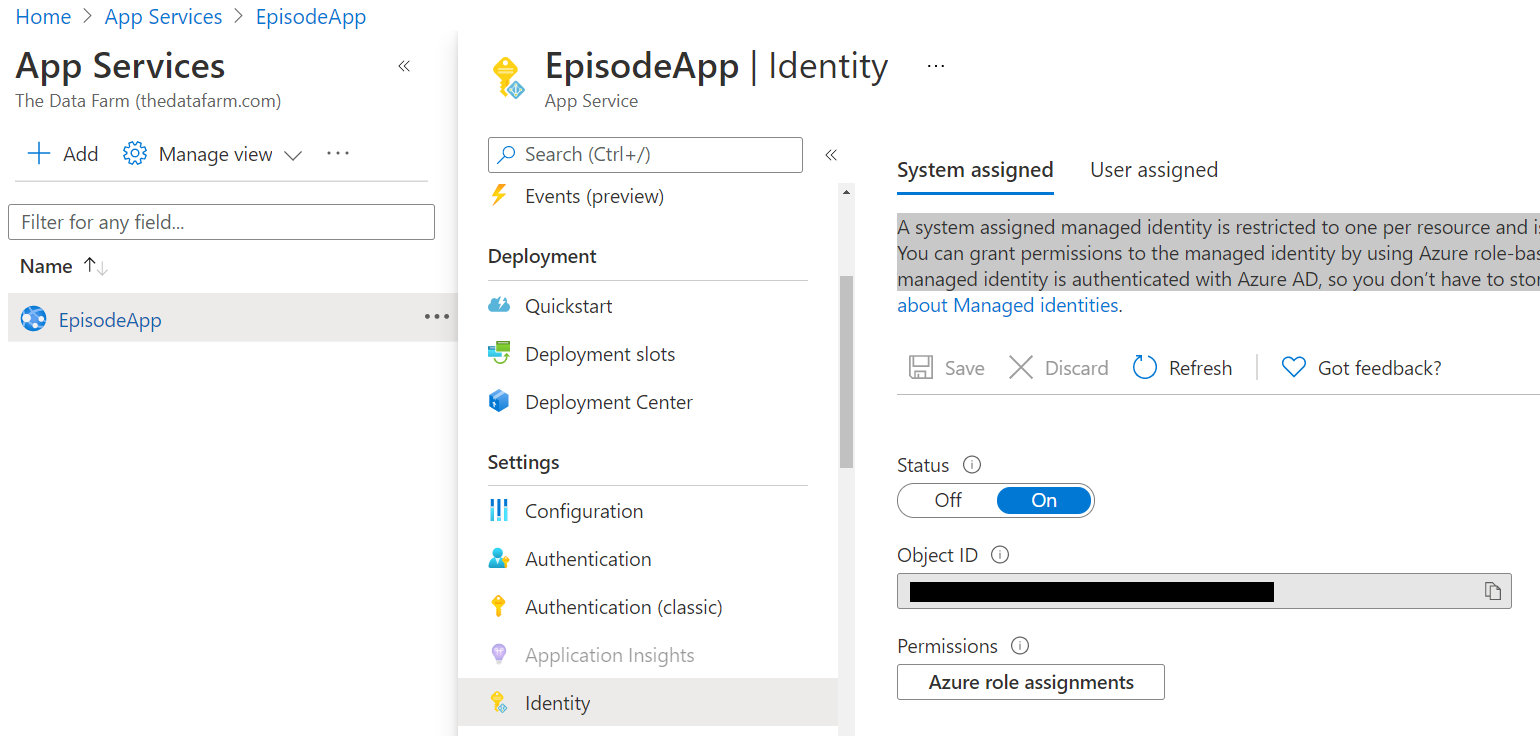
I'll begin that tuning by checking in on the Identity for the App Service itself. Managed identities are accounts that are provisioned and managed by Azure AD automatically. When the App Service was created for the published application, Azure assigned it an identity. That's referred to as a “system assigned” identity, as opposed to a user assigned identity. The portal displays a handy description of a system assigned identity.
“A system assigned managed identity is restricted to one per resource and is tied to the lifecycle of this resource. You can grant permissions to the managed identity by using Azure role-based access control (Azure RBAC). The managed identity is authenticated with Azure AD, so you don't have to store any credentials in code.”
You can see the identity in the portal by opening the App Service and choosing Identity from its menu bar (Figure 5). You can also access identity information via the Azure CLI or PowerShell commands.
Next, you'll need to create an Access policy in Key Vault for that Managed Identity and also let the Azure SQL database know about it. If you're using the portal to set up the access, then you'll be able to search for and choose the EpisodeApp identity. That's the path I'll be following. If you're using the Azure CLI or PowerShell, then you'll need to copy that Object ID (I've covered mine in the screenshot) to include in commands.
Create an Access Policy to Read Key Vault Secrets
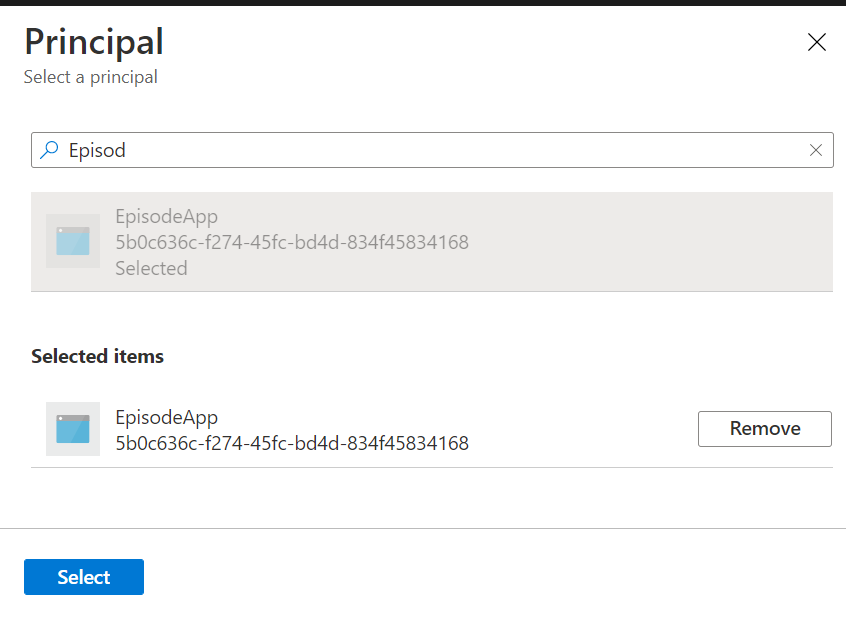
Hopefully, you read the earlier article and remember how to create access policies for Azure Key Vault. Here are the “Cliff Notes.” Find Key Vault, choose the specific vault from the list of key vaults, and then click the Access Policies link under Settings in its menu. Finally, choose Add Access Policy. You'll only need two permissions: Get and List from the Secret permissions. Select those. The next two options are to either choose a principal or Application access. Either one will work because if you set a principal that's an app service identity, it'll recognize that it's an application and categorize it as such. I chose to set the principal, clicking on None selected, which shows a list of the top five accounts/identities in your Azure AD. You can filter down to the name of your identity; mine is EpisodeApp (Figure 6). Select it and then click the Select button. Then, back in the Add access policy form, click the Add button. When the portal returns to the list of access policies, you still need to save your changes. There's a save icon, harking back to the days of 3.5-inch floppy disks, at the top of the page.
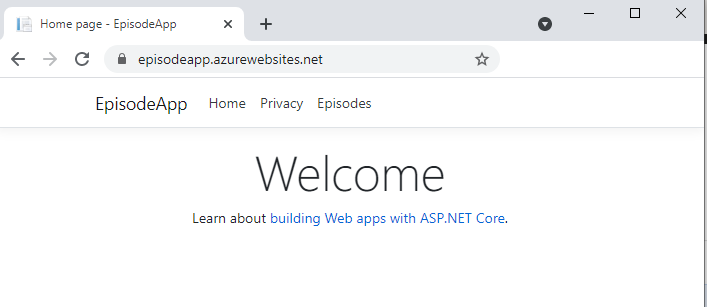
Once the access policy is set up for the key vault, my app will run because it will succeed when the app's startup code attempts to hook into the key vault, which happens before the connection string is even needed. However, it wasn't instantaneous in my case. I don't know if it was a matter of time and patience - which I don't have - or the app restart I forced. Figure 7 shows the default home page created by the template I used to build the website.
Providing the App's Managed Identity Access to the Database
If you click on the Episodes link at this point, it will still fail. Even though I now have access to Key Vault and therefore the connection string for the database, remember that there's no user ID or password in the connection string for authenticating to the database. I need to let the database know that this Azure Web App is allowed to communicate with it by using its Managed Identity.
There are two steps to achieving this:
- Add the app service identity as a user on the database.
- Specify read and write permissions for that user.
Both of these steps can be performed in TSQL through any application where you can connect to the database and execute commands. Because I already have the solution open in Visual Studio, I may as well use the SQL Server Data Tools (SSDT) in Visual Studio.
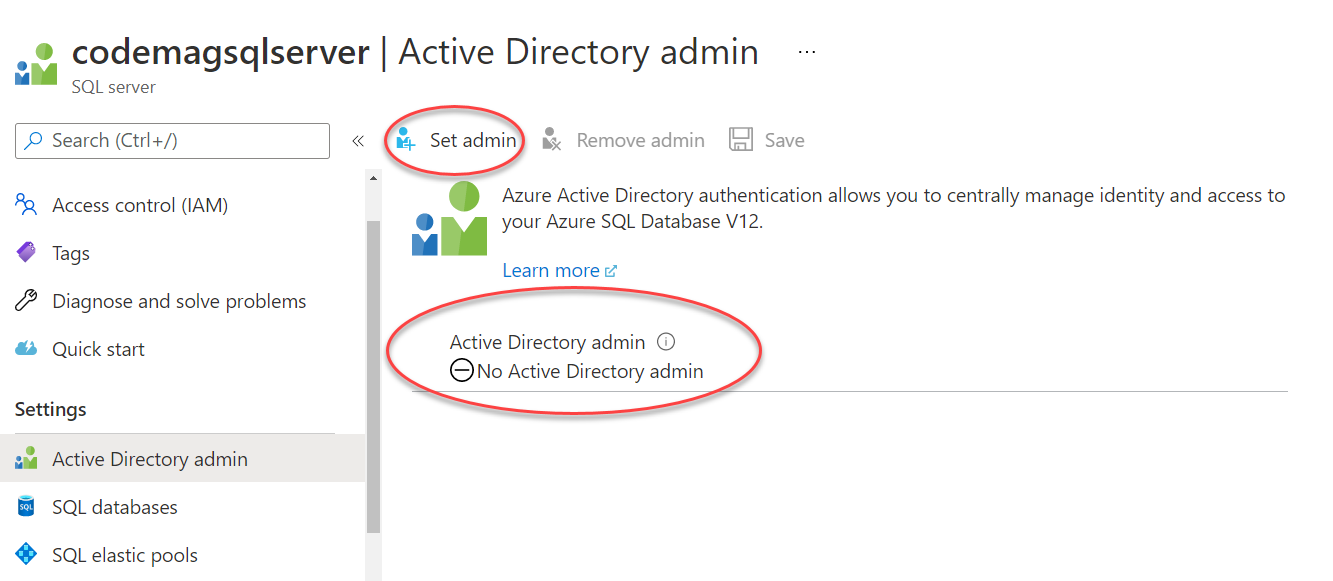
There was a wrinkle in my setup. My database had originally been created with SQL Server authentication, i.e., a user ID and password. In order to add a managed identity (the EspisodeApp identity) as a user, I have to control the database with an Active Directory account - in other words, the identity that I use to log into my Azure subscription. By default, Active Directory accounts are not given administrative privileges on Azure SQL databases. To fix this, I had to return to the database's server in the portal and under Settings, choose Active Directory admin.
There, I could see that I wasn't set up to admin the server with an Active Directory account (Figure 8). To remedy this, I chose Set admin and then selected my main Azure subscription identity (and saved that!) as an administrator of that server.
Then I was able to connect to the database from SQL Server Object Explorer using Active Directory Integrated Authentication. (Figure 9).
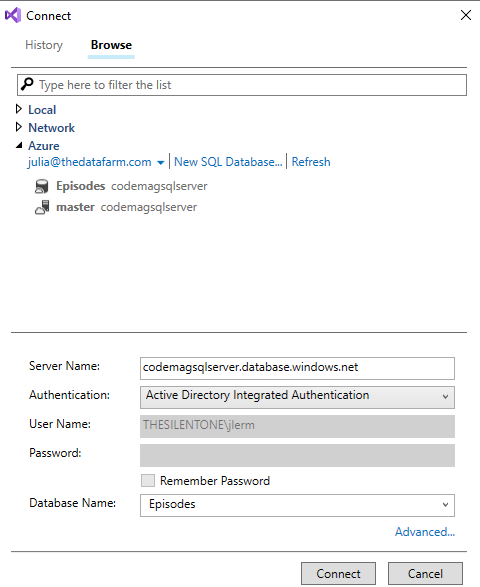
Once I have a connection to the database and a query window open, I'll execute three commands.
CREATE USER EpisodeApp FROM EXTERNAL PROVIDER
ALTER ROLE db_datareader ADD MEMBER EpisodeApp
ALTER ROLE db_datawriter ADD MEMBER EpisodeApp
This combination associates the EpisodeApp identity as a user of the database and then allows that user to read and write data.
Signaling the Connection String to Use Managed Identity
In the last twist of this transformation, I can inform the database to use Managed Identity to authenticate the user, in this case, the Episodes Application, and grant access to the database.
This is done with an attribute in the SQL Server connection string - Authentication. Specifying Azure Active Directory with the Authentication attribute has been possible for a while, and, in fact, other APIs already supported the use of Managed Identity. It's only recently that the Microsoft.Data.SqlClient API also supported Managed Identity.
For the curious, there are now six possible values you can set in the Authentication property:
- Active Directory Password: You also supply UserId and Password and the database will seek them out in Azure AD.
- Active Directory Integrated: This combines using an on-premises AD with Azure AD.
- Active Directory Interactive: This mode triggers multi-factor authentication.
- Active Directory Service Principal: This involves registering the application directly with the database (non-user interactive).
- Active Directory Device Code Flow: This method is most commonly used for apps on IoT devices.
- Active Directory Managed Identity: This is what I'll use to allow Managed Identities to authenticate.
The attribute is written as:
Authentication=Active Directory Managed Identity
That means my connection string will now look like this:
Server=tcp:codemagsqlserver.database.windows.net,1433;
Authentication=Active Directory Managed Identity;
Database= Episodes
Keep in mind that the line wrapping is solely for the sake of this article's formatting rules.
A few points to note about this. The method used to be known as Active Directory MSI, and the API will recognize if you use “Active Directory MSI” as the value instead.
Specifying this attribute on its own in the connection string works if, like the example in this article, the identity was defined by the service. However, if you're using a user-assigned Managed Identity for authentication (created by you or another admin perhaps) then you'll need to provide the object ID of that Managed Identity in a User ID attribute.
See more details about this attribute in the docs at http://bit.ly/ADMIAuthentication.
Remember that the connection string is stored in the Azure Key Vault. The values of secrets in the key vault are immutable, so rather than editing them, the Portal gives you a way to add a new version. That path is to return to the Secrets list in your Azure Key Vault, select the secret and in the Details tab, and choose the New Version option. I typically set up the string in Notepad to make sure it's correct and then copy from there and paste into the Value text box. By default, the new (latest) version will be the only active version of the key.
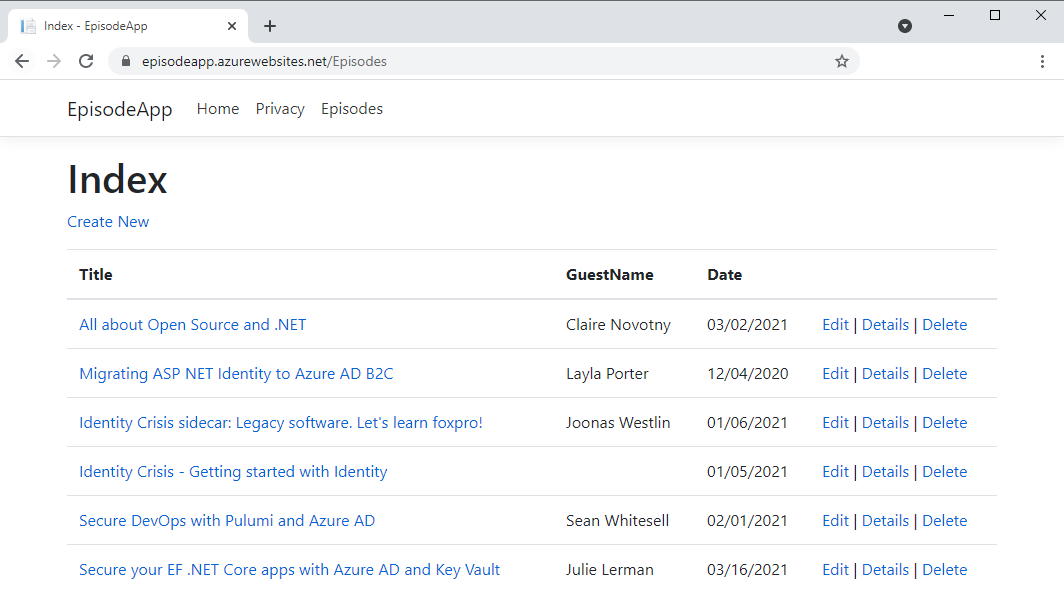
With this, I can return to the Azure hosted Episodes app and browse to the Episodes list as well as edit or add episodes as I see fit (Figure 10).
Debug Against a Local Database
What about continuing to develop and debug from Visual Studio? Currently, the code always reads from key vault and always comes up with the new authentication mode, which will fail from Visual Studio. Even if I also put the connection string into appsettings.development.json, the Key Vault configuration will take precedence.
One approach to solving this is to conditionally read from the Key Vault only when you're not in development mode. This is controlled by the ASPNETCORE_ENVIRONMENT environment variable, which is, by default, Development on your development computer and, also by default, Production in your deployed application. If your deployed application were also in Development mode, users would see all of the detailed error and tracing information when the app fails. That's definitely not desirable.
Let's take advantage of ASPNETCORE_ENVIRONMENT to solve this problem.
I've added the localdb connection string into appsettings.development.json. Then I'll return to program.cs in the application and modify the code where, in the previous article, I instructed the app to read configurations from the Key Vault. Now I'll have it read from the key vault only if that environment variable is Production. That information is exposed through ASP.NET Core APIs as HostBuilderContext.HostingEnvironment.IsProduction().
What was formerly:
.ConfigureAppConfiguration((context, config) =>
{
    var builtConfig = config.Build();
    config.AddAzureKeyVault(
        new Uri("https://lermancodemagvault.vault.azure.net"),
        new DefaultAzureCredential());
})
Should now be:
.ConfigureAppConfiguration((context, config) =>
{
    if (context.HostingEnvironment.IsProduction())
    {
        var builtConfig = config.Build();
        config.AddAzureKeyVault(
            new Uri(
                "https://lermancodemagvault.vault.azure.net"),
                new DefaultAzureCredential());
    }
})
I re-published the app to verify that it works both in debug mode in Visual Studio and on the Azure App Service.
Bask in the Glory of Your Totally Secure, Secret-less ASP.NET Core App Thanks to Managed Identity
That's it! I started out this process knowing nothing about Managed Identities and bringing to the table my many decades of fear of anything to do with security. Being more of a back-end person, I'd never published an ASP.NET Core app as an Azure App Service. Now I have a pretty decent understanding of Azure Active Directory, Managed Identity, and how to hook up various services in Azure to work with each other and share security information without me having to provide it in my application. I hope that I've been able to share the same confidence with you.
Although the database is secure in that it can only be used by my application, and my key vault is secure for the same reason, the application itself isn't secure because it's just a simple demo. I will definitely be locking it down prior to this article's publication, because I have seen what happens when I leave sample applications running on the internet with anyone having the ability to enter and edit the data. You can download the code that goes with the article on the CODE Magazine website or grab it from GitHub at https://github.com/julielerman/CodeMagEpisodeApp.
