


In Part 1 of this article series (called Use the MVVM Design Pattern in MVC Core: Part 1, you started using the Model-View-View-Model (MVVM) design pattern in MVC Core applications. In that article, you created an MVC Core application using VS Code and a few class library projects in which to put your entity, repository, and view model classes. Using the AdventureWorksLT database, you created a page to display product data in an HTML table. In addition, you wrote the appropriate code to search for products based on user input.
In this article, you're going to add on to the sample from the last article to sort the database when the user clicks on any of the column headers in the HTML table. You're going to learn how to add a pager to your HTML table so only a specified number of rows are displayed on the page. Finally, you learn to cache the product data in the Session object to improve performance.
Sort the Product Table
In most Web applications, when you have an HTML table of data, the user can click on the header above each column and sort the data within that column. If the user clicks on the same column header twice in a row, it first sorts the data in ascending, then in descending order. If the user clicks on a different column header, the sort direction should go back to ascending and the table should be sorted on the new column's data.
Add Sort Properties to ViewModel Base Class
The ViewModelBase class you created in the previous article is designed to be the base class for any view models you add to your project. As many pages you design might need the sorting functionality, add three new properties to the ViewModelBase class, as shown in the following code snippet:
public string SortDirection { get; set; }
public string SortExpression { get; set; }
public string PreviousSortExpression { get; set; }
Initialize the three properties you just added by adding code into the constructor, as shown below.
public ViewModelBase()
{
    EventCommand = string.Empty;
    SortDirection = "asc";
    SortExpression = string.Empty;
    PreviousSortExpression = string.Empty;
}
You put either “asc” or “desc” to specify the sort direction into the SortDirection property. The SortExpression property holds the name of the column the user just clicked upon. The PreviousSortExpression property holds the name of the last column the user clicked upon. If the SortExpression property is equal to the PreviousSortExpression, change the SortDirection to the desc if its current value is asc, or to asc if its value is desc. After you change the SortDirection, put the SortExpression value into the PreviousSortExpression property. Open the ViewModelBase.cs file and add a new method named SetSortDirection() to perform this logic.
protected virtual void SetSortDirection()
{
    if (SortExpression == PreviousSortExpression)
    {
        // Toggle the sort direction if the field name is the same
        SortDirection = (SortDirection == "asc" ? "desc" : "asc");
    }
    else
    {
        SortDirection = "asc";
    }
    // Set previous sort expression to new column
    PreviousSortExpression = SortExpression;
}
Create Hidden Input Fields for New Properties
In the last article, you added a partial page with hidden input fields to hold the values of each property added to the ViewModelBase class. The EventCommand property is the only hidden input field in this partial page at this point. Open the _StandardViewModelHidden.cshtml file and add three more hidden input fields to hold the values of each of the three new properties you added to the ViewModelBase class. Modify the partial page to look like the following code snippet:
@model MVVMViewModelLayer.ViewModelBase
<input type="hidden" asp-for="EventCommand" />
<input type="hidden" asp-for="SortDirection" />
<input type="hidden" asp-for="SortExpression" />
<input type="hidden" asp-for="PreviousSortExpression" />
Create Clickable Column Headers
You need to change each column header to hyperlinks so the user can click on them. To do this, use an anchor tag with a couple of data- attributes added to pass data to the view model. Add an attribute named data-custom-cmd and set its value equal to sort. This tells the view model what operation to perform. Add another attribute named data-custom-arg and set its value to the property name to sort upon. This value will be different for each column the user clicks on. Open the partial page named _ProductList.cshtml and add the links to each of the column headers, as shown in Listing 1.
Listing 1: Change the table headers to hyperlinks for sorting
<th>
    <a href="#" data-custom-cmd="sort" data-custom-arg="Name">Product Name</a>
</th>
<th>
    <a href="#" data-custom-cmd="sort" data-custom-arg="ProductNumber">Product Number</a>
</th>
<th class="text-right">
    <a href="#" data-custom-cmd="sort" data-custom-arg="StandardCost">Cost</a>
</th>
<th class="text-right">
    <a href="#" data-custom-cmd="sort" data-custom-arg="ListPrice">Price</a>
</th>
Set the SortExpression Property Using jQuery
In the last article, you added a $(document).ready() function to connect up a click event to any HTML element that has a data-custom-cmd attribute. Within that code, you retrieve the value in the data-custom-cmd attribute and put it into the hidden input field that is bound to the EventCommand property in your view model. If the EventCommand property is set to “sort”, retrieve the value in the data-custom-arg attribute and put that value into the hidden input field bound to the SortExpression property. Open the Products.cshtml and locate the $(document).ready() function at the bottom of the file. After the line of code that updates the $("#EventCommand") hidden input field add an If statement and the code within it as shown below.
// $(document).ready()
// Fill in command to post back to view model
$("#EventCommand").val($(this).data("custom-cmd"));

// Only set sort variables if command was "sort"
if($("#EventCommand").val() == "sort") {
    // Get the new sort expression
    $("#SortExpression").val($(this).data("custom-arg"));
}
Add SortProducts Method
Now that you have the EventCommand and SortExpression properties filled in with the proper values, and you have code written in the SetSortDirection() method to set the SortDirection and PreviousSortExpression properties, it's time to do the actual sorting. Open the ProductViewModel.cs file and add a SortProducts() method, as shown in Listing 2.
Listing 2: For each column in your table you need code to sort data based on that field.
protected virtual void SortProducts()
{
    // Search for Products
    SearchProducts();

    if (EventCommand == "sort")
    {
        // Set sort direction
        SetSortDirection();
    }

    // Determine sort direction
    bool isAscending = SortDirection == "asc";

    // What field should we sort on?
    switch (SortExpression.ToLower())
    {
        case "name":
            if (isAscending)
            {
                Products = Products.OrderBy(p => p.Name).ToList();
            }
            else
            {
                Products = Products.OrderByDescending(p => p.Name).ToList();
            }
            break;

        case "productnumber":
            if (isAscending)
            {
                Products = Products.OrderBy(p => p.ProductNumber).ToList();
            }
            else
            {
                Products = Products.OrderByDescending(p => p.ProductNumber).ToList();
            }
            break;

        case "standardcost":
            if (isAscending)
            {
                Products = Products.OrderBy(p => p.StandardCost).ToList();
            }
            else
            {
                Products = Products.OrderByDescending(p => p.StandardCost).ToList();
            }
            break;

        case "listprice":
            if (isAscending)
            {
                Products = Products.OrderBy(p => p.ListPrice).ToList();
            }
            else
            {
                Products = Products.OrderByDescending(p => p.ListPrice).ToList();
            }
            break;
    }
}
The first thing the SortProducts() method does is to retrieve the product data from the data repository by calling the SearchProducts() method. Once the Products collection has been filled in with the product data, call the SetSortDirection() method. Check the SortDirection property to see if it is set to “asc” or “desc”. Set a Boolean variable appropriately. In the switch() expression, compare the value in the SortExpression property against each case statement. Once you have a match on the column name, check the Boolean variable to see if you should apply the OrderBy() or OrderByDescending() methods to the Products collection.
Add Sort Command to HandleRequest() Method
The HandleRequest() method is the public method called from the controller. This method is where you check the EventCommand property to decide what method(s) to call in the view model to set the view model properties for displaying on the screen. You just passed in a new command with a value of “sort”, so you need to add a new case statement just above the “search” case. Modify the method called from SearchProducts() to SortProducts().
case "sort":
case "search":
  SortProducts();
  break;
Set Sort Order in Controller
When the user first enters your product list page, show them the products sorted by the Name property. Open the ProductsController.cs file and add two lines of code to the Products() method, as shown in the code snippet below.
public IActionResult Products()
{
    // Load products
    _viewModel.SortExpression = "Name";
    _viewModel.EventCommand = "sort";
    _viewModel.HandleRequest();
    return View(_viewModel);
}
The first line of code sets the SortExpression property to “Name”. The second line of code sets the EventCommand property to “sort”. When the HandleRequest() method is called, the SortProducts() method is called because of the value in the EventCommand property. Because the value in the PreviousSortExpression property is blank and the value in the SortExpression property is “Name”, the two values are not equal. This causes the SortDirection property to be set to “asc”. Because of the SortExpression and SortDirection, the switch statement causes the Products collection to be ordered by the Name property in an ascending order.
Reset Hidden Fields After Postback
When the user clicks on another column header and forces a post-back with new values to sort by, the [HttpPost] Products() method is called. After the HandleRequest() method is called, there are new values in the SortExpression, PreviousSortExpression and SortDirection properties. To update the hidden input fields, call the ModelState.Clear() method as shown in the code snippet below.
[HttpPost]
public IActionResult Products(ProductViewModel vm)
{
    vm.Repository = _repo;
    vm.HandleRequest();
    ModelState.Clear();
    return View(vm);
}
Try It Out
Now that you have code written to perform sorting, it is time to try it out. Run the Web application and click on the different column headers. Try clicking on different headers to see the data sort in ascending order for each column. Then try clicking on the same column header to see the data swap between ascending and descending order for that column of data.
Create a Common Library Project
The next step is to add paging to your table. In order to do this, you need some classes to help with the paging. These classes are in the download for this article under a folder called PagerClasses. Please download the samples now so you can continue following along.
These pager classes you downloaded belong in another class library that you are naming CommonLibrary. This class library will be for any generic classes that can be used in any type of application. To create the CommonLibrary project, open a terminal window by clicking on the Terminal > New Terminal menu. Go to your development directory (in my case, that was D:\Samples). Type in the following commands to create a new folder named CommonLibrary.
MD CommonLibrary
CD CommonLibrary
dotnet new classlib
The dotnet new classlib command creates a class library project with the minimum number of references to .NET Core libraries. Now that you have created this new project, add it to your Visual Studio Code workspace by clicking the File > Add Folder to Workspace... menu. Select the CommonLibrary folder and click on the Add button. You should see the CommonLibrary project added to your VS Code workspace. Delete the Class1.cs file, as you're not going to need that. Copy the \PagerClasses folder into the CommonLibrary folder so it now appears in your VS Code workspace.
Add References to the Common Library
This CommonLibrary needs to be referenced from both the MVVMViewModelLayer and the MVVMSample projects. Click on the Terminal > New Terminal menu and select the MVVMSample folder. Set a reference to the CommonLibrary project using the following command.
dotnet add . reference ../CommonLibrary/CommonLibrary.csproj
Change the directory to the MVVMViewModelLayer folder and execute the following command to reference the CommonLibrary in this project as well.
dotnet add . reference ../CommonLibrary/CommonLibrary.csproj
Try It Out
To ensure that you've typed in everything correctly, run a build task to compile the projects. Because you have a reference from the MVVMSample to the CommonLibrary, if you run a build task on the MVVMSample project, it builds all of the other projects, including the CommonLibrary. Select the Terminal > Run Build Task... menu and select the MVVMSample project. Watch the output in the terminal window and you should see that it compiles all five of your projects.
Paging
Instead of displaying hundreds of product rows in a table and forcing the user to scroll down on your Web page, add a pager to your table like the one shown at the bottom of Figure 1. There are two pieces to adding a pager to your table: the first is the actual pager UI, and the second is the calculation and selection of which rows are on each page. All the code to do the calculations and create a set of pager items used to display the pager are contained in the classes in the \PageClasses folder you just added to the CommonLibrary project. I'm not going to cover how these classes work, as that is beyond the scope of this article. I am going to show you how to use them to create the pager shown in Figure 1.
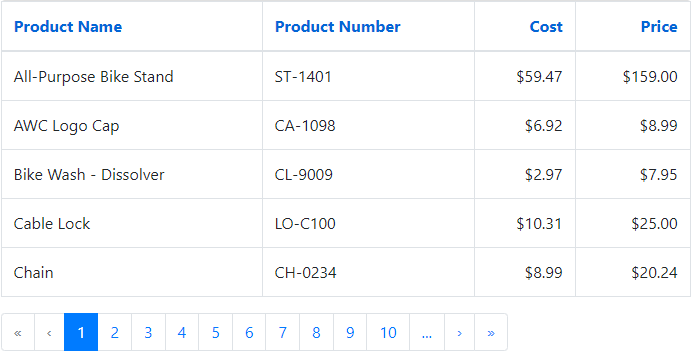
To create a pager that looks like what you see in Figure 1, use Bootstrap and the HTML shown in Listing 3. Add the data-custom-cmd and data-custom-arg attributes to each anchor tag to set properties in the view model class. The data-custom-arg attribute is going to be used to set a property named EventArgument in the ViewModelBase class. In the previous section on sorting, you used the data-custom-arg attribute to set the SortExpression property. For paging, you are going to set the EventArgument property from the data-custom-arg attribute and use that to tell the pager how to page through the data.
Listing 3: Create a pager using HTML and Bootstrap
<ul class="pagination">
<li class="page-item disabled">
<a class="page-link" href="#" data-custom-cmd="page" data-custom-arg="first">«</a>
</li>
<li class="page-item disabled">
<a class="page-link" href="#" data-custom-cmd="page" data-custom-arg="prev">‹</a>
</li>
<li class="page-item active">
<a class="page-link" href="#" data-custom-cmd="page" data-custom-arg="0">1</a>
</li>
<li class="page-item">
<a class="page-link" href="#" data-custom-cmd="page" data-custom-arg="1">2</a>
</li>
<li class="page-item">
<a class="page-link" href="#" data-custom-cmd="page" data-custom-arg="10">...</a>
</li>
<li class="page-item">
<a class="page-link" href="#" data-custom-cmd="page" data-custom-arg="next">›</a>
</li>
<li class="page-item">
<a class="page-link" href="#" data-custom-cmd="page" data-custom-arg="last">»</a>
</li>
</ul>
Add Paging Properties to View Model Base Class
Open the ViewModelBase.cs file and add a few new properties to help with paging. The first one, EventArgument, receives the action to perform when paging. For example, this can be set to “next”, “previous”, “first”, “last”, or a specific page number, as you can see by looking at the “data-custom-arg” attributes in Listing 3. The next property, Pager, is of the type Pager, which is one of the classes you downloaded and added to the CommonLibrary project from the PagerClasses folder. This class contains properties such as PageSize, VisiblePagesToDisplay, PageIndex, StartingRow, TotalPages, and TotalRecords. The last property to add to the view model, Pages, is a collection of PagerItem objects. A PagerItem object represents a single visible anchor tag in the pager displayed at the bottom of the table. Each PagerItem object contains properties such as Text, Tooltip, Argument, and CssClass.
public string EventArgument { get; set; }
public Pager Pager { get; set; }
public PagerItemCollection Pages { get; set; }
After adding these new properties, initialize the EventArgument and Pager properties in the constructor of the ViewModelBase class using the code shown in the following code snippet:
public ViewModelBase()
{
    EventCommand = string.Empty;
    EventArgument = string.Empty;
    Pager = new Pager();
    SortDirection = "asc";
    SortExpression = string.Empty;
    PreviousSortExpression = string.Empty;
}
Add a new method named SetPagerObject() to the ViewModelBase class. This method accepts the total amount of records in the Product table. This parameter is passed to the Pager.TotalRecords property. The TotalPages property in the Pager object is calculated from the TotalRecords and the PageSize properties. PageSize has a default size of ten. If the TotalRecords is set to 50, the total pager objects to show on the UI is five.
protected virtual void SetPagerObject(int totalRecords)
{
    // Set Pager Information
    Pager.TotalRecords = totalRecords;

    // Set Pager Properties
    Pager.SetPagerProperties(EventArgument);

    // Build paging collection
    Pages = new PagerItemCollection(Pager);
}
Next, the SetPagerProperties() method is called and passed the EventArgument property. Remember the EventArgument is set to “next”, “previous”, or similar commands depending on which anchor tag the user clicked upon. From this command, the PageIndex property in the Pager object is set.
Now that you have the properties in the Pager object calculated, pass this Pager object to the PagerItemCollection object. By reading the TotalRecords, the TotalPages and the PageIndex properties in the Pager object, the PagerItemCollection builds the collection of pages used to display the anchor tags.
Create Pager UI on the Product List Page
To build the pager that the user sees on the list page, open the _ProductList.cshtml file and add a using statement at the top of the file to reference the CommonLibrary.PagerClasses namespace. It's in this namespace that the Pager classes are located.
@using CommonLibrary.PagerClasses
Move to the bottom of this file and add the code in this next snippet. This code is what takes the Pages property you just created in the SetPagerObject() method and builds each hyperlink you see in the pager at the bottom of Figure 1. Feel free to step through the code in the PagerItemCollection object to see how this pager is built.
<ul class="pagination">
    @foreach (PagerItem item in Model.Pages)
    {
        <li class="page-item @item.CssClass">
            <a class="page-link" href="#" data-custom-cmd="page" data-custom-arg="@item.Argument" title="@item.Tooltip">@Html.Raw(item.Text)</a>
        </li>
    }
</ul>
Get One Page of Data from the Products Collection
Before you can try out the paging, you have a few more pieces of code to write. First, open the ProductViewModel.cs file and add a using statement at the top of the file.
using CommonLibrary.PagerClasses;
Within the ProductViewModel class, add a new property to hold onto the total amount of product records you read from the table. The TotalProducts property is used to display how many records the user selected and display it on the page.
public int TotalProducts { get; set; }
Add a new method named PageProducts() that sets the TotalProducts property, then calls the SetPagerObject() method in the base class. Once the Pager object has been set up, you now need to get just the data for the current page of data. The starting row in the Products collection can be calculated by taking the current PageIndex property and multiplying that number by the PageSize property. Pass this result to the LINQ Skip() method on the Products collection. Then take the next PageSize number of records from the collection.
protected virtual void PageProducts()
{
    TotalProducts = Products.Count;
    base.SetPagerObject(TotalProducts);
    Products = Products.Skip(base.Pager.PageIndex * base.Pager.PageSize).Take(base.Pager.PageSize).ToList();
}
Locate the HandleRequest() method and modify the switch statement to handle the different commands. Modify the search command to reset the PageIndex property. Add a page command for when the user clicks on one of the pager anchor tags. Call the PageProducts() method after the call to the SortProducts() method in both the search and page case statements.
case "search":
    Pager.PageIndex = 0;
    SortProducts();
    PageProducts();
    break;
case "sort":
case "page"
    SortProducts();
    PageProducts();
    break;
Add Hidden Input Fields for Paging
Open the _StandardViewModelHidden.cshtml file and add two new hidden input fields. You need to post-back both the EventArgument and the current PageIndex values. The EventArgument is going to have the “data-custom-arg” value from the pager and the PageIndex is the page the user is currently viewing.
<input type="hidden" asp-for="EventArgument" />
<input type="hidden" asp-for="Pager.PageIndex" />
Add Total Records to Products Search Page
You added the TotalProducts property to the ProductViewModel class. It's now time to display that on the page. Put the following code within the card-footer in the _ProductSearch.cshtml file.
<div class="card-footer bg-primary text-light">
    <div class="row">
        <div class="col-8">
            <button type="button" data-custom-cmd="search" class="btn btn-success">Search</button>
        </div>
        <div class="col-4">
            <p class="text-right">Total Records: @Model.TotalProducts</p>
        </div>
    </div>
</div>
Set the EventArgument Property Using jQuery
The last thing you need to do before trying out the paging is to take the data-custom-arg attribute value and place it into the new hidden input field you just added. Open the Products.cshtml file and locate the $(document).ready() function and after the line of code that updates the $("#EventCommand") hidden input field, add a new line of code to set the EventArgument as shown in the code snippet below:
// The $(document).ready() function
// Fill in command to post back to view model
$("#EventCommand").val($(this).data("custom-cmd"));

// Fill in arguments to post back to view model
$("#EventArgument").val($(this).data("custom-arg"));
Try It Out
You're now ready to try out the paging to ensure that you typed everything in correctly. Run the application and try clicking on the various anchor tags on the pager UI.
Changing the Page Size
By default, the PageSize property in the Pager object is set to 10. If you wish to adjust the size, modify the PageSize property in the controller. Open the ProductsController.cs file and, in the Products() method, add the following line of code just before the call to the HandleRequest() method.
_viewModel.Pager.PageSize = 5;
Also, in the [HttpPost] Products() method, add the following line of code just before the call to the HandleRequest() method.
vm.Pager.PageSize = 5;
Try It Out
Run the application again and you should see only five rows of data appear on each page in the table.
Cache the Products List
As you may have noticed, the Products are read from the database each time you sort or page through the data. Having to retrieve the data every time from the data is very inefficient and this process can be fixed easily. If your product data does not change that often, cache the data in your Web server's memory. There are many methods you may employ for caching; for this article, let's use the Session object.
Add Property to Hold all the Product Data
In the Product view model class, there is a Products collection to hold the data for the one page of data to display. To avoid a round-trip to your SQL Server to get all your product data, add another property to hold the original list of product data. The list of all product data is placed into your cache after retrieving the data the first time. The data is retrieved from the cache on each post-back to populate the Products collection when the user requests the next page of data to display. Open the ProductViewModel.cs file and add a new property named AllProducts.
public List<Product> AllProducts { get; set; }
Each time the user posts back to the controller to either search, sort, or page, the SearchProducts() method is called to retrieve the data from the Repository class. In this method, modify the code to use the data in the AllProducts collection if that collection has been retrieved from the cache.
Locate the SearchProducts() method and modify it to look like Listing 4. In SearchProducts(), check if this is the first time the user has hit the product list page. If the AllProducts collection is null, then call the Search() method on the Repository class to get all of the product data from the database server and store that data into the AllProducts property.
Listing 4: Modify the SearchProducts() method to use the cached data
public virtual void SearchProducts()
{
    if (AllProducts == null)
    {
        if (Repository == null)
        {
            throw new ApplicationException("Must set the Repository property.");
        }
        else
        {
            // Get data from Repository
            AllProducts = Repository.Search(SearchEntity).OrderBy(p => p.Name).ToList();
        }
    }

    // Get data for the Products collection
    Products = AllProducts.Where(p => (SearchEntity.Name == null || p.Name.StartsWith(SearchEntity.Name)) && p.ListPrice >= SearchEntity.ListPrice).ToList();
}
In the Products() method in the ProductsController class, you're going to store the AllProducts collection into the Session object. You're then going to retrieve the data from the Session object in the [HttpPost] Products() method and put that data back into the AllProducts collection. When the SearchProducts() method is called the second time, the AllProducts collection is not null and thus the Products collection is built by querying the AllProducts collection instead of going to the database server.
Add Session State to MVC Core
As mentioned, you are going to use the Session state object that's built-in to MVC Core. In order to use Session, you must configure it in the Startup class. Open the Startup.cs file and locate the InjectAppServices() method you created in the last article. After the line of code services.AddDbContext(), add the following two lines of code to add services to support session state.
// The next two lines are for session state
services.AddDistributedMemoryCache();
services.AddSession();
Next, locate the Configure() method and find the line of code app.UseRouting(). After this line of code, add the following line of code to turn on session state.
app.UseSession();
Add Newtonsoft Package
The Session object in MVC Core can only store strings or integers. However, you need to put in a collection of Product objects. In order to do this, you need to serialize the collection into JSON. This can be done using the Newtonsoft package. Open a terminal window in the MVVMSample folder and execute the following command to bring in the Newtonsoft library.
dotnet add package Newtonsoft.Json
Store AllProducts Collection into Session
It's now time to cache the data you placed into the AllProducts collection. Open the ProductsController.cs file and add some Using statements to the top of the file.
using System.Collections.Generic;
using Microsoft.AspNetCore.Http;
using MVVMEntityLayer;
using NewtonSoft.Json;
Locate the Products() method and after the call to HandleRequest() has been called, get the data from the AllProducts collection, serialize it, and place it into the Session object using the SetString() method as shown in the code below.
HttpContext.Session.SetString("Products", JsonConvert.SerializeObject(_viewModel.AllProducts));
When the user clicks on any of the links that post back to the controller, the [HttpPost] Products() method is called. Place the following line of code just before the call to the HandleRequest() method to populate the AllProducts collection with the data you stored into the Session object.
vm.AllProducts = JsonConvert.DeserializeObject<List<Product>>(HttpContext.Session.GetString("Products"));
When the HandleRequest() method is called, the AllProducts collection has data in it, and thus in the SearchProducts() method, the Products collection is built from the data in this collection instead of calling the database server.
Try It Out
Run the application and try out the various features of the page. Try searching for data, try sorting the data, and try paging through the data. If you set a breakpoint, in the SearchProducts() method, you can see that it only fetches the data from the Repository class the first time into the page. After that, the data is always coming from the cached data.
Summary
In this article, you learned how to add hyperlinks to each column header in a table to allow sorting of product data. Next, you added paging capabilities to the table, so the user only sees a limited amount of data at a time. This is a better user experience than having a large scrollable table. Finally, you learned how to use the Session object in order to avoid a round-trip to the database server each time the user clicks on something on the page. This saves time and resources and makes updating your page much quicker. The great thing about using the MVVM design pattern is the code in your controller is still very simple, and your view model class need only expose one public method. In the next article (Use the MVVM Design Pattern in MVC Core: Part 3) you'll learn to add, edit, and delete product data using the MVVM design pattern.
