


Just like in .NET applications, you might want to have global configuration settings in your Angular applications that you can access from any component or service class. There are many approaches you can take for retrieving these global settings; I'm going to use a service that can be injected into any class. I think the flexibility of using a service is an ideal method for providing application-wide settings to any class that needs them.
This article illustrates how to create an Angular service to read and modify configuration settings. I'm going to use Visual Studio Code and Visual Studio 2017, along with C# and Angular 4. You're going to learn to create a class to hold configuration settings. These settings can be retrieved from a JSON file or from a Web API call. Once you've retrieved the settings, you can store them into local storage. Placing them into local storage allows your user to modify those settings.
Create a New Angular Project
If you're new to Angular, you are going to need the following tools installed on your computer.
- Node.js
- TypeScript
- Angular
- Angular CLI
- An editor, such as Visual Studio or Visual Studio Code
In this article, I'm going to use Visual Studio Code and the Angular CLI to create the sample project. I'll assume that you have the tools listed above installed on your computer. If you haven't already installed them, please do so now, so that you can follow along with this article.
Open a command prompt on your computer and navigate to a folder where you typically create your development projects. For example, on my computer, I usually go to my D drive and go to a folder named \Samples. So, from the command prompt I enter the following commands.
D:
cd \Samples
Using the Angular CLI, I create a new project under the Samples folder using the following command.
ng new ConfigSample
Executing the ng new command creates a new folder named \LogSample. The new command creates the files needed to develop an Angular application. While you are still in the command prompt, navigate to the new folder using the following:
cd ConfigSample
Start Visual Studio Code by typing code followed by a space and a period. This tells Code to start and open the current folder.
code .
When you are in Visual Studio Code, click on the View menu and choose the Integrated Terminal... menu option. A small window opens at the bottom of Visual Studio Code. Into this command window, type the following command to start up the lite-server.
npm start
The lite-server is a small server that runs on your local computer on port 4200 by default. Start your browser of choice and navigate to the http://localhost:4200 and you should see a Web page that looks like Figure 1.
Create the Application Settings Service Classes
You're going to create a class to be used across many other component and service classes in your Angular application. Place this new class into a \shared folder located under \src\app. Create the \shared folder now.
Right mouse-click on the \shared folder and add a new file named appsettings.ts. Create a class in this new file with properties to hold the values you wish to use in your Angular application. For example, if you have a Product form that's used to add new products to a database, you might want to provide some default values for a couple of the fields. The following code includes a class named AppSettings with two properties; defaultUrl and defaultPrice.
export class AppSettings {
  defaultUrl: string = "http://www.pdsa.com"
  defaultPrice: number = 1
}
An AppSettingsService Class
It's now time to create an Angular service class to return an instance of the AppSettings class. Add a new TypeScript file under the \shared folder named appsettings.service.ts. Add the code shown in the following code snippet:
import { Injectable } from '@angular/core';
import { Observable } from 'rxjs/Observable';
import 'rxjs/add/observable/of';
import { AppSettings } from "./appsettings";

@Injectable()
export class AppSettingsService {
  getSettings(): Observable<AppSettings> {
    let settings = new AppSettings();
    return Observable.of<AppSettings>(settings);
  }
}
The preceding code is a standard representation of an Angular service class. In the getSettings() method, create a new instance of the AppSettings class and return that object from this service. The main reason you create a service here is to provide the flexibility to change the implementation of how you retrieve the settings later. For example, you might choose to read the settings from a JSON file, or make a Web API call to get the settings. Any method that calls this service always makes the same call regardless of where those settings are stored. The calling methods don't know if the implementation changes; they still receive the same settings class.
The Consumer of the Settings Service
Now that you have a simple application settings service class created that can return an instance of the AppSettings class, test it by creating a consumer. You can build a unit test to call the service, but let's use something a little more real-world. In this section of the article, build a Product class, a Product HTML page, and a Product component class to add a new product. You're going to set default values from the AppSettings into the appropriate properties of a Product object, then display those properties on the HTML page.
Add a new folder named \product under the \src\app folder. Add a new file in this folder named product.ts. Add a few properties to this class to represent the typical properties associated with a product, as shown in the following code snippet.
export class Product {
  productId: number;
  productName: string;
  introductionDate: Date;
  price: number;
  url: string;
}
Create an HTML page to which you can bind the properties of the Product class. Add another new file within the \product folder and name it product-detail.component.html. Add the code shown in Listing 1.
Listing 1: Add an HTML page to display the Product properties.
<div *ngIf="product">
  <table>
    <tbody>
      <tr>
        <td>Product Name:</td>
        <td>
          <input [(ngModel)]="product.productName" />
        </td>
      </tr>
      <tr>
        <td>Introduction Date:</td>
        <td>
          <input [(ngModel)]="product.introductionDate" />
        </td>
      </tr>
      <tr>
        <td>Price:</td>
        <td>
          <input [(ngModel)]="product.price" />
        </td>
      </tr>
      <tr>
        <td>URL:</td>
        <td>
          <input [(ngModel)]="product.url" />
        </td>
      </tr>
    </tbody>
  </table>
  <div>
    <button (click)="saveProduct()">Save</button>
  </div>
</div>
Create a component class to work with the HTML page you just created. Add a new file within the \product folder named product-detail.component.ts. Add the appropriate import statements to create the component class. Import the Component class and the OnInit interface. You also need the Product class you just created. Finally, import the AppSettings and AppSettingsService classes in this new component class.
import { Component, OnInit } from "@angular/core";
import { Product } from './product';
import { AppSettings } from '../shared/appsettings';
import { AppSettingsService } from '../shared/appsettings.service';
Each component class you create must be decorated with the @Component() decorator function. Pass in an object to this function to supply some meta-data about how this component is used. The object passed in creates a selector property set to the value product-detail. This value is used as a new element on an HTML page to invoke this component class. You also specify the location of the HTML page you just created by using the templateUrl property.
@Component({
  selector: "product-detail", templateUrl: "./product-detail.component.html"
})
After the @Component decorator, export a class named ProductDetailComponent and make sure that it implements the OnInit interface. The ngOnInit() function is called after the ProductDetailComponent class is instantiated. Just write an empty ngOnInit() method for now, and a saveProduct() method too. The saveProduct() method is called from the button in the HTML you created previously.
export class ProductDetailComponent implements OnInit {
  ngOnInit(): void {
  }

  saveProduct(): void {
  }
}
Next, add a constructor to the ProductDetailComponent class. Into this constructor, add a private variable named appSettingsService that's of the type AppSettingsService. Adding this code in the constructor tells Angular to inject an instance of the service into this class when it creates an instance of this component.
constructor(private appSettingsService: AppSettingsService) {
}
In the HTML created earlier, you referenced a product object. Create that property named product now. Also, create a property to assign to the global settings retrieved from the AppSettingsService.
product: Product;
settings: AppSettings;
Write the code within the ngOnInit() method to call the getSettings() method on the appSettingsService object. The subscribe method calls getSettings() and receives the settings back from the service. Subscribe has three parameters: a success function, an error function, and a completed function. In the success function, set the result returned to the settings property in this class. Because all you're doing is returning a new instance of a class, you can safely ignore the error function. In the completed function, create a new instance of the Product object and assign the price and URL properties to the defaults returned from the settings object.
ngOnInit(): void {
  this.appSettingsService.getSettings().subscribe(settings => this.settings = settings, () => null, () => {
    this.product = new Product();
    this.product.price = this.settings.defaultPrice;
    this.product.url = this.settings.defaultUrl;
  });
}
Update AppModule
For your components and services to work within your application, you need to inform Angular of the service and the component. Open the app.module.ts file and add the following import statements.
import { FormsModule } from '@angular/forms';
import { ProductDetailComponent } from "./product/product-detail.component";
import { AppSettingsService } from "./shared/appsettings.service";
After you have the appropriate classes imported, modify the metadata properties of the @NgModule decorator function. Add the FormsModule class to the imports property. Add the ProductDetailComponent to the declarations property. Modify the providers property and add the AppSettingsService to the array. The @NgModule decorator function should now look like the following code snippet.
@NgModule({
  declarations: [AppComponent, ProductDetailComponent],
  imports: [BrowserModule, FormsModule],
  providers: [AppSettingsService],
  bootstrap: [AppComponent]
})
Update AppComponent
Open the app.component.html file and delete all the code in this HTML file. Replace the code with the following.
<h1>Configuration Settings Sample</h1>
<div>
  <product-detail></product-detail>
</div>
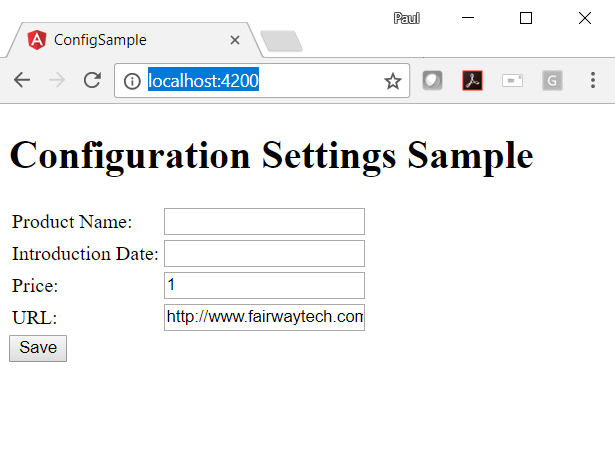
Save all the changes to all your open files. Switch your open browser on the URL http://localhost:4200 and you should see your product page appear. Because the product property is bound to the different fields on the HTML page you created, the values are displayed automatically on the page, as shown in Figure 2.
Get Settings from a JSON File
In the previous sample, you hard-coded values into the AppSettings class. Instead of hard-coding the settings values, let's place those settings into a JSON file. If you don't already have one, create a folder called \assets under the \src folder. Add a JSON file named appsettings.json in the \assets folder. Add the following code into this file:
{
  "defaultUrl": "http://angular.io",
  "defaultPrice": 2
}
Modify AppSettingsService Class
Open the appsettings.service.ts file and add a few more import statements.
import { Http } from '@angular/http';
import 'rxjs/add/operator/map';
import 'rxjs/add/operator/catch';
Import the Http class from @angular/http. Import the ReactiveJS operators map and catch. Modify the getSettings() method to call the http.get() method, passing in the path to the JSON file you created. Extract the response in the map() function and either return the JSON object from the response or an empty object. In the catch method, call a method named handleErrors(). The complete listing of the code that should be contained in the appsettings.service.ts file is shown in Listing 2.
Listing 2: Retrieve application settings from a JSON file.
import { Injectable } from '@angular/core';
import { Http } from '@angular/http';
import { Observable } from 'rxjs/Observable';
import 'rxjs/add/operator/map';
import 'rxjs/add/observable/of;
import 'rxjs/add/observable/catch;

import { AppSettings } from "./appsettings";

const SETTINGS_LOCATION = "assets/appsettings.json";

@Injectable()
export class AppSettingsService {
    constructor(private http: Http) {
    }

    getSettings(): Observable<AppSettings> {
        return this.http.get(SETTINGS_LOCATION)
            .map(response => response.json() || {})
            .catch(this.handleErrors);
    }

    private handleErrors(error: any): Observable<AppSettings> {
        // Return default configuration values
        return Observable.of<AppSettings>(new AppSettings());
    }

    private handleErrors(error: any): Observable<AppSettings> {
    }
}
Handling Exceptions
If the JSON settings file cannot be found, or if some other exception happens, the handleErrors() method is called. In addition to returning an AppSettings object, you might want to record the error information somewhere. In my last article, I created a logging system for Angular; use that if you want. For this article, just log the error to the console window. Regardless, the handleErrors() method returns an instance of an AppSettings class. You don't want your application to fail just because you can't get some specific global settings. So, return an instance of AppSettings with the appropriate defaults set. Make your handleErrors() method look like the following code snippet.
private handleErrors(error: any): Observable<AppSettings> {
  // Log the error to the console
  switch (error.status) {
    case 404:
      console.error("Can't find file: " + SETTINGS_LOCATION);
      break;
    default:
      console.error(error);
      break;
  }

  // Return default configuration values
  return Observable.of<AppSettings>(new AppSettings());
}
Update AppModule
If you don't already have it in your application, import the HttpModule from @angular/http in your app.module.ts file. Ensure that the HttpModule is listed in the imports property in the @NgModule() decorator function as well.
Save all the changes to the files you made. Go to the browser and you should now see the values from the JSON file appear in the price and the URL fields.
Using Local Storage
Retrieving the settings from the AppSettings class is great, but the user can't change those settings. To do that, you must store those settings somewhere. All modern browsers allow you to store key/pair values into a local storage area that persists between browser sessions. This storage is ideal for the global setting values presented in this article.
Saving Data into Local Storage
Open the appsettings.service.ts file and add a constant at the top of this file called SETTINGS_KEY. This constant contains the key value used for retrieving, storing, or deleting values in local storage.
const SETTINGS_KEY = "configuration";
Create a saveSettings() method that accepts an instance of an AppSettings class. Call the setItem() method on the localStorage object, passing in the key value contained in the SETTINGS_KEY constant as the first parameter and the AppSettings object as the second parameter. You need to stringify the AppSettings object in order to convert the JSON object to its appropriate string representation.
saveSettings(settings: AppSettings) {
  localStorage.setItem(SETTINGS_KEY, JSON.stringify(settings));
}
To test the new saveSettings() method, add a new button to the product-detail.component.html page. Call a method named saveSettings() from the click event of this button by writing the following code:
<button (click)="saveSettings()">
Save Settings
</button>
Open the product-detail.component.ts file and add the saveSettings() method to be called from the click event on the button.
saveSettings(): void {
  this.settings.defaultPrice = this.product.price;
  this.settings.defaultUrl = this.product.url;
  this.appSettingsService.saveSettings(this.settings);
}
In the saveDefaults() method, take the bound product properties and move them into the appropriate properties in the settings property of the ProductDetailComponent class. Call the saveSettings() method of the appSettingsService class that was injected by Angular into your ProductDetailComponent class.
Retrieve Settings and Store into Local Storage
Now that you have the ability to store values into local storage, you need to modify the getSettings() method in the appsettings.service.ts file to attempt to retrieve those values from local storage. If the values are found in local storage, return those values; otherwise return the values from the JSON file. Modify the getSettings() method to look like Listing 3.
Listing 3: Modify the getSettings() method to retrieve values from local storage
getSettings(): Observable<AppSettings> {
    let settings = localStorage.getItem(SETTINGS_KEY);

    if (settings) {
        return Observable.of(JSON.parse(settings));
    }
    else {
        return this.http.get(SETTINGS_LOCATION).map(response => {
            let settings = response.json() || {};
            if (settings) {
                this.saveSettings(settings);
            }

            return settings;
        })
        .catch(this.handleErrors);
    }
}
The getSettings() method attempts to get the settings object from local storage by passing the SETTINGS_KEY value to the getItem() method. If the variable named settings contains a value, create an AppSettings object using JSON.parse() and returning an Observable of the AppSettings object.
If nothing is found in local storage, retrieve the values from the file using the http.get() method. If the values are found in the file, save them into local storage by calling the saveSettings() method. After the first time calling the getSettings() method, succeeding calls to this method retrieve values from local storage. You only get the default values from the JSON file the first time.
Delete Settings
In many applications, the user can reset back to factory defaults. To accomplish the same thing in your Angular application, delete the values stored in local storage. If you delete all of the values, then the next time the getSettings() method is called, the original values from the JSON file are read. Add a deleteSettings() method to the AppSettingsService class.
deleteSettings(): void {
  localStorage.removeItem(SETTINGS_KEY);
}
Because the complete AppSettings object is stored within the one key in local storage, call the removeItem() method and pass in the SETTINGS_KEY constant to erase all the settings. To test this method, add a new button to the product-detail.component.html page in the sample.
<button (click)="deleteSettings()">
Delete Settings
</button>
Open the product-detail.component.ts file and add the deleteSettings() method. In this method, call the deleteSettings() method on the appSettingsService object that was injected into this component.
deleteSettings(): void {
  this.appSettingsService.deleteSettings();
}
Save all of your changes, switch back to your browser, and you should see your two new buttons appear on the screen. Try modifying the price and URL fields and click the Save Settings button. Refresh the page to ensure that the new values are retrieved from local storage. Next, try clicking on the Delete Settings button to delete the values from local storage. Refresh the page again to ensure that the values are retrieved from the JSON file.
Create Web API for Configuration Settings
In the last two examples in this article, you hard-coded global settings and retrieved them from a JSON file. Now you're going to retrieve settings by calling a Web API method and get the settings from a SQL Server table. To use a Web API call, you need to perform a few steps.
- Create a new Web API project in Visual Studio
- Create a SQL Server table named AppSettings
- Create Entity Framework classes to retrieve data from the SQL table
- Add a C#
ConfigControllerclass - Enable Cross-Origin Resource Sharing (CORS)
- Convert C# PascalCase property names to JSON camelCase property names
Create a Visual Studio Web API Project
Open Visual Studio 2017 and select File > New > Project… from the main menu. From the New Project dialog, select Visual C# > Web > ASP.NET Web Application (.NET Framework). Set the name to ConfigWebApi and click the OK button. In the New ASP.NET Web Application dialog, select the Web API template and click the OK button. After a minute or two, you'll have a new Web API project created.
Create SQL Server Table
Create a table named AppSettings on an available SQL Server. This table should have column names that match the Angular AppSettings class. As with any proper database design, add a primary key for the table named AppSettingsId. Set this primary key as non-clustered, and add the IDENTITY attribute to start with the value of 1 and increment by 1 for each new record added. Below is the T-SQL statement to create this table in SQL Server.
CREATE TABLE dbo.AppSettings(
  AppSettingsId int NOT NULL CONSTRAINT PK_AppSettings PRIMARY KEY NONCLUSTERED IDENTITY(1,1),
  DefaultUrl nvarchar(255) NULL,
  DefaultPrice money NULL CONSTRAINT DF_AppSettings_DefaultPrice DEFAULT ((1))
)
After creating your table, add a new record to the table with some default values such as the following:
INSERT INTO AppSettings(DefaultUrl, DefaultPrice)
VALUES ('http://www.google.com', 42);
Create Entity Framework Classes
Right mouse-click on the Models folder in your Visual Studio project and choose Add > ADO.NET Entity Data Model… from the context-sensitive menu. Set the name of the data model to ConfigSample. Select Code First from Database from the first page of the Entity Data Model Wizard dialog and click the Next button. Create a new connection to the SQL Server and select the database where you created the AppSettings table and click the Next button. Drill down to the AppSettings table you created and click the Finish button. After about a second, two Entity Framework classes have been generated and added to your Models folder.
ConfigController Class
You're now ready to write your Web API controller and a method to retrieve the AppSettings values in your SQL Server table. Right mouse-click on the Controllers folder and select Add > Web API Controller Class (v2.1) from the menu. Set the name of this new controller to ConfigController and click the OK button. Add a using statement at the top of this file.
using ConfigWebApi.Models;
Delete all the methods within this class, as you don't need them. Add a Get() method, shown in Listing 4, to retrieve the settings from the SQL Server table. When writing a Web API method, return an object that implements the IHttpActionResult interface. The ApiController class has a few methods you call to create a return object. The Get() method creates an instance of the ConfigSample DbContext. Use the FirstOrDefault() method on the AppSettings collection to retrieve the first record in the AppSettings table. If a null is returned from this method, set the return variable to NotFound(). If a record is found, call the Ok() method and pass the settings variable into this method so that the values are returned from this method. If an error occurs, return an InternalServerError object.
Listing 4: Add a Get() method to your Web API controller to retrieve settings from a SQL table.
[HttpGet]
public IHttpActionResult Get()
{
    IHttpActionResult ret;
    ConfigSample db = null;
    AppSetting settings = new AppSetting();

    // Retrieve settings from SQL table
    try
    {
        db = new ConfigSample();

        settings = db.AppSettings.FirstOrDefault();
        if (settings == null)
        {
            ret = NotFound();
        }
        else
        {
            ret = Ok(settings);
        }
    }
    catch (Exception)
    {
        ret = InternalServerError(new ApplicationException("Error retrieving settings from AppSettings table."));
    }

    return ret;
}
Enable CORS
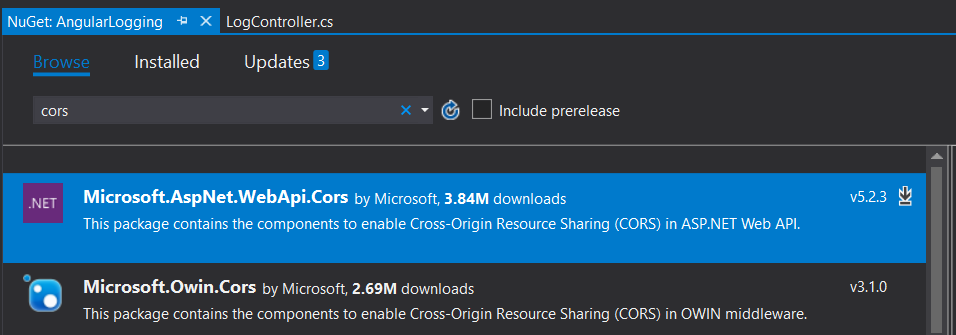
Because you created a new Visual Studio application to run your Web API method, it's running in a different domain from your Angular application. For your Angular application to call this Web API you must tell the Web API that you're allowing Cross-Origin Resource Sharing (CORS). Right-mouse click on your Web API project and select Manage NuGet Packages…. Click on the Browse tab and search for cors as shown in Figure 3. Install this package into your project.
After CORS is installed into your project, open the \App_Start\WebApiConfig.cs file and add the following line of code in the Register() method:
public static void Register(HttpConfiguration config)
{
    config.EnableCors();
    ...
}
Go back to your ConfigController class and add the following using statement:
using System.Web.Http.Cors;
Add the EnableCors() attribute just above your ConfigController class. You can get specific on the origins, headers, and methods properties to restrict access to only your Angular application if you want. For the purposes of this article, just set them to accept all requests by specifying any asterisk for each, as shown in the following code snippet:
[EnableCors(origins: "*", headers: "*", methods: "*")]
public class ConfigController : ApiController
{
    ...
}
Convert C# Class to JSON
C# property names are generally created using Pascal casing. Pascal casing means each letter of each word in the property name is initial-capitalized. The convention for naming properties in JavaScript and TypeScript is to use camel casing. Camel casing is where each word in the property name is initial capitalized except for the first word. So, the DefaultUrl property name in C# is expressed as defaultUrl in TypeScript. When the Web API serializes the AppSettings class to return it to your Angular application, it takes the property names of C# and translates them directly into JSON. You can change the serializer so that the Web API converts the Pascal-cased C# property names into camel-cased TypeScript property names.
Open the WebApiConfig.cs file and add a couple of using statements at the top of this file.
using System.Net.Http.Formatting;
using Newtonsoft.Json.Serialization;
Locate the Register() method and just below the first comment, add the lines shown in the following code snippet. Leave the rest of the code the same in the Register() method.
public static void Register(HttpConfiguration config)
{
    // Convert to camelCase
    var jsonFormatter = config.Formatters.OfType<JsonMediaTypeFormatter>().FirstOrDefault();
    jsonFormatter.SerializerSettings.ContractResolver = new CamelCasePropertyNamesContractResolver();

    // Rest of the code below here
}
Run your Web API project and when it's running in the browser, copy the URL from the address line to the clipboard. You're going to need this address for your Angular service.
Modify AppSettingsService
Switch back to your Angular project in Visual Studio Code. Open the appsettings.service.ts file and locate the constant SETTINGS_LOCATION. Replace the contents of the value with what's in your clipboard. Then, add on “api/config” to the end. Your constant should now look like the following (with a different port number, of course).
const SETTINGS_LOCATION = "http://localhost:8314/api/config";
Switch to the browser that's running your Angular project. Click on the Delete Defaults button to delete the previous settings. Refresh your browser, and you should now see the values returned from your Web API call in the appropriate fields on the Web page.
Summary
In this article, you learned an approach for handling application-wide settings for Angular applications. A service approach is the most flexible approach for providing settings to any other class in your application. You can choose to store your settings in a class or in an external JSON file, or make a call to a Web API to retrieve the values. Store the settings retrieved into local storage to allow your users to modify those settings, if desired. If you delete the values from local storage, you allow your user to revert to the original default settings.
