


In a previous CODE Magazine article (https://www.codemag.com/article/1607081), I described an open-source light scripting language that can be easily customized. I called this language CSCS (Customized Scripting in C#), because it's implemented in C# and its functionality can be tweaked and extended in C#. In another CODE Magazine article (https://www.codemag.com/article/1711081), you can read how this language can be used on top of Xamarin to create cross-platform native mobile apps in a scripting language.
In this article, I'm going to show how you can use CSCS scripting in Unity to change a game or an app functionality on the fly. CSCS can be used to add possibilities for the game designer or for the game users. It's called “modding.” Modding is slang derived from the verb modify. It refers to performing a function not originally intended by the designer of the game. Mods can be quests, items, game elements (houses for the player, towns, shops, factions), or altering technical things (scripts, textures, meshes).
“Modding” refers to adding, altering, or purging the content of a game to perform a function not originally intended by the designer.
The main idea is to enable customizing your app or game as much as possible without recompilation. Not only that, the customization can also take place at runtime, after the game or app has already started.
All of the custom scripting and modding functionality is done using the CSCS scripting language. The CSCS full implementation in C# is on GitHub (the link is in the sidebar). Also, you're going to see how to use Visual Studio Code to debug custom scripts running in Unity.
In this article, I'm going to show how you can add customized scripting to a Unity project, taking the Microsoft Maquette Unity project as an example. Even though this example is an application, adding scripting to a game is similar.
Microsoft Maquette
Microsoft Maquette (https://www.maquette.ms) is a brand-new Microsoft Windows Mixed Reality tool for creating immersive prototypes using a virtual reality (VR) headset and hand controllers. Maquette is implemented in Unity and it's also very easy to export the content you create with Maquette into your Unity projects. At the time of this writing, the tool is still in beta, with no scheduled release date. This tool makes it especially easy to create a spatial prototype in 3D. See Figure 1 for an example of content created with Microsoft Maquette.
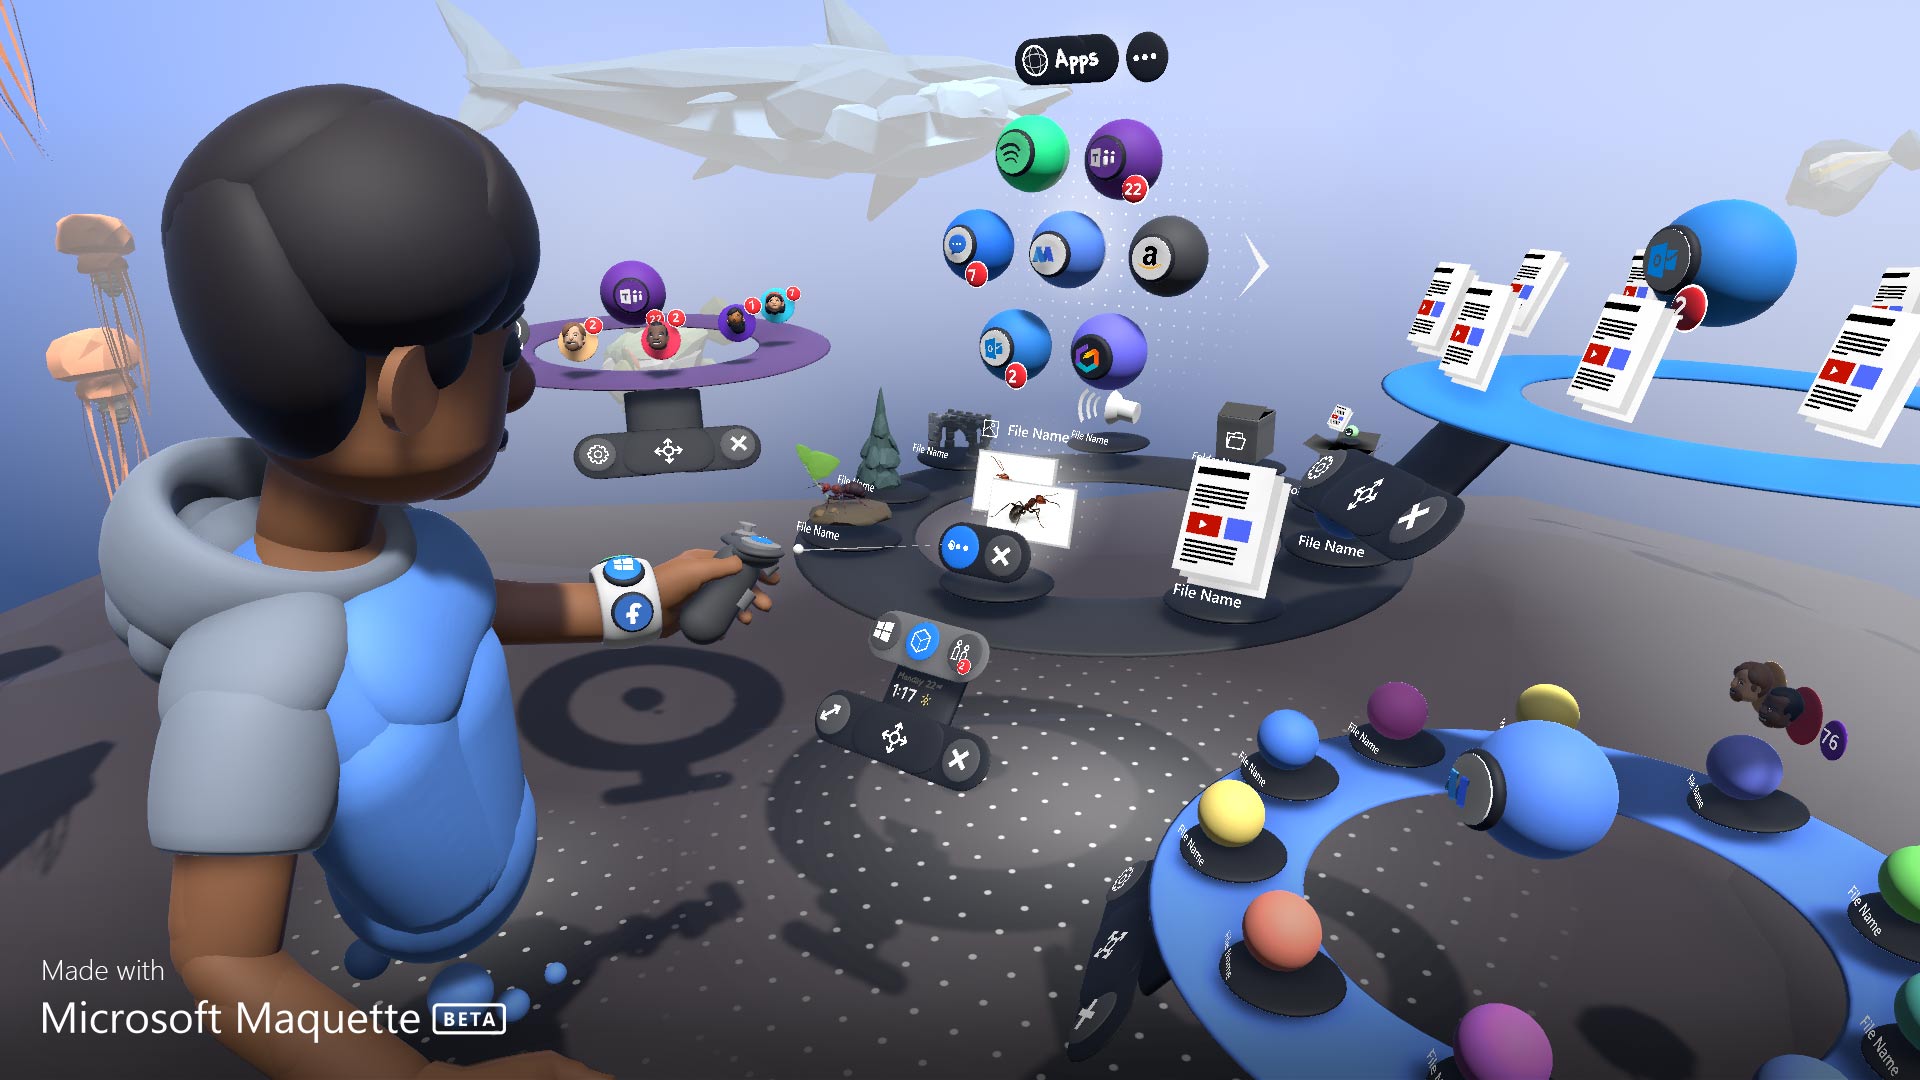
It's a lot of fun to create different objects in 3D using a VR Headset and hand controllers. However, it could also be useful to be able to create some common scenes and objects in a script file and then to add these objects to an existing (or a new) Maquette project on the fly. This is where customized scripting can be used. So, the Microsoft Maquette team has decided to use CSCS to investigate scripting to extend its functionality and give their users access to scripted extensions.
In the next section, you'll see how you can add a CSCS scripting module to a Unity project using a Microsoft Maquette project as an example.
If our lives are already written, it would take a courageous man to change the script.
– Alan Wake
General Structure of a Unity Project
After downloading the CSCS parsing module from the GitHub, you can include it in the Assets area, as shown in Figure 2.

The CSCS folder has identical files as the C# files under the CSCS folder in GitHub. This folder contains all of the necessary files to parse CSCS scripts. Because everything is open source, you're free to do any additions and modifications there.
Next, you need a script controller object. It initializes the CSCS scripting and makes sure the scripts are run when required and on the correct thread.
Unity has a few special methods that are called from the main thread by the Unity framework. This happens for objects derived from the special Unity MonoBehaviour class. MonoBehaviour.Awake() method is called only once when the game is starting. MonoBehaviour.Update() method is called every frame from the Unity Main thread. You're going to use these two methods to add the custom scripting functionality to your game.
Create your class deriving from MonoBehaviour as follows:
public class MaquetteScriptController:MonoBehaviour
{
    void Awake() {
    // Code here will be executed once.
    }
    void Update() {
    // Code here will be executed each frame.
    }
}
You'll be adding some muscle to this class in the next sections.
You can add the new controller either directly from Unity or using the GameObject.AddComponent() method from any other real game object that already exists in a Unity scene as follows:
MaquetteScriptController myScriptController = gameObject.
    AddComponent<MaquetteScriptController>();
Note that in either case, MaquetteScriptController class should be initialized only once and used exclusively as a singleton.
Running the Whole Script on the Unity Main Thread
In Unity, all of the GUI related functionality happens on the main thread, including creating and modifying different game objects. If you try calling some GUI related functions other than from the main thread, you get an exception like this: “get_gameObject can only be called from the main thread.”
If scripting triggers execution of a custom code that can modify Unity game objects, that code must be run on the Unity main thread. There are different ways of doing this; here, I'm going to propose one of them that's relatively common, but you're free to choose any other way.
A C# unit containing the script to be run will be the ScriptCommand structure. It will be also responsible to call the CSCS core scripting classes for parsing and execution of a CSCS script. Check out the implementation of the ScriptCommand structure in Listing 1.
Listing 1: Implementation of the ScriptCommand C# Class
public struct ScriptCommand
{
    public string command;
    public SplitAndMerge.Variable result;
    public string output;
    public string errorMessage;

    public ScriptCommand(string sCommand)
    {
        command = sCommand;
    }
    public void Execute()
    {
        output = "";
        try
        {
            result = SplitAndMerge.Interpreter.Instance.Process(command);
            output = SplitAndMerge.Interpreter.Instance.Output;
            errorMessage = "";
        }
        catch (Exception exception) {
            errorMessage = exception.Message;
            SplitAndMerge.ParserFunction.InvalidateStacksAfterLevel(0);
        }
    }
}
You collect all of the incoming requests to run custom scripts in a ConcurrentQueue object consisting of the ScriptCommand objects. You use a concurrent queue because it's thread safe: the scripts can be queued and dequeued from different threads. You define this queue in the MaquetteScriptController class as follows:
static ConcurrentQueue<ScriptCommand>
    m_scriptQueue = new ConcurrentQueue<ScriptCommand>();
You add each incoming request to this queue as follows:
public static void AddScriptToQueue(string code)
{
    ScriptCommand command = new ScriptCommand(code);
    m_scriptQueue.Enqueue(command);
}
To consume this queue, there are two possibilities. If custom scripts must be executed on the main thread, modify the Update() method that you defined in the MaquetteScripController as follows:
void Update()
{
    while (m_scriptQueue.Count != 0)
    {
        ScriptCommand next;
        if (m_scriptQueue.TryDequeue(out next))
        {
            next.Execute();
        }
    }
}
Note that you don't have to use any locks here because they are taken care of by the .NET Framework.
If a custom script modifies the GUI, the code must be evaluated on the Unity main thread.
Another possibility to consume the queue is when you don't have to run the CSCS script on the Unity main thread. Or maybe you don't have to run the whole script on the main thread, but just some parts of it – this can be customized in the C# implementation of a CSCS function – you'll see some examples of this later on.
To consume the queue and execute the scripts not on the Unity main thread, you need to start a separate thread:
public void OnStartup()
{
    Task.Run(() => {
        RunScriptingEngineThread();
    });
}
Where the implementation of the RunScriptingEngineThread() is as follows:
public static void RunScriptingEngineThread()
{
    while (!m_ScriptQuitEvent.WaitOne(0))
    {
        while (m_scriptQueue.Count != 0)
        {
            ScriptCommand next;
            if (m_scriptQueue.TryDequeue(out next))
            {
                next.Execute();
            }
            m_ScriptLoopEvent.WaitOne(1000);
        }
    }
}
The m_ScriptLoopEvent and m_ScriptQuitEvent are auto reset event handlers:
static AutoResetEvent m_ScriptLoopEvent = new AutoResetEvent (false);
static AutoResetEvent m_ScriptQuitEvent = new AutoResetEvent (false);
In this case, the implementation of the Update() method is simpler – it just signals that the processing may take place now (in case there are pending requests). It also makes sure that the script processing doesn't occur more often than every frame:
void Update()
{
    m_ScriptLoopEvent.Set();
}
The m_ScriptQuitEvent makes sure that the scripting thread is finished on Unity shutdown:
public void OnShutdown()
{
    m_ScriptQuitEvent.Set();
    m_ScriptLoopEvent.Set();
}
You've seen how to process incoming scripting requests. But how do they get into Unity? This is a static auxiliary method to add a file with a CSCS script to the execution queue:
public static void ExecuteScript(string scriptFile){
    if (File.Exists(scriptFile))
    {
        string sCode = "include(\"" + scriptFile + "\");";
        AddScriptToQueue( sCode );
    }
}
You can call this method from anywhere in your Unity code. In particular, you can call it from an initialization routine, so that a custom script for setting up initial scenes and game objects can be called every time a Unity game or app is started.
In the next section, you're going to see another way of triggering custom script execution in Unity using Visual Studio Code CSCS Debugger.
Connecting to Unity from Visual Studio Code
In a previous CODE Magazine article (https://www.codemag.com/Article/1809051) you read how to create a Visual Studio Code Debugger and a REPL Extension for any language. As an example, I used CSCS. You don't have to re-implement the extensions, but just take the ones in the Visual Studio Marketplace (they're free to use; see the links in the sidebar).
Using a debugger extension, you can connect from Visual Studio Code (let's call it VS Code for brevity) to Unity and execute any CSCS script in Unity, set breakpoints, check variable values, go through the call stack, etc. Using the REPL extension, you can execute any code selected in the VS Code editor.
Using the REPL VS Code extension, you can add new Game Objects to a running Unity instance on the fly.
The code for the CSCS receiving part on the Unity side is mostly in Breakpoints.cs, DebuggerServer.cs, and Debugger.cs files. All of these files are already in the CSCS core directory (see Figure 2). You can start the Debugger server in the Awake() method of the MaquetteScriptController like this:
void Awake()
{
    SplitAndMerge.Interpreter.Instance.Init();
    SplitAndMerge.DebuggerServer.StartServer(13337);
}
The Awake() method also initializes the CSCS main scripting functions.
The port 13337 is the default port to where the VS Code CSCS Debugger extension connects (note that both Unity and VS Code are supposed to run on the same computer). If you want to change the port number, don't forget to change it in the VS Code CSCS Debugger configuration settings as well (in the launch.json file).
The CSCS Debugger server keeps an internal queue of requests received from the VS Code. To process this queue in Unity, there are the same two possibilities I discussed earlier: Either run the CSCS scripts on the Unity main thread or in a separate thread. In the case of processing on the Unity main thread, add the following code to the MaquetteScriptController.Update() method:
if (SplitAndMerge.DebuggerServer.DebuggerAttached)
{
    SplitAndMerge.DebuggerServer.ProcessQueue();
}
In the case of processing CSCS scripts on a separate thread, add the code above to the RunScriptingEngineThread() (see Listing 2).
Listing 2: A Fragment of the Implementation of the MaquetteScriptController Class
public class MaquetteScriptController : MonoBehaviour
{
    static ConcurrentQueue<ScriptCommand> m_scriptQueue =new ConcurrentQueue <ScriptCommand>();
    static AutoResetEvent m_ScriptLoopEvent = new AutoResetEvent (false);
    static AutoResetEvent m_ScriptQuitEvent = new AutoResetEvent (false);
    static ConcurrentQueue<Action> m_actionQueue = new ConcurrentQueue<Action>();

    void Awake()
    {
        SplitAndMerge.Interpreter.Instance.Init();
        SplitAndMerge.DebuggerServer.StartServer(13337);
    }
    public void OnStartup()
    {
        MaquetteFunctions.DefineScriptFunctions();
        Task.Run(() => { RunScriptingEngineThread(); });
    }
    public void OnShutdown()
    {
         m_ScriptQuitEvent.Set();
         m_ScriptLoopEvent.Set();
    }
    public static void ExecuteScript(string scriptFile)
    {
        if (File.Exists(scriptFile))
        {
            string sCode = "include(\"" + scriptFile + "\");";
            AddScriptToQueue( sCode );
        }
    }
    public static void AddScriptToQueue( string sCode )
    {
        ScriptCommand command = new ScriptCommand(sCode);
        m_scriptQueue.Enqueue(command);
    }
    public void Update()
    {
        m_ScriptLoopEvent.Set();
        while (m_actionQueue.Count != 0)
        {
            Action action;
            if (m_actionQueue.TryDequeue(out action)) {
                action.Invoke();
            }
        }
    }
    public static void ExecuteInUpdate(Action action)
    {
        m_actionQueue.Enqueue(action);
    }
    public static void RunScriptingEngineThread()
    {
        while (!m_ScriptQuitEvent.WaitOne(0)) {
            if (SplitAndMerge.DebuggerServer.DebuggerAttached) {
                SplitAndMerge.DebuggerServer.ProcessQueue();
            }
        while (m_scriptQueue.Count != 0) {
            ScriptCommand next;
            if (m_scriptQueue.TryDequeue(out next)) {
                next.Execute();
            }
        }
        m_ScriptLoopEvent.WaitOne(500);
        }
    }
}
That's it! Before you see real examples, you need to see how to execute only a part of the script on the Unity main thread.
Running Parts of the Code on the Unity Main Thread
First, define a static concurrent queue in the MaquetteScriptController class. It will contain the C# code to be executed on the Unity main thread:
static ConcurrentQueue<Action> m_actionQueue = new ConcurrentQueue<Action>();
Then you can add requests for the C# code to be executed on the main thread in the following method in the MaquetteScriptController class:
public static void ExecuteInUpdate(Action action)
{
    m_actionQueue.Enqueue(action);
}
Now, in order to execute the code on the Unity main thread, add this to the MaquetteScriptController.Update() method:
while (m_actionQueue.Count != 0)
{
    Action action;
    if (m_actionQueue.TryDequeue(out action))
    {
        action.Invoke();
    }
}
An example of executing some code on the Unity main thread is the following:
// Not on the Unity Main Thread
ManualResetEvent mre = new ManualResetEvent(false);

ScriptController.ExecuteInUpdate(() => ( () =>
{
    // C# code here executed on the Main Thread
    mre.Set();
});

// Not on the Unity Main Thread
mre.WaitOne();
Check out the GetProperty() and SetProperty() methods in Listing 3 to see how parts of the code are scheduled on the main thread.
Listing 3: A fragment of the Implementation of the EntityScriptObject Class
public class EntityScriptObject : ScriptObject
{
    static List<string> s_properties = new List<string> {
        "color", "position", "rotation", "scale", "translate"
    };

    public virtual List<string> GetProperties()
    {
        return s_properties;
    }

    public Variable GetProperty(string sPropertyName,
        List<Variable> args = null, ParsingScript script = null)
    {
        Variable newValue = Variable.EmptyInstance;
        ManualResetEvent mre = new ManualResetEvent (false);

        MaquetteScriptController.ExecuteInUpdate(() => ( () =>
        {
            // Work on the Unity Main Thread ...
            switch (sPropertyName) {
                case "color":    newValue = GetColorProperty();
                case "position": newValue = GetPositionProperty();
                case "rotation": newValue = GetRotationProperty();
                case "scale":    newValue = GetScaleProperty();
                case "translate": newValue = args != null && args.Count > 0 ?
                    Translate(args[0]) : Variable.EmptyInstance;
            }
            mre.Set();
        });

        mre.WaitOne();
        return newValue;
    }

    public virtual Variable SetProperty(string sPropertyName, Variable argValue)
    {
        Variable newValue = Variable.EmptyInstance;
        ManualResetEvent mre = new ManualResetEvent (false);

        MaquetteScriptController.ExecuteInUpdate(() => ( () =>
        {
            // Work on the Unity Main Thread ...
            switch (sPropertyName) {
                case "color": newValue = SetColorProperty(GetColorFromVariable(argValue));
                case "position": newValue = SetPositionProperty(GetVector3FromVariable(argValue));
                case "rotation": newValue = SetRotationProperty(GetVector3FromVariable(argValue));
                case "scale": newValue = SetScaleProperty(GetVector3FromVariable(argValue));
                case "translate": newValue = Translate(argValue);
            }
            mre.Set();
        });

        mre.WaitOne();
        return newValue;
    }
    public Variable GetPositionProperty()
    {
        Vector3 myVector3 = m_EntityObject.transform.position;
        return CreateVector3Variable(myVector3);
    }
    public Variable SetPositionProperty(Vector3 aVector3)
    {
        m_EntityObject.transform.position = aVector3;
        m_EntityObject.SerializeState();
        return Variable.EmptyInstance;
    }
    public Variable Translate(Variable vectorVariable)
    {
        Vector3 aVector3 = GetVector3FromVariable(vectorVariable);
        m_EntityObject.transform.Translate(aVector3);
        m_EntityObject.SerializeState();
        return Variable.EmptyInstance;
    }
    public static Variable CreateVector3Variable(Vector3 aVector)
    {
        Variable newValue = new Variable(Variable.VarType.ARRAY);
        newValue.AddVariable(new Variable(aVector.x));
        newValue.AddVariable(new Variable(aVector.y));
        newValue.AddVariable(new Variable(aVector.z));
        return newValue;
    }
    MqEntity m_EntityObject = null;
}
Now let's see an example of running custom scripts in Unity at runtime using the techniques you've developed so far and using Microsoft Maquette as an example Unity project.
Adding Objects to Maquette from Visual Studio Code at Runtime
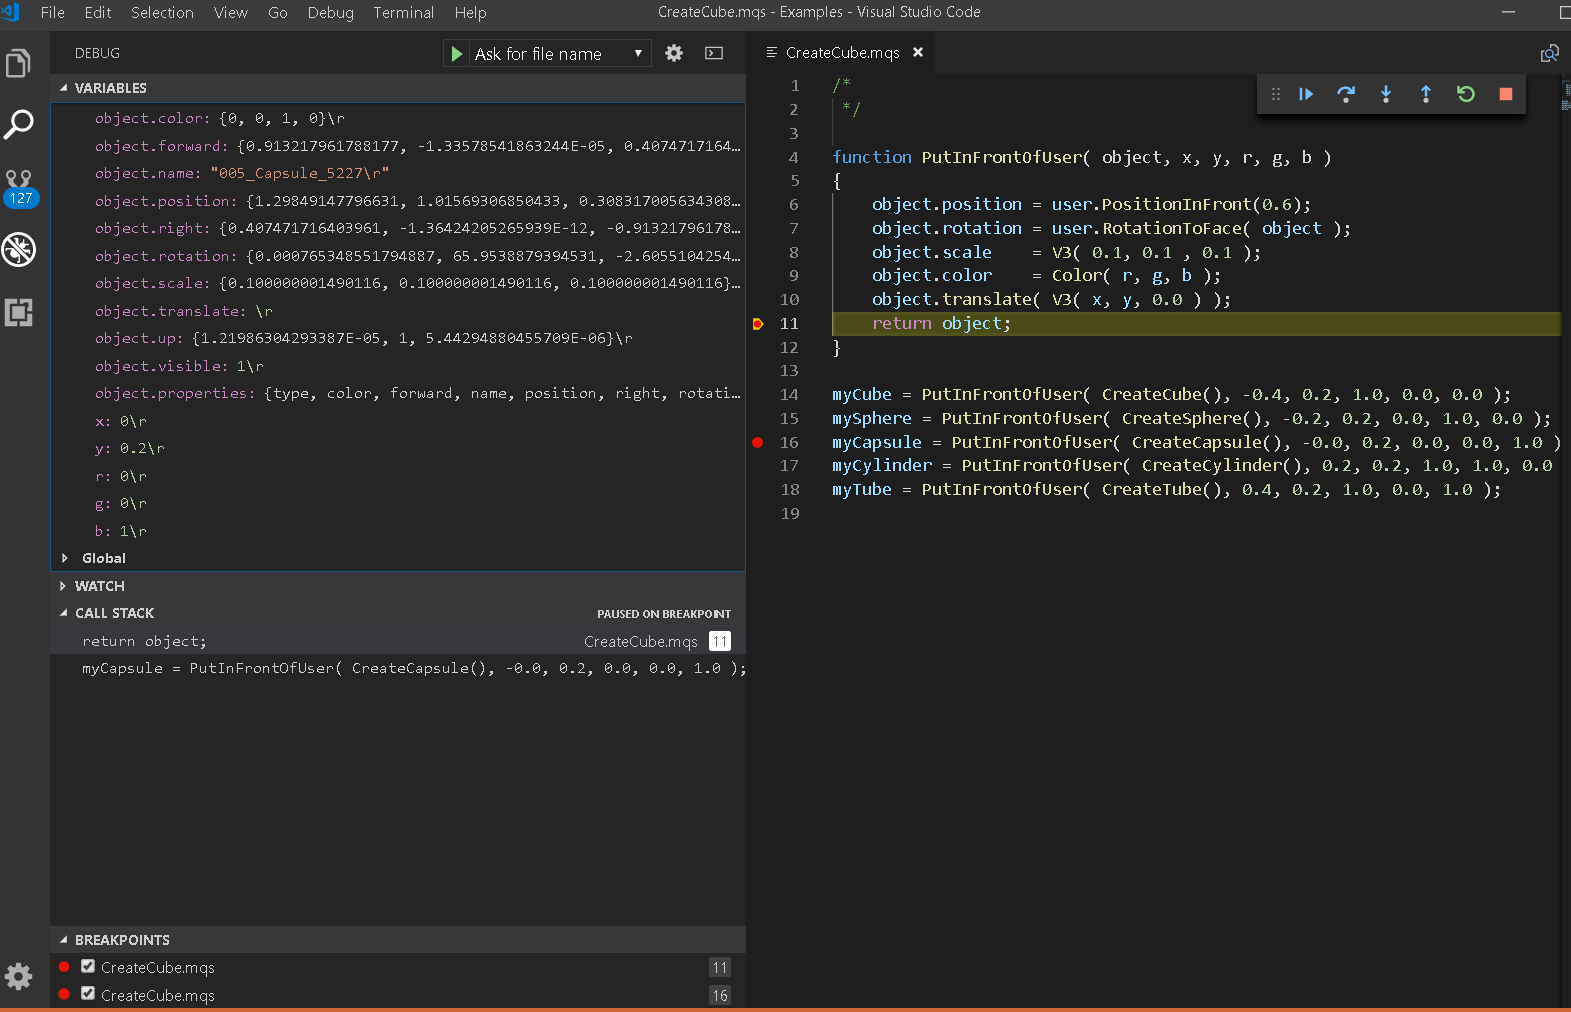
The VS Code CSCS debugger in action is shown in Figure 3. It shows a script that adds a cube, a sphere, a capsule, a cylinder, and a tube to the current Microsoft Maquette scene. In this figure, the VS Code Debugger is connected to the CSCS Debugger server on the Microsoft Maquette Unity side.
The result of running this script in Microsoft Unity is shown in Figure 4.
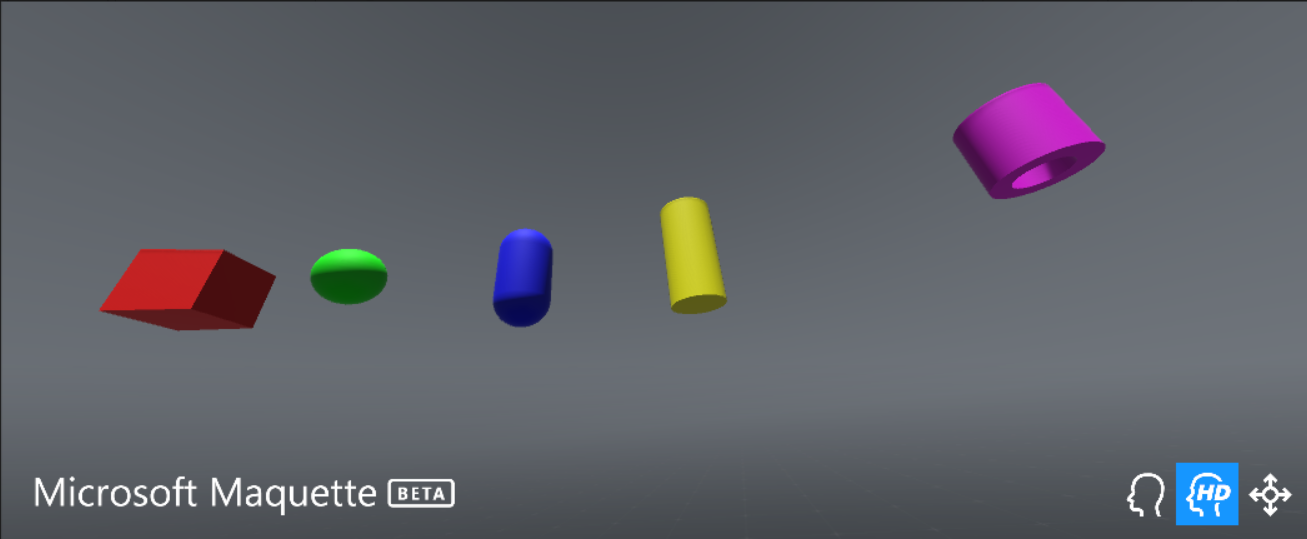
As you can see, all five figures were added to the current scene at the place I was looking with my VR Headset.
Now let's see how it all worked.
To add new CSCS functions to the parser, the following statements are used in the initialization phase:
public static void DefineScriptFunctions()
{
    ParserFunction.RegisterFunction("CreateCube", new CreateCubeFunction());
    ParserFunction.RegisterFunction("CreateSphere", new CreateSphereFunction());
    ParserFunction.RegisterFunction("CreateCapsule", new CreateCapsuleFunction());
    ParserFunction.RegisterFunction("CreateTube", new CreateTubeFunction());
}
Each of the registered functions must be a class deriving from the SplitAndMerge.ParserFunction class.
A fragment of the implementation of the CreateCubeFunction class is shown in Listing 4. I provided a skeleton but omitted a few lengthy details of building a Cube because they are out of the scope of this article.
Listing 4: A Fragment of the Implementation of the CreateCubeFunction Class
class CreateCubeFunction: ParserFunction
{
    static Variable CreateEntityOfType(string sPrimitiveType, List<Variable> args = null)
    {
        EntityScriptObject myObject = new EntityScriptObject();
        Variable newValue = new Variable (myObject);
        ManualResetEvent mre = new ManualResetEvent (false);

        MaquetteScriptController.ExecuteInUpdate(() => ( () =>
        {
            // Some work on the Unity Main Thread ...
            mre.Set();
        });

        mre.WaitOne();
        return newValue;
    }
    protected override Variable Evaluate(ParsingScript script)
    {
        List <Variable> args = script.GetFunctionArgs();
        string sPrimitiveType = Utils.GetSafeString(args, 0, "Cube");
        Variable newValue = CreateEntityOfType(sPrimitiveType);
        return newValue;
    }
}
Implementing Scripting Objects in an Object-Oriented style
You probably noticed in Figure 3 that you can perform a few operations on an object passed to the PutInFrontOfUser() CSCS method:
object.position=user.PositionInFront(0.6);
object.rotation=user.RotationToFace( object);
object.scale   =V3( 0.1, 0.1 , 0.1 );
object.color   =Color( r, g, b );
object.translate( V3( x, y, 0.0 ) );
return object;
The CSCS object variable above can be any shape, such as a cube, a sphere, etc. How can you implement such CSCS objects in C#?
All of the CSCS variables and objects correspond to a SplitAndMerge.Variable C# object. Each Variable object has a type (string, number, array, etc.). There's a special Variable type called OBJECT. Using this Variable type, you implement CSCS objects.
You initialize this SplitAndMerge.Variable object with another object that implements the ScriptObject interface:
public interface ScriptObject {
    // Triggered by "a.name = value;"
    Variable SetProperty(string name, Variable value);
    // Triggered by "x = a.name;"
    // If args are null, triggered by Debugger
    // If args are not empty, triggered by a
    // function call: "y = a.name(arg1, ...);"
    Variable GetProperty(string name, List<Variable> args = null, ParsingScript script = null);

    // Returns all properties that it implements List<string> GetProperties();
}
So, in order to implement an object in CSCS, you create a C# class implementing the ScriptObject interface and then pass it to the SplitAndMerge.Variable constructor. See an example of this in Listing 3 (in the CreateEntityOfType() method):
EntityScriptObject myObject = new EntityScriptObject();
Variable newValue = new Variable (myObject);
The EntityScriptObject class implements the ScriptObject interface and you can check out a fragment of its implementation in Listing 4. (I also omitted the lengthy Unity and Maquette related details that aren't relevant to this article).
Wrapping Up
Using Microsoft Maquette as an example, you saw how you can do modding in Unity – altering game (or app) functionality either at runtime or just before starting the game without the need of a recompilation.
I hope you enjoyed the Microsoft Maquette example and are now ready to use scripting in your own projects, binding Unity functionality to custom scripting functions.
All of the CSCS code is open source. See the accompanying CSCS source code download and the GitHub links in the sidebar for the most up-to date developments. Note that Microsoft Maquette is proprietary software and therefore its source code is not available for download.
For manipulating Unity games by debugging a CSCS script in Visual Studio Code, install the Visual Studio Code CSCS Debugger and CSCS REPL extensions. See the links in the sidebar as well.
I'd be happy to hear back from you about how you're using customized scripting with Unity.
I'd like to give special thanks to Stefan Landvogt from the Microsoft Maquette team for providing me with priceless tips and suggestions.
