


Close your eyes and imagine a utopian world where client and/or department Web sites are easily deployed and the responsibility for content creation and modification is turned over to the administrators of the site.
Imagine site administrators creating new content pages consisting of pre-built content types like announcements, contacts, discussions, events, FAQs, news feeds, feedback forms, and even custom-developed content types. Continue imagining them creating new menu options and even adding new users and administering the security rights of users. Sound good? Now imagine all this available for free as an open-source Visual Studio .NET project. Sounding even better? Welcome to the DotNetNuke content management portal!
Overview
DotNetNuke, affectionately known as DNN, is an open source (VB.NET), ASP.NET-based, content management system used to create easy-to-use, updatable, customizable, and secure content management portals for Internet and intranet use. Each site can support multiple portals so there are host-level options and portal-level options. A DNN Administrator user has total control of the portal-level options including membership, security, and content.
Make sure you change the password for the admin and host accounts before you take your site to the Internet unless you want strangers to have the ability to administer your portal!
DNN is an extension of the IBuySpy Portal Solution Kit (IBS) that Microsoft released in January 2002. The development community adopted IBS as an essential reference for creating ASP.NET applications. IBS included ten basic user modules and four administration modules for building data-driven intranet and Internet portal applications. DNN (formerly known as the IBuySpy Workshop) is the result of many hours of work by Shaun Walker of Perpetual Motion Interactive Systems, Inc. (www.perpetualmotion.ca).
This article will focus on DNN v1.0.10d, which is the version available as I'm writing this article. Shaun and the DNN Core Team plan to release the much-anticipated DNN v2.0 in early 2004. Does that mean that this article contains outdated content? No. I have begun working with v2.0 and the major changes lie in DNN 2.0's ability to apply skins to the user interface and the way DNN 2.0 handles data in custom modules, both of which are topics for a future article. That still leaves plenty of material to cover that will apply to DNN 1.x and DNN 2.0.
Before you continue reading, take a minute or two to visit a couple of sites created with DNN to give you and idea of the type of application / portals you can create with DNN (Table 1).
A few of the benefits to building your next site with DNN include the ability to specify content that expires on a chosen date, multi-browser support, role-based security to control user access to Web site content, the ability to develop custom modules, and oh yeah, it's FREE!!
Performing a Clean Install
Ok, now that you've had a chance to check out a few sites developed with DNN, let's start by walking through how to build a site of your own. We'll walk through all the steps to get you up and running including downloading the source code, configuring IIS, and creating a database.
A few of the benefits to building your next site with DNN include the ability to specify that content will expire on a chosen date, multi-browser support, role-based security to control user access to Web site content, the ability to develop custom modules, and oh yeah, it's FREE!!
Before we get started, let me tell you how my development environment is configured. I'm running Windows XP SP1, IIS 6.0, VS.NET 2003, .NET Framework 1.1, and SQL Server 2000. I am logged on as an Administrator.
Step One: Download the DotNetNuke Portal Code
Let's start by downloading the DotNetNuke code from the DotNetNuke site at www.dotnetnuke.com (Figure 1). An interesting note about the DotNetNuke site is that it was created with and is maintained with DNN itself. There isn't anything on the DNN site that is not part of the built-in portal feature set. That doesn't mean you cannot extend the default portal though. (I'll write more on that later when I discuss developing custom modules.)
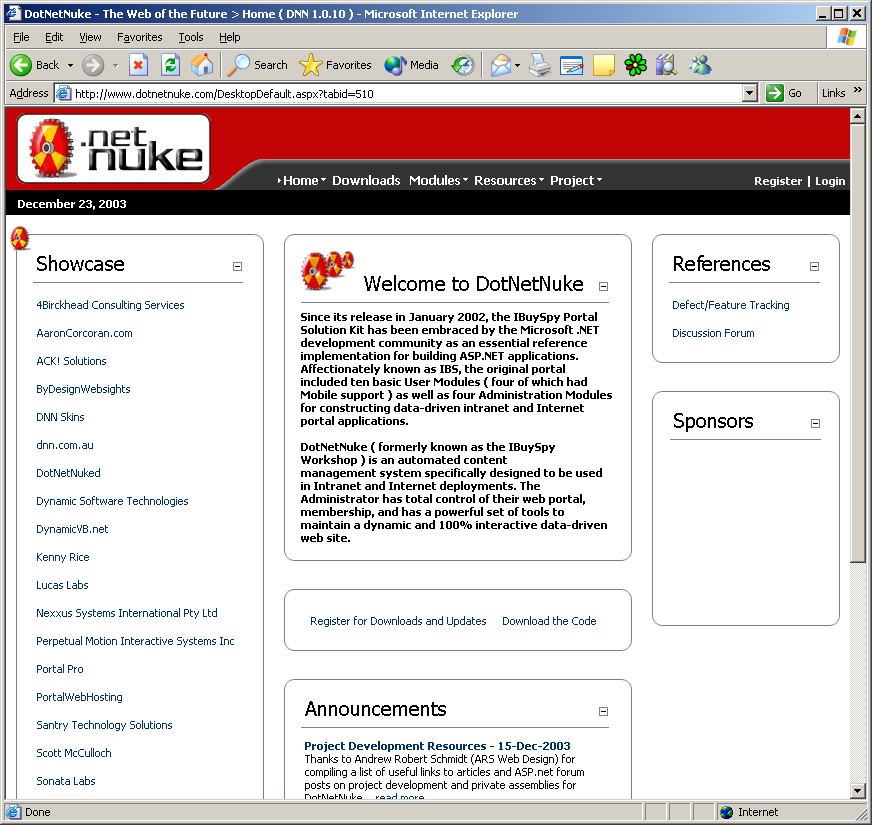
OK, back to downloading the code. A DNN site lets you assign roles-based access to specific content on the site. The DNN site (www.DotNetNuke.com) has done just that with access to downloading the code. The site requires that you register and then login to the site before you can download the code.
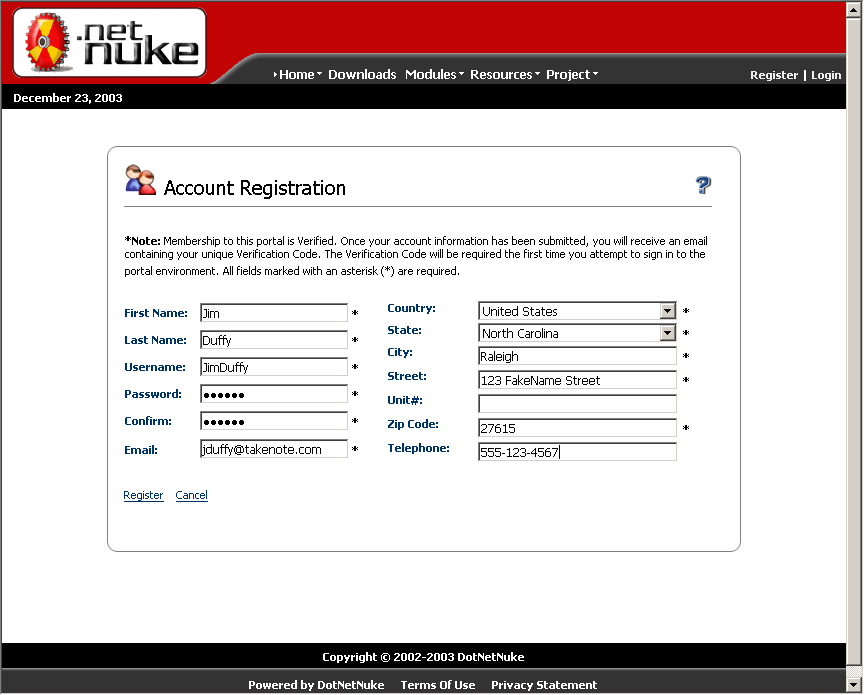
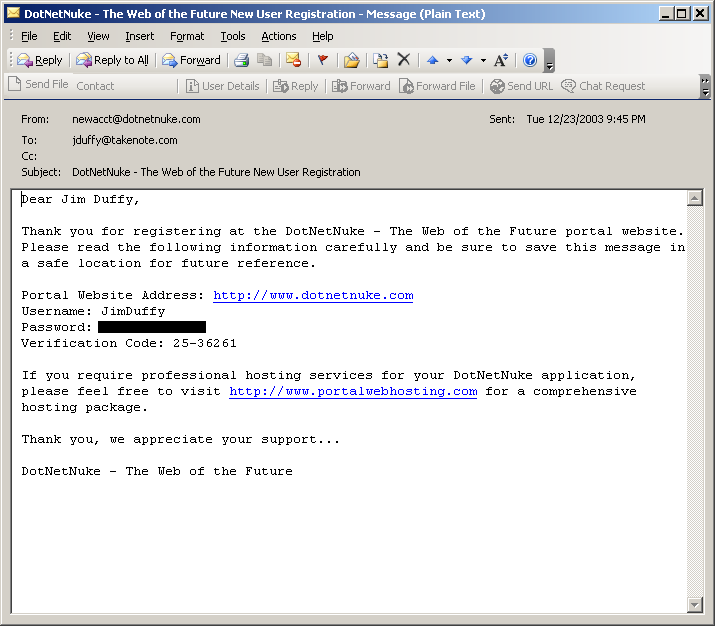
You won't have any difficulty registering. Click Register in the upper right hand corner of the page and fill out the registration form (Figure 2). Once you complete and submit the registration page, DNN will send you an email with a verification code to use the next time you log in to the site (Figure 3).
With your verification code in hand, you can now log in to the DotNetNuke site. Click Login in the upper right hand corner of the page and an Account Login module will appear in the upper left hand corner. Enter your username and password and click Log In. Since this is your first time accessing the site, instead of logging you in immediately, the site will prompt you for your verification code (Figure 4).
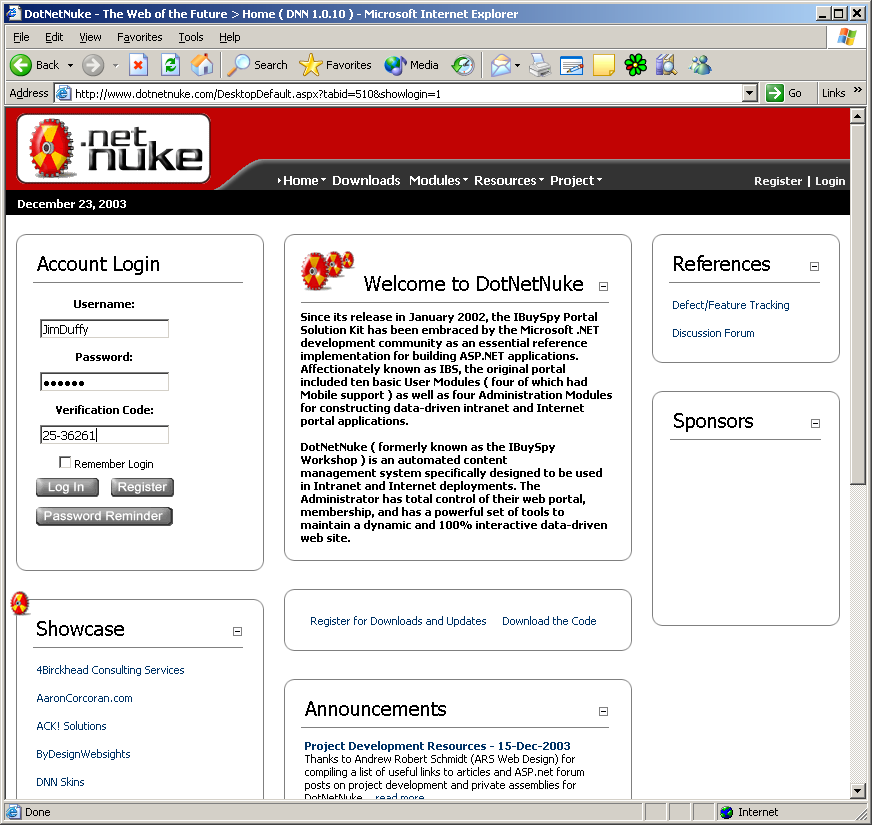
Enter the verification code you received via email and click Log In. If all goes well and you log in successfully you will see your name in the upper right-hand corner of the page.
Finally, you can get to the DNN code. Click Downloads from the top menu and then click the Download link. For simplicity, save the zip file containing the code to C:\DotNetNuke. Once you've downloaded the file, extract the zip file to the same C:\DotNetNuke directory. Take a quick look at the directory and you'll see a directory structure and the associated DNN files (Figure 5).
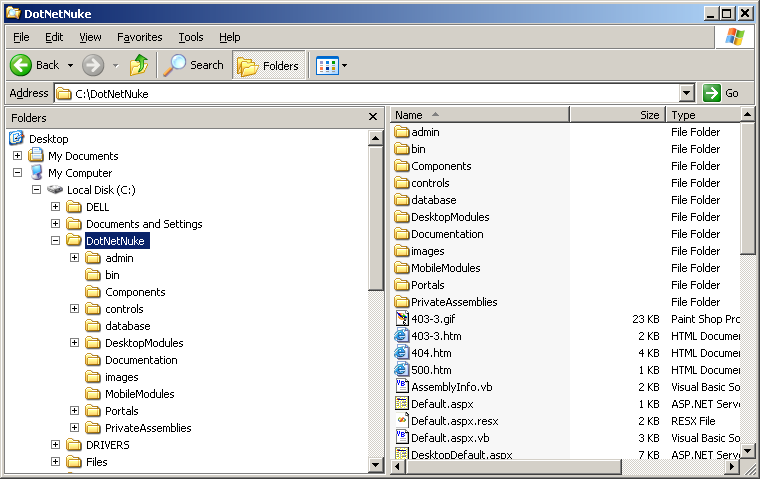
A close inspection of the C:\DotNetNuke directory reveals a VS.NET solution file (DotNetNuke.sln) and a VS.NET project file (DotNetNuke.vbProj). These are VS.NET 2002 files so you'll need to upgrade them if you open them in VS.NET 2003. The DesktopModules directory contains the source files associated with the built-in modules. In the Documentation directory you'll find a readm.txt file that walks you through the steps for a clean installation.
One of the best resources to help you understand how to build your own custom modules is to check out how the pre-built ones work.
The DNN architecture revolves around ASP.NET's ability to add user controls to a page at runtime. (See my article, “Dynamically Adding Controls” in the Jan/Feb 2004 issue of CoDe Magazine.) The DeskTopDefault.aspx page, located in the C:\DotNetNuke directory, hosts the user controls (modules) that the portal displays as it runs. The DeskTopPortalBanner.ascx file, located in the C:\DotNetNuke\Controls directory, controls the look and layout of the header for each page in the portal. It doesn't take a rocket scientist to figure out that the DeskTopPortalFooter.ascx file, also located in the C:\DotNetNuke\Controls directory, controls the look and layout of the footer for each page. I'm explaining this now to give you some background on how DNN does what it does. You won't need to concern yourself with these files in order to get your portal built.
Step Two: Give ASPNET Permissions on the Root Folder
Next, you need to make sure that the ASPNET user, created when you installed the .NET Framework, has full control privileges on the root DNN folder, C:\DotNetNuke.
How you do this varies slightly based on which OS you're running. Start by right-clicking on the C:\DotNetNuke folder and select Sharing (or something similar). Select the Security tab or locate the Permissions button. You want to locate the ASPNET user and assign “Full Control” to the C:\DotNetNuke folder.
Step Three: Create an IIS Virtual Directory
Next you want to tackle the chore of creating an IIS virtual directory for your new portal. Open Internet Information Services and drill down to and select the Default Website. Right-click on Default Website, select New, and then select Virtual Directory. IIS will launch the Virtual Directory Creation wizard. Click Next to move to the Virtual Directory Alias step and type DotNetNuke. Click Next to move to the Web Site Content Directory step and browse your way to (or enter) C:\DotNetNuke. Click Next to move to the Access Permissions settings. Click Next to accept the defaults. This takes you to the last step in the wizard. Click Finish to complete the creation of the DotNetNuke virtual directory.
Step Four: Create a SQL Server Database
When you open a portal for the first time, DNN executes a SQL Server script that populates a blank database with the DNN tables and stored procedures. Note that DNN's script does NOT create the database so it needs to exist before you open the portal for the first time.
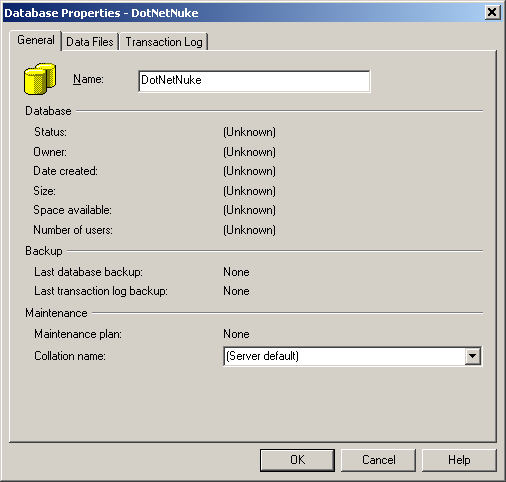
I'll walk you through how to build a SQL Server database named DotNetNuke. You may name the database for your next portal something else more descriptive, but for now let's stick with a database named DotNetNuke. Open the SQL Server Enterprise Manager, drill down into the server you want to create the database on, select Databases, right-click, and select New Database. Enter DotNetNuke as the name of the database and click OK (Figure 6). Database creation step complete, mission accomplished!
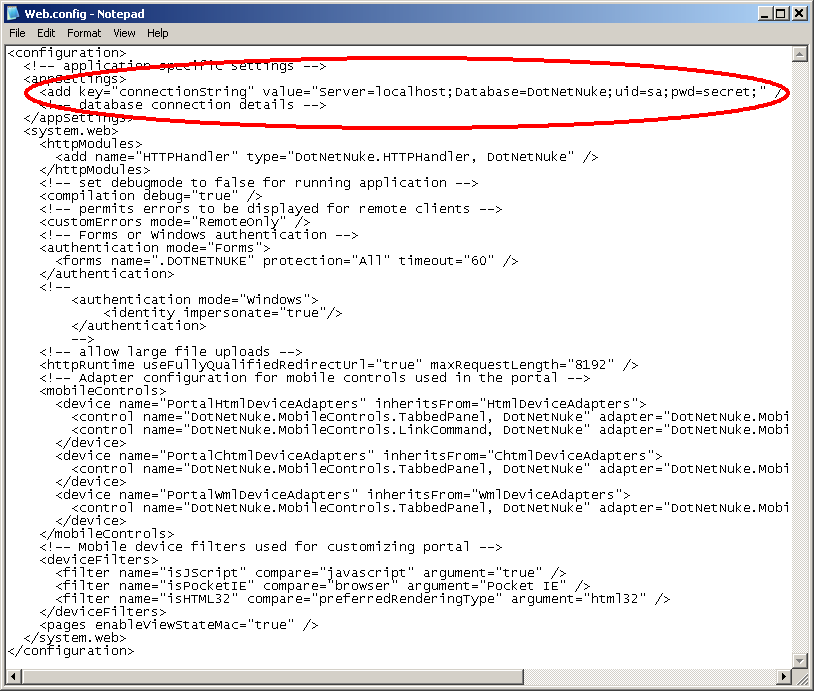
With the database done, you need to make sure you tell DNN about the DotNetNuke database. DNN stores the database connection information in the Web.Config file contained in the portal's root directory, C:\DotNetNuke. Open the Web.Config file with a plain text editor like Notepad and enter the appropriate settings for your server name, user id (uid), and password (pwd). You won't have to specify the name of the database for this portal since it defaulted to DotNetNuke. Since I'm developing this portal on my laptop, I chose the localhost server (the default setting), sa as the user id, and secret as the sa password (Figure 7). Please note that I'm using the sa userid here for demonstration purposes only. You should use another account in a production environment.
Step Five: Open the Portal for the First Time
Now seems like a good time for a quick review. You've downloaded the DNN portal code and set it up in C:\DotNetNuke. You've created an IIS virtual directory pointing at the C:\DotNetNuke directory, you've created a DotNetNuke database, and you've modified the connection settings in the Web.Config file to work with your SQL Server. At this point you're ready to open your portal for the first time, which will run the SQL Server script to create the necessary tables and stored procedures.
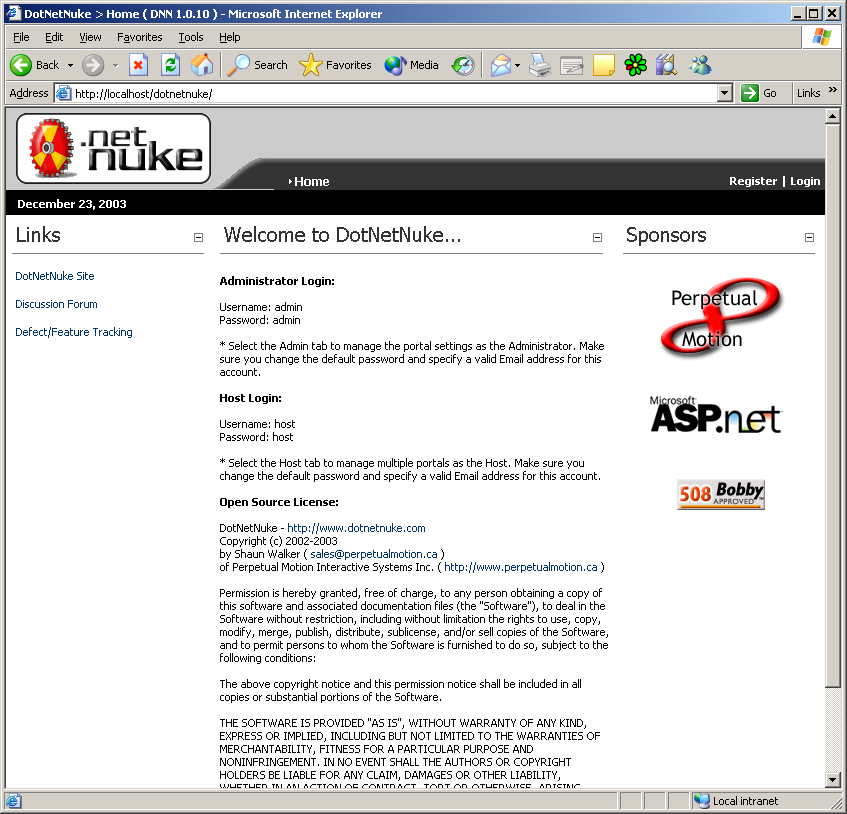
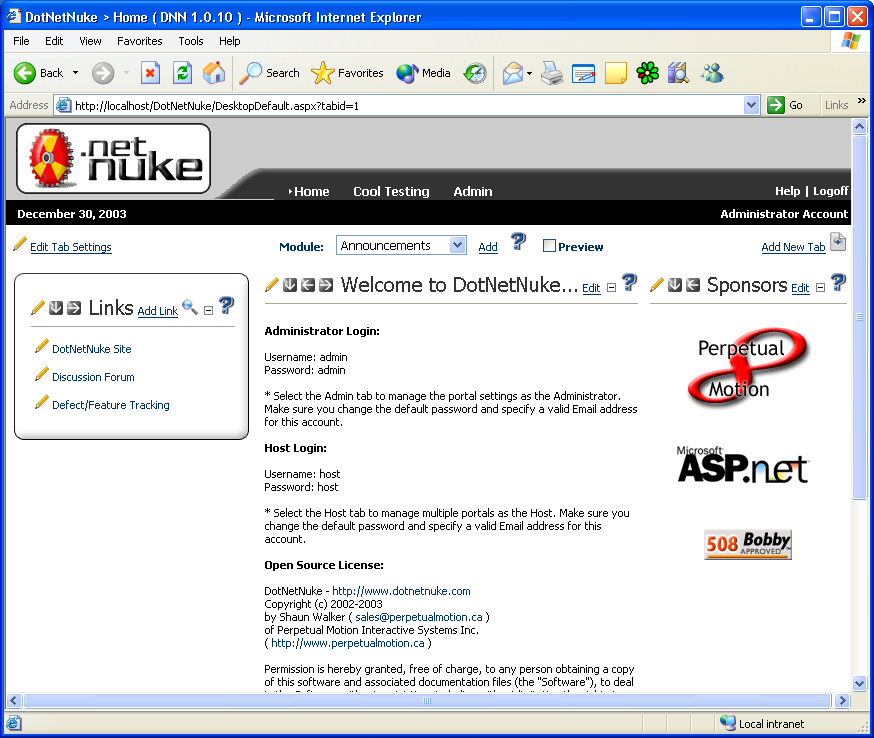
Launch your new portal by pointing Internet Explorer at http://localhost/dotnetnuke. If everything works correctly, DNN will create the required tables and stored procedures in your database (more about this later), and you can see your new portal in the browser (Figure 8).
Understanding Portal Architecture
Look closely at your newly created portal and you'll notice that the text in the Welcome to DotNetNuke section provides the default logins for the admin and host users. The difference between these two logins is related to DNN's support for multiple portals. DNN restricts the admin login to administering the current portal whereas DNN allows the host login to modify host and individual portal settings. Go ahead and logon as the **admin **user name and **admin **as the password. Remember to change the password for the admin and host accounts before you take your site to the Internet unless you want strangers to have the ability to administer your portal!
Tabs
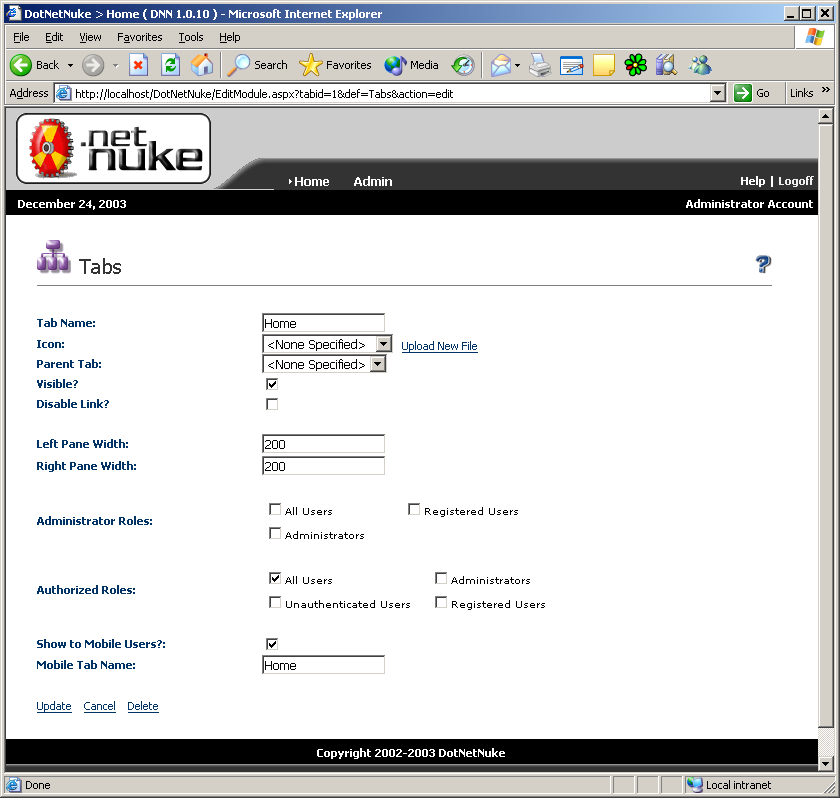
Let's take a look at the sections of a portal page. The top section consists of the site logo, advertising banner graphic (our site doesn't have one), and the portal menu (Figure 9). DNN refers to each item in the menu as a Tab. A tab is a Web page on your portal. Typically, you'll add many tabs to your portal. Across the top of the page, just below the menu bar, you will see the tab settings section (Figure 10). In this section you can edit existing tabs, add new tabs, and add new sections called modules (more about them shortly). Click Edit Tab Settings on the Home page to display the Tabs Settings page (Figure 11). A quick review of this page shows the name of the tab (Home), any icon associated with the tab, the parent tab (used for menu hierarchy), the visibility setting, the disabled setting, the width for the left and right panes (the sections currently containing the Links and Sponsors sections), which user groups have administrative rights to the tab, which user groups have access to see the tab, and a couple of mobile user settings that we're not going to be concerned with for now.


Since you haven't made any changes, click Cancel to return to the Home tab. To add a new tab you simply click Add New Tab and complete the Tabs Setting page. We'll add a new tab after you learn about modules.
Modules
Each tab consists of one or more modules. Modules contain content on a portal page. In DNN as you've seen so far, examples of modules include the Links, Welcome to DotNetNuke, and Sponsors sections.
In the center of the tab settings section you'll see a drop down containing all of the default DNN modules. The list includes announcements, contacts, discussions, events, FAQ's, feedback, links, news feeds, text/html, and even a weather module.
To add a module to the current page you select the type of module you want and click Add. Before you add a new module though, let's take a look at the existing modules on this page.
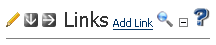
Each module has a number of icons across the top representing specific actions for the module (Figure 12). Click the pencil to display the settings for the selected module. The arrows to the right of the pencil will change the location of the module with the tab. Go ahead and click on the pencil in the Links module to display the Module Settings page (Figure 13).
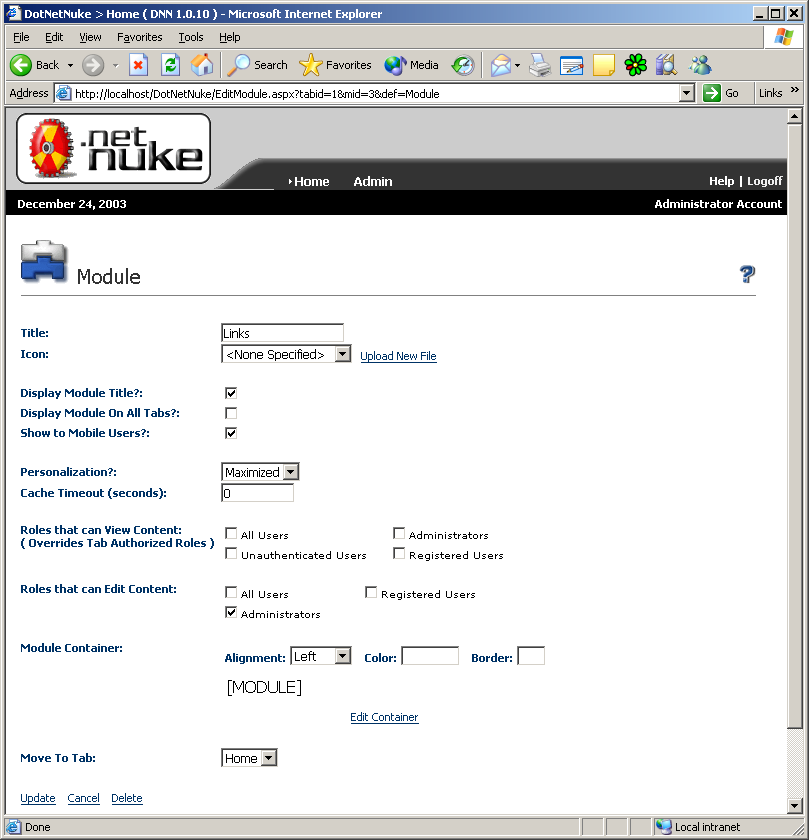
The options on the Module Settings page include the title of the module, the icon associated with it, the visibility of the module's title, whether or not the module should appear on all pages, how you want DNN to display the module (maximized, minimized, or none), user group security settings that determine which users can see and potentially edit the content in the module, the outline container used for the module, and the ability to move the module to another page.
Module containers provide a way to customize the appearance of the module on the page.
You'll find over 50 free DNN 1.x module containers at ByDesign Web sites (www.bydesignwebsights.com/dnncontainers). If you're following along, please go to that site now. Once the page is done loading, select a container and click View Details to see what the container looks like. Go ahead and download the 3-D Round container (3dround.zip) and we'll take a look at its contents.
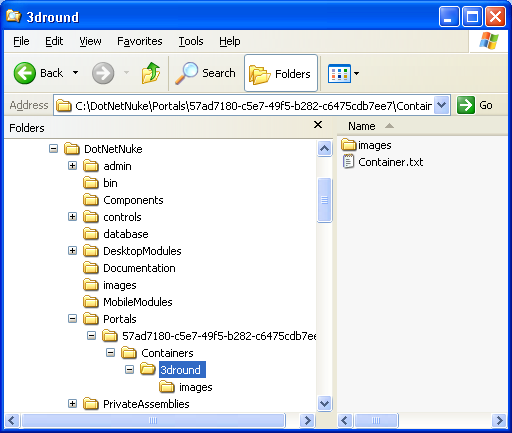
3dround.zip includes a container.txt file plus all of the .GIF files that make up the container. The container.txt file houses the HTML that DNN will use to display the container. Extract the zip file to the C:\DotNetNuke\Portals{GUID HERE}\Containers directory (you'll need to create the Containers directory). You should end up with a 3dround directory containing contents.txt and an images directory under that containing the graphic for the container (Figure 14).
Open the container.txt file with a text editor (Notepad will work), select all its contents, and copy them to the clipboard. Next, select and edit the module you want to work with. Click the Edit Container link and replace the existing HTML for the container with the contents of the container.txt file.
Set Default means that all containers built from now on will use this container. Set Global means that all module containers in the portal will be updated to this container.
Click Update to save your changes. If you encounter an error (“A potentially dangerous Request.Form value was detected from the client”), update your web.config file to reflect this change:
<pages enableViewStateMac="true"
validateRequest="false" />
If all went well, your Links section should have an attractive border around it now (Figure 15).
You might wonder where DNN stores the container HTML, as well as the other information about each module. If you take a look at the list of tables in the DotNetNuke database you will see a table named Modules. Each module in your portal is represented by a record in the Modules table. DNN stores the HTML for each module's container information in a field named Container. Another issue you might encounter if you work with numerous module containers is that some of the containers have more HTML text in them than the Container field table supports. The Container field defaults to nvarchar(1000) but you can increase this default to accommodate the larger container strings. If you do increase the size of the container field, make sure you update the @Container parameter in the UpdateModule stored procedure to reflect your change.
Before you start wondering how many module containers you can play with, let's get back to where we were. Click Cancel since you didn't make any changes to the module settings. Notice the arrows directly to the left of the word Links. You'll use these arrows to move the module around within the page. Experiment a little by clicking on any of the module arrows and notice where things move to.
Adding Tabs and Modules
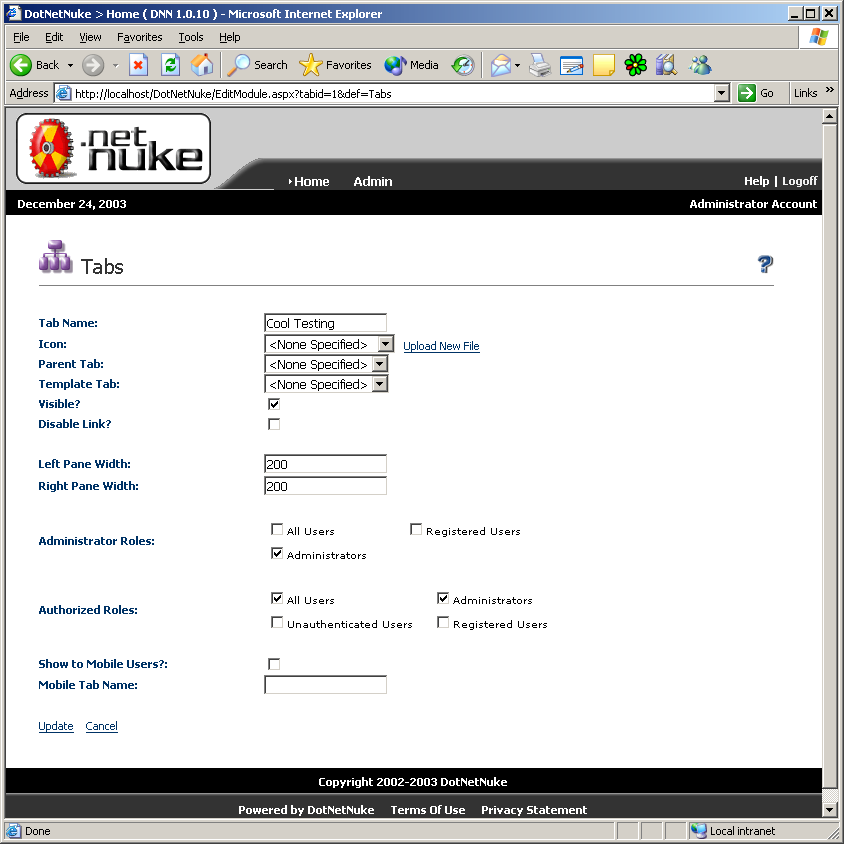
Now you're ready to add a new tab and add content modules to it. Select Add New Tab and enter Cool Testing as the tab name. Don't worry about an icon for now, so leave the icon setting at None Specified. We want this tab to occupy a menu next to the Home menu option so we'll select None Specified as the Parent Tab. The Template Tab option allows you to specify which tab you want the new one to look like when it's created. This is nice if you've got a specific look you want all of your tabs to have. For now, leave it as None Specified. Take a look at the remaining settings. We'll leave them as they are for now. That's all there is to creating a new tab (Figure 16). Click Update to save the tab and return to the Home page. You should see a Cool Testing option in the menu.
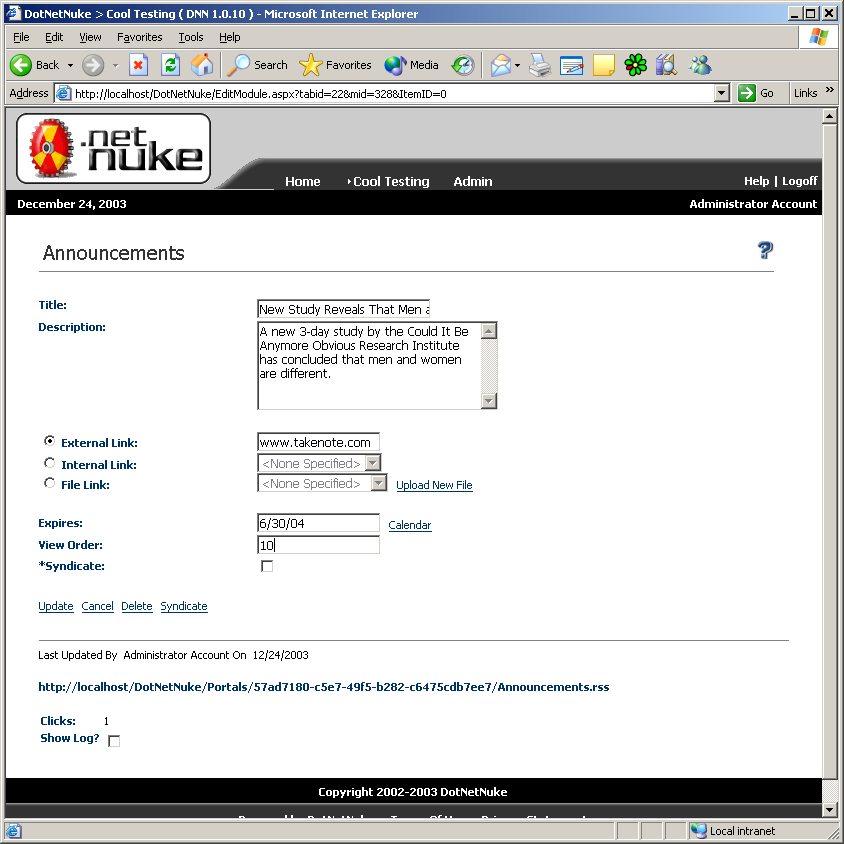
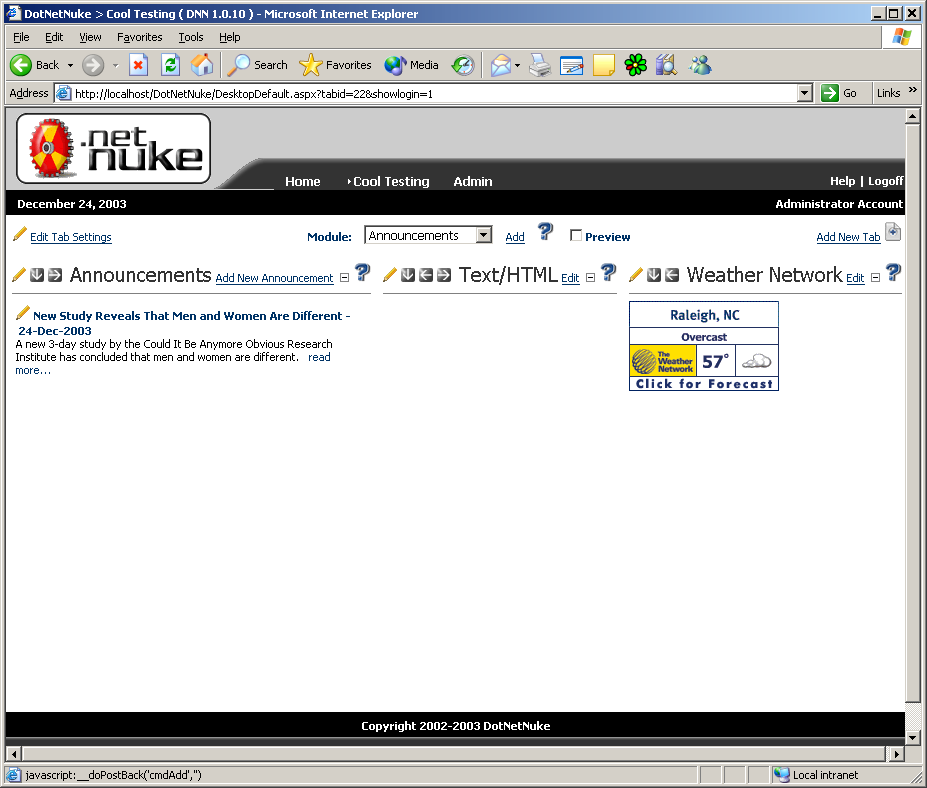
Click the Cool Testing menu option to display the empty Cool Testing tab. Let's add an Announcement module to the tab. Make sure you've selected Announcement in the dropdown list and click Add. DNN adds the new Announcements module, which covers the entire width of the page. Click the left arrow next to Announcements to move this module to the left column. Click Add New Announcement to bring up the Announcements settings page. Enter New Study Reveals That Men and Women Are Different as the title and enter some text for the description. Next, specify that this links to an external link and enter www.takenote.com as the external link. Enter an expiration date for this announcement and a numeric value for the View Order field. DNN uses the View Order field to determine sort order. A good tip is to use multiples of ten to leave room for new announcements that you might need to slip into the current set of announcements. That's enough for this announcement (Figure 17). Click Update to save it and return to the Cool Testing Tab.
Let's add another module to this page. Select Weather Network from the list of modules and click Add. Click on the right arrow to move this module to the right hand column on the page. Click Edit next to Weather Network to display the Weather Network settings page. Fill out the options for your area and click Update. You should now have weather information for your area displayed on the page.
How would you like to see what the page looks like without all the administrative icons being displayed and taking up room? Click the Preview checkbox to see how your page is shaping up for normal display.
You'll add one last module to your page to complete it. Select Text/HTML from the module list and click Add. The Text/HTML module provides a way to add plain text or HTML text to a page. If DNN hasn't positioned this new module in the center of the page, go ahead and do that now. Click Edit to open the Text/HTML editor. Type This is pretty cool stuff in the Desktop Content box and click Update.
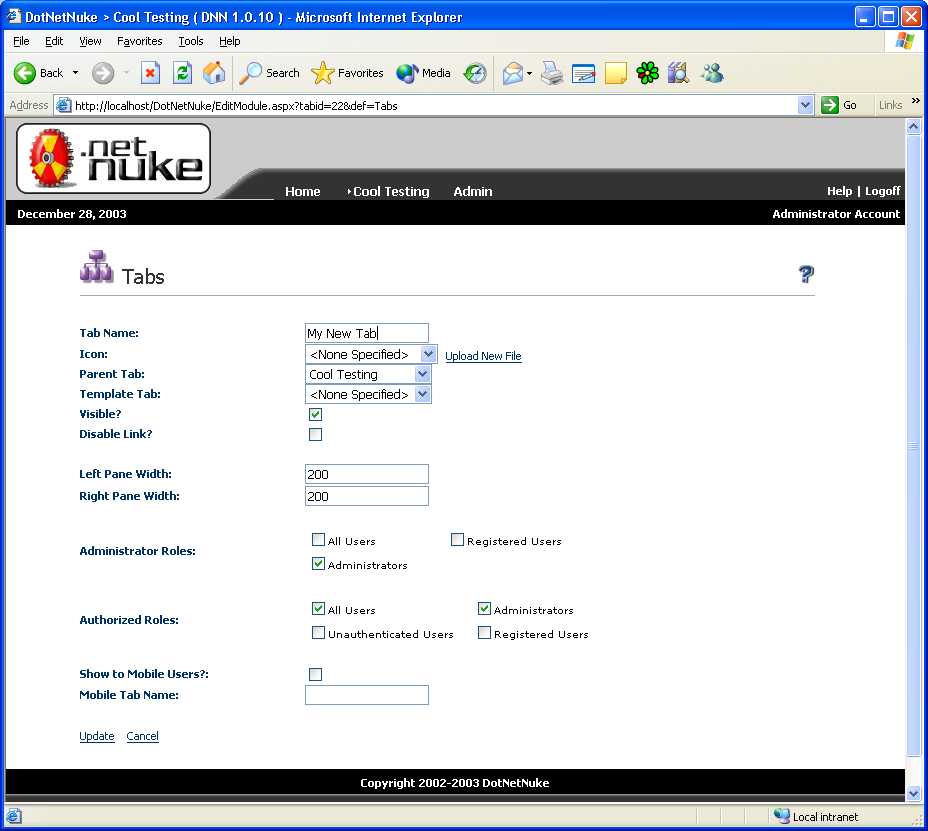
This completes your first tab (Figure 18). Now you'll learn how to build a sub-tab of this one. Click Add New Tab in the upper right hand corner to open the Tabs editor page. Name this new tab My New Tab (don't worry about a tab icon at this point), specify Cool Testing as the Parent Tab. You'll use the default settings for the rest of the options. Click Update to create the tab (Figure 19).
Click on the Cool Testing menu option and you should see My New Tab listed under it. Now that you have a couple of tabs to work with, let's take a look at some of the administration options available.
Administration Options
The Admin menu option contains all of the administration options for your portal.
Site Settings
You'll use the Site Settings tab to set portal-level settings. Options include the portal title, logo displayed in the page header, site description, site keywords, background image, page footer text, and the user registration verification method among others.
Tabs
You'll use the Tabs tab to view and update the hierarchical position of all the tabs within the portal. You can move tabs around the tab hierarchy simply by clicking an arrow indicating the direction to move the tab. You can move tabs up or down. If you move tabs left or right you are indenting (or un-indenting) them as sub-tabs. This Tabs page makes changes in the overall structure of your site very easy to implement.
Security Roles
You'll use the Security Roles tab to add and/or modify the security groupings for the portal. DNN uses the security roles throughout the portal to determine access rights to content.
Let's add a Security Role. Click the Add New Role option in the upper right hand corner of the Security Roles tab. Name the new role My Security Role, enter This is my new role as the description, and select the Auto Assignment check box. The Auto Assignment option specifies if all new registered users will automatically be a member of this security role. Click update to save your new role.
User Accounts
As you could guess, use the User Accounts tab to manually add, delete, or modify existing portal users. Most new users add themselves via the portal registration process. Click a letter to list users starting with that letter or All for a complete list. Click the pencil icon next to a user's name to display their information and settings (Figure 20). The Manage Security Roles option will display the User Roles page (Figure 21). To add a security role to a user, select the security roll from the list and click Update Role Membership.

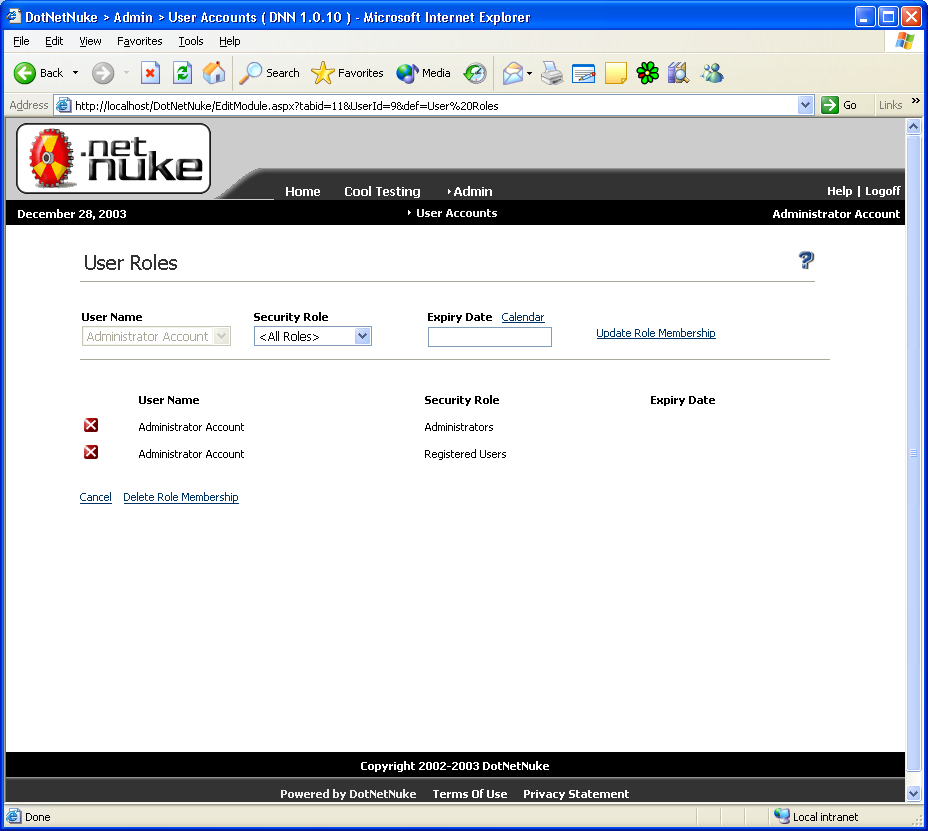
Go ahead and add access to the My Security Role role to the Administrator Account.
Now that you've assigned a security role to a user, let's take a look at how to assign or restrict access based on a security role. Select the Admin menu and choose the Tabs option. Select My New Tab and click the pencil to edit the tab. You should now see your new security role, My Security Role, in the Administrator Roles and Authorized Roles sections.
The Administrator Roles section specifies if users assigned to the role selected are granted update rights to the tab. The Authorized Roles section specifies if users assigned to the role selected are granted rights to see and interact with the tab.
Implementing security is as easy as that. Create the security roles, assign users to a role, and then specify security role access on the tabs in your portal.
Vendors
You'll use the Vendors tab to maintain the Service Directory for the site. DNN uses the vendor information with the Banners module to add banners to your site.
Site Log
Use the Site Log page to view the site activity log automatically maintained by the portal. Here you can select from a variety of different log report formats and types. Options include Affiliate Referrals, Detailed Site Log, Page Popularity, User Frequency, and a number of others.
Bulk Email
The Bulk Email option provides a quick and easy mechanism for communicating with the registered users of the portal. You can determine who the email goes to either by specifying all the members of a specific security role by selecting the security role from a list, or you can manually enter email addresses.
File Manager
You'll use the File Manager tab to upload files to the portal.
Host Options
The menu option called Host contains all of the host options for your portal.
Host Settings
You use the Host Settings tab to set host-level settings. These differ from the Admin settings because DNN applies these options across all the portals on your site. Host settings include the host title, host URL, payment processor, hosting fee, host space allotment, and SMTP mail server to name a few.
Portals
To list all of the portals being hosted you'll use the Portals tab. You'll also use the Portals tab to maintain existing portals or optionally add a new one.
DNN supports two types of portals: parent portals and child portals. Parent portals have a distinct and unique URL such as www.takenote.com. Child portals are sub-portals under a primary hosting provider account. www.takenote.com/MySubPortal is an example of how you would access child portals on the Web server. You can switch child portals to parent portals simply by changing the Portal Alias value.
Module Definitions
The Portals tab lists all of the default and custom modules currently available for use when you're adding new content. You'll also use the Portals tab to upload new modules for use on your sites.
File Manager
Use the File Manager tab to upload files to the host site.
Vendors
Like the same option of the Admin menu, you use the Vendors tab to maintain the Service Directory for the site. DNN uses the vendor information with the Banners module to add banners host-wide to all portals being hosted.
SQL
Use the SQL tab to execute SQL commands against the SQL Server your site is connecting to.
Extending DNN with Custom Modules
Up to this point you have created your own tabs and added pre-defined modules. What if you need to capture and store specific information like employee timecard information or reporting an accident or mishap on a factory floor? In this scenario, the pre-defined modules will not be of any help?you'll need to build your own custom module.
Time and space limit me from going into the planning, designing, and coding of a custom module in DNN 1.x. This is also one of the areas that will change the most in DNN 2.0. Fear not, though, because coding a custom module is a subject for one of my next articles. In the mean time, I've compiled a list of Web sites that will get you started (Table 2).
One of the best resources to help you understand how to build your own custom modules is to check out how the pre-built modules work. You will find them in the DesktopModules folder when you load the DotNetNuke project in VS.NET.
Big Changes Coming in V2.0
As I mentioned at the begining of this article, Shaun Walker and the DNN Core Team are currently hard at work on DNN 2.0. If all goes according to plan, you should be able to download DNN 2.0 (www.dotnetnuke.com) by the time you read this article. Look for a follow-up article from me very soon exploring all the new features of DNN 2.0.
You're probably wondering what's new in DNN 2.0. While the list below only represents a subset of the new features, it will touch on the highlights.
Skins
Depending on who you're talking to, skinning tends to mean different things to different people. At one end, skinning provides a static layout but allows you to change the colors and styles with the ability to override images as well. At the more extreme end, skinning allows you to customize every aspect of the user interface without changing the actual content.
DNN 2.0 will provide a free-form skinning solution that will provide full control over the user interface. Additionally, DNN 2.0 will support skinning at the host, portal, and tab levels. You will also be able to skin your module containers. You can read more about skinning in a 40-page whitepaper on the DotNetNuke site.
Data Access Layer
DNN 2.0 will introduce a new database access layer that will allow DNN to run with any data store; currently DNN supports only SQL Server. Microsoft Access and SQL Server data providers will ship with DNN 2.0, and a third party will provide a MySQL data provider.
Business Logic Layer
DNN 2.0 will introduce a new business logic layer that uses custom business objects. You can read more about the new Data Access Layer and Business Logic Layer in a 50-page whitepaper on the DotNetNuke site.
Modules
DNN 2.0 will let you use an unlimited number of user controls per module. Conversely, DNN 1.x only supports the DesktopSrc and EditSrc controls in each module. Module security has also been improved, providing each user control with its own security access specification.
DNN 2.0 will implement a cleaner, clutter-free, module title user interface. It reduces the number of icons by providing a single link that displays a popup menu containing all of the actions for the module.
Style Sheets
DNN 2.0 will add support for multiple external style sheet specifications.
Summary
That should give you plenty to get started with for now. Obviously I couldn't cover every feature of the portal, but I hope I covered enough to make you feel comfortable enough to jump in and start creating DNN portals of your own. Keep reading CoDe Magazine because I plan to offer a future article that will revolve around DNN.
I also want to take this opportunity to thank Shaun Walker and the DNN Core Team for their hard work and dedication to delivering a fine piece of software. I'm excited about the upcoming release of DNN 2.0!
| URL | Description |
|---|---|
| www.dotnetnuke.com | Official Web site for DotNetNuke |
| www.takenote.com | Web site for TakeNote Technologies (author's Web site) |
| www.dnnskins.com | Web site dedicated to skins for DNN 2.0 |
| cafednn.yodamon.com | Web site for Café DotNetNuke |
| www.dnnfaq.com | Web site for DotNetNuke FAQs |
| URL | Description |
|---|---|
| Creating DotNetNuke MultiPage Modules | www.wwwcoder.com/main/parentid/224/site/2050/68/default.aspx |
| Private Assembly Tutorial | www.niquest.com |
| Creating DNN Modules in C# | www.dotnetnuke.dk |
