


If you've been developing for iOS, you're no doubt familiar with Storyboard, Apple's visual tool for developing the user interfaces of iOS applications. And depending on how early you got started in iOS development, you might even be familiar with Interface Builder and XIBs. Last year, Apple announced SwiftUI at the WWDC 2019. With SwiftUI, Apple aims to update the iOS development experience to the modern world.
Each iteration of the tools makes it much easier and more efficient for developers to create their apps, but with each innovative tool that comes along, developers have to start learning all over again. In this article, I aim to introduce you to SwiftUI, and like all my articles, I hope to get you jumpstarted in the shortest amount of time. Let's get started!
What Is SwiftUI
SwiftUI is a declarative programming framework for developing user interfaces for iOS and macOS applications. To see how it compares to existing framework, let's see how user interfaces are built before SwiftUI was introduced.
Prior to SwiftUI, most developers used UIKit and Storyboard (which is still supported by Apple in the current version of Xcode (version 11.3.1)). Using UIKit and Storyboard, developers drag and drop View controls onto View Controllers and connect them to outlets and actions on the View Controller classes. This model of building UIs is known as Model View Controller (MVC) and creates a clean separation between the UI and business logic.
The following shows a simple implementation in Storyboard. Here, a Button and a TextField view have been added to the View Controller in Storyboard and an outlet and an action have been created to connect to them:
import UIKit
class ViewController: UIViewController {

  @IBOutlet weak var txtText: UITextField!
  @IBAction func btnClicked(_ sender: Any) {
  }
To lay out the views, you use auto-layout to position both views in the middle of the screen (both horizontally and vertically). To customize the look-and-feel of the TextField, you can code it in the viewDidLoad() method:
override func viewDidLoad() {
    super.viewDidLoad()

    txtText.font = UIFont(name: "AppleSDGothicNeo-Bold", size: 20)
    txtText.layer.cornerRadius = 8.0;
    txtText.layer.masksToBounds = true
    txtText.layer.borderColor = UIColor.lightGray.cgColor
    txtText.layer.borderWidth = 2.0
    txtText.textAlignment = NSTextAlignment.center
    txtText.addConstraint(txtText.heightAnchor.constraint(equalToConstant: 50))
}
When the button is tapped, the IBAction named bnClicked (a delegate method) is fired. Using the IBOutlet named txtText, you reference the UITextField object and set its text property to a string:
@IBAction func btnClicked(_ sender: Any) {
    txtText.text = "Hello, UIKit!"
}
View as a Function of State
SwiftUI, on the other hand, is a state-driven, declarative framework. In SwiftUI, all the above could be implemented with the following statements:
import SwiftUI
struct ContentView: View {
  @State private var text = ""
  var body: some View {
    VStack {
      Button(action: { self.text = "Hello, SwiftUI!" }) {
        Text("Button").padding(EdgeInsets(top: 10, leading: 10, bottom: 10, trailing: 10))
      }
      TextField("", text: $text)
        .multilineTextAlignment(TextAlignment.center)
        .padding(15)
        .frame(maxWidth: .infinity,  alignment: .center)
        .foregroundColor(Color.black)
        .font(.custom("AppleSDGothicNeo-Bold", size: 20.0))
        .overlay(RoundedRectangle(cornerRadius: 8).stroke(Color.gray,lineWidth: 2))
        .padding(.leading ,10)
        .padding(.trailing ,10)
    }
  }
}
Here, the UI is created declaratively using code, and there's no need for Storyboard in this example. Layouts are now also specified declaratively using code (the VStack in this example stacks all the views vertically). Delegates are now replaced with closures.
More importantly, views are now a function of state: The text displayed by the TextField view is now bound to the state variable text. When the button is tapped, you change the value of the text state variable, which automatically updates the text displayed in the TextField view.
To alter the behaviour of each view, you use modifiers, which are basically functions that you apply to a view or another view modifier, thereby producing a different version of the original view. Examples of modifiers in this example are padding(), overlay(), font(), and so on.
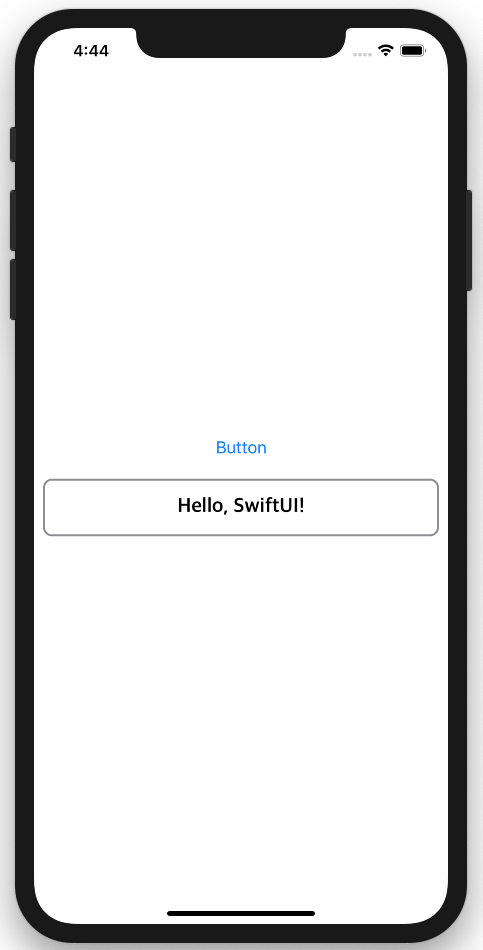
Figure 1 shows the how the UI looks in SwiftUI when the button is clicked.
Getting the Tools
To start developing using SwiftUI, you need the following:
- Xcode version 11 or later
- A deployment target (simulator or real device) of iOS 13 or later
- macOS Mojave (10.14) or later (if you are running macOS Mojave, you can still use SwiftUI but you won't be able to use live preview and design canvas features; full features are only available in macOS Catalina (10.15) and later)
Hello, SwiftUI
Once you've installed Xcode, I know you're very eager to try out SwiftUI. So let's have a dive in into SwiftUI and see how it works first-hand.
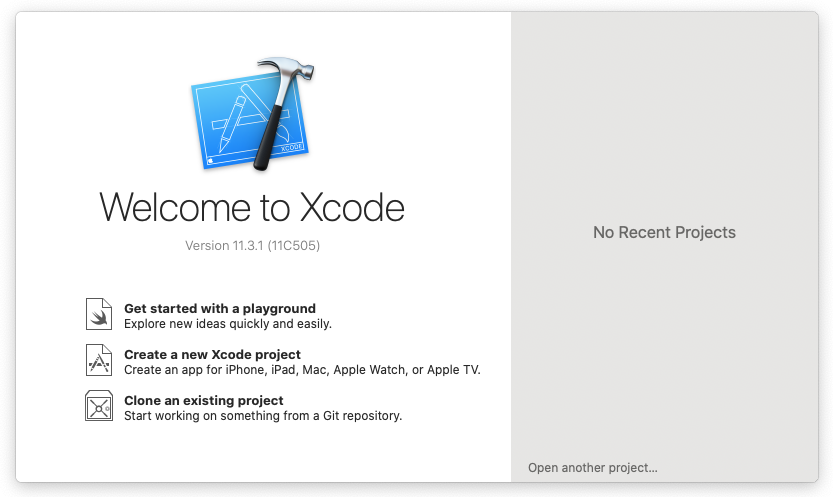
Launch Xcode. Click on the “Create a new Xcode project” to create a new project (see Figure 2).
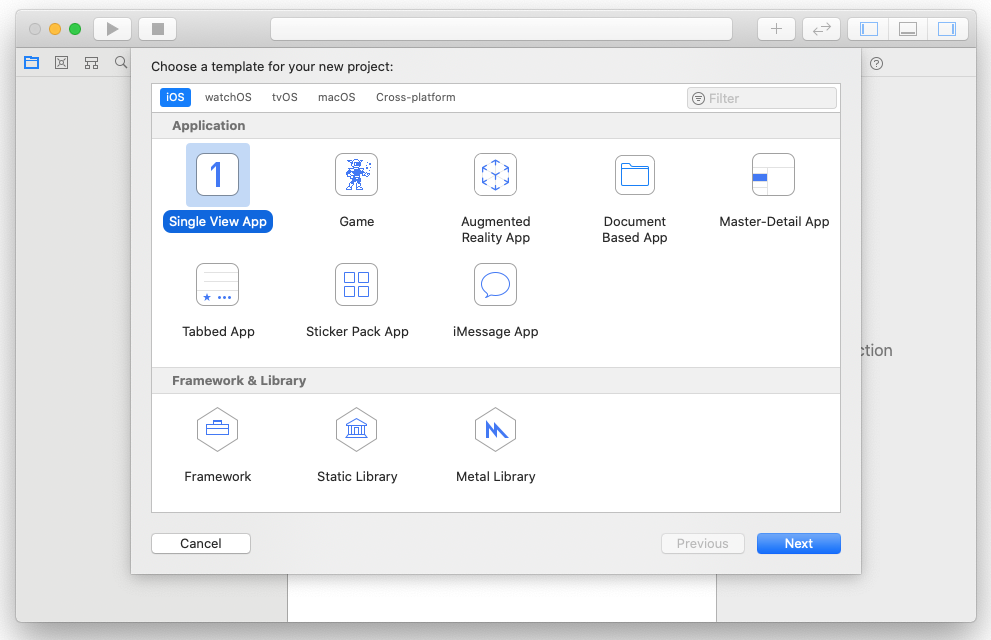
Select Single View App and click Next (see Figure 3).
Name the project HelloSwiftUI and select the various options, as shown in Figure 4. For the User Interface option, ensure that SwiftUI is selected. Click Next and save the project to a location on your Mac.

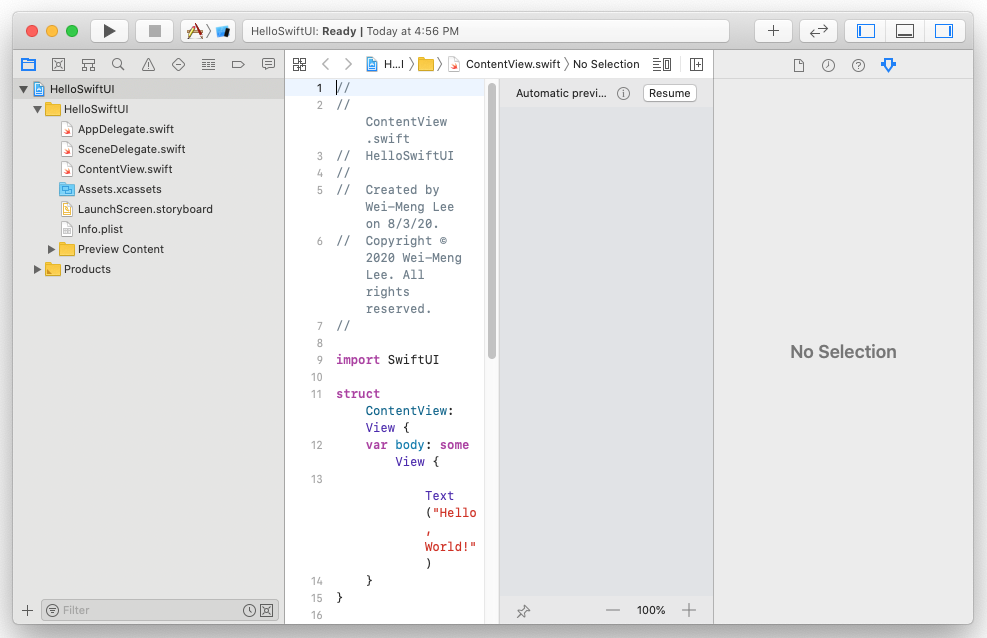
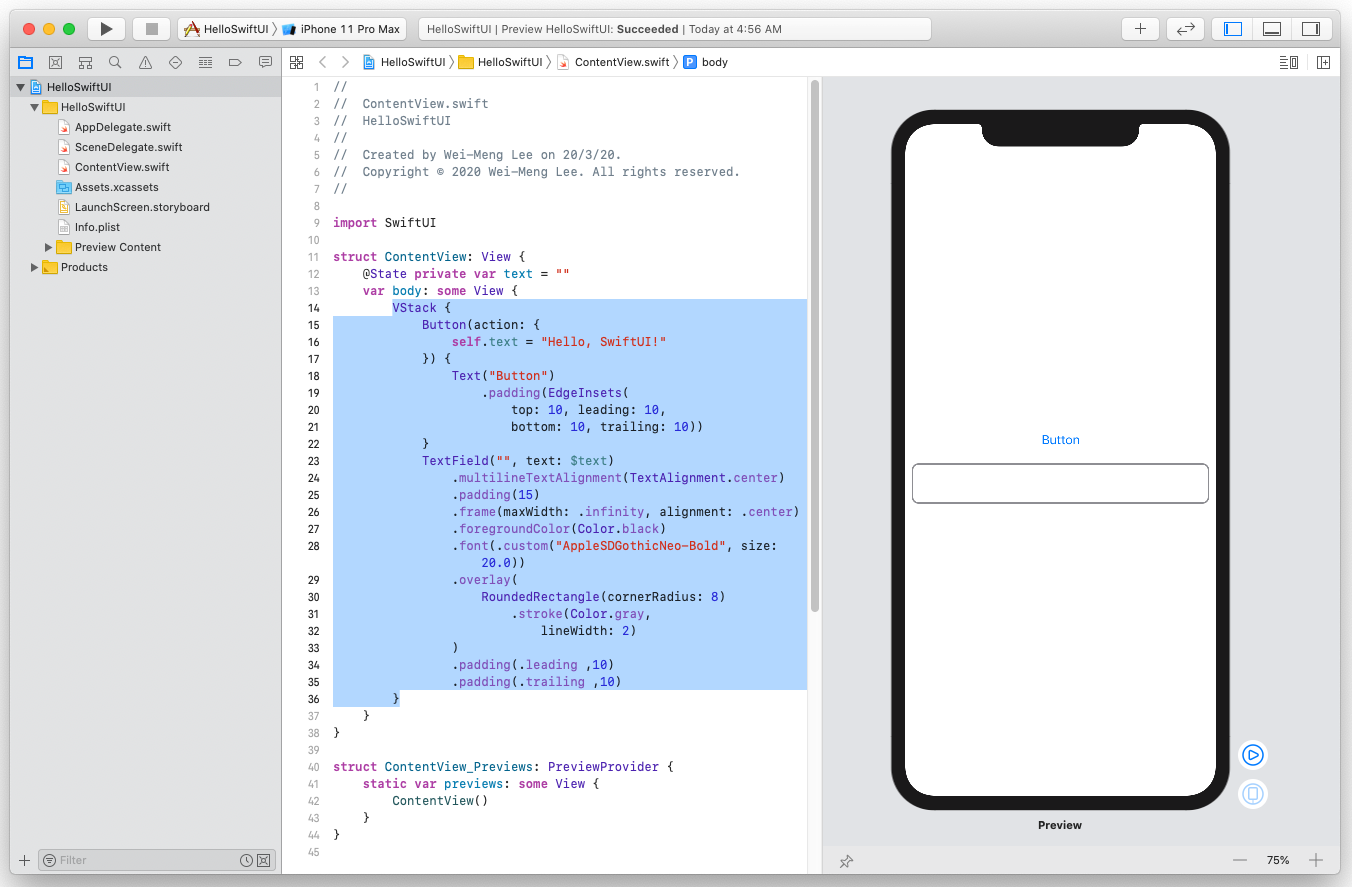
You should see the project created for you (see Figure 5). The ContentView.swift file contains the user interface for your application's main screen.
Automatic Previewing of Your UI Using the Canvas
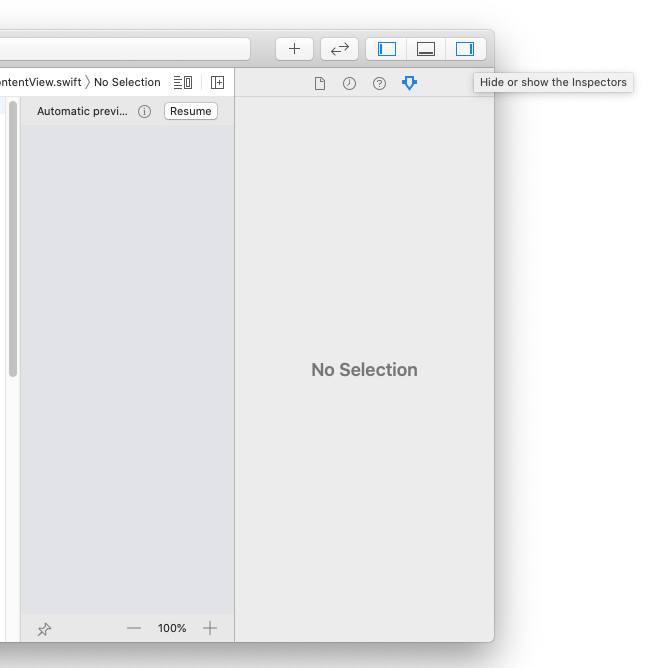
By default, you should see the Inspector window on the right side of the Xcode window. For building your UI using SwiftUI, you usually don't need the Inspector window, so you can dismiss it to gain more screen estate for previewing your UI using the Canvas. To dismiss the Inspector window, click on the button on the top right corner of Xcode (see Figure 6).
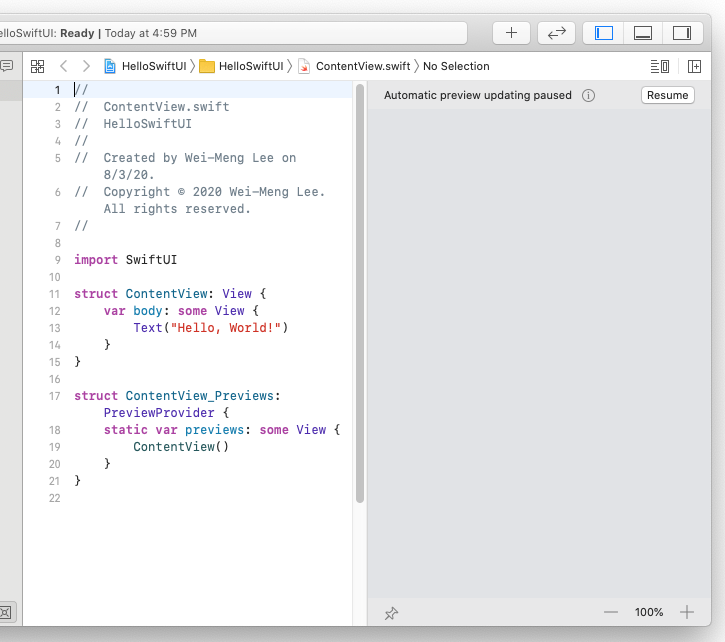
With the Inspector window dismissed, you should now see the Canvas on the right-side of Xcode (Figure 7). The Canvas lets you preview the UI of your application without needing to run the application on the iPhone Simulator or real device.
In Xcode, if you don't see the Canvas, you can bring it up again through the Editor > Canvas menu. To preview your UI, click the Resume button on the Canvas. You should now be able to see the preview.
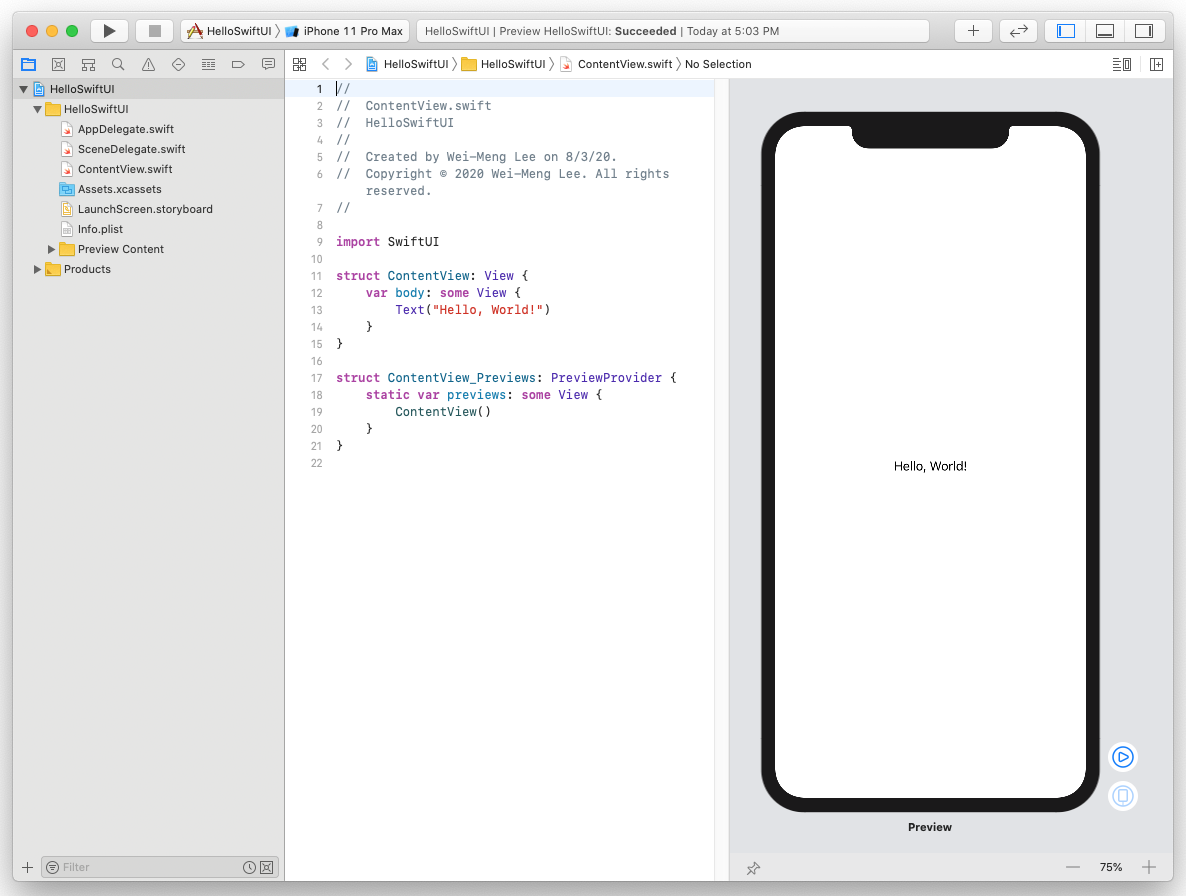
You can click on the Resume button to start the preview (see Figure 8).
If you don't see the Resume button when trying to preview your SwiftUI UI, make sure you are running macOS Catalina (10.15) or later.
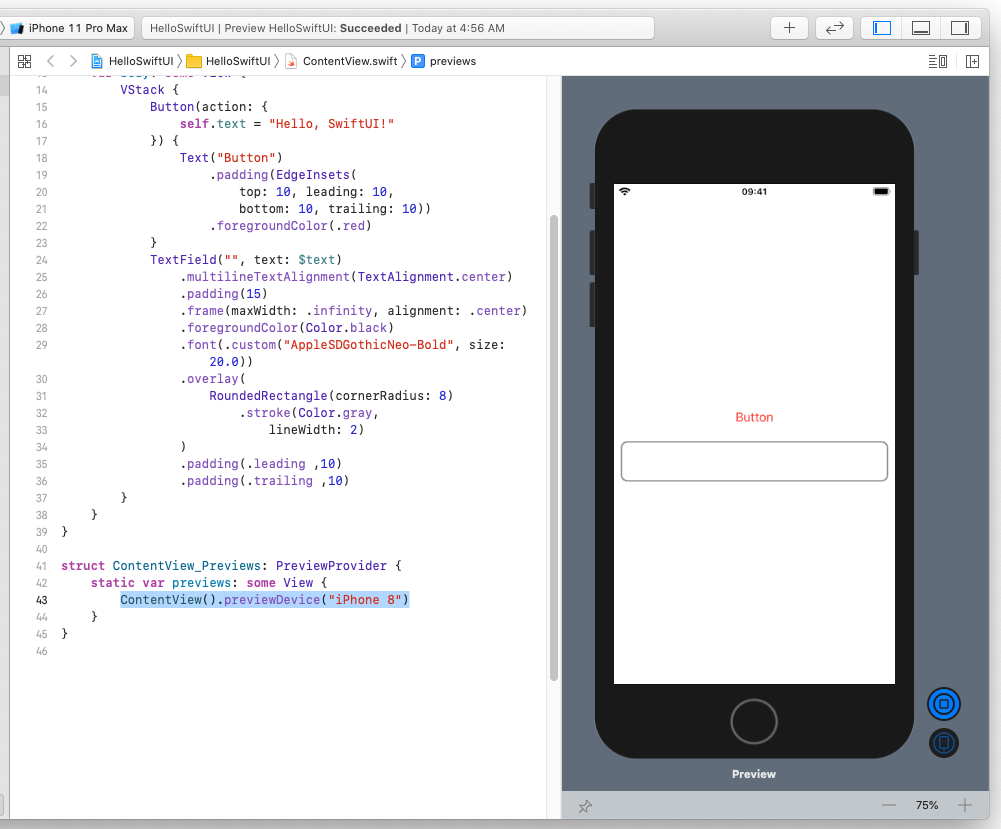
Let's now modify the ContentView.swift file with the code that you've seen earlier (see Figure 9).
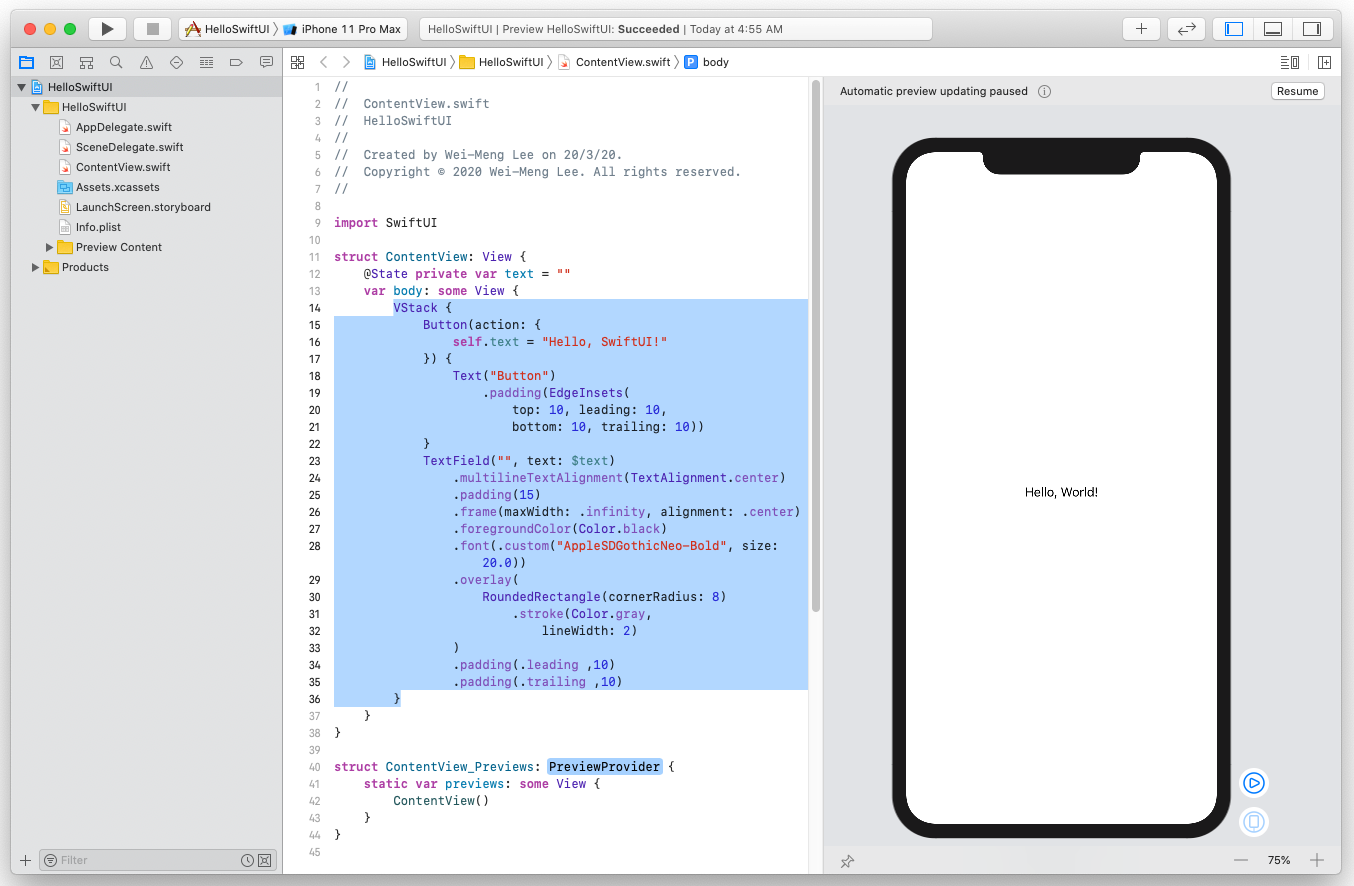
You may notice that the automatic preview has paused. This sometimes happens when the file you're previewing has some changes that caused the containing module to be rebuilt. When that happens, click the Restore button and you should now see the preview again (see Figure 10).
If you now change the color of the Text view (within the Button view) to red, you should see the changes appear automatically reflected in the preview:
Button(action: { self.text = "Hello, SwiftUI!" }) {
    Text("Button").padding(EdgeInsets(top: 10, leading: 10, bottom: 10, trailing: 10)).foregroundColor(.red)
}
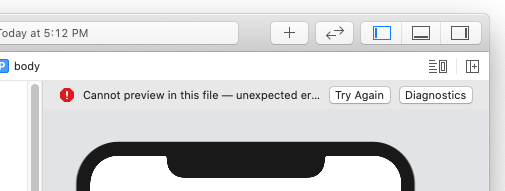
Note that the automatic update feature of Preview doesn't always work. There are times where you have to click Try Again button to rebuild the preview (see Figure 11).
Live Preview
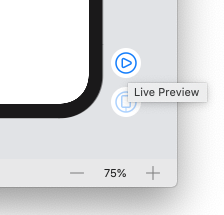
If you recall, the code changes the text on the TextField when the button is clicked (or tapped on a real device). However, if you try clicking on the button on the preview canvas, you can observe that there's no reaction. This is because the preview canvas only allows previewing of your UI and doesn't run your application. To run the application, you need to click on the Live Preview button (see Figure 12).
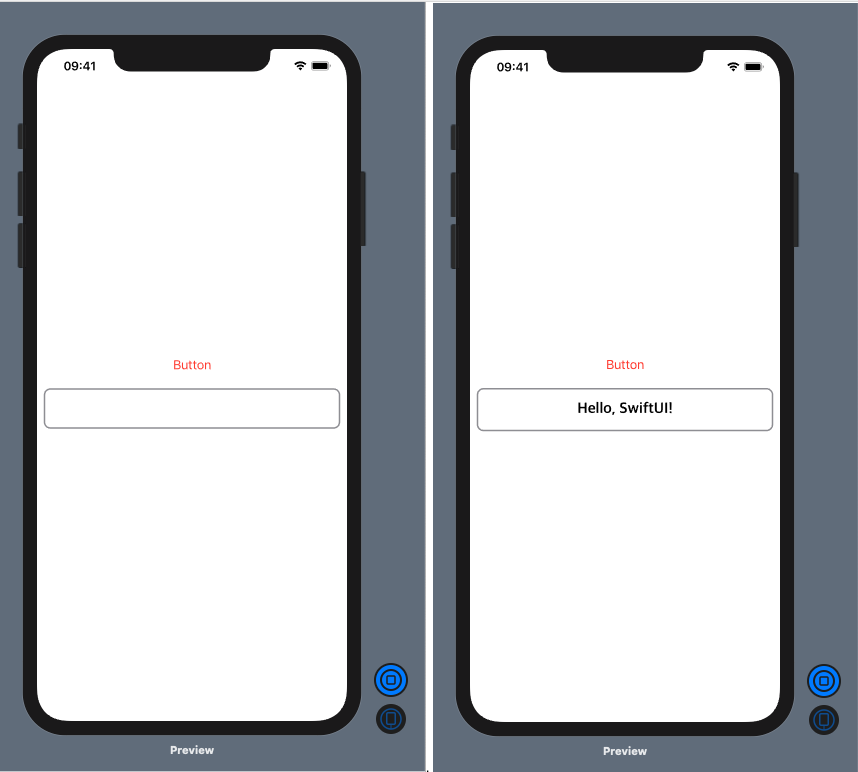
Once the Live Preview mode is turned on, the background of the simulator turns dark (see left of Figure 13). You can now click on the button and the text on the TextField will be updated (see right of Figure 13).
Generating Different Previews
Notice this block of code at the bottom of ContentView.swift?
struct ContentView_Previews: PreviewProvider {
    static var previews: some View {
        ContentView()
    }
}
The ContentView_Previews struct conforms to the PreviewProvider protocol. This protocol produces view previews in Xcode so that you can preview your user interface created in SwiftUI without needing to explicitly run the application on the iOS Simulator or real devices. Essentially, it controls what you see on the Preview canvas. As an example, if you want to preview how your UI will look on an older iPhone 8 device, you can modify the ContentView_Previews struct as follows (see also Figure 14):
ContentView().previewDevice("iPhone 8")
Creating a News Reader Application
The best way to learn a new framework or tool is to actually create an application using it. In this section, you will build a news reader application to download the news headlines, display them in a List view, and allow the user to tap on a particular news item to read more about the news.
Examining the Structure of the News Headline Feed
For this example, you'll use the free service provided by News API (https://newsapi.org). This is a JSON-based API that provides you with breaking news headlines and allows you to search for articles from over 30,000 news sources and blogs. To register for your own API key, go to https://newsapi.org/register.
For your project, you'll retrieve all the top business headlines in the US. The URL looks like this: https://newsapi.org/v2/top-headlines?country=us&apiKey=<API_Key>
The news headline API returns a JSON string containing the details of the news headlines. You can paste the URL onto a Web browser and obtain the content. Once the JSON content is displayed on your browser, copy and paste it into a JSON validator website, such as http://jsonlint.com, and you'll have a good idea of the structure of the JSON content. Figure 15 shows the structure of a sample of the JSON content:
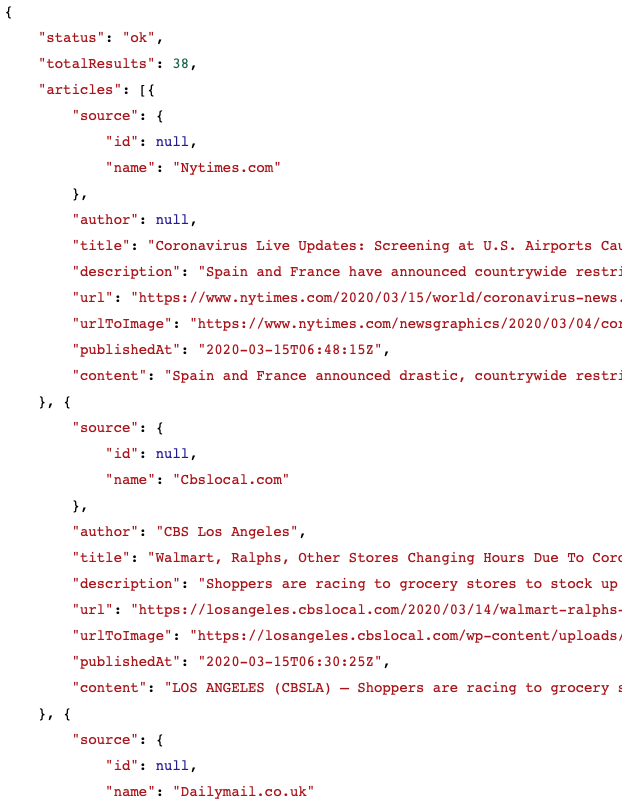
Observe that the value of the articles key is an array of items each containing the details of each article. In each article, you want to retrieve the following details:
- title: the title of the news item
- url: the link containing the details of the news item
- description: a synopsis of the news item
- urlToImage: the link containing the image for the article
You're now ready to start coding. Using Xcode, create a Single View App project and name it NewsReader.
To extract the items from JSON into structures in Swift, create the following structs in ContentView.swift:
import SwiftUI
struct Result: Codable {
    var articles: [Article]
}
struct Article: Codable {
    var url: String
    var title: String
    var description: String?
    var urlToImage: String?
}
struct ContentView: View {
    var body: some View {
        Text("Hello, World!")
    }
}
By conforming to the Codable protocol, the Result and Article structs are now able to map Swift Objects to JSON data, and vice versa.
Fetching the JSON String
Before you see how to fetch the news headlines from the Web, let's define a state variable named articles. This state variable stores all the decoded JSON content and you'll also use it to bind to your List view for display:
struct ContentView: View {
private let url = "https://newsapi.org/v2/top-headlines?country=us&apiKey=<API_KEY>"
@State private var articles = [Article]()
var body: some View {
Text("Hello, World!")
}
}
To fetch the news headlines, you shall define the fetchData() function as shown in Listing 1.
Listing 1: Defining the fetchData() function
struct ContentView: View {
private let url = "https://newsapi.org/v2/top-headlines?country=us&apiKey=<API_KEY>"
@State private var articles = [Article]()
func fetchData() {
guard let url = URL(string: url) else {
print("URL is not valid")
return
}
let request = URLRequest(url: url)
URLSession.shared.dataTask(with: request) {
data, response, error in
if let data = data { // data is Optional, so you need to unwrap it
if let decodedResult = try?
JSONDecoder().decode(Result.self, from: data) {
// decoding is successful
DispatchQueue.main.async {
// assign the decoded articles to the state variable
self.articles = decodedResult.articles
}
return
}
}
print("Error: \(error?.localizedDescription ?? "Unknown error")")
}.resume()
}
var body: some View {
Text("Hello, World!")
}
}
You use the dataTask() method of the URLSession.shared object instance to fetch the news headlines. Once the JSON content is downloaded, you use the JSONDecoder() object's decode() function to convert the JSON content into the Result struct that you've defined earlier. Once the conversion is done, you assign the result to the articles state variable.
Defining the View
You can now define the view. Use a List view to display the list of articles:
var body: some View {
    List(articles, id: \.url) { item in
        VStack(alignment: .leading) {
            Text(item.title).font(.headline)
            Text(item.description ?? "").font(.footnote)
        }
    }.onAppear(perform: fetchData)
}
The List view is bound to the articles state variable, and for each row in the List view you use a VStack view to display the title and description of each article. The onAppear() modifier to the List view specifies that the fetchData() function be called when the List view first appears.
For your reference, the content of the ContentView.swift file is shown in Listing 2.
Listing 2: The code in ContentView.swift
import SwiftUI
struct Result: Codable {
var articles: [Article]
}
struct Article: Codable {
var url: String
var title: String
var description: String?
var urlToImage: String?
}
struct ContentView: View {
private let url = "https://newsapi.org/v2/top-headlines?country=us&apiKey=<API_KEY&>"
@State private var articles = [Article]()
func fetchData() {
guard let url = URL(string: url) else {
print("URL is not valid")
return
}
let request = URLRequest(url: url)
URLSession.shared.dataTask(with: request) {
data, response, error in
if let data = data { // data is Optional, so you need to unwrap it
if let decodedResult = try?
JSONDecoder().decode(Result.self, from: data) {
// decoding is successful
DispatchQueue.main.async {
// assign the decoded articles to the state variable
self.articles = decodedResult.articles
}
return
}
}
print("Error: \(error?.localizedDescription ?? "Unknown error")")
}.resume()
}
var body: some View {
List(articles, id: \.url) { item in
VStack(alignment: .leading) {
Text(item.title).font(.headline)
Text(item.description ?? "").font(.footnote)
}
}.onAppear(perform: fetchData)
}
}
struct ContentView_Previews: PreviewProvider {
static var previews: some View {
ContentView()
}
}
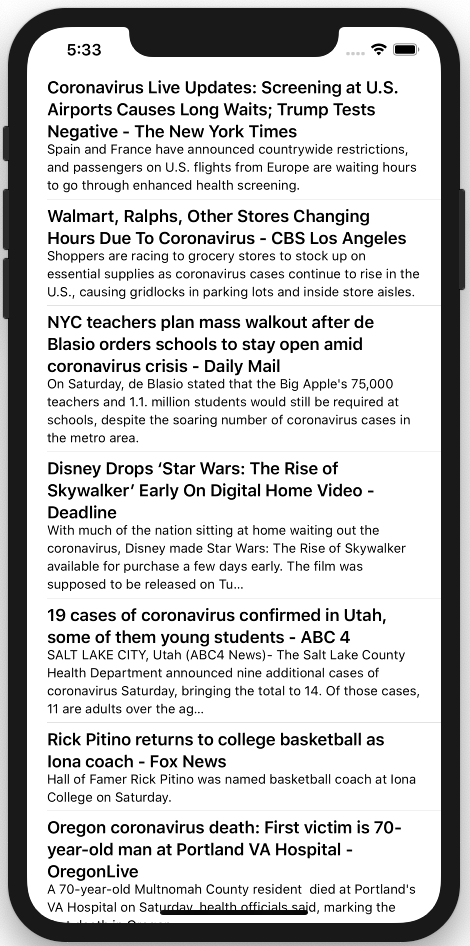
Figure 16 shows how the app looks when you run the Live Preview on Xcode.
Displaying Images Remotely
So far, the news headlines are displayed nicely using the List view. However, it would be much nicer if you were able to display an image for each news headlines. As the saying goes, a picture is worth a thousand words.
In SwiftUI, you can display images using the Image view. However, one key problem with the Image view is that it's only capable of displaying local images. That is, images that are bundled locally with the application. If you want to display an image that's located on the Web, you're out of luck.
One way to fix this is to create your own Image view to load images remotely. But there are already solutions developed by others, so you can just make use of one of them. For this purpose, you'll use the URLImage view located at https://github.com/dmytro-anokhin/url-image.
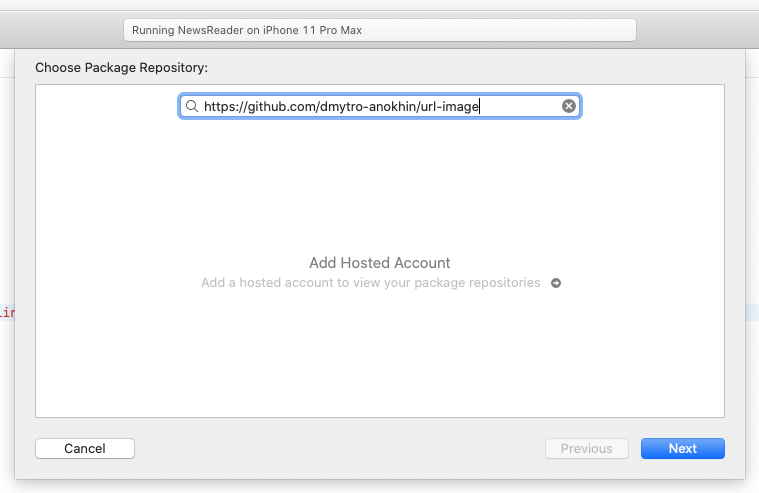
To make use of the URLImage view, you need to add its package to your project. You can do so by going to Xcode and selecting File > Swift Packages > Add Package Dependency... Enter this URL: https://github.com/dmytro-anokhin/url-image (see Figure 17).
Click Next in the current page as well as the next page. Finally, click Finish. The package will now be added to the project.
With the URLImage package added to the project, add the following statements in bold to the ContentView.swift file, as shown in Listing 3.
Listing 3: Adding the statements to load remote images using the URLImage view
import SwiftUI
import URLImage
struct Result: Codable {
var articles: [Article]
}
struct Article: Codable {
var url: String
var title: String
var description: String?
var urlToImage: String?
}
struct ContentView: View {
private let url = "https://newsapi.org/v2/top-headlines?country=us&apiKey=<API_KEY>"
@State private var articles = [Article]()
func fetchData() {
...
}
var body: some View {
List(articles, id: \.url) { item in
HStack(alignment: .top) {
URLImage((( URL(string:item.urlToImage ?? "https://picsum.photos/100") ?? nil
)!),
delay: 0.25,
processors:
[Resize(size: CGSize(width: 100.0, height: 100.0), scale: UIScreen.main.scale)],
content: {
$0.image
.resizable()
.aspectRatio(contentMode:.fit)
.clipped()
}
).frame(width: 100.0, height: 100.0)
}
VStack(alignment: .leading) {
Text(item.title).font(.headline)
Text(item.description ?? "").font(.footnote)
}
}.onAppear(perform: fetchData)
}
}
struct ContentView_Previews: PreviewProvider {
static var previews: some View {
ContentView()
}
}
The bold statements add the URLImage view (of size 100x100) to each row in the List view. You need to check whether each news headline contains an image (through the urlToImage property). If no image is available, make use of a sample image provided by this site: https://picsum.photos/. The URL: https://picsum.photos/100 indicates to the site to return an image of size 100x100 pixels.
Figure 18 shows the image displayed next to each news headline.
Wrapping the List View in a NavigationView
Now that you have managed to populate the List view with the various news headlines, you can wrap the List view in a NavigationView:
var body: some View {
    NavigationView {
        List(articles, id: \.url) {
            item in ...
        }.onAppear(perform: fetchData).navigationBarTitle("News Headlines")
    }
}
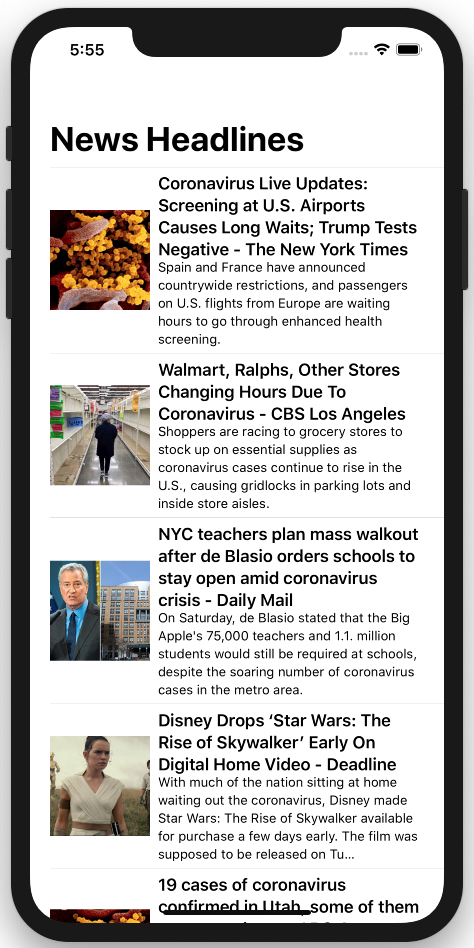
The NavigationView is a view for presenting a stack of views representing a visible path in a navigation hierarchy. Figure 19 shows the List view displayed within a NavigationView with the navigation bar title set.
You can make the text in the navigation bar title smaller by setting its display mode to inline:
.navigationBarTitle("News Headlines", displayMode: .inline)
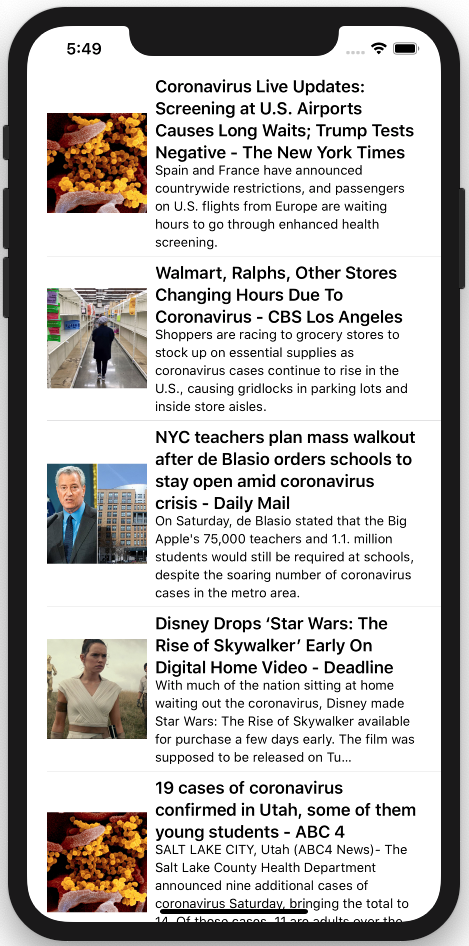
Figur 20 shows reduced font size of the navigation bar title.

Creating the Details Page
When the user taps on a row in the List view, you should display the content of the news in another page. The details of the news could be obtained through its url property of the Article struct.
To display the news using its URL, you need to use a Web browser. In the current version of SwiftUI, not all the views are implemented yet, and this includes the implementation of the Web browser, which is available in the existing WebKit framework and known as the WebView. What you need to do now is make use of the WebView in your SwiftUI application.
To do so, let's add a new SwiftUI View file to the project and name it as NewsView.swift. Add the following statements in bold to the NewsView.swift file, as shown in Listing 4.
Listing 4: Adding a new file named NewsView.swift to the project
import SwiftUI
import WebKit

struct WebView: UIViewRepresentable {
  let request: URLRequest

  func makeUIView(context: Context) -> WKWebView  {
      return WKWebView()
  }

  func updateUIView(_ uiView: WKWebView,  context: Context) {
    uiView.load(request)
  }
}

struct NewsView: View {
  let url: String

  var body: some View {
    WebView(request: URLRequest(url: URL(string:url)!))
  }
}

struct NewsView_Previews: PreviewProvider {
  static var previews: some View {
    NewsView(url: "https://codemag.com/Magazine")
  }
}
The UIViewRepresentable protocol allows you to create and manage a UIView object in your SwiftUI application. By conforming to this protocol, you need to implement the following methods:
- makeUIView: creates the view object
- updateUIView: updates the state of the view object
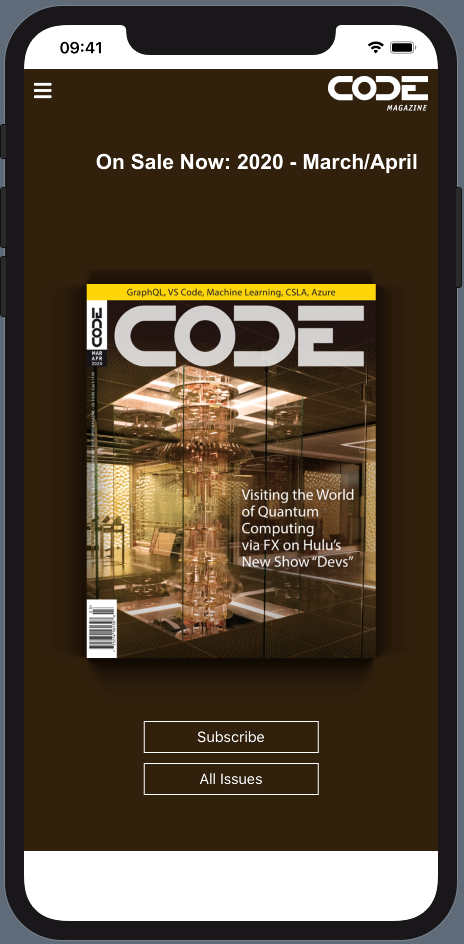
Once the WebView is created, you can use it by passing in the URL of the page to load. For the preview, you load the CODE Magazine home page, as shown in Figure 21.
Once the details page is created, you're ready to link it with the ContentView. Add the following statements in bold to the ContentView.swift file, as shown in Listing 5.
Listing 5: Linking the ContentView to NewsView
  var body: some View {
    List(articles, id: \.url) {
        item in NavigationLink(destination: NewsView(url:item.url)
      ) {
        HStack(alignment: .top) {
          URLImage((( URL(string:item.urlToImage ?? "https://picsum.photos/100") ?? nil
          )!),
            delay: 0.25,
            processors:
              [Resize(size: CGSize(width: 100.0, height: 100.0), scale: UIScreen.main.scale)],
            content: {
              $0.image
              .resizable()
              .aspectRatio(contentMode:.fit)
              .clipped()
            }
          ).frame(width: 100.0, height: 100.0)
        }

        VStack(alignment: .leading) {
          Text(item.title).font(.headline)
          Text(item.description ?? "").font(.footnote)
        }
      }
    }.onAppear(perform: fetchData)
  }
}
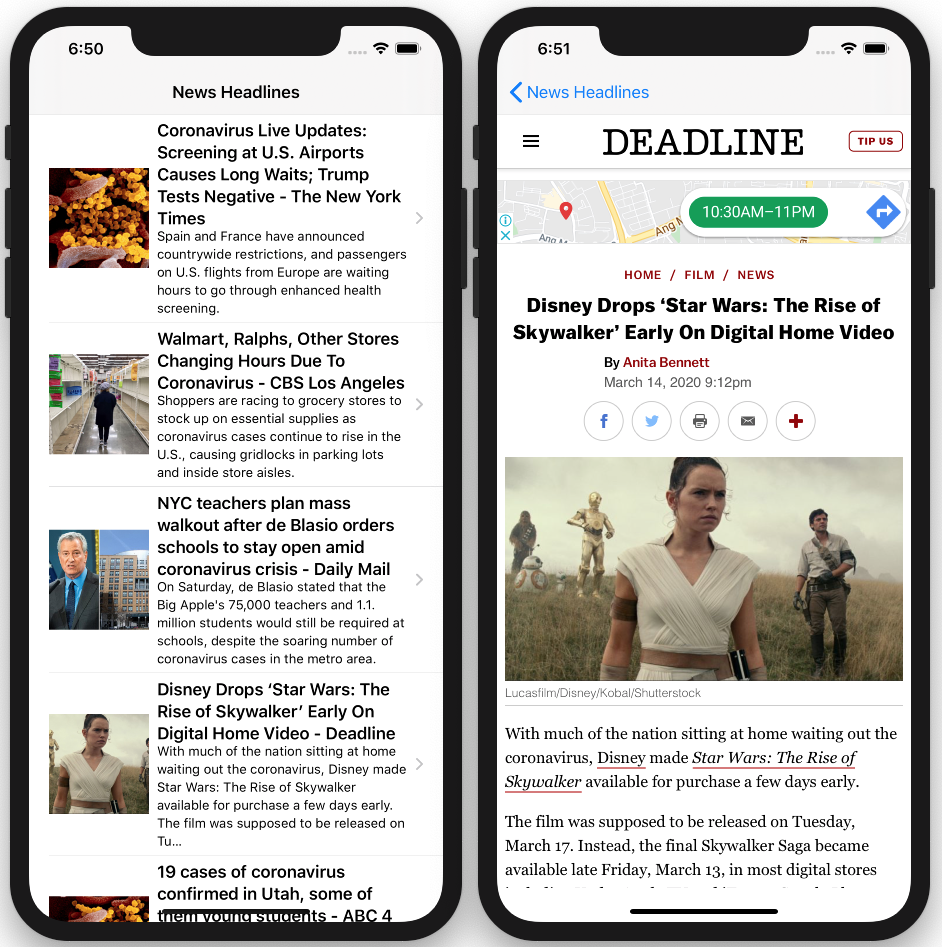
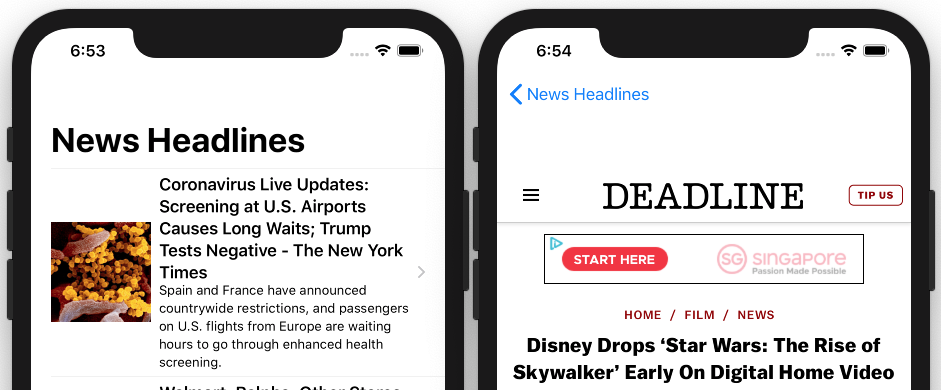
Figure 22 shows how the application works. Tap on a row in the List view and the details will be loaded on the details page.
Want to display the navigation bar title back to large text? Well, you can set it as follows in the ContentView.swift file:
var body: some View {
    NavigationView {
        List(articles, id: \.url) { item in
            NavigationLink(destination: NewsView(url:item.url)) {
                ...
            }.onAppear(perform: fetchData).navigationBarTitle("News Headlines")
        }
    }
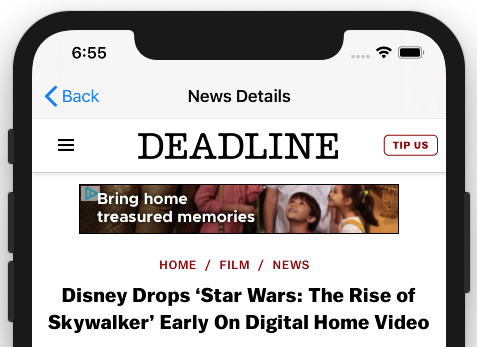
However, you'll soon realize that when you navigate to the details page, there's a large empty space below the navigation bar in the details page (see Figure 23).
To resolve this, you need to set the navigation bar title in the NewsView.swift to display in inline mode:
struct NewsView: View {
  let url: String
  var body: some View {
    WebView(request: URLRequest(url: URL(string:url)!))
      .navigationBarTitle("News Details", displayMode: .inline)
    }
}
Figure 24 shows the details view now showing the content without the empty space. In addition, the navigation bar also displays a title.
.navigationBarTitle("", displayMode: .inline)
Summary
I hope this article has given you a good idea of the power of SwiftUI. Although SwiftUI is still in its early days, by the time you read this, you shouldn't be too far off from the next update of SwiftUI. By then, SwiftUI will have ported more of the UIKit views and you should be able to develop your applications entirely using SwiftUI.
