


Ready to build a Web experience your users will love?
Windows Live Services are the building blocks of your new site. Get started right now with the Windows Live Quick Applications.
It takes an engaged audience and compelling experiences to reach success on the Web. Using Windows Live Services, your site can provide engaging experiences that connect directly with hundreds of millions of Windows Live users. But how do you start? Windows Live Quick Applications gives you an easy way to get started by showing you how to build new experiences for your customers with Windows Live Services. You can quickly and easily use Windows Live Services to give your users new ways to share information, communicate and stay connected.
Windows Live Services combine the features of Windows Live with an easy-to-use developer platform.
Each Quick Application uses several Windows Live Services to store and share data in a fully functional Web application. You can download the source code to learn about Windows Live development and modify the code to create your own site.
Everything you need to get started is at http://dev.live.com/QuickApps/. On this site you can download the source code, learn how to customize the Quick Applications, and deploy them on your own site.
Read on for a tour of the Quick Applications and step-by-step instructions for using the Quick Applications as a starting point for building your next generation Web experience.
Windows Live Services Work Together
You can use each of the Windows Live Services on its own. You can build a Web site that uses Windows Live ID to manage its user base or add Live Search to an existing site. However, the services realize their full potential when combining several of the APIs into one Web application.
For example, to develop a rich media experience, just glue together Silverlight Streaming and the Windows Live Spaces Photo API. Just adding those two services gives you full-motion video, user-generated content, and photo albums-all hosted by Windows Live and presented by your site.
Visitors to your site can also communicate and stay connected with Windows Live Services. Build Windows Live Messenger into your site so your users can communicate with one another; integrate Windows Live Alerts to keep them connected anywhere on the network, even when offline.
You don’t have to create an authentication scheme for your users. Your server doesn’t need to host streaming media or run a database to keep track of contacts. Just build the glue-connect the Windows Live Services together to create your own new user experience.
Exploring the Quick Applications
The Windows Live Quick Applications are sample Web applications that use Windows Live Services to bring a Web scenario to life. Each Quick Application is a free source code download you can customize and use in your own site.
You’ll find the source code for each Quick Application on http://dev.live.com/QuickApps, along with demos, deployment guides, webcasts and more. Using this code to develop your own Web site is easy. Just download the source code, customize the application to meet your needs, and deploy the finished Web site.
Let’s explore several of the Windows Live Quick Applications.
Tafiti
Tafiti is one of the newest Quick Applications. It mixes Live Search with Silverlight and Windows Live ID to present a highly immersive search experience.
To explore Tafiti, browse to http://tafiti.mslivelabs.com. Enter a search term, browse the results, and drag your favorite hits to the Shelf on the right, as seen in Figure 1.
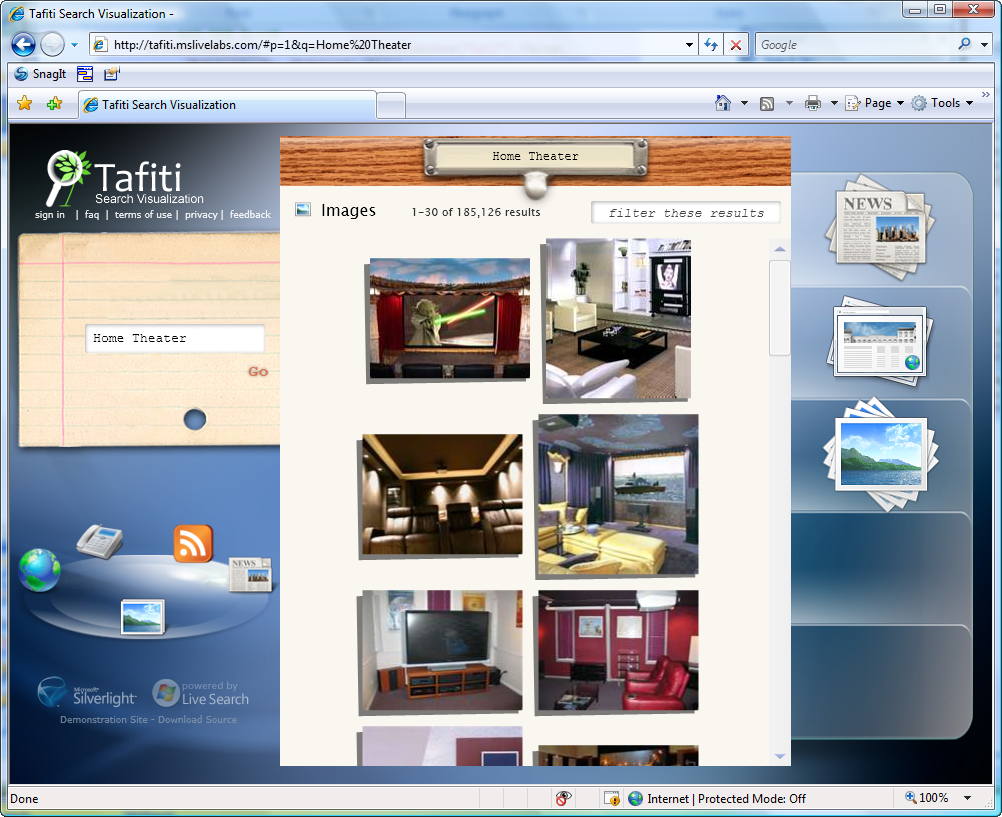
The Live Search Web Service provides Tafiti’s search results. Web results, images, news, book search, and more are available from the service. You can integrate Live Search into your site with the Web service or by inserting a special HTML block in your Web page. Learn more about integrating Live Search at http://dev.live.com/livesearch.
Live ID enables two features in Tafiti. When you sign in with a Windows Live ID, Tafiti saves your shelf with your search results. The next time you sign in with your Live ID, Tafiti retrieves the shelf, letting you start researching where you left off.
Tafiti also uses Live ID when you send the contents of your shelf to a friend in e-mail. Tafiti stores your shelf, associates it with your Live ID, and sends the recipient a hyperlink to the results.
Contoso ISV
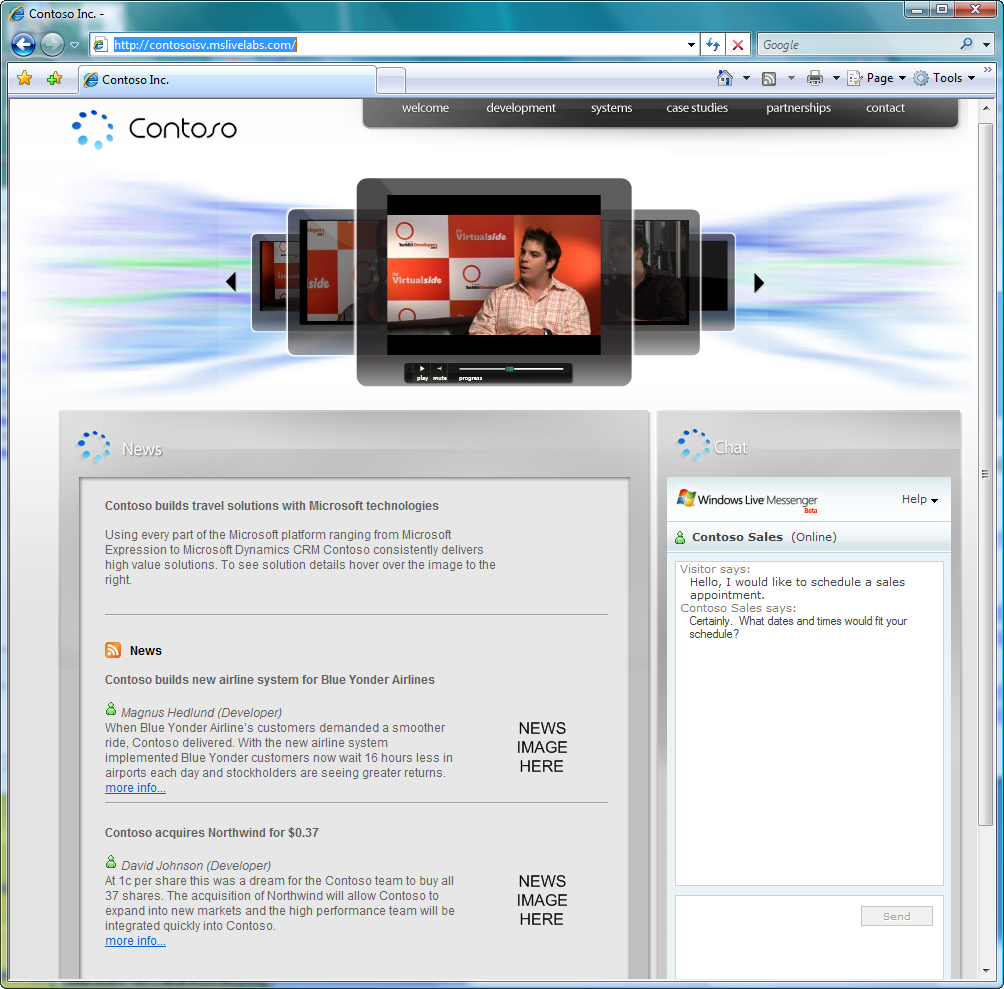
Contoso ISV uses many of the Windows Live Services to build an online Customer Relationship Management (CRM) application. This Quick App glues together Silverlight Streaming, Windows Live Messenger, Windows Live Alerts, and Virtual Earth to demonstrate a business-focused Web application.
Tafiti uses Silverlight 1.0, Windows Live ID, and Live Search to present a highly immersive search experience.
Windows Live Messenger enables several features in Contoso ISV. The Windows Live Messenger IM Control drops right into the Web site. It lets visitors have instant messaging conversations with Contoso staff without leaving the home page (Figure 2).
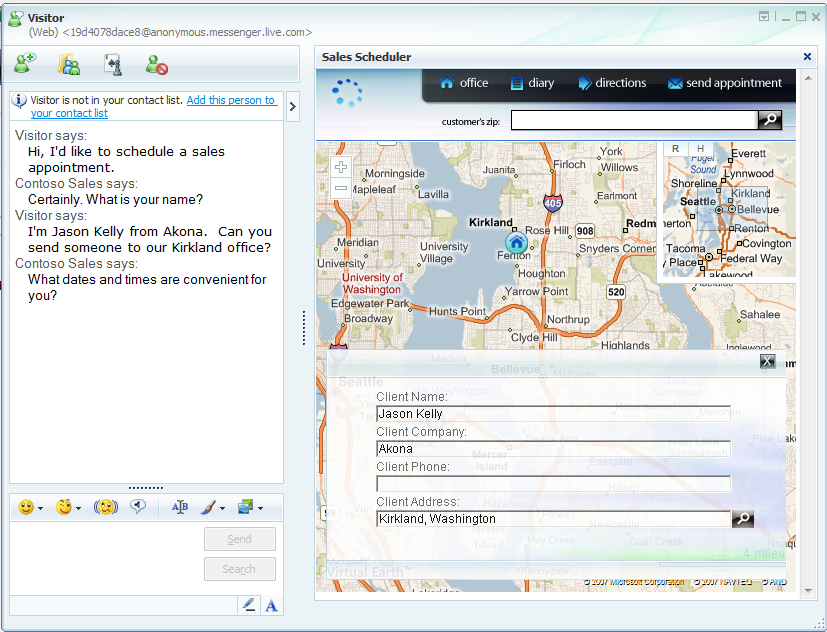
Several Windows Live Services come into play when a customer schedules a meeting. Virtual Earth is integrated with Windows Live Messenger to schedule an appointment and get driving directions (Figure 3**).** When the sales staff schedules the appointment, the company representative automatically receives a Windows Live Alert notifying them of the new appointment.
Contoso ISV also uses Silverlight Streaming to deliver the video content displayed on the home page. Silverlight Streaming offers free hosting of videos and interactive content. Windows Live hosts and streams the media, relieving developers of storage and scalability concerns.
To see this combination of Windows Live Services in action, go to http://contosoisv.mslivelabs.com.
Contoso Bicycle Club
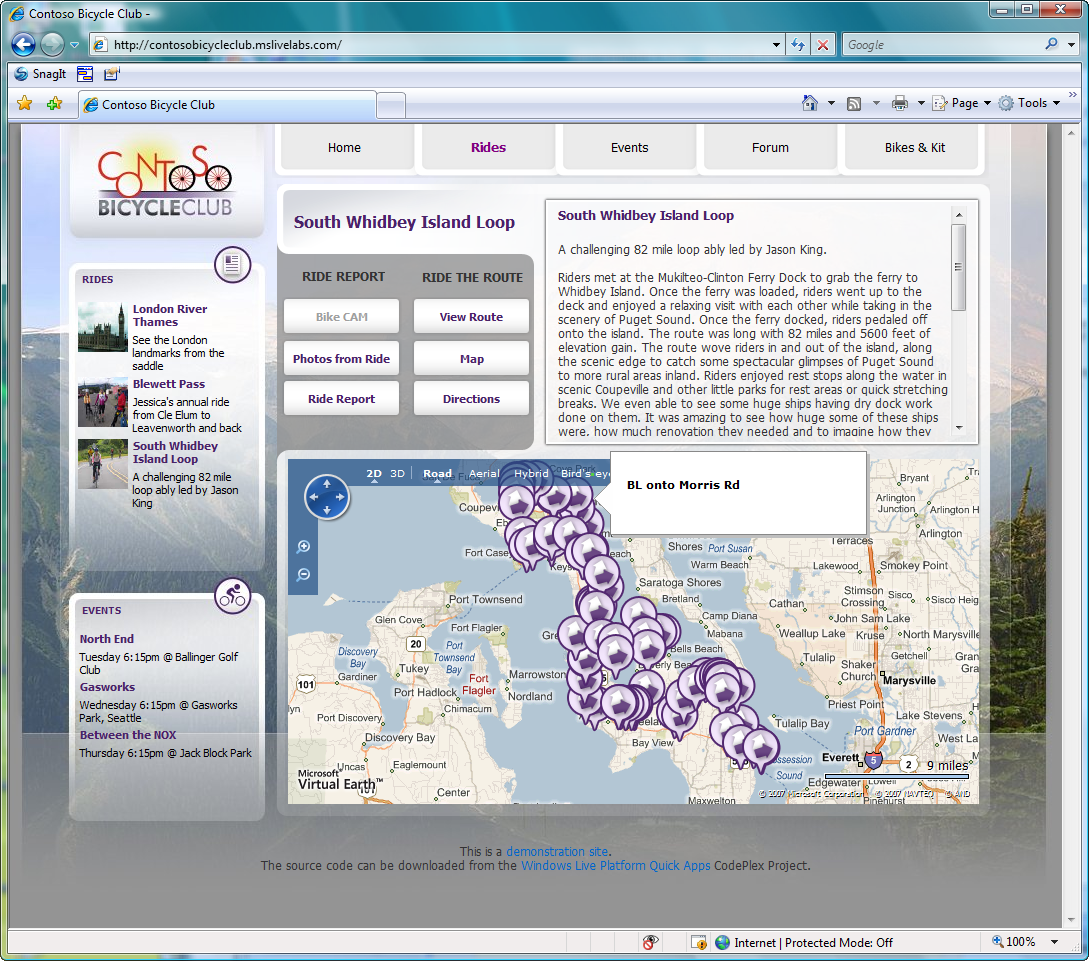
Contoso Bicycle Club is a place for bicyclists to post photos and reports from their favorite rides. Despite the rich content displayed on the site, the application itself does not store any images or maps. All the photos, reports, and ride routes are hosted by Windows Live. It’s a great example of how you can glue Windows Live Services together into a complete Web site. The back end is handled by Windows Live; you only need to develop the presentation layer.
Windows Live Spaces stores most of the content for Contoso Bicycle Club. Members post a description of each new ride to the space at http://contosobicycleclub.spaces.live.com/. The blog posts include links to a map of the ride, directions, and a photo album-all hosted by Windows Live.
The route and directions for the ride come from Live Search Maps and Spaces hosts a photo album of the ride. The club Web site combines the data from these Windows Live APIs into an integrated view of the ride (Figure 4).
Contoso Bicycle Club also has the “Bikes & Kit” section-a place for users to buy and sell their bicycles and gear. Windows Live Expo hosts the content for this section; the Quick App uses the Expo API to retrieve the list of items for sale.
This Quick App shows how you can develop a Web site and use Windows Live to store all the content. Explore the site and download the code at http://contosobicycleclub.mslivelabs.com.
More Quick Applications
You’ll find several other Quick Applications on the site. Each of them has full documentation, deployment instructions, and source code available for download. You can mix and match code from each one to create the site you want.
For all the Quick Applications, documentation, demos, webcasts, and source code, go to http://dev.live.com/QuickApps.
From Quick Application to Your Site
Reviewing the Quick Applications source code is an easy way to learn how to develop with Windows Live Services. You can also use the code as a template to develop new Web sites. The quickest way to build a Windows Live-enabled Web site is to download the Quick Application’s source code, modify it to meet your needs, and then incorporate it into your own site.
You just create the glue-connect the Windows Live Services together to create your own new user experience.
To get started building your own Windows Live-based Web site, choose the Quick Application that integrates the Windows Live Services you’d like to use. Then change the look and feel of the site to reflect your own design and add any new pages you need. Perhaps you’ll want to weave a few more of the Windows Live Services into your site. Whatever you’re building, the Quick Applications are the perfect starting points.
Getting Started
I am building a site for home theater enthusiasts called Ultimate Home Theater. The front page will show a blog of the latest home theater news and will have a link to a photo gallery. Users should be able to sign up for alerts when new content is posted and the site needs a place for users to buy and sell home theater equipment.
I want to get the site online as quickly as possible without writing custom code to store and retrieve blog posts, show pictures, or keep track of items for sale. That’s where Windows Live Services save the day: Windows Live takes care of uploading and hosting the data. I just write the glue code that calls the Windows Live APIs and presents the data.
I’ll start with Contoso Bicycle Club, because it already has several features that I want to build into Ultimate Home Theater. It has photo albums and blog posts and also offers bicycle gear to buy or sell. That’s just what I need to start building Ultimate Home Theater.
I’ll start by downloading the code and getting the basic site up and running. Then just customize the site however you like. You might need to add or remove some pages. Perhaps you’ll want to integrate more Windows Live Services.
Getting the Code
First, download the Quick Application’s code. Go to http://www.codeplex.com/WLQuickApps and click the Releases tab. All of the Quick Applications come in one source code package. Download the package, unzip it, and then open one of the Quick Applications in Visual Studio.
Before you start customizing the application, get the Quick Application up and running on your Web server. Each of the applications has prerequisites and installation instructions on its individual CodePlex Web page. After you get the unmodified application up and running, it’s time to evolve it into your site.
Integrating Windows Live Spaces
The home page of Ultimate Home Theater has a sidebar listing the latest posts to a home theater blog. Windows Live Spaces hosts the blog content and my site just subscribes to an RSS feed to get the content. I’ll use my existing Space at http://jason-kelly.spaces.live.com/. A new HomeTheater category in my Space will contain the content for the blog.
Contoso Bicycle Club has an ASP.NET user control named LatestRidesControl.aspx. It retrieves blog posts from the Windows Live Spaces RSS feed and displays them on the site. This control is just what I need. I simply moved this user control to the main panel of the page. Then, in Web.config, I changed the application settings to point to the URL for my HomeTheater RSS feed. Now, visitors to the Ultimate Home Theater site can see the latest blog posts from my Space.
For more information on integrating Windows Live Spaces into your site, browse to http://dev.live.com/spaces.
Sending Alerts for New Content
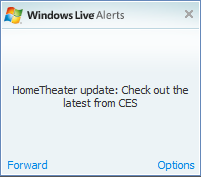
With Windows Live Alerts on the site, readers can opt-in to receive alerts whenever new content is posted. If a reader is signed into Windows Live Messenger, an alert will pop up on their screen with a link to the new post. Alerts can also be sent by e-mail or to a mobile device.
To add alerts to your site, start at http://signup.alerts.live.com/ and fill out a Web form with information about the site and the RSS feed URL for the content. After activating your account, you’ll receive an e-mail with a short block of HTML code to add to your site. The HTML block adds a signup button to the page. Clicking the button brings readers to the Windows Live Alerts signup page for your site.
To add Windows Live Alerts to Ultimate Home Theater, I filled out the registration form and placed the HTML block on the home page. When a reader opts-in to alerts from the site and is signed into Windows Live Messenger, they receive alerts like the one in Figure 5.
Adding a Photo Album
Contoso Bicycle Club has a photo slide show feature for each ride, but for the home theater site I want a separate page to host the photos. To do this, I started with Contoso’s Ride Report page and removed several elements I didn’t want on the page. Then I changed the main menu to include a Photos link that shows the slide show.
The page uses the SlideShow control from the ASP.NET AJAX Control Toolkit to display an ongoing photo slide show. The control consumes an RSS feed from my photo album in Windows Live Spaces and displays each photo in turn.
Listing 1 shows the ASPX code used to create the slide show. Listing 2 shows the GetSlides() method that parses the photos RSS feed and returns the slides to the slide show control.
Windows Live Spaces takes care of hosting the photos, saving me from writing code to handle uploading and storing the images. More information is available at http://dev.live.com/spaces/photos.
Including Windows Live Expo
To complete Ultimate Home Theater, I’ll add a marketplace for users to buy and sell home theater equipment. Windows Live Expo is a free online classified ad service. Live Expo exposes all of its functionality to developers through a Web service API. Contoso Bicycle Club already uses this service to allow members to buy and sell bicycle gear. I just need to change the site to search for home theater equipment instead of bicycles.
The Contoso Bicycle Club Quick Application implements a useful wrapper for the Live Expo Web service. I can use the ExpoService wrapper for Ultimate Home Theater by just changing a few parameters.
Each caller to the Windows Live Expo API must send a unique string called an application key. To request a free Expo application key, go to http://expo.live.com/MyAPIKeys.aspx and sign in with your Windows Live ID. I added my key to the Web.config file of the application. Then I changed the code in Classifieds.aspx to search for the desired category and keywords:
// Get your appKey from <a href="http://expo.live.com">expo.live.com</a>
ExpoService expoService =
 new ExpoService(appKey, "1");

XmlDocument xmlDocument =
 expoService.GetListings("66", "","home theater");
For information about the API keys and how to call the Windows Live Expo APIs, view http://dev.live.com/expo.
The Finishing Touches
To finish up Ultimate Home Theater, I customized the layout to create a new look and feel for the site. Modifying the CSS, changing the graphics, and editing the master pages are the final steps of turning a Quick App into a custom site. You can see the results at http://www.jasonkelly.net/HomeTheater.
Conclusion
Windows Live Services open the features of Windows Live up to any Web site with an easy-to-use developer platform. The wide array of services, simple terms of use, and helpful documentation simplify many aspects of modern Web development.
Quick Applications are rich sample applications designed to help you integrate Windows Live Services into your Web site. More than just sample code, Quick Applications are fully functional applications that you can customize and extend to build your own site much more quickly than starting from scratch.
The latest information on the Windows Live Services is at http://dev.live.com.
Listing 1: Photos.aspx.
<asp:Image ID="Slides" runat="server" Height="480"
     ImageUrl="images/blank_slide.png"/>

<ajaxToolkit:SlideShowExtender ID="slides"
   runat="server" TargetControlID="Slides"
   SlideShowServiceMethod="GetSlides"
   AutoPlay="true" UseContextKey="true"
   Loop="true" />
Listing 2: GetSlides method.
public static Slide[] GetSlides(string request)
{
   // Spin up a new XML document to house the RSS FEED.
   System.Xml.XmlDocument xmlDocument = new XmlDocument();

   // Execute the request using the Reader
   XmlReader xmlReader = XmlReader.Create(request);

   // Load the XML Document with the reader output
   xmlDocument.Load(xmlReader);

   // Fetch the node list from the RSS
   XmlNodeList xmlNodeList =
        xmlDocument.SelectNodes("/rss/channel/item/enclosure");

   // Create arraylist to house the slides
   ArrayList slides = new ArrayList();

   // Enumerate the enclosures
   foreach (XmlNode xmlNode in xmlNodeList)
   {
       // fetch the description
       string description =
            xmlNode.ParentNode.FirstChild.InnerText;

       // Add the slide
slides.Add(new Slide(xmlNode.Attributes["url"].Value,
     description, description));
   }

   // Return the slides.
   return (Slide[]) slides.ToArray(typeof(Slide));

}
