


It's 2022 and one of the most common file types I deal with on nearly a daily basis is the CSV file. If you told me this just a few short years ago, I would have told you: “The 80s called and they want their file format back.” And yet here we are in the second decade of the 21st century and I DO deal with CSV more frequently than I would have ever expected.
First, let's discuss just what CSV files are. Comma Separated Files (CSV) are text files that contain multiple records (rows), each with one or more elements (columns) separated by a comma character. Actually, the elements can be separated by any type of delimiter, not only a comma. For instance, another common file format is the Tab Separated Value (TSV) file where every element is separated by a tab character.
The 80s called and they want their file format back.
So why is there this sudden demand for skills when dealing with CSV files? As The Dude would say: “It's the science, man.” And by that, I mean the data science. In our current state of development, we deal with huge quantities of data, and often this data is shared between organizations. CSV files present a unique set of opportunities for sharing large quantities of data as they're dense and contain little of the wasted content that's commonly found in JSON or XML files. They also compress rather nicely, which lowers bandwidth uses. Figure 1 shows an example of a simple CSV file containing movie data.
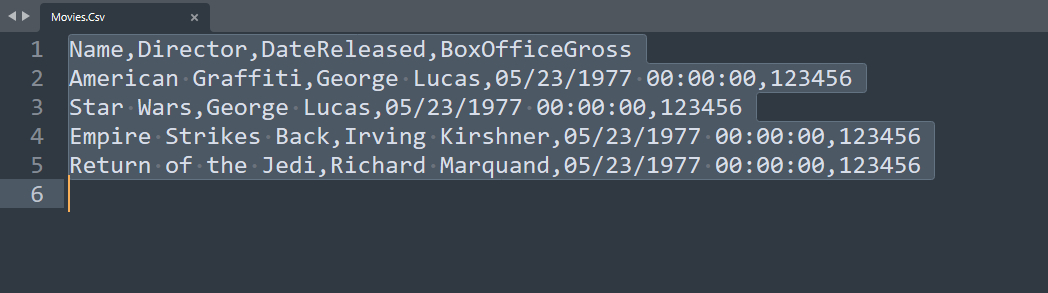
By the end of this article, you'll be intimately familiar with this data. You'll learn how to read, write, and format Visual Studio files based on this data.
Movie Data Sample
As stated above, this article will be all about reading and writing movie data formatted in various CSV formats. The following class code represents the data:
public class Movie
{
    public string Name { get; set; } = "";
    public string Director { get; set; } = "";
    public DateTime DateReleased { get; set; }
    public decimal
    BoxOfficeGross { get; set; } = 0.0m;
}

public static List<Movie> GetMovies()
{
    var movies = new List< Movie >();

    movies.Add(new Movie (){
        Name = "American Graffiti",
        Director = "George Lucas",
        DateReleased = new DateTime(1977,5,23),
        BoxOfficeGross = 123456});

    movies.Add(new Movie () {
        Name = "Star Wars",
        Director = "George Lucas",
        DateReleased = new DateTime(1977, 5, 23),
        BoxOfficeGross = 123456 });

    movies.Add(new Movie () {
        Name = "Empire Strikes Back",
        Director = "Irving Kirshner",
        DateReleased = new DateTime(1977, 5, 23),
        BoxOfficeGross = 123456 });

    movies.Add(new Movie (){
        Name = "Return of the Jedi",
        Director = "Richard Marquand",
        DateReleased = new DateTime(1977, 5, 23),
        BoxOfficeGross = 123456
    });
    return movies;
}
Introducing CSVHelper
A few years ago, my team began building a data analytics platform for our data scientists to use. The data was hosted in a platform called Snowflake that uses CSV files as a mechanism for loading data into their cloud services. When this need arose, I did what all good developers do: I searched for a tool that would help me deal with CSV files.
This is where I came across a .NET library called CSVHelper. This open-source tool, written by developer Josh Close (any many others), is simple to use yet powerful enough to deal with many data types of CSV scenarios that have presented themselves over the years.
Getting up and running with CSVHelper is simple. The following steps demonstrate how to bootstrap a .NET application capable of manipulating CSV files.
Bootstrapping CSVHelper
There are only two steps to bootstrapping CSVHelper:
- Create a new Console Application
- Install CSVHelper via the NuGet Package Manager Console using the following command:
Install-Package CsvHelper
Now you're ready to begin manipulating CSV files.
Writing CSV Files
Once you've created your basic project, you can start by outputting a collection of data to a CSV file. The following code demonstrates the simplest mechanism for writing a collection of movie records to a CSV file.
public static void WriteCsvFile(List<Movie> dataToWrite, string outputFile)
{
    var config = new CsvConfiguration(CultureInfo.InvariantCulture);

    using (var writer = new StreamWriter(outputFile))
    using (var csv = new CsvWriter(writer, config))
    {
        csv.WriteRecords(dataToWrite);
    }
}
When you examine this code, take notice of the following items:
- The code creates a
CSVConfigurationobject. This object will be used to control the output of your CSV file. - The file opens a
StreamWriterthat controls where your file will be written. - The code then creates a
CSVWriterobject passing in theconfigurationobject. This Writer sends your data to the stream opened by the writer using the passed-in configuration settings. - Finally, the call to
WriteRecordsroutine takes anIEnumarablecollection and writes to the CSV file.
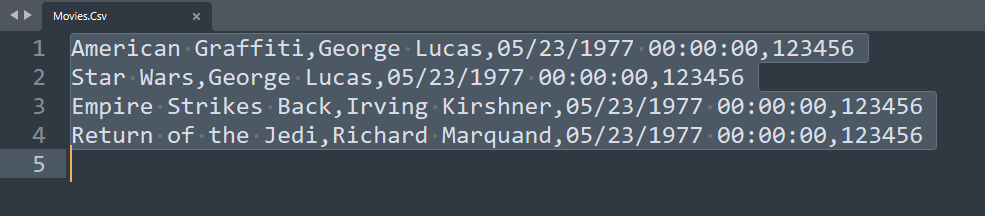
The output of this set of code can be found in Figure 2.
Configuring Writer Options
As stated earlier, the CSVWriter accepts a configuration object that's used to control output options. A few of the key options will be covered next.
No Header Column
You may or may not want to include a header file in your CSV files. By default, CSVHelper adds the name of your class' properties in a header row. You can turn off the header by setting it with the following code:
config.HasHeaderRecord = false;
Figure 3 shows the results of this option.
Changing Delimiters
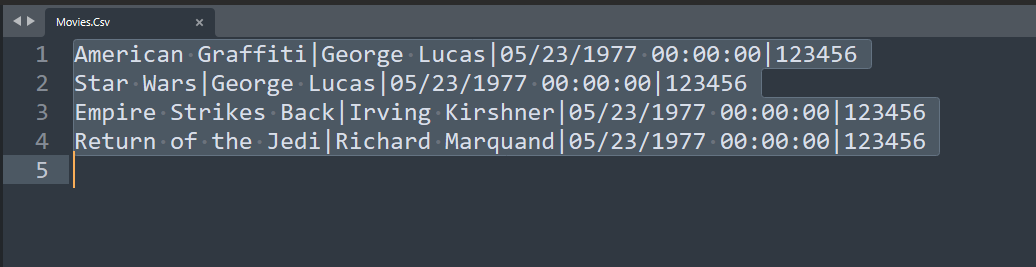
One of the more common options is the delimiter used between each data element. By default, CSVHelper delimits data comma characters. The following three examples show how you can change the delimiter to the PIPE, TAB, and a “crazy” delimiter.
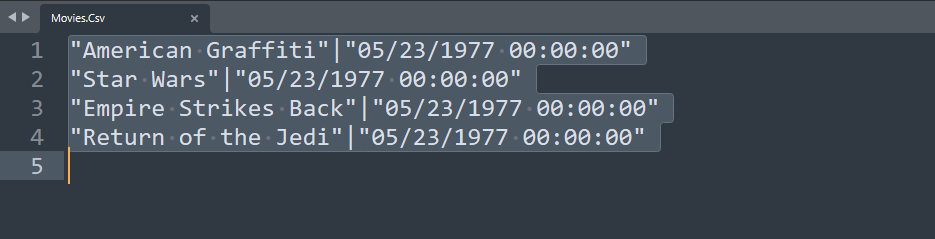
- Changing the delimiter to PIPE:
config.Delimiter = "|";
Figure 4 shows the PIPE delimiter in action.
- Changing the delimiter to TAB:
config.Delimiter = "\t";
Figure 5 shows the TAB delimiter in action.

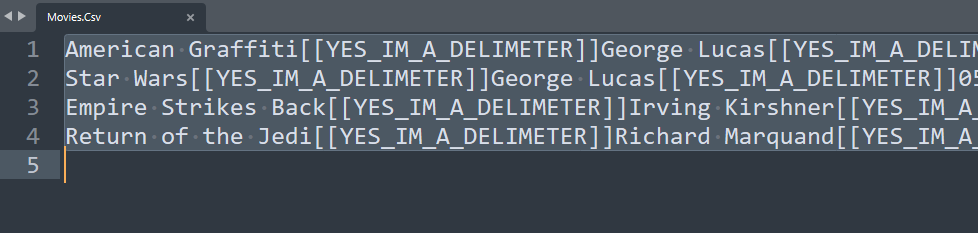
- Creating a “Crazy” delimiter (This is just to demonstrate that your delimiter can be anything you desire):
config.Delimiter = "[[YES_IM_A_DELIMETER]]";
Figure 6 shows the “Crazy” delimiter doing its thing.
Quote Delimiting
I've found in many situations that my data needs to have each data element wrapped in quotation marks. This is especially true when your data contains delimiters within their fields, e.g., commas. CSVHelper allows you to quote-delimit your data using the following options.
config.ShouldQuote = args => true;
Figure 7 shows the CSV with quoted content.

Formatting Output with Map Classes
Another very handy tool is the ability to control the output sent to your file. By default, CSVHelper outputs elements by reflecting on the class they come from and creating columns for each property. There are many situations where you may want to export a limited set of properties or you wish to change the order of the output files.
This is where mapping classes come in. When exporting data CSVHelper can accept a mapping object derived from the ClassMap class. The following code demonstrates a ClassMap that limits the data exported to two properties.
public class MovieOutputClassMap: ClassMap<Movie>
{
    public MovieOutputClassMap()
    {
        Map(m => m.Name);
        Map(m => m.DateReleased);
    }
}
Once you've built your class map, you need to apply it to your writer. This is done using two commands. The first one creates an instance of your class map.
var classMap = new MovieOutputClassMap();
The second registers it with the writer Context property:
csv.Context.RegisterClassMap(classMap);
The full writer code is shown below:
public static void
WriteCsvFile(List<Movie> dataToWrite, string outputFile)
{
    var config = new CsvConfiguration(CultureInfo.InvariantCulture);

    //include header
    config.HasHeaderRecord = false;

    //change delimiter
    config.Delimiter = "|";

    //quote delimit
    config.ShouldQuote = args => true;

    //changing the order of fields
    var classMap = new MovieOutputClassMap();

    using (var writer = new StreamWriter(outputFile))

    using (var csv = new CsvWriter(writer, config))
    {
        csv.Context.RegisterClassMap(classMap);
        csv.WriteRecords(dataToWrite);
    }
}
Figure 8 shows the CSV file with two columns.
You can also use a class map to reorder your output
public class MovieOutputClassMap: ClassMap<Movie>
{
    public MovieOutputClassMap()
    {
        Map(m => m.Name);
        Map(m => m.DateReleased);
        Map(m => m.Director);
        Map(m => m.BoxOfficeGross);
    }
}
Figure 9 shows the CSV file with its columns reordered.
Along with altering the number of columns exported and changing the ordinal position of them, you can also control the text that's emitted into the CSV stream. Altering the output (and input) is done using a class that implements the ITypeConverter interface.
The code below demonstrates creating a type converter that alters the output of the DateReleased property removing the time component.
This code receives the property's value and returns a string using the ConvertToString aspect of the type converter. There's also a corollary for reading these values from strings via an implementation of the ConvertFromString function.
public class DateOutputConverter : ITypeConverter
{
    public object ConvertFromString(string text,
        IReaderRow row, MemberMapData memberMapData)
    {
        throw new NotImplementedException();
    }
    public string ConvertToString(
        object value,
        IWriterRow row,
        MemberMapData memberMapData)
    {
        var retval = ((DateTime) value).ToString("d");
        return retval;
    }
}
Once you've created your converter, you attach it to your column via the mapping class. The following code shows how to attach a converter to a property map.
public class MovieOutputClassMap : ClassMap<Movie>
{
    public MovieOutputClassMap()
    {
        Map(m => m.Name);
        Map(m => m.DateReleased).TypeConverter(new DateOutputConverter());
        Map(m => m.Director);
        Map(m => m.BoxOfficeGross);
    }
Figure 10 shows the CSV file with the date formatting altered.

Reading CSV Files
Now that you have a basic understanding of writing CSV files, you can turn your sights to reading CSV files. There are two primary mechanisms for reading a file. The first is to open the file and iterate through it one record at a time.
When you examine this set of code for reading files, take notice of the following items:
- The code creates a
CSVConfigurationobject. This object is used to control how the reader manipulated your CSV data as it was read. - The file opens a
StreamReader, which controls where your file will be read from. - The code then creates a
CSVReaderobject passing in theconfigurationobject. This reader is used to iterate through your CSV file one record at a time. - The code iterates the file using the
Read()function, which moves down the file one record at a time. Note that the code does aRead()immediately, to skip the record header. - Finally, the code uses various Getter functions to read data from each column.
public static List<Movie> ManualReadCsvFile(string inputFile)
{
    var retval = new List<Movie>();
    var config = new CsvConfiguration(CultureInfo.InvariantCulture);

    using (var reader = new StreamReader(inputFile))
    using (var csv = new CsvReader(reader, config))
    {
        //skip the header
        csv.Read();
        while (csv.Read())
        {
            var movie = new Movie();
            movie.Name = csv.GetField(0);
            movie.Director = csv.GetField(1);
            movie.DateReleased = csv.GetField<DateTime>(2);
            movie.BoxOfficeGross = csv.GetField<decimal>(3);
            retval.Add(movie);
        }
    }
    return retval;
}
Another and much simpler way to read a file is to use CSVHelper's built-in mechanism for iterating through a file automatically transforming CSV records into to .NET classes.
When you examine this set of code for reading files, take notice of the following items:
- The code creates a
CSVConfigurationobject. This object is used to control how the reader manipulated your CSV data as it was read. - The file opens a
StreamReader, which controls where your file will be read from. - The code then creates a
CSVReaderobject passing in theconfigurationobject. This reader is used to iterate through your CSV file one record at a time. - The code then reads all the records using the
GetRecords<T>method. This function returns anIEnumerablecollection. - The collection is then added to the functions return value via the
AddRange()method.
public static List<Movie> ReadCsvFile(string inputFile)
{
    var retval = new List<Movie>();
    var config = new CsvConfiguration(CultureInfo.InvariantCulture);
    using (var reader =new StreamReader(inputFile))
    using (var csv = new CsvReader(reader, config))
    {
        retval.AddRange(csv.GetRecords<Movie>());
    }
    return retval;
}
As you can see, this style of code is much simpler to deal with.
You can also use class maps to change the order of how CSV elements are read from your CSV file and are applied to the returned object's properties. The following class map reads content from the CSV created earlier in this article. Notice the column order.
public class MovieInputClassMap : ClassMap<Movie>
{
    public MovieInputClassMap()
    {
        Map(m => m.Name);
        Map(m => m.DateReleased);
        Map(m => m.Director);
        Map(m => m.BoxOfficeGross);
    }
}
The code used to attach a class map is exactly like the writer. You simply create an instance of the class map and apply it to the CSVReader's Context property:
public static List<Movie> ReadCsvFile(string inputFile)
{
    var retval = new List<Movie>();
    var config = new CsvConfiguration(CultureInfo.InvariantCulture);

    var classMap = new MovieInputClassMap();

    using (var reader = new StreamReader(inputFile))

    using (var csv = new CsvReader(reader, config))
    {
        csv.Context.RegisterClassMap(classMap);
        retval.AddRange(csv.GetRecords<Movie>());
    }
    return retval;
}
Conclusion
As you can see, using CSVHelper greatly simplifies the process of reading and writing CSV files. This library has a good balance of simple-to-use yet very capable tools. I highly recommend exploring more capabilities of this object.
So now you may be asking yourself how you can exploit these tools and techniques in the data science space. Well, that's where the next article comes in. In a future article, I'll demonstrate streaming this data into Snowflake via an S3 bucket and how to bulk-load data into Postgres using the same tools. Thanks for exploring the non-glamorous world of CSV files with me.
