


Today, I introduce you to a new series of articles, starting from this issue, on deploying a PHP Laravel application on Google Cloud Platform (GCP). GCP is rich in services and documentation. They've done a great job documenting their services in a variety of programming languages including, and not limited to, Go, PHP, Java, Node.js, and others.
If the GCP documentation is so good, why am I writing this series, you may ask. The GCP team gives us access to the How-To's (https://cloud.google.com/docs), like using the GCP services in detail for different programming languages. They cover all the basics well, including scenarios on using the services in different situations. However, there's almost no focus on custom or specific frameworks like PHP Laravel. I found little documentation or articles online on deploying a PHP Laravel application on GCP. Hosting a PHP Laravel on GCP was nightmarish for me. Not only hosting but automating and optimizing the deployment process in itself was near impossible! That's why I'm writing this - so you don't have the same experience.
In this series of articles, I'll be dissecting every single detail that you need to deploy your PHP Laravel application on GCP. I'll assume that you have no prior experience with GCP and will guide you accordingly on all aspects of automating your deployment of the PHP Laravel application on GCP.
This first article covers the following topics:
- Creating a GCP account
- Creating a GCP first project
- Creating a PHP Laravel 8 application using Docker containers
- Hosting the application's source code on GitHub
- Connecting the GitHub repository to GCP
- Automating the deployment process from GitHub to GCP, using GCP Cloud Build service
Create a GCP Account
A GCP account connects directly to a Gmail account. To start, get yourself a Gmail account and then visit the GCP home page at https://cloud.google.com/. GCP offers its clients and potential clients a free trial and tier account. You can read more about the details here: https://cloud.google.com/free.
Sign in to GCP by visiting the URL (https://cloud.google.com/) and clicking the Sign-in button. You need to provide a valid Gmail account to sign in.
Right after signing in, click the Console button located at the top-right side of the screen. Figure 1 shows the GCP home page when you first sign in.
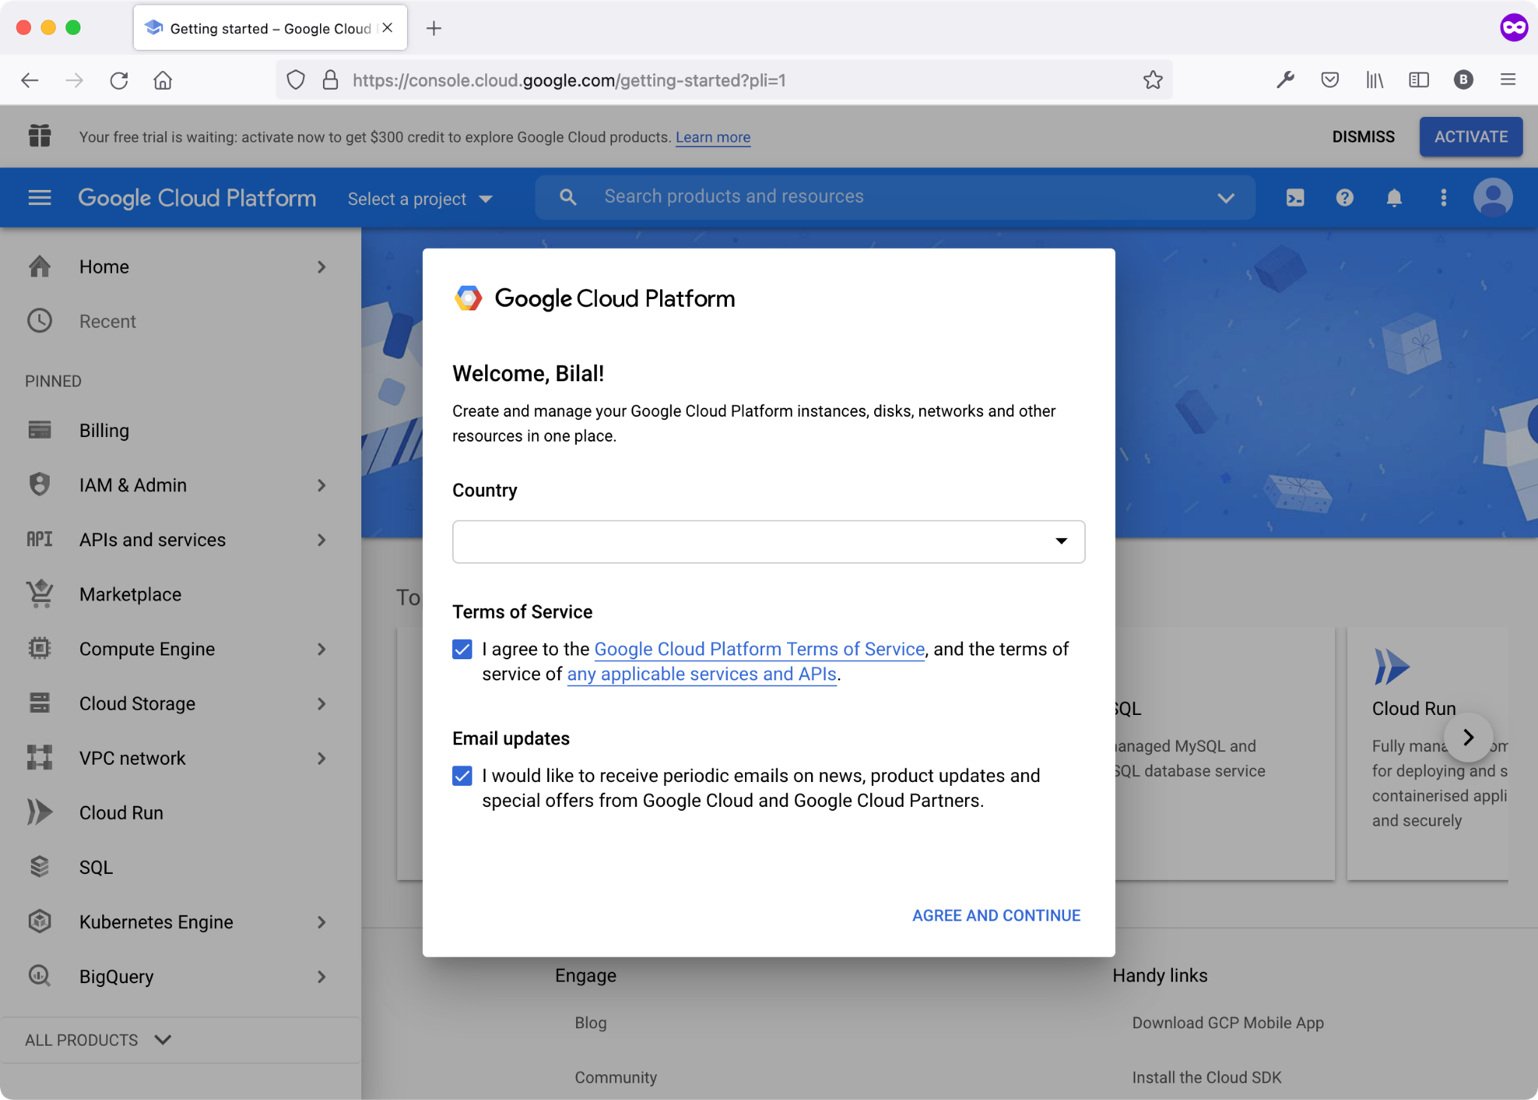
You need to have a Gmail account to gain access to Google Cloud Platform.
You start by:
- Selecting the Country you reside in.
- Accepting the Terms of Service by checking the checkbox.
- Opting in or out of receiving Email Updates on GCP services and the newsletter.
- Clicking on the AGREE AND CONTINUE button.
You can skip the next step or select the purpose you are using GCP. For now, I skipped it.
Let's activate this free account by clicking the Activate button located at the top-right side of the screen. The process for registering a free tier account takes you on a series of steps to get the account up and running.
What you need to do is:
- Fill-in and verify your GCP account information.
- Fill-in and verify GCP payment information.
- Fill out a post-registration survey.
When you complete the registration, GCP automatically creates your first project and names it My First Project. You can continue using this project, disregard it, or create another project, as you see fit. In addition, GCP sets up your billing account automatically.
Create a PHP Laravel 8 Application
Laravel is a mature PHP framework for building Web applications (https://laravel.com/). It offers a foundational starting point, with extensive documentation and integrations with third-party services to give you most of the features you need to kick off your next Web application.
From the documentation: “Laravel strives to provide an amazing developer experience while providing powerful features such as thorough dependency injection, an expressive database abstraction layer, queues and scheduled jobs, unit and integration testing, and more.”
Now, I'll guide you through creating your first Laravel project locally on your computer. The intention is neither to explain the rich features of Laravel nor to teach you how to develop and use them. If you're interested in that, I suggest you follow the documentation, as they offer everything a newbie needs to start using the framework.
Depending on your local environment, whether you are using a macOS, Windows, or Linux, you can choose the right way to install a fresh copy of the Laravel project. Check the documentation (https://laravel.com/doc/8.x/installation) for more information.
The Laravel team recommends using a service named Laravel Sail (https://laravel.com/docs/8.x/sail), which is a built-in solution for running your Laravel project using Docker (https://www.docker.com/). That's the best option when you have a team of developers or are planning on expanding the team to include more developers.
Google App Engine Flexible supports PHP with a maximum version of 7.3.
Before you install Laravel locally, make sure you have the following two requirements:
- Docker, installed and running on your local computer
- Composer (https://getcomposer.org/) installed
Step 1: Install Laravel Using Composer
Start by running this command:
composer \create-project \laravel/laravel="8.5.23"\gcp-app2
I've named my new project as gcp-app and explicitly installed Laravel v8.5.23. As of the time of writing, that's the maximum Laravel version you can deploy on the GAE Flexible environment. This environment allows a maximum version of PHP 7.3. Higher versions of Laravel make use of third-party libraries that require PHP 8.0.
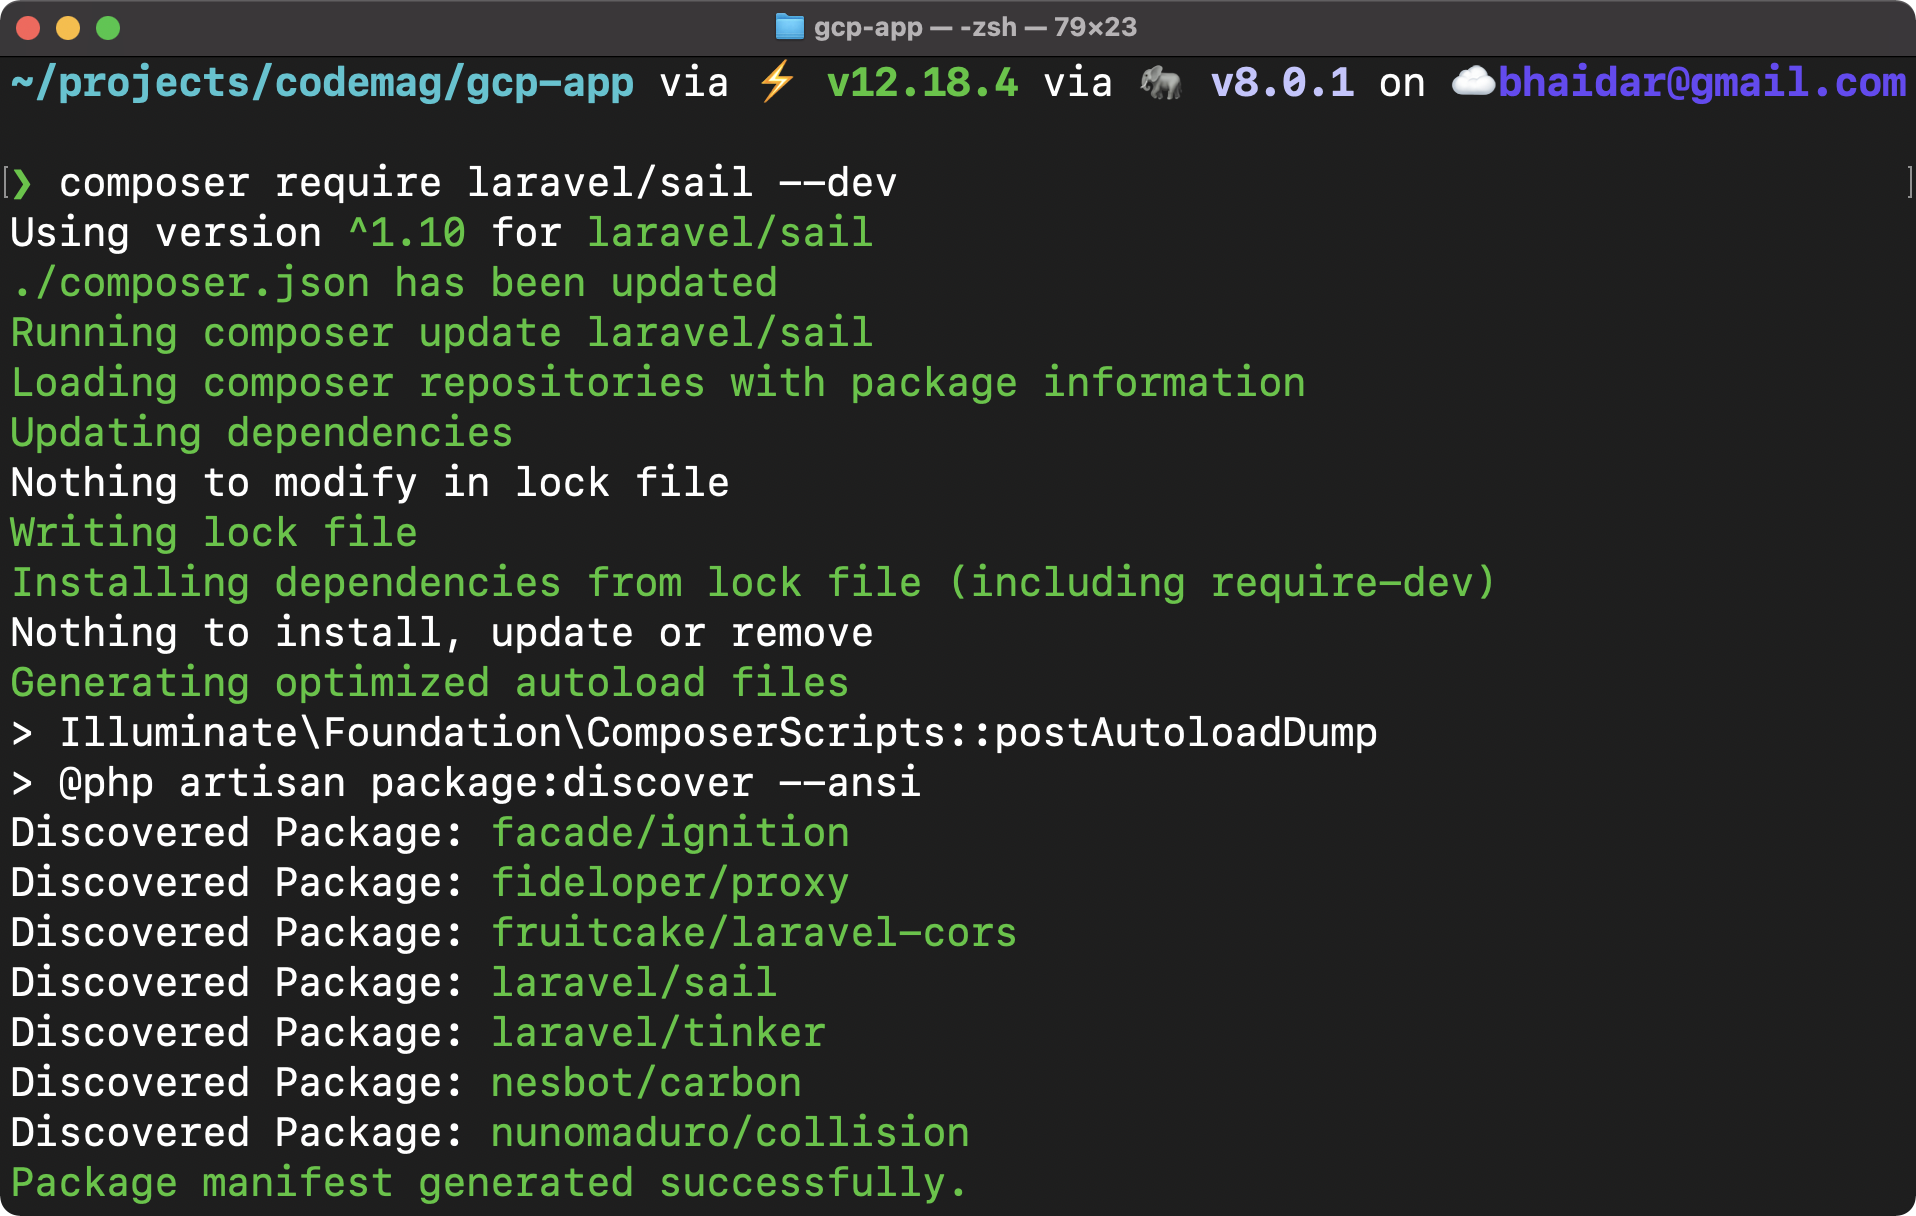
Step 2: Download and Install Laravel Sail
Right after installing the Laravel project locally, you need to download and install the Laravel Sail package. This package adds all the necessary boilerplate tools to allow running your Laravel application in Docker containers. Run the following command to download the package:
composer require laravel/sail --dev
Figure 2 shows running this command in action.
Composer downloads and configures the package locally. The next step is to install the Sail package. Figure 3 shows the installation process.
Run the following command:
php artisan sail:install
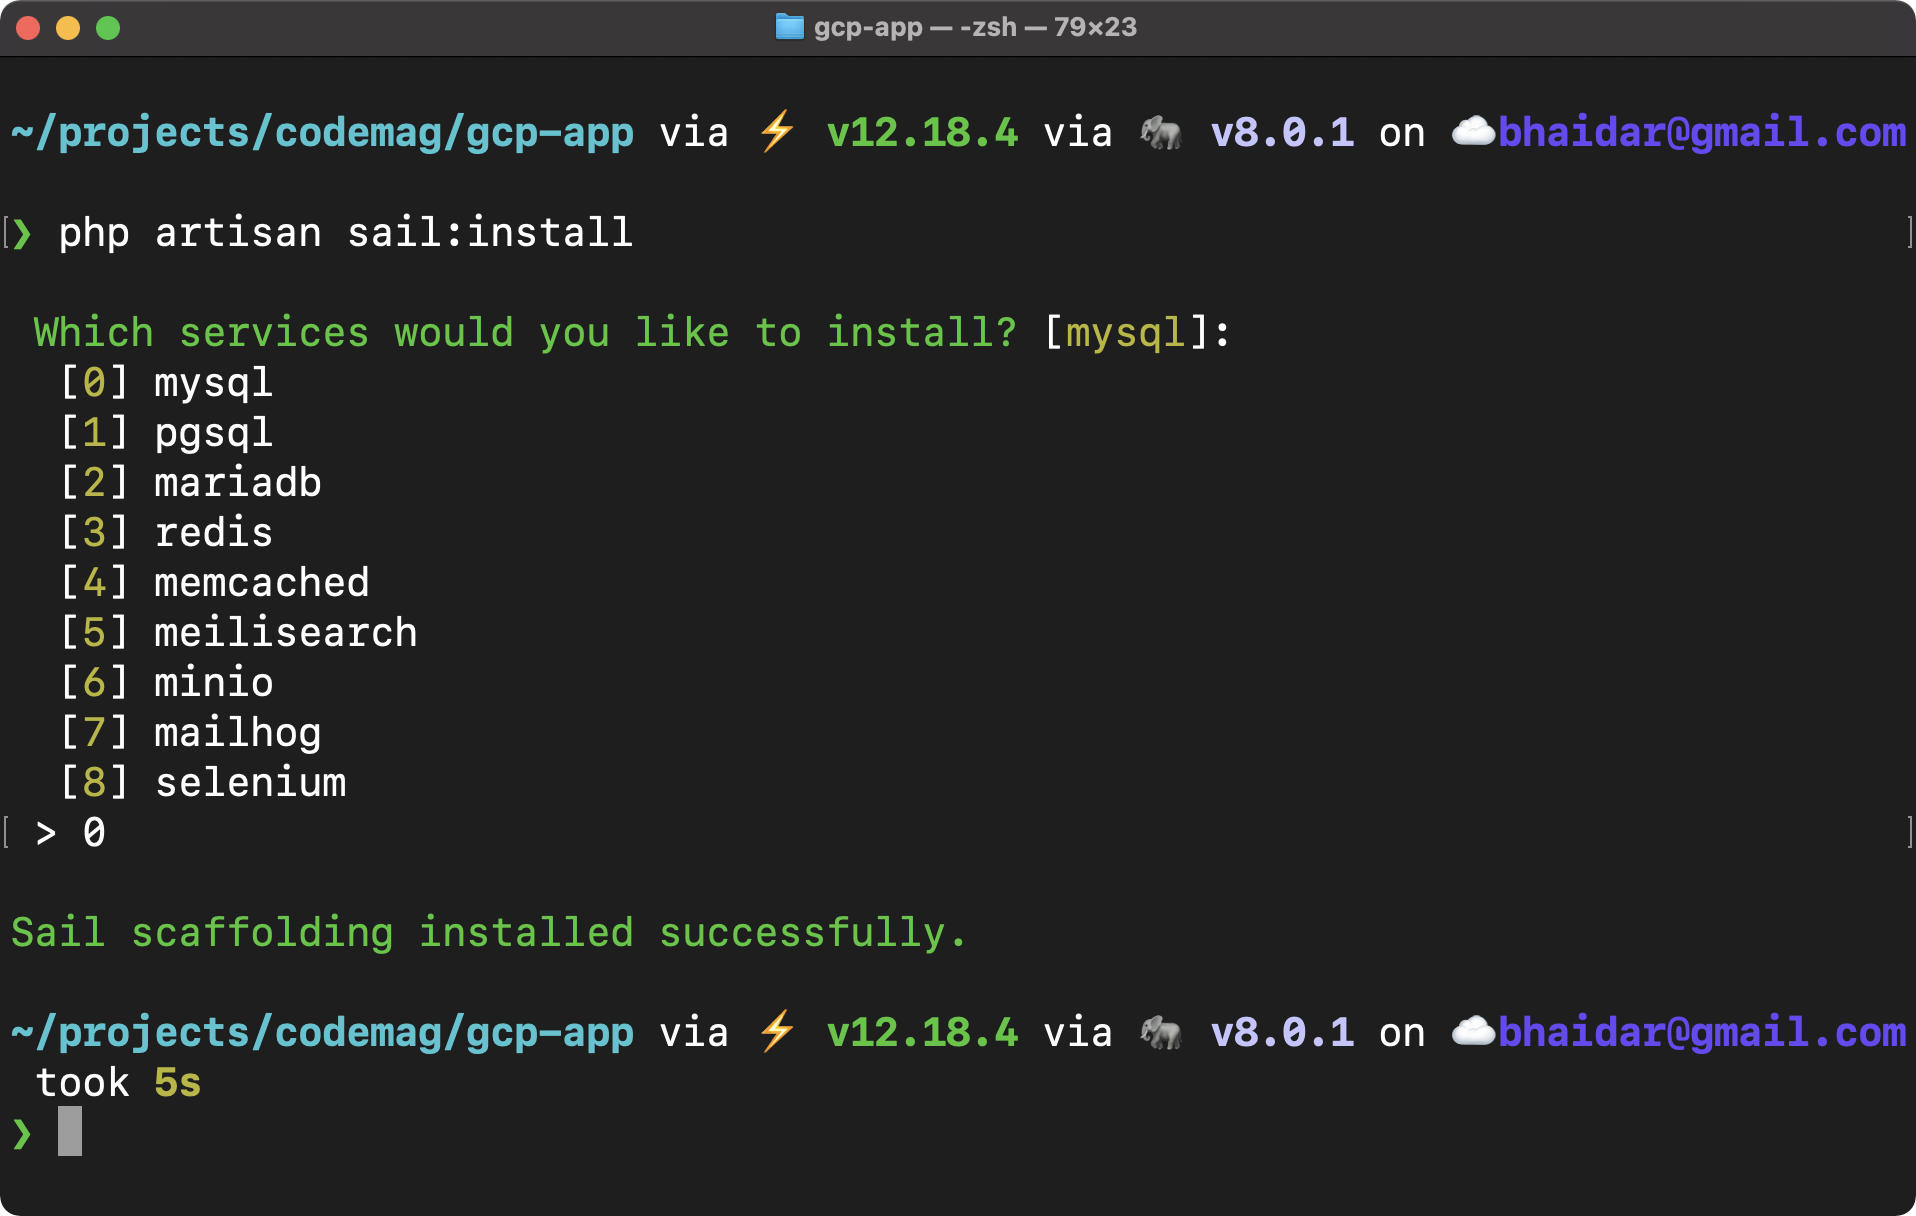
The command installs the package and prompts you to select one or more services to be included within the Sail installation and later run them as Docker containers.
Here, I just selected mysql. You can install multiple services by separating them with commas (e.g., 0, 3, 6).
Before running the application, make sure to open the /composer.json file and fix the Laravel Framework package to version 8.40 as follows:
"laravel/framework": "8.40"
Make sure the laravel/framework package you select doesn't have any third-party package dependencies using a higher version of PHP 7.3.
Step 3: Run the Application Locally
The final step is to run the application and view it in the browser. You need to use the Sail package to run the application as follows:
./vendor/bin/sail up --d
This command starts up all Docker containers (MySQL, Nginx, PHP, etc.) and makes the application ready to receive requests.
It takes a few minutes, depending on your Internet speed, to download all the Docker images, start them, and then serve your application. The sail command runs all the Docker containers in the background silently using the –d command option.
Let's run the default migrations that ships with a brand-new Laravel project:
sail artisan migrate:fresh
This command runs all the migrations present locally and creates the database tables accordingly.
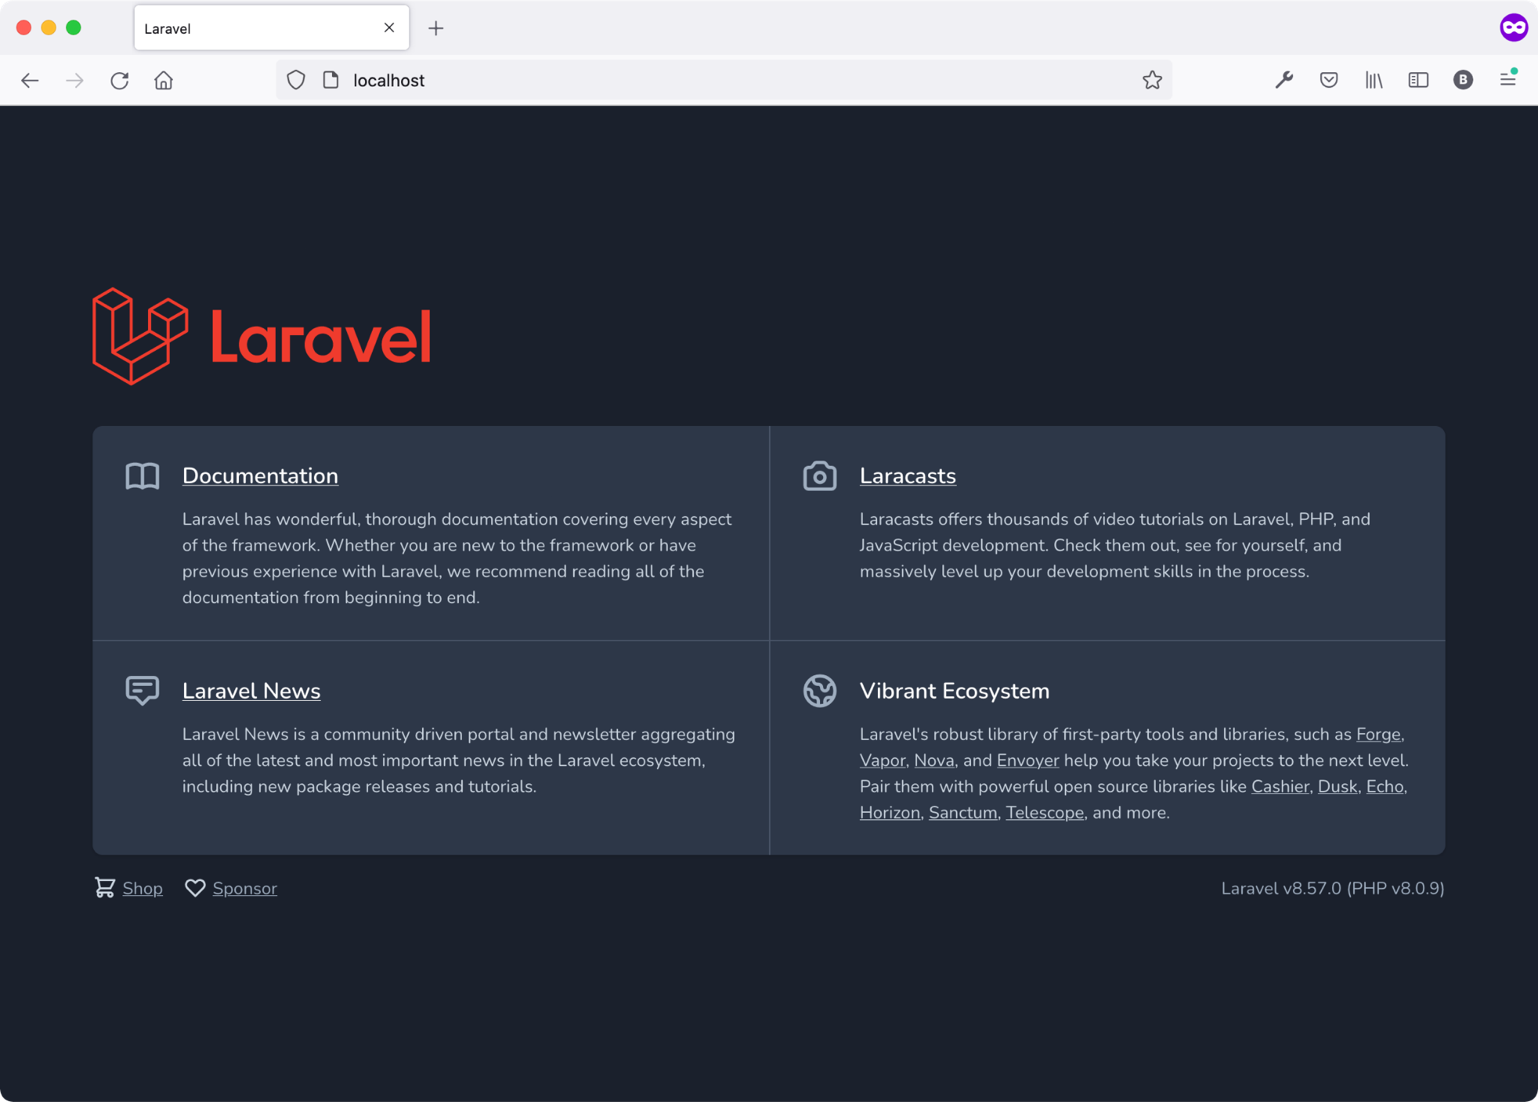
Now that you have your Laravel project ready, let's run it in the browser by visiting the URL http://localhost/.
Figure 4 shows the Laravel project up and running locally inside the browser.
Hosting the Application on GitHub
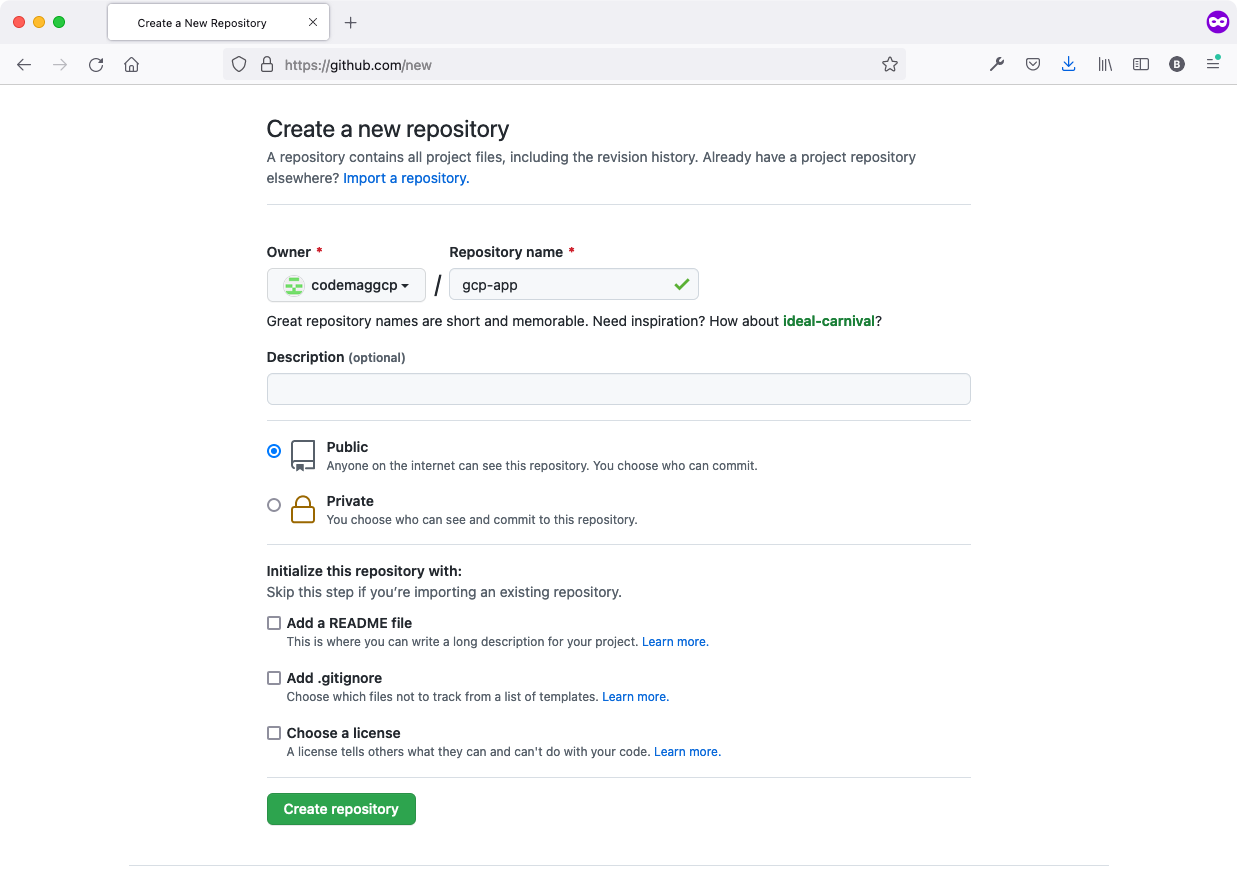
Let's start by creating a new GitHub repository named gcp-app. Figure 5 shows the creation screen for this new repository.
Right after creating the repository, run the following commands to push your local Laravel to GitHub:
echo "# gcp-app" >> README.md
git init
git add README.md
git commit -m "first commit"
git branch -M main
git remote add origin https://github.com/codemaggcp/gcp-app.git
git push -u origin main
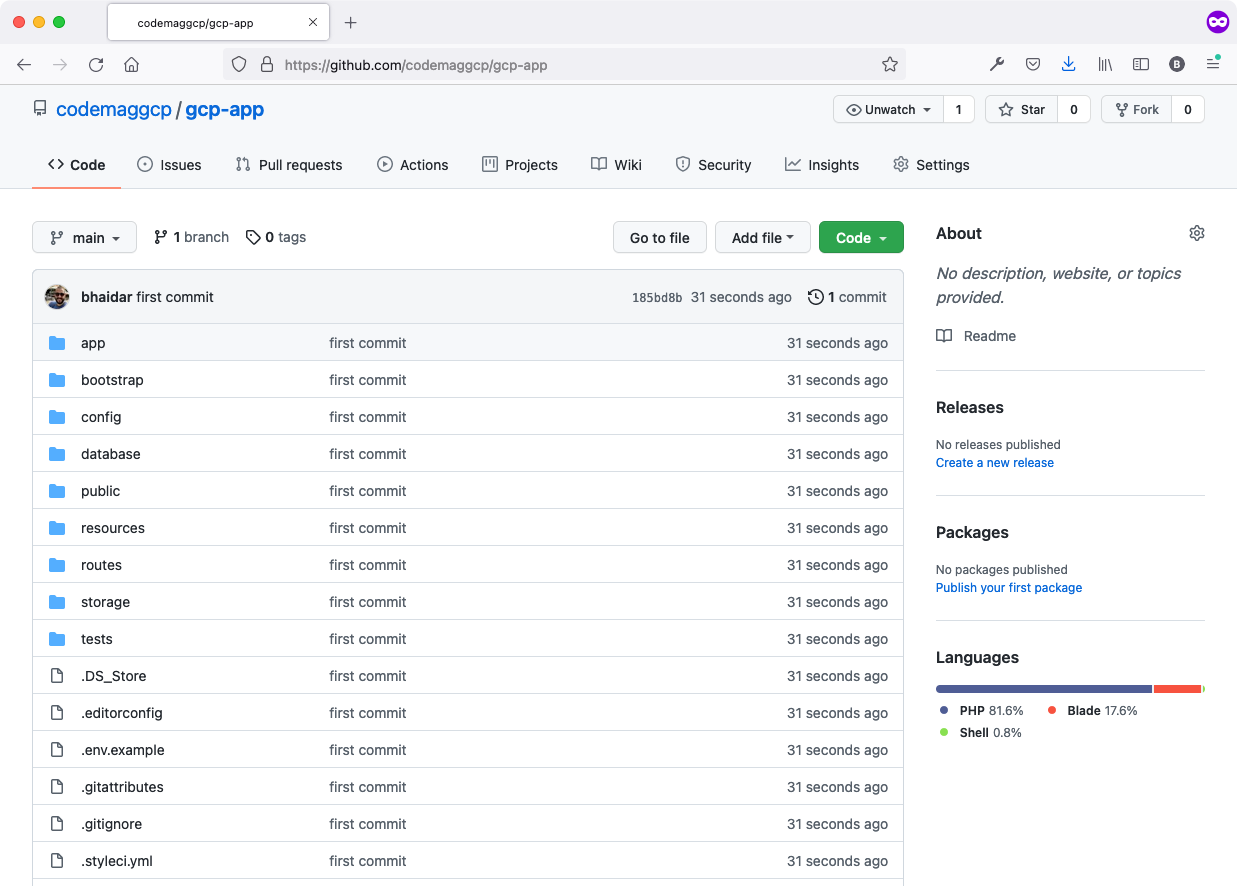
Switch back to GitHub and confirm that you have successfully pushed all the files and folders. Figure 6 shows the GitHub repository populated with your Laravel project.
That's it for now! In the coming section, you'll be connecting this GitHub repository to the GCP project you created, to automate the deployment of the Laravel project onto the GCP environment.
Create a GCP App Engine Application
The GCP App Engine (GAE) (https://cloud.google.com/appengine/) is a fully managed, serverless platform for developing and hosting a wide range of Web applications across multiple technologies. It has tight integration with the rest of the services offered by GCP, like Cloud Storage, and others. It takes the burden of managing virtual machines off your shoulders and handles all the nifty small details on your behalf.
GCP offers two flavors of GAE: Standard and Flexible environment. In brief, the standard environment (https://cloud.google.com/appengine/docs/standard) has limitations that make it more suitable to host stateless Web applications that respond to HTTP requests quickly. The flexible environment (https://cloud.google.com/appengine/docs/flexible) runs your applications in Docker containers on Google Compute Engine virtual machines (VMs) (https://cloud.google.com/compute/docs/instances). It offers more flexibility and freedom to host any kind of Web application on Docker containers.
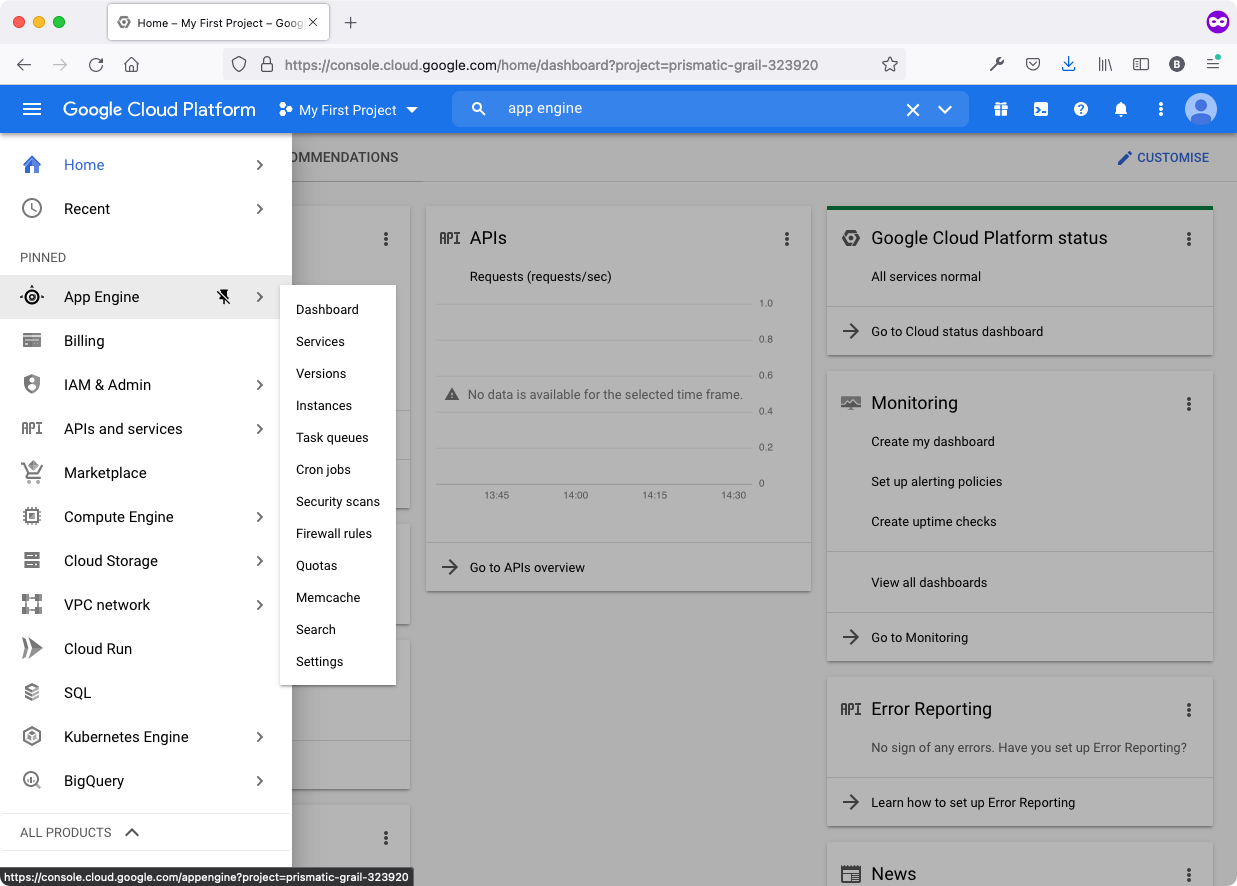
Let's start by navigating to the App Engine section on Google Cloud Console by selecting it from the left-side menu. Figure 7 shows where to locate the GAE on the main GCP menu.
You can always pin menu items inside the GCP left-side menu for ease of access
Click the CREATE APPLICATION button. Follow the steps to create your first GAE application.
GCP, like other cloud platforms, defines a location where the VMs hosting and handling your Web applications are. In GCP terms, this is known as Region and Zone. Figure 8 shows the region selection page.
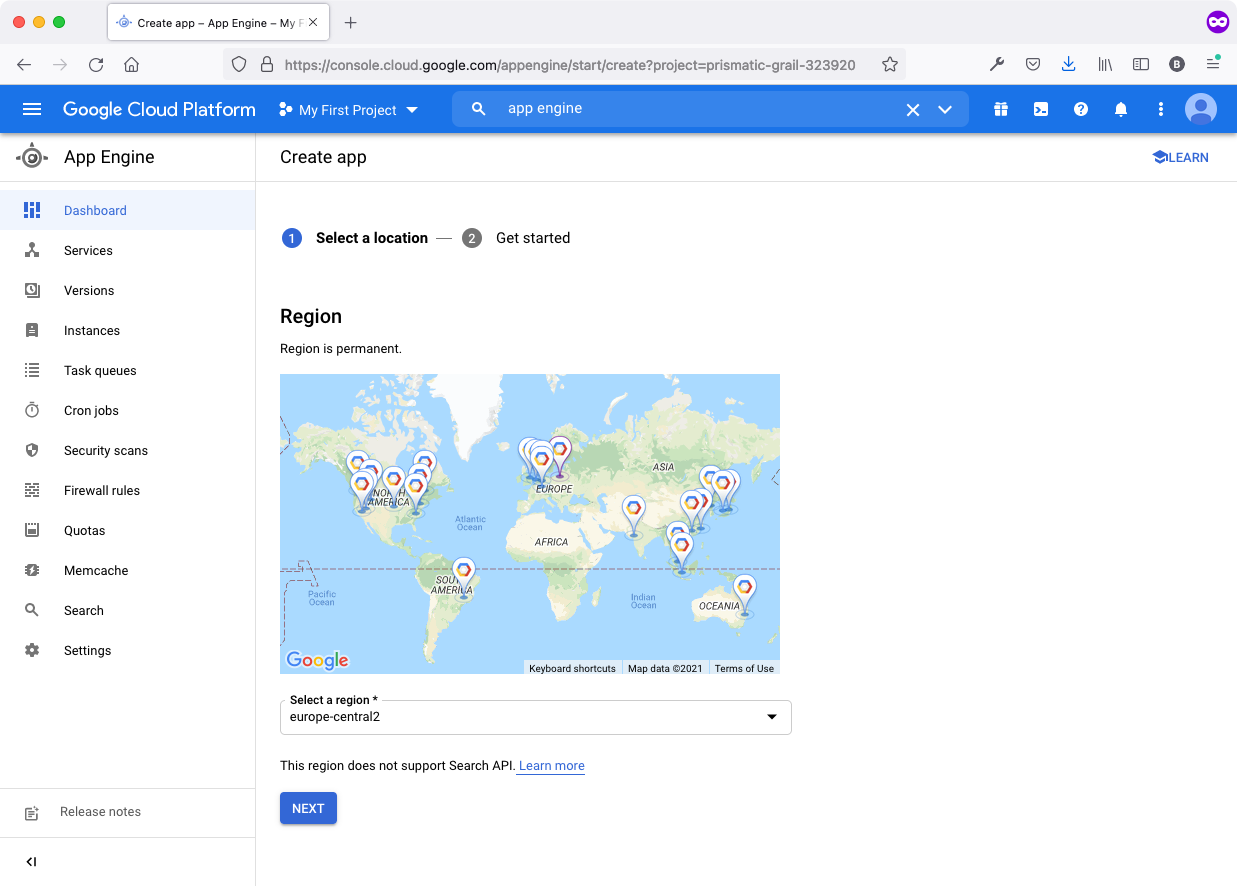
You're free to choose the region you like. In my case, I selected the europe-central2 region. Then click the NEXT button. You're done! On the next page, you can select the Language and Environment field. In case you want to deploy the Laravel project manually, go ahead and click the DOWNLOAD the CLOUD SDK on this page.
Follow the steps on-screen to finish the deployment. I won't be deploying the project manually; instead, I'll be using another service offered by GCP, named Cloud Build, which automates the deployment process every time you push new code to your GitHub branch.
The GAE follows an advanced and quite complex structure to host your Web applications. It defines the concept of a Service. You may have one or more services serving your Web application. Services can easily communicate with each other.
A Service can contain one or more Versions. A Web application can have multiple versions deployed inside the same Service. You may read more about GAE Services and Versions here (https://cloud.google.com/appengine/docs/flexible/php/configuration-files).
Let's add the app.yaml file into the root folder of the Laravel project. This file instructs the GAE on how to deploy the application, what language it uses, what resources it needs, and many other options we'll discover together along the way.
Create a new app.yaml file and paste the text shown in Listing 1.
Listing 1: app.yaml file
runtime: php
env: flex

runtime_config: document_root: public

# Ensure we skip ".env", which is only for local development
skip_files:
    - .env

automatic_scaling:
    min_num_instances: 1
    max_num_instances: 1

resources:
    cpu: 2
    memory_gb: 4
    disk_size_gb: 100

env_variables:
    # Put production environment variables here.
    APP_DEBUG: true
    APP_ENV: production
    APP_KEY: YOUR_APP_KEY
    APP_NAME: "GCP App - CODE"

    LOG_LEVEL: debug
Let's explore the configuration settings contained in Listing 1. The runtime variable specifies the language that the project uses. In this case, Laravel makes use of the PHP programming language. The env variable specifies whether this project uses GAE Standard or Flexible environment.
The runtime_config variable allows you to configure Nginx, PHP runtime, Supervisord, and other runtime environments. In this case, I'm setting the value of document_root to public. The document_root represents the DOCUMENT_ROOT for Nginx and PHP.
The skip_files variable defines which file or file types are to be ignored when deploying this project to GAE virtual machines.
You can use the automatic_scaling variable to specify the autoscaling requirements. In this case, you're configuring the GAE to use a single virtual machine instance at any time.
The resources variable allows you to specify the hardware capabilities of the instance(s) that GAE uses to host your Web application. In this case, you're specifying the virtual machine instance to have two CPUs, 4 GB of RAM, and a disk of size 100 GB.
The env_variables represent the .env file for the project when it runs in the GAE cloud.
The app.yaml is much more involved and allows you to specify more settings. You can review them all here: https://cloud.google.com/appengine/docs/flexible/php/reference/app-yaml.
Now let's replace the YOUR_APP_KEY with an actual Laravel application key. Run the following command:
php artisan key:generate --show
Grab the key that's displayed on the screen and paste it instead of YOUR_APP_KEY inside the app.yaml file. Then, make sure you append the following script under the scripts section of the composer.json file:
"scripts": {
        ...
        "post-install-cmd": [
            "chmod -R 755 bootstrap\/cache",
            "php artisan cache:clear"
        ]
},
This script runs after a successful deployment to set the proper permissions on the bootstrap/cache folder and clear the cache of the Laravel project.
For now, commit the changes you've made to the source code (without pushing them to GitHub).
Now that you've successfully configured the GAE, you can proceed to the next step and make use of the GCP Cloud Build to deploy your project.
Create a GCP Cloud Build Workflow
Cloud Build is a service that executes your builds on GCP's infrastructure. When it runs, it searches for a build config file inside your application folder. This file contains build steps to instruct Cloud Build on how to build the application and what to do with the artifact generated as a result of the build process.
Every build step consists of a Docker image to use and a command to run inside this Docker image. This means that every step of the Cloud Build workflow executes inside its own Docker container. The Docker container can run fetch dependencies, unit tests, integration tests, static analysis tools, and it can generate artifacts for deployment.
Cloud Build is part of Google's CI/CD Platform (https://cloud.google.com/docs/ci-cd) that allows you to build, deploy, and automate the entire process.
With Cloud Build, you can:
- Build your app (run tests, etc.).
- Deploy your app (on GAE, Cloud Run, and other services).
- Automate the entire process by using Cloud Build Triggers.
By the end of this next section, you'll build a complete Cloud Build Workflow to automate the build and deployments of the Laravel project at hand.
Step 1: Enable GCP APIs and Libraries
First things first: You need to enable a few APIs and Services on GCP. Locate the following APIs, and enable them in this order:
- App Engine Admin API
- Cloud Build API
- Compute Engine API
- Cloud Deployment Manager V2 API
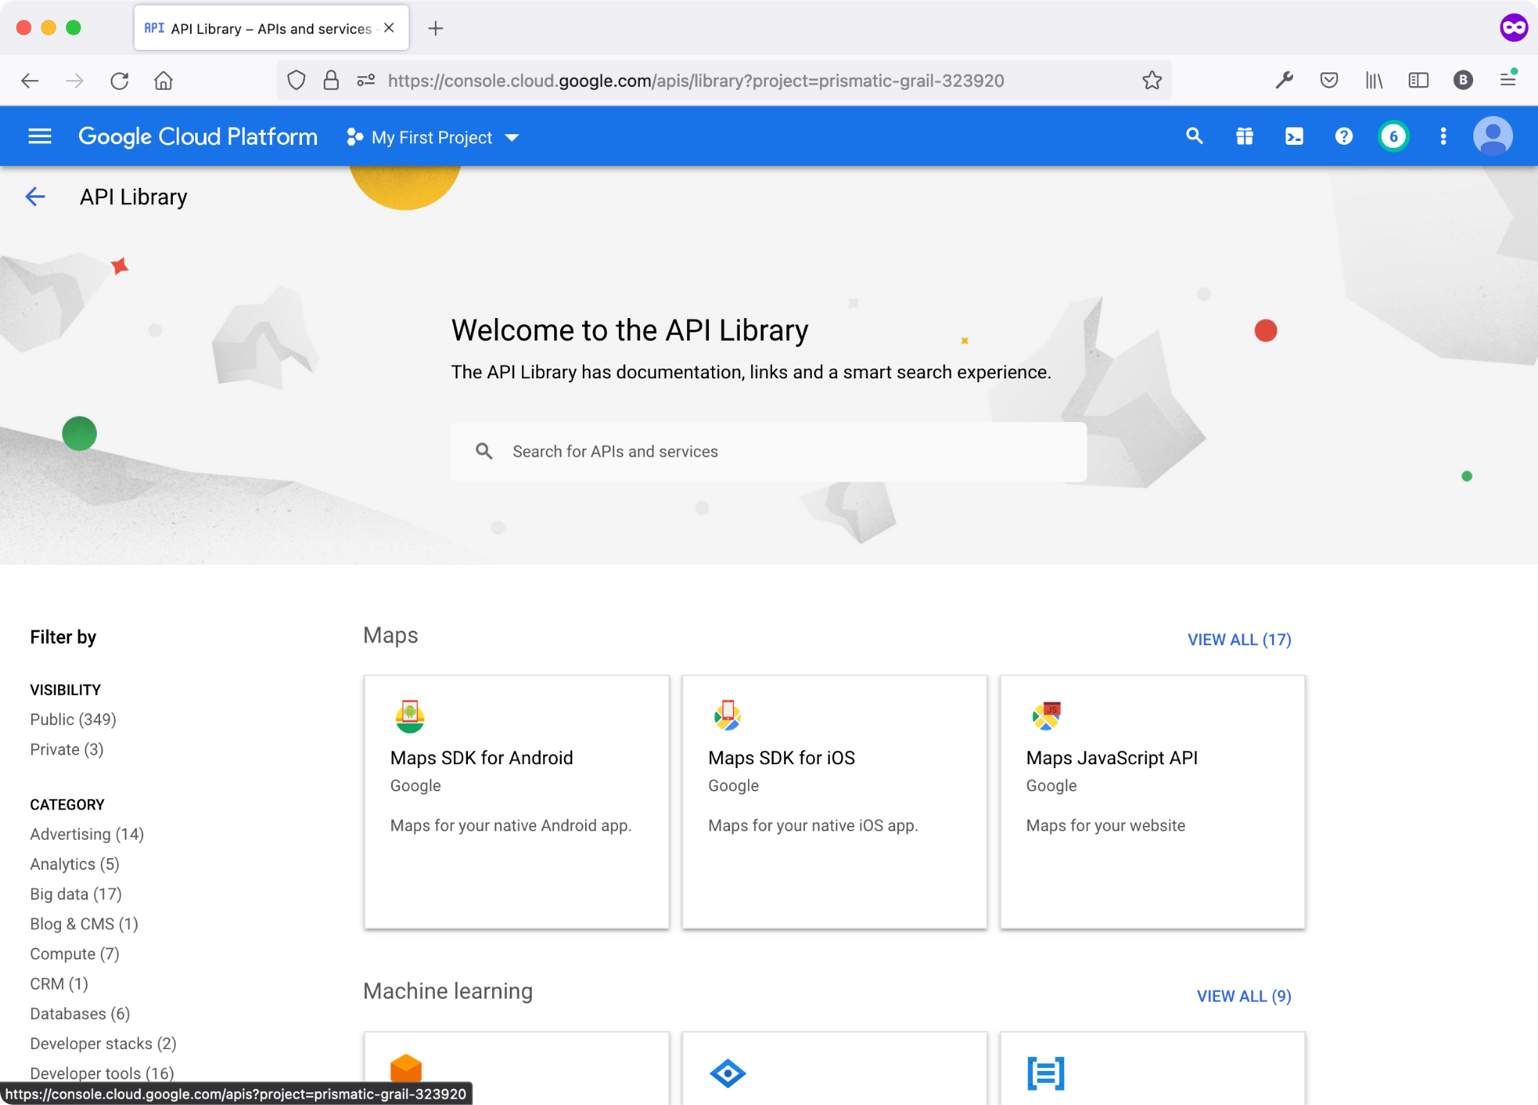
To enable any API or Library on the GCP, on the left-side menu, locate and click the APIs and Services menu item. Then, once you're on the APIs and Services page, click the Library menu item. Figure 9 shows the API Library page.
Search for a library, click on it, and enable it. Figure 10 shows the Cloud Build API page.
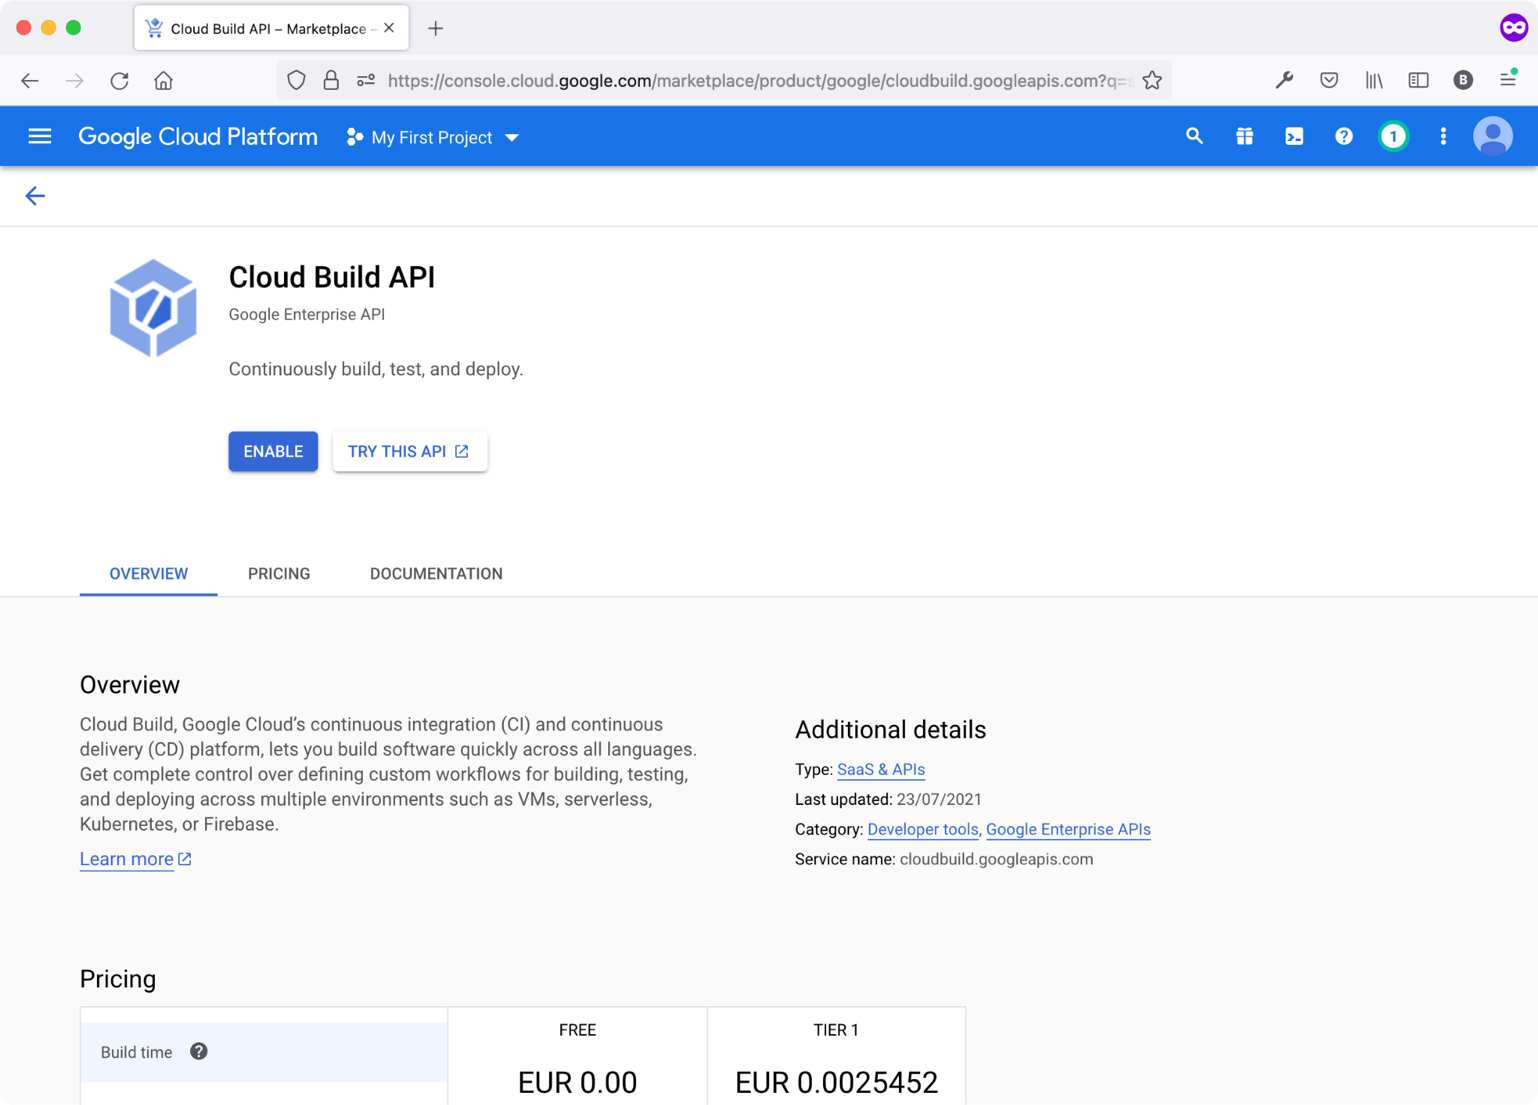
Click the ENABLE button to enable this API.
Step 2: Give Permissions to the Cloud Build Service Account
GCP has the concept of a service account. A service account is a special kind of account used by an application or a virtual machine instance, not a person.
For example, applications use service accounts to make authorized API calls. In another example, a Compute Engine VM can run as a service account, and it can be given permissions to access the resources it needs. This way, the service account is the identity of the service, and the service account's permissions controls which resources the service can access.
You can read more about GCP Service Accounts here: https://cloud.google.com/iam/docs/service-accounts.
When you create a GAE application, GCP creates a default GAE service account behind the scenes. When you enable the Cloud Build API, once again, it creates a Cloud Build service account.
To allow the Cloud Build API to build your application and deploy it to the GAE, you need to give its service account all the necessary permissions to do its job properly.
Locate and access the Identity and Access Management & Administration (IAM & Admin) section on the left-side menu. This section allows you to manage all identity and access management to your project(s) on GCP.
Figure 11 shows all the required roles and permissions that I've assigned to the Cloud Build service account. Look for the member that ends with @cloudbuild.gserviceaccount.com to locate the Cloud Build service account.
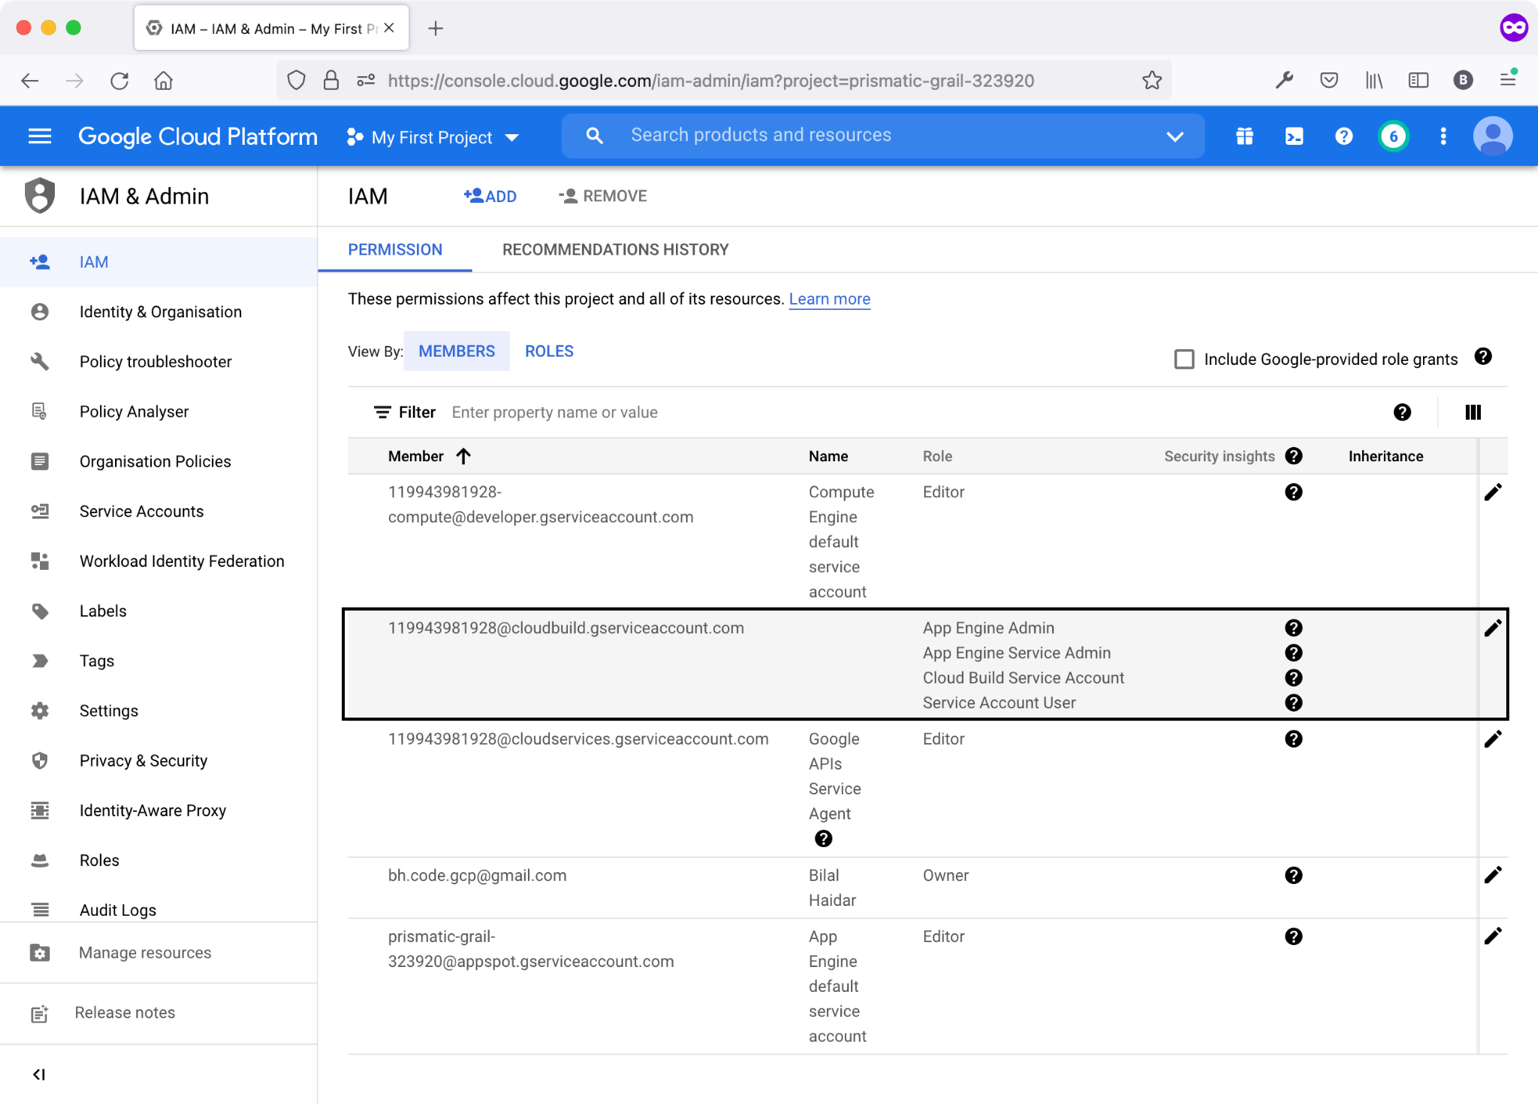
You can click the pencil icon to edit the list of roles assigned to the Cloud Build service account or any other member.
Those are all the permissions needed so far to enable the Cloud Build service to build your application and deploy it to GAE.
Step 3: Add a cloudbuild.yaml Build Config File
To deploy an app on GAE, you can either do it manually by using the Cloud SDK commands (https://cloud.google.com/sdk) or automate the entire process using Cloud Build.
As mentioned, Cloud Build requires having a build config file. Let's start by creating the ci/cloudbuild.yaml file. Paste the content in Listing 2 inside the cloudbuild.yaml file.
Listing 2: ci/cloudbuild.yaml file
steps:
    - name: 'gcr.io/google.com/cloudsdktool/cloud-sdk'
    entrypoint: 'bash'
    args:
        - '-c'
        - |
          gcloud config set app/cloud_build_timeout 3600 \
          && gcloud app deploy -q --promote -v=$BUILD_ID \
          --project=$PROJECT_ID

timeout: '3600s'
The cloudbuild.yaml file has a single build step. It runs two Google Cloud SDK commands inside a Docker container that's based on the Cloud SDK Docker image named gcr.io/google.com/cloudsdktool/cloud-sdk.
The two Cloud SDK commands are straightforward:
- gcloud config set app/cloud_build_timeout 3600: The timeout, in seconds, to wait for Docker builds to complete during deployments.
- gcloud app deploy -q –promote -v=$BUILD_ID –project=$PROJECT_ID: This command deploys the application to the GAE using the following options:
- -q: Disables all interactive prompts when running gcloud commands. If the command required an input, defaults will be used or an error will be raised
- –promote: Allows the deployed version to receive all traffic.
- -v: The version of the app that will be created or replaced by this deployment. In this case, I'm using a built-in variable, the Cloud Build ID, to serve as a version name.
- –project: The GCP project ID to use for this invocation.
Now that the cloudbuild.yaml file is ready, let's move on to automate running the Cloud Build and deploying the Laravel project.
Step 4: Create a Cloud Build Trigger
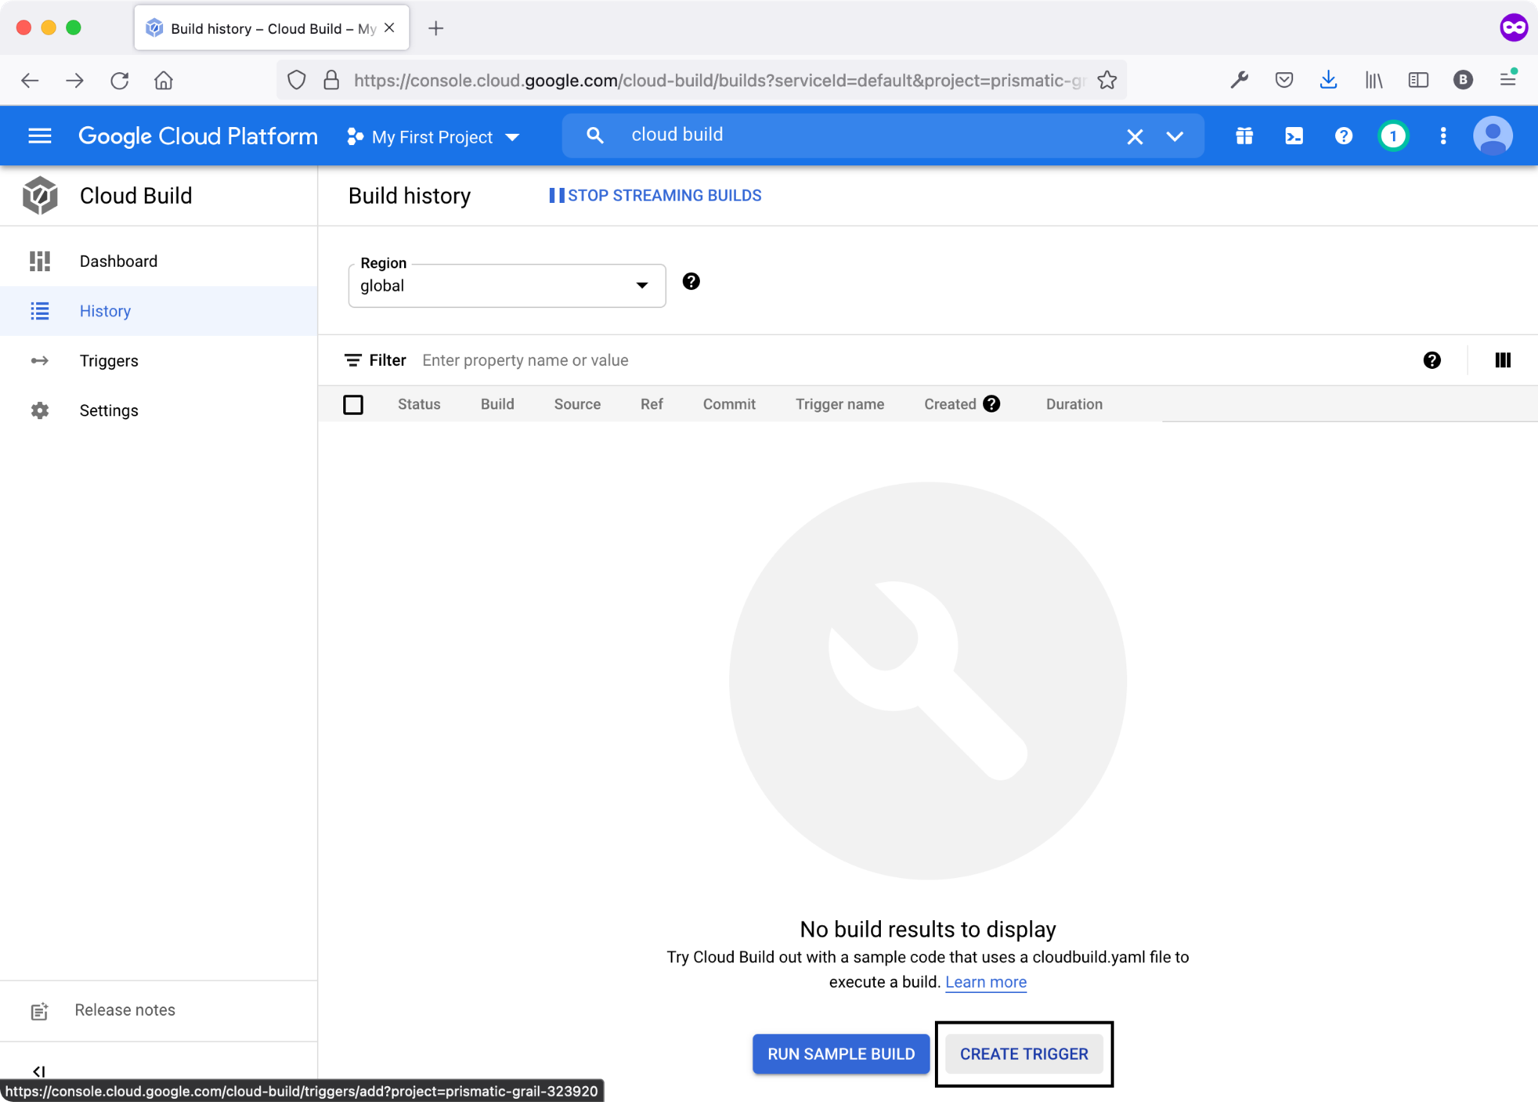
Navigate to the Cloud Build section on the left-side menu. Locate and click Triggers. Figure 12 shows the Triggers page.
Click the CREATE TRIGGER button located in the bottom center of the page. Figure 13 shows the first part of the trigger creation page.
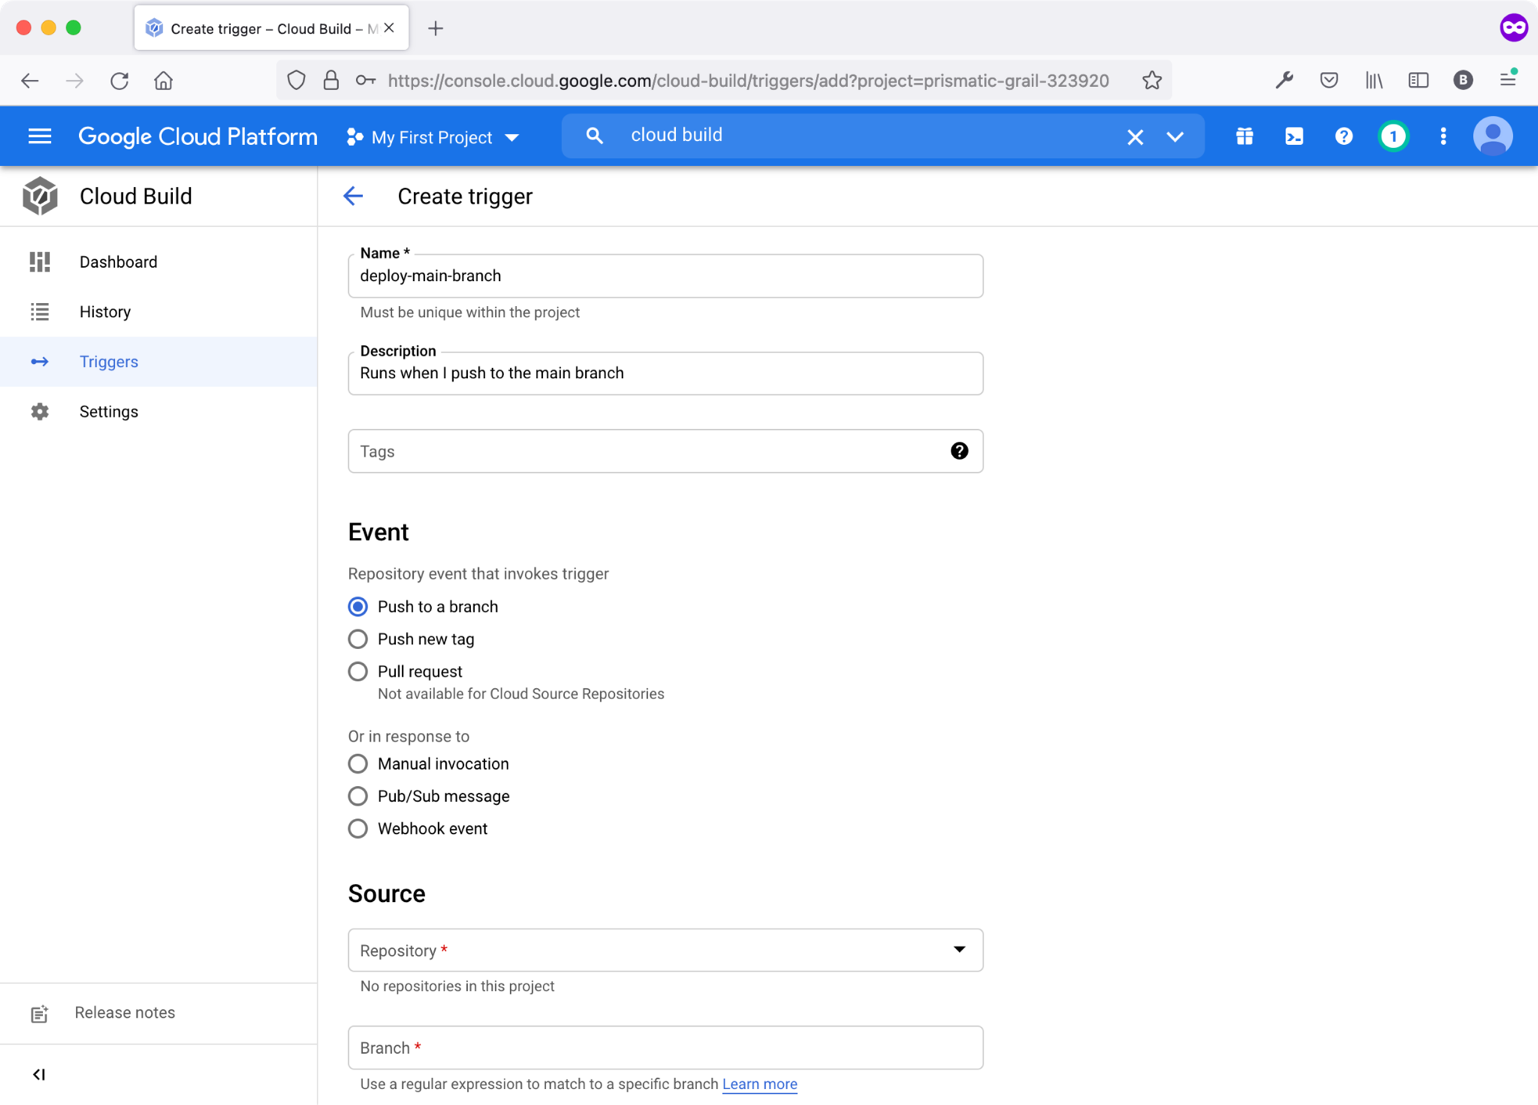
Give this new trigger a name and description (optional).
The Event defines the event that, when it happens, causes this trigger to run. There are a variety of options to pick from. In this case, I'll be using the Push to a branch event. This means that every time I push a GitHub branch, this trigger executes.
The next step is to select the Git repository and branch. Click inside the Repository field and then click the CONNECT NEW REPOSITORY button. Figure 14 shows the pop-up window to connect to the repository.
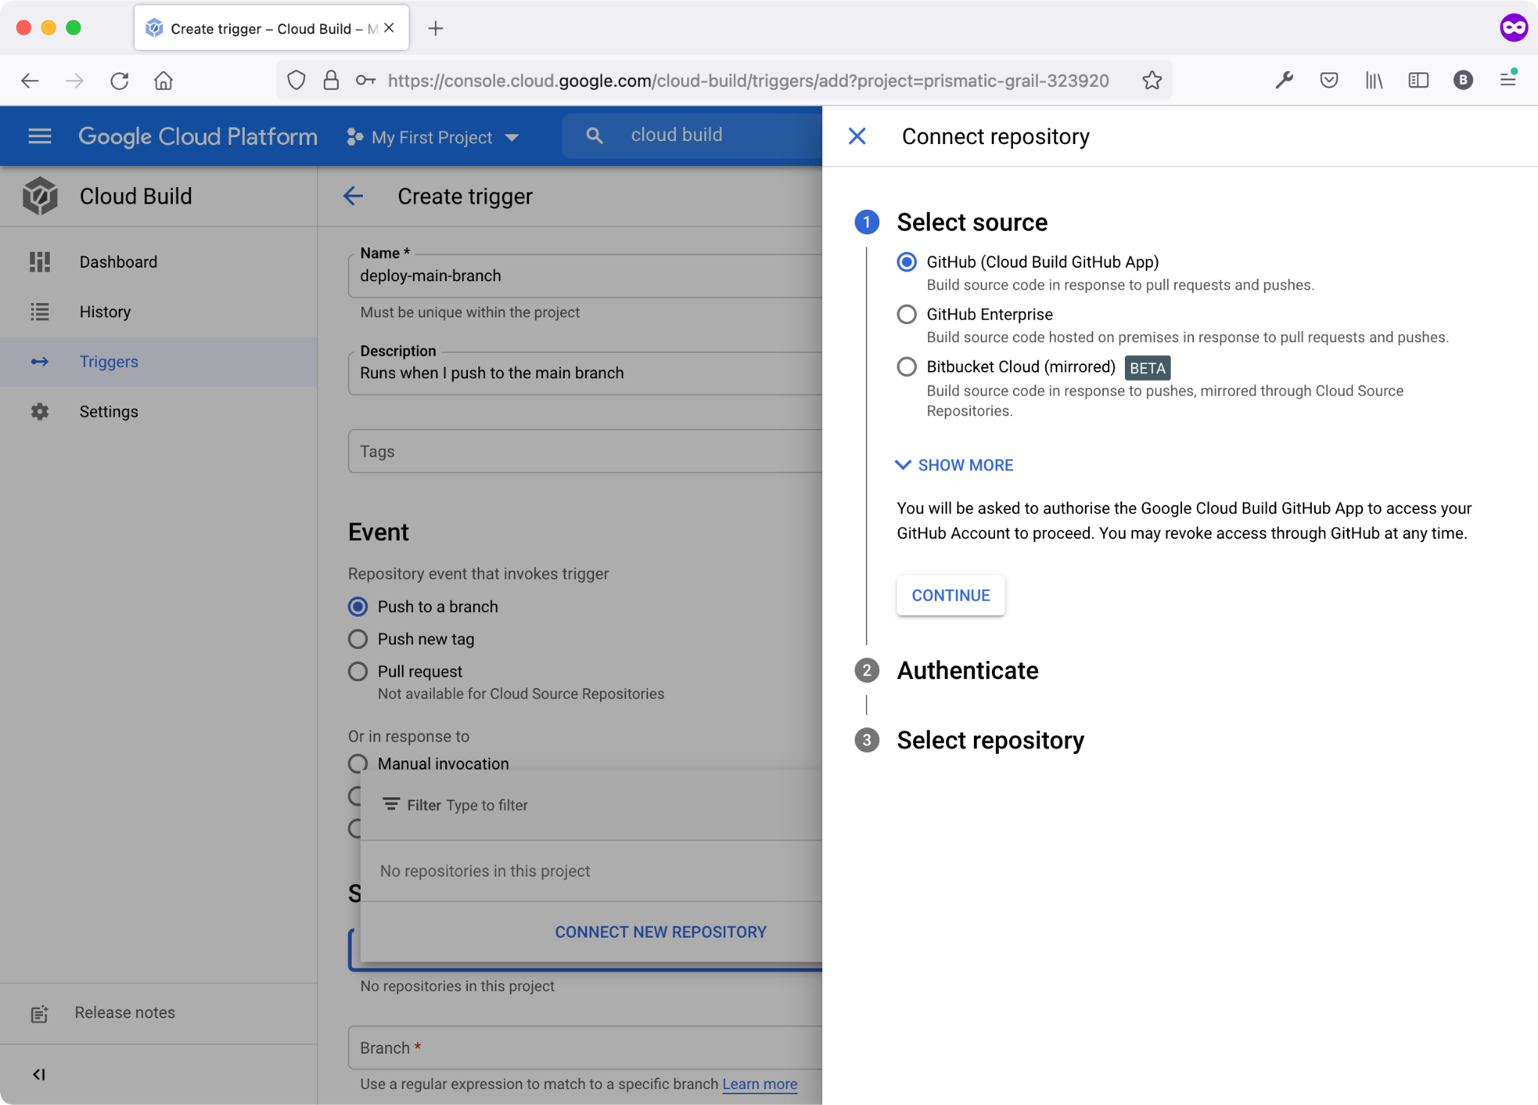
You can connect to a variety of source controls. I'll keep the default option and use GitHub. Click the CONTINUE button.
GCP wants to take your permissions and authenticate you to GitHub so that it can connect to the GitHub repository on your behalf. Authenticate GitHub and give the permissions needed.
Next, select the GitHub repository. If you haven't connected your GitHub account before with GCP, you need to locate and click the INSTALL GOOGLE CLOUD BUILD button on one or all of your GitHub repositories. Once done, you can select your GitHub account and repository to use in this Cloud Build trigger. Figure 15 shows the repository that I've selected.
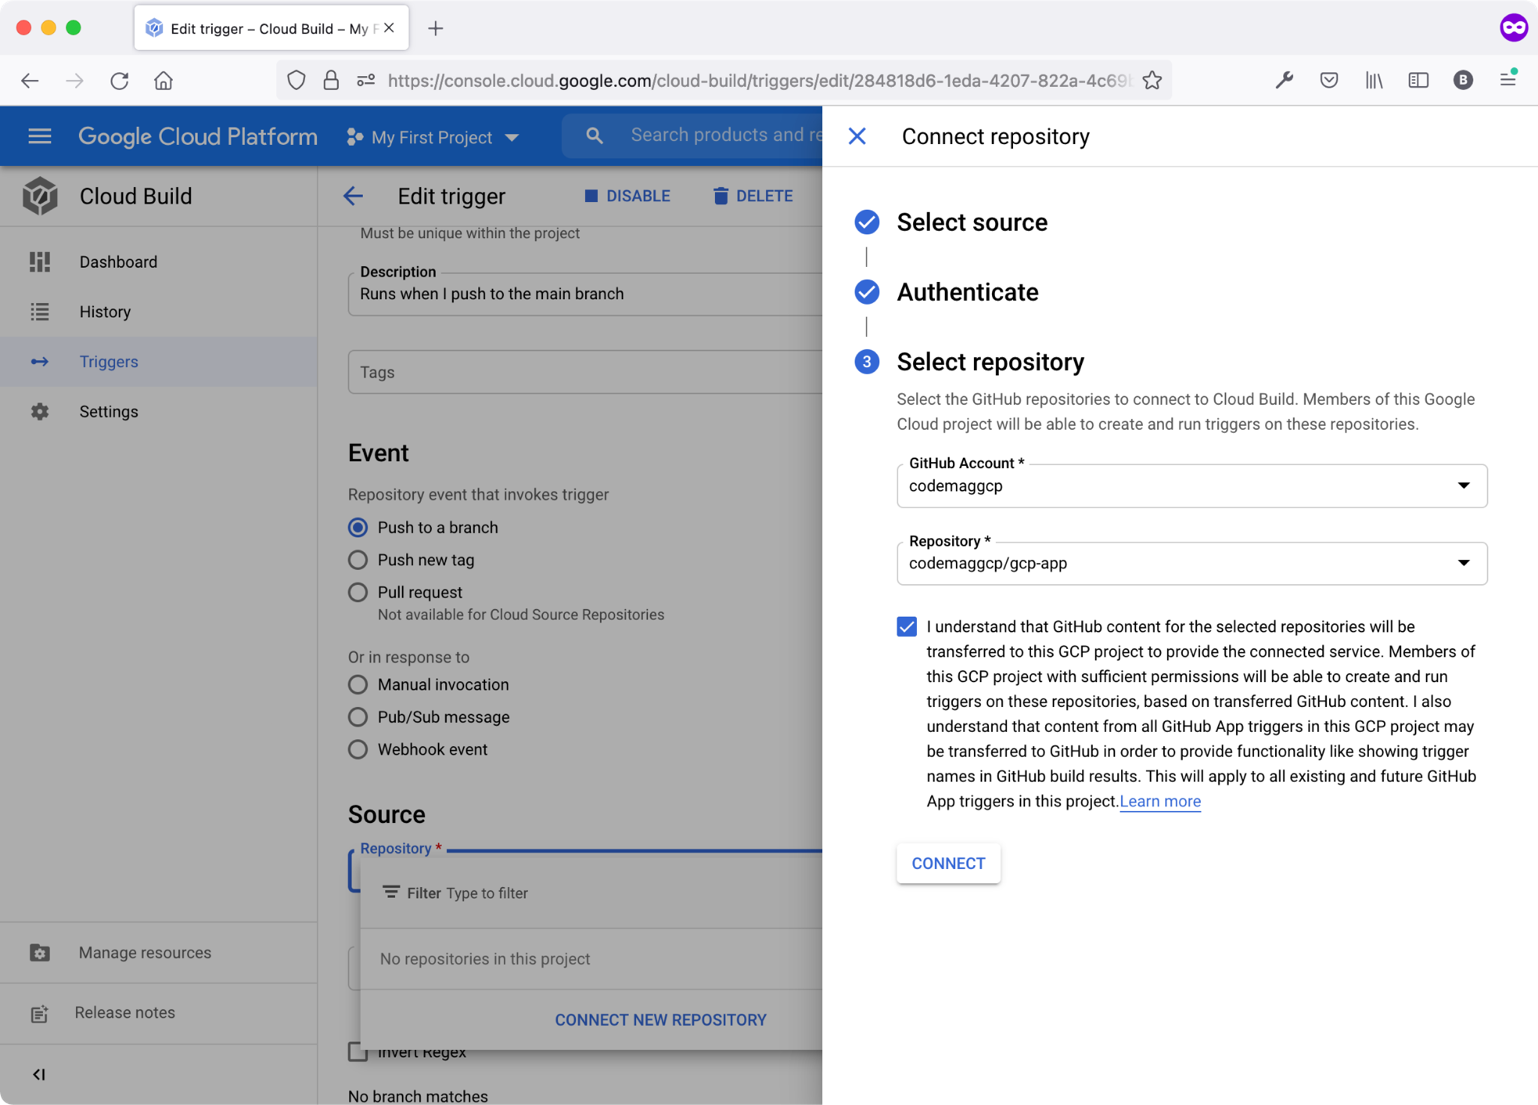
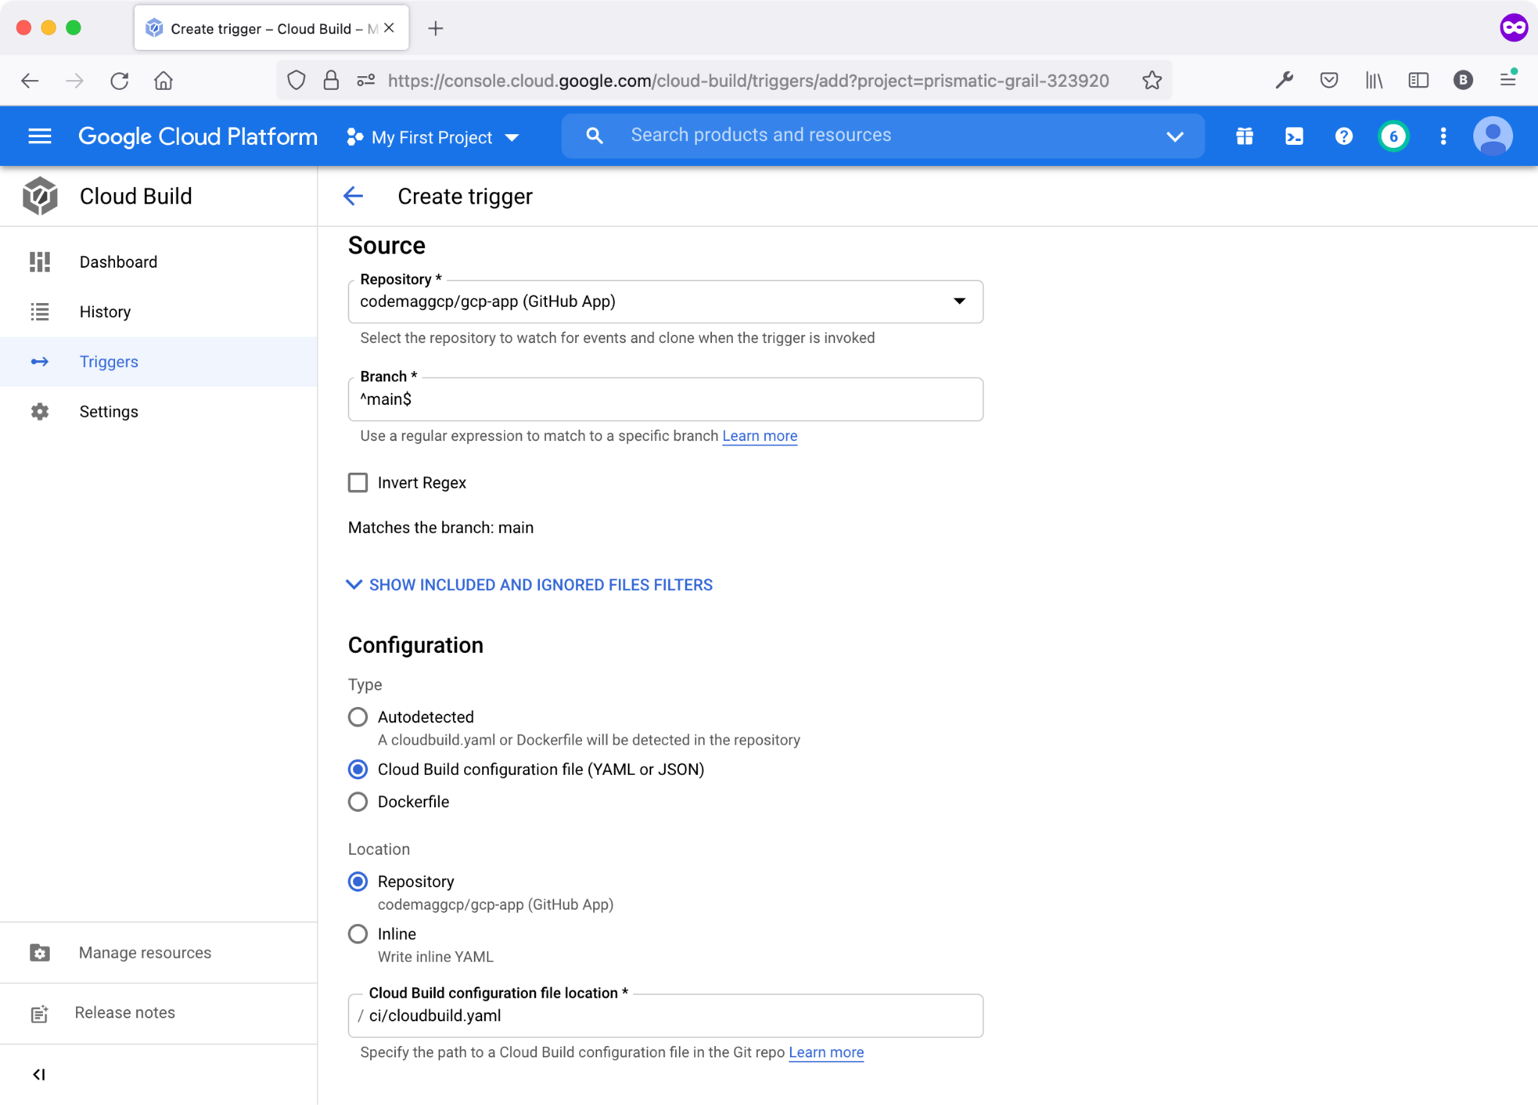
Now, click the CONNECT button. Go back to the trigger creation page and input the following expression for the branch name: ^main$. By completing these steps, you're instructing GCP to execute this trigger every time you push code into the main branch.
Finally, you want to specify the file path of the cloudbuild.yaml file. Figure 16 shows where to specify the file path.
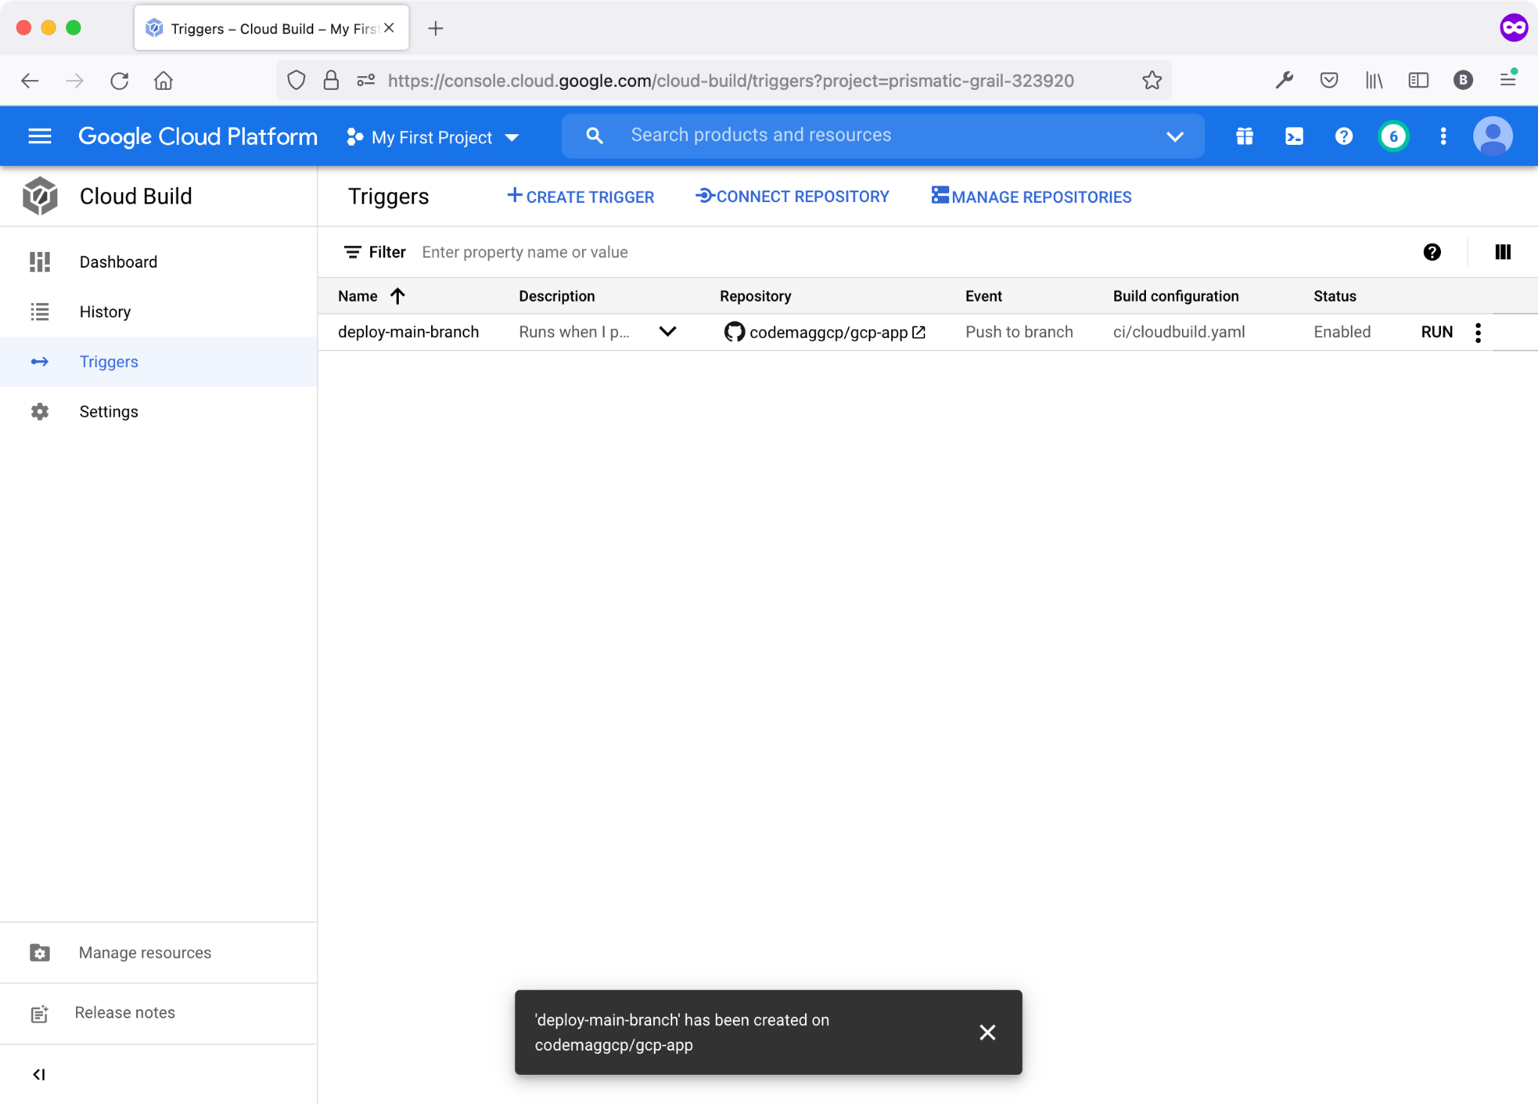
In summary, you've created a Cloud Build trigger that runs when you push code to the application GitHub repository main branch that eventually runs and executes the cloudbuild.yaml file. Return to the Cloud Build Triggers page and make sure that you've created the trigger successfully. Figure 17 shows the new trigger that you just created.
Step 5: Run Cloud Build Trigger
The Cloud Build Trigger is the glue that connects three major activities in the life cycle of a project:
- Developing and pushing code to source control (GitHub in this case)
- Building the application on GCP infrastructure
- Deploying the application on GAE
Thanks to the Cloud Build Trigger, when you push your code to GitHub, the trigger runs and executes the Cloud Build Workflow. In turn, it builds the Laravel project and deploys it on GAE.
To deploy your application, you've got two options:
- Click RUN on the trigger itself.
- Push code to GitHub on the main branch of the application's repository.
Whichever option you choose, Figure 18 shows a successful execution of the trigger.
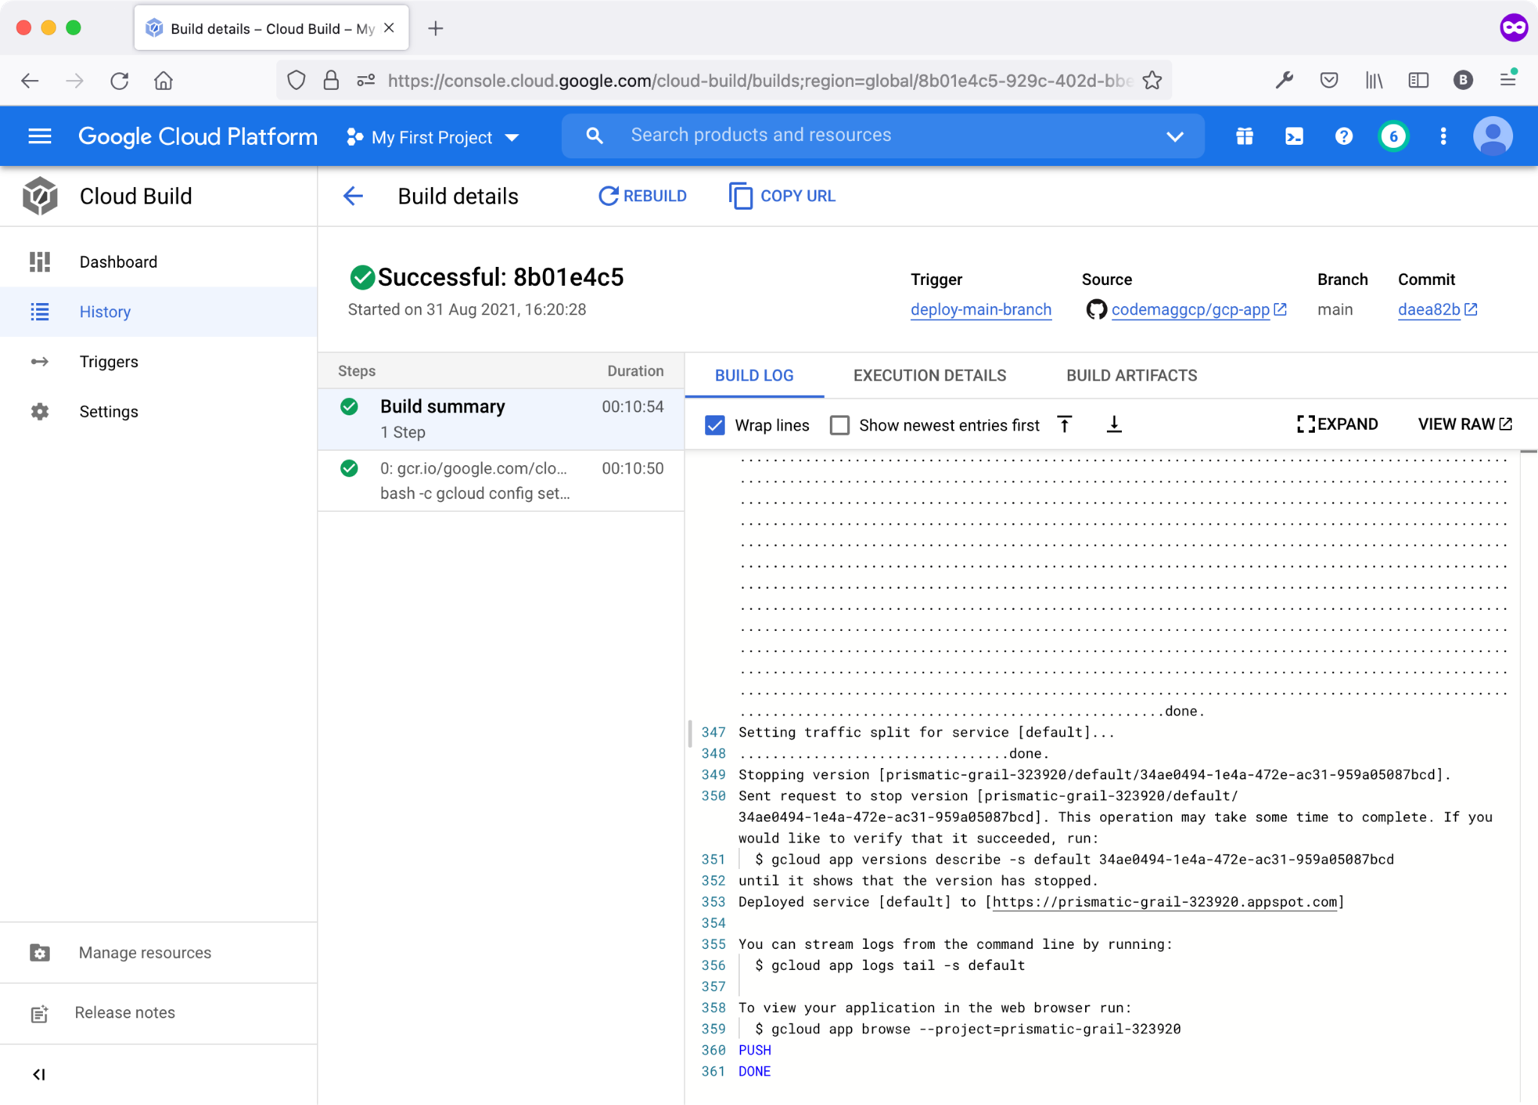
Navigate back to the App Engine section under Services and click the default service. The Laravel application deployed opens in a new instance of the browser.
Conclusion
In this article, I laid down the foundation for the coming articles in this new series. Starting from the very basics of deploying a Laravel project to GCP is a steppingstone in understanding the rest of the features and requirements of deploying applications to GCP.
Next time, I'll dive into database topics like creating and using a GCP Cloud SQL and connecting to a Cloud SQL from within a Laravel application. Also, you'll see how to run Laravel migrations as part of the Cloud Build Workflow, and much more.
Stay tuned!
