


Microsoft Office SharePoint Portal Server 2003 and Windows SharePoint Services offer an exciting key technology: Web Parts.
Both SharePoint offerings ship with an array of sample Web Parts; putting them in action is the best way to learn what Web Parts are and how they are used. Creating Web Parts in Visual Studio.NET is about to become one of the most powerful tools in your developer's repertoire.
From the end user point of view, Web Parts provide customization tools that affect the appearance and content displayed on a workspace. Web Parts empower end users to design their own user interfaces to fit a personal way of thinking, analyzing, and of getting the job done, using drag-and-drop plug-and-play components on each individual's SharePoint workspace. These plug-and-play components display a wide variety of information in a number of formats and views.
Web Parts can be added to Web Part Zones at design time or left empty, waiting for the user to add the specific Web Parts they want to use.
One of the key concepts behind Windows SharePoint Services and Web Parts is that non-programmers can assemble the information they need and control how they want it displayed. On a single page, someone could analyze sales information, keep an eye on a stock ticker, review a calendar, and monitor a sports news feed. Some of these functions are less vital than others, but a non-programmer now has the ability to view this sort of information if they want to.
All of the customization is done at run time while the user views a live page. Changes are made when the user specifies modifications to the current page; a list of available Web Parts is displayed, a Web Part is selected, and a simple drag and drop places it in the desired location. The Web Part displays whatever content it has been programmed to display, be it sales information and sales graphs, a customer list, a stock ticker, or fantasy football results. Users drag and drop a Web Part into a specified Web Part Zone on a specific type of Web Part Page that is designed to be receptive.
The latest SharePoint products and technologies use Microsoft ASP.NET Web Part Pages to design and display SharePoint sites. How much freedom users have to use Web Parts and Web Part Pages depends on to which security group (or groups) the user is assigned and the rights assigned to each group.
From a developer's point of view, a Web Part is just a collection of ASP.NET server controls. The primary difference between a standard ASP.NET control and a Web Part is that standard ASP.NET controls are added to ASP.NET pages at design time by developers, and a Web Part is added to a Web Part Zone on a Web Part Page at run time by users.
As part of its integration with Windows SharePoint Services, FrontPage 2003 provides the capability to build Web Parts Pages comprised of Web Part Zones.
One thing you might have noticed is that Web Parts don't fit the mold of traditional programming with a definite demarcation between design time and run time. Run time demands a new role for users: real-time page design and creation. This simplifies Web design because the focus can be on page design and layout, done in Microsoft Office FrontPage 2003 or Microsoft Visual Studio.NET.
Adding a Web Part to a SharePoint Server Portal 2003 Page
In order to add and change Web Parts on a shared-view SharePoint site, you must be granted the Add and Customize Pages rights for the site. As a member of the Web Designer and Administrator site groups, you will be granted this right by default. In order to add and change Web Parts on a personal view of a SharePoint site, you must be granted the Add/Remove Private Web Parts right and the Update Personal Web Parts right. In addition to being granted to the Web Designer and Administrator site groups by default, these rights are also granted to the members of the Contributor group.
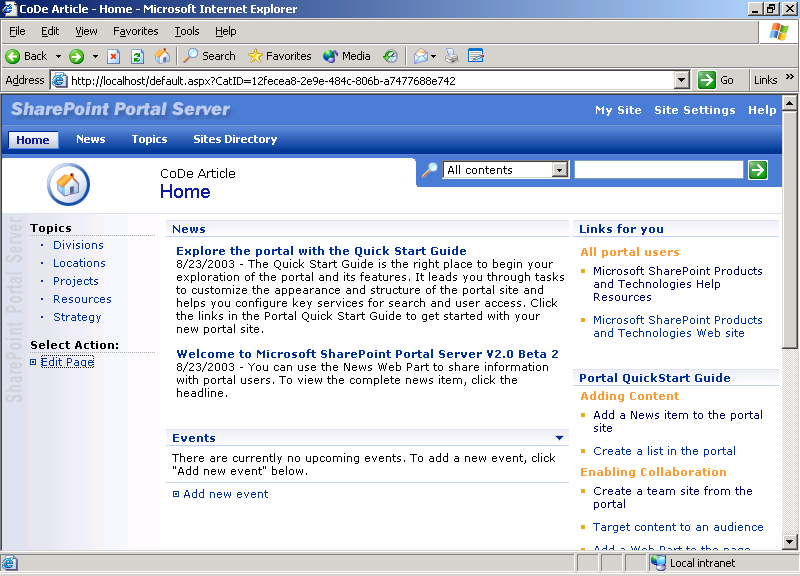
Let's look at a sample SharePoint Service Portal 2003 page (see Figure 1). The page contains some headings including Home, News, Topics, and Site Directory. You'll also notice a section in the body of the page for News, Events, Links for You, and Portal QuickStart Guide.
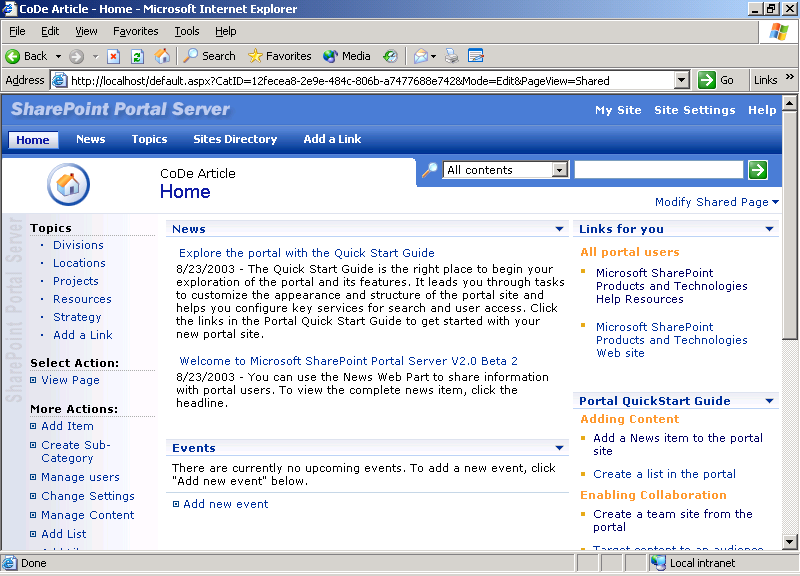
To modify the contents on this page, you need to click on the Edit Page link on the right-hand navigation menu. This adds a Modify Shared Page link to the upper right-hand side of the page just under the search text box (see Figure 2).
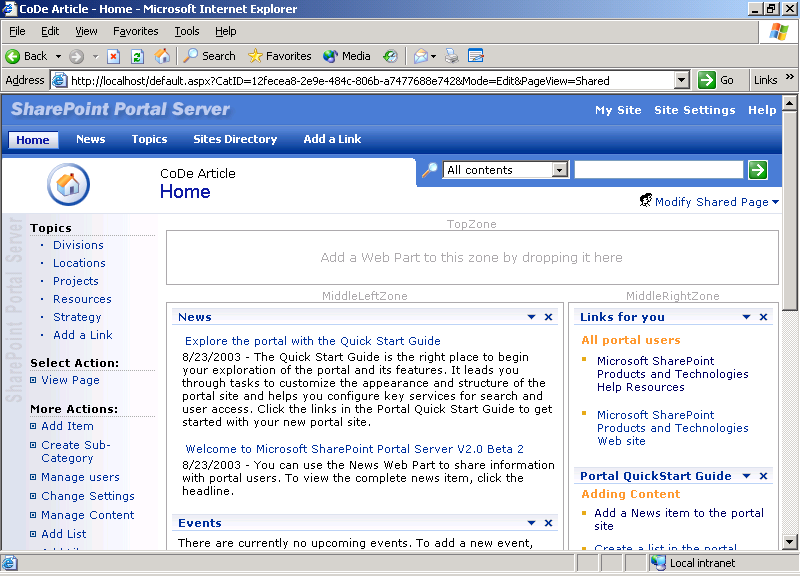
The changes that take place when you click Modify Shared Pages and then Design This Page are conspicuous (see Figure 3). The Web Part Zones are now visible. There are four Web Part zones on this page, although only three are visible in Figure 3. The visible Web Part zones are TopZone, MiddleLeftZone, MiddleRightZone, and BottomZone, which is not visible in this screen capture.
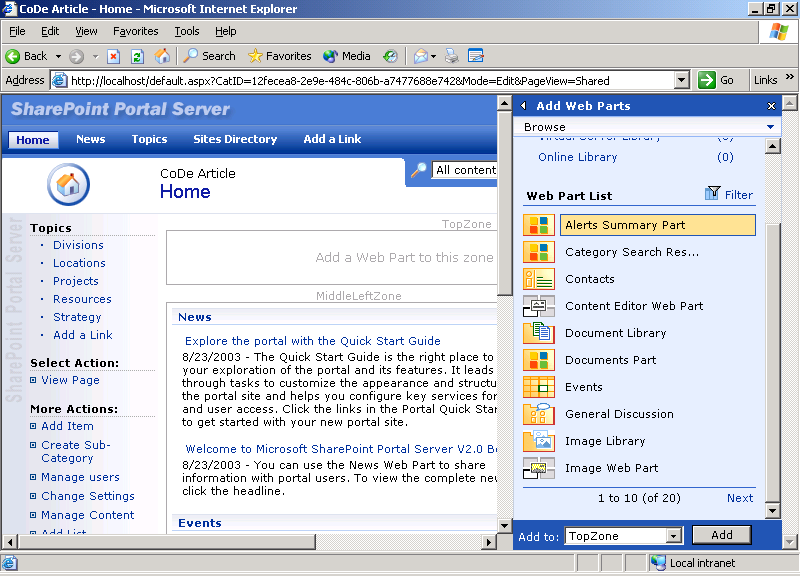
To add a Web Part to a zone on the page, select Modify Shared Pages again and select Add Web Part from the drop-down list that appears (see Figure 4). Add the Web Part of your choice to a zone by dragging and dropping it. You can also add the Web Part by specifying the zone in the drop-down list's lower section and clicking the Add button. You can see in Figure 5 that the Contacts Web Part has been selected and added to the TopZone.
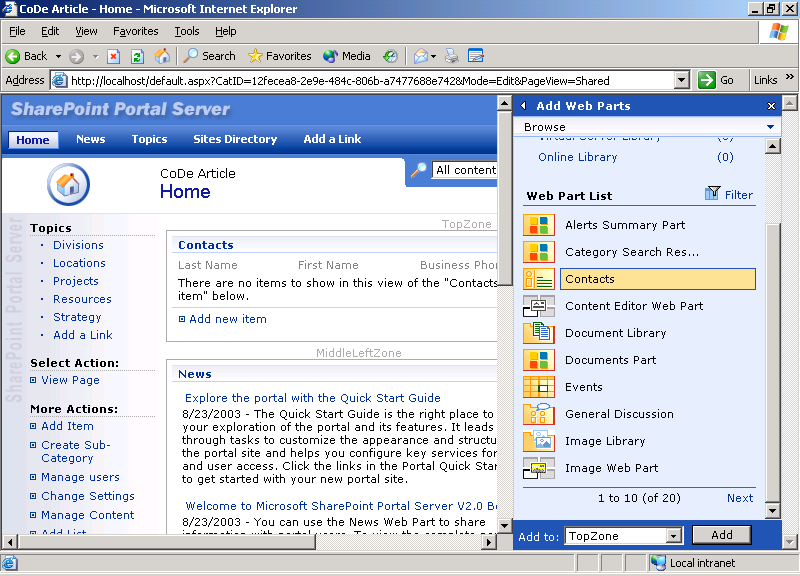
The Web Parts in the drop-down list were installed as part of SharePoint Portal Server 2003. A few of the other Web Parts that are included are the PivotView, which adds a Pivot control to a SharePoint site for ad hoc data analysis, the DataSheet, which adds spreadsheet functionality, the Quick Quote, which displays stock and other financial information when you enter a stock symbol, and the Web Capture, which incorporates all or part of another Web page into a SharePoint page.
Designing Web Parts with Visual Studio.NET
You can use Visual Studio .NET to build Web Part assemblies for use in SharePoint products and technologies. There are two options for building your Web Parts in Visual Studio: you can use the standard (provided) template for building a Web Control gallery, or you can use a special template and build a Web Part gallery. The Web Part gallery templates are not included with Visual Studio .NET, but they are downloadable from http://msdn.microsoft.com/library/default.asp?url=/library/en-us/dnspts/html/sharepoint_webparttemplates.asp
Using SharePoint and Web Parts, non-programmers can assemble the information they need and control how they want it displayed.
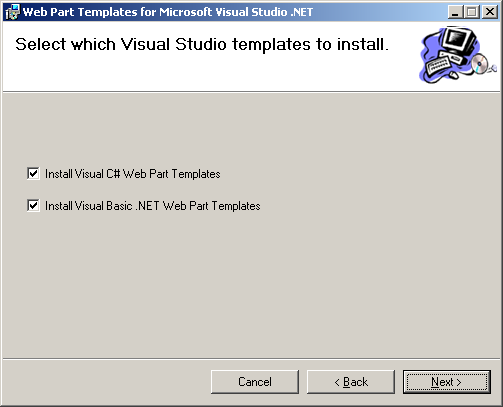
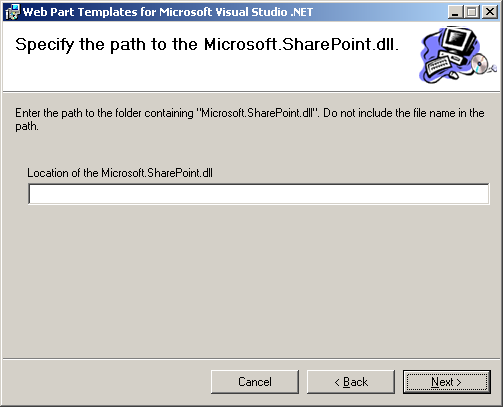
The templates are provided to help you create Web Parts and are very similar to the default server control file and project templates included with Visual Studio .NET. These templates are available for both Visual Basic .NET and C#. You choose the language you want when you run the template's setup program (see Figure 6). Another piece of information you need to supply while installing the templates is the location of the Microsoft.SharePoint.dll file (see Figure 7). On a computer running Windows SharePoint Services, the DLL is stored in local_drive:\Program Files\Common Files\Microsoft Shared\Web Server Extensions\60\ISAPI.
Creating a project from the Web Part gallery templates offers advantages and features over using the standard Web Control gallery template, including:
- An automatic reference to the Microsoft.SharePoint.dll file
- A Web Part class file and a matching .dwp file
- A Web Part Manifest.xml file used during installation of the Web Part on the SharePoint server
You will find the process of creating a Web Part very familiar if you have ever created an ASP.NET custom control. All the techniques for building an ASP.NET custom control also apply to building a Web Part custom control. The primary difference is that with a Web Part, you inherit from the WebPart class instead of from a WebControl class. You also need to override the RenderWebPart method instead of overriding the RenderContents method.
Additional information regarding developing Web Parts for SharePoint products and technologies is available in the SharePoint Products and Technologies Software Development Kit (SDK) available from MSDN (http://msdn.microsoft.com/sharepoint), and there are additional resources listed in the sidebar.
Conclusion
Developing Web Parts is definitely not your grandfather's programming. Web Parts mean new opportunities, new horizons, and new challenges for developers providing a revolutionary capability for end users to customize their workspaces.
As always, I'm interested to hear your feedback about the material covered here.
