

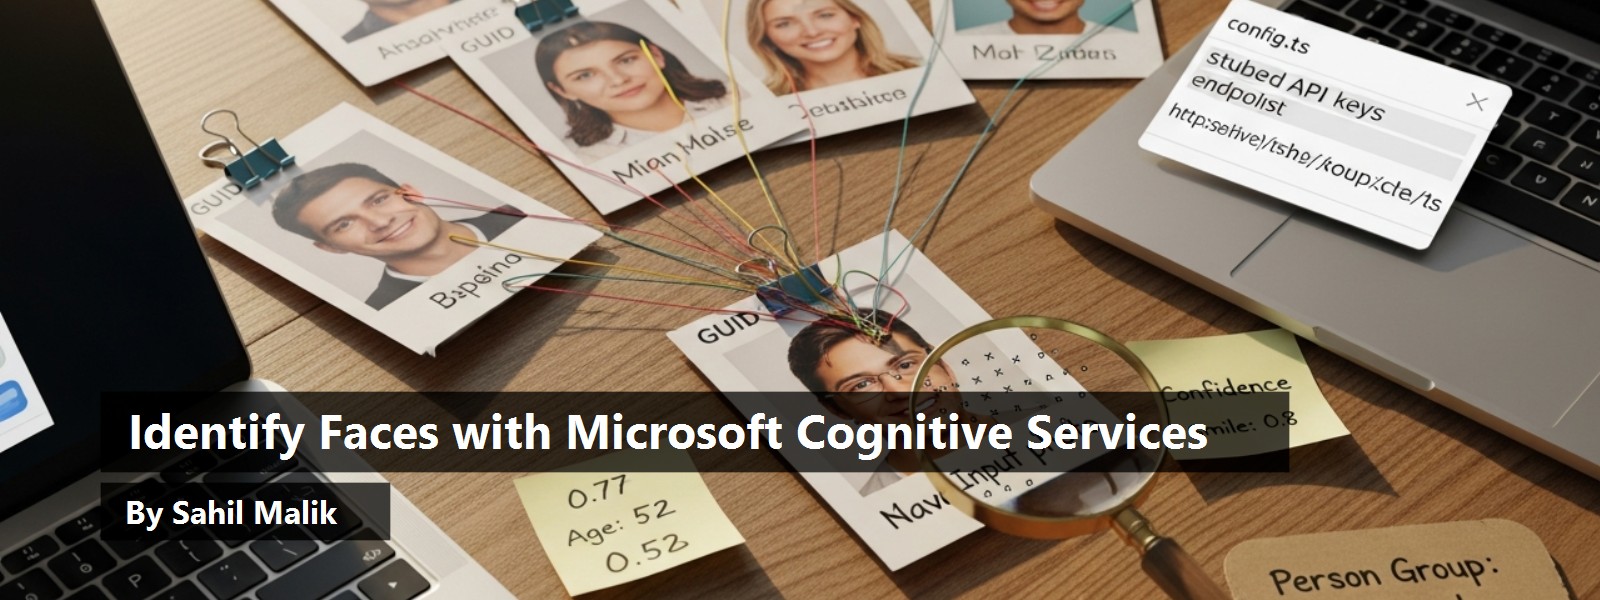


Microsoft Cognitive Services, or as I like to call it, AI for the common folk, allows your applications to hear, see, and understand just like you would. Think of all the people you know, your best friends, your family, your boss, people you dislike; are you thinking of their faces?
Find additional: Artifical Intelligence Articles
When your boss knocks on your cubicle with a coffee cup in his hand, and says, “Hey Peter,” you instantly know if you'll need to work the weekend. You see his emotions in his face.
Microsoft Cognitive Services puts all that power into your applications. And it's easy! If you can call a REST API, your application can do amazing things. Although the focus of this article is on a very narrow capability, recognizing faces, let me tell you some other amazing capabilities Cognitive Services has.
Microsoft Cognitive Services: The Vision API
Microsoft Cognitive Services is comprised of Vision, Speech, Knowledge, Search, and Language APIs. Within each of these buckets, there are numerous capabilities.
The Vision API allows you to distill actionable information from images. This means that you show it a picture, and it tells you what it sees in the picture: it describes it back to you. Yes really. You show it a picture of a dog, and it'll tell you “Hey, this is a dog.” But it gets better. It can also tell you if the picture's black and white, or what the various important colors are in it. It can do handwriting or OCR recognition. It can differentiate among line art, clip art, or photographs. It can flag adult or racy content, generate thumbnails, detect faces, even identify emotions on the faces. It can even see an image and recognize celebrities or landmarks, or you can create your own models, say dog breeds, and it recognizes what breed a dog is, by showing it a picture of a dog! Any dog!
In this article, I'll show the Vision API a picture of a person, and it will recognize who the person is. Specifically, the Face API part of the Vision API will do this.
The speech and language APIs are somewhat interconnected. They can do things like speech to text and text to speech. They can even do things like recognize a language if you provide some input text. Or detect sentiment, key phrases, and break apart sentences if you provide some input text. It can even do translations between languages. Pair these together and you can do real-time text-to-speech in one language, translate to another, and text-to-speech in another language. These are things you can build, easily, if you can call a REST API. Oh, did I mention that it can also do spell check? I know you're laughing - haven't we had spell check for ages in Microsoft Word? Yes, but powered by the cloud, it's far more sophisticated.
Perhaps the most interesting part of the speech and language APIs is LUIS, or Language Understanding Intelligent Service. It allows your applications to understand natural language as input and derive actionable information out of them. For instance, wash my car, or clean my car, are about the same thing, aren't they? You can pair this with, say, the bot framework, and speech-to-text, and you now have a completely new level of application, specific to your domain. Imagine building the next Alexa/Cortana/Siri for your business applications. Would you like to walk into a meeting room and ask, “Is this meeting room free?”
Building these kinds of systems is easy! And you can write it in any platform you wish. You could build it in Node.js and run it on a $39 Arduino.
There's so much that you can build easily with Cognitive Services. I hope to talk about many such capabilities in upcoming articles, but for now, let me return to the focus of this article, identifying faces.
Identifying vs. Recognizing
Let's start by defining the problem domain. Cognitive Services allow you to easily recognize faces in a picture. You show it a picture, and it tells you that at certain rectangle position, there is a face. It'll even tell you things like this person is a female, age 27, who is 99% happy, 1% angry, 0.9% surprised, with a head tilted in a certain way, is bald or not, wears eyeglasses, and a lot more!
As impressive as that is, that's easy! In this article, I'll go the next step: I'll first build a library of people with associated faces. For instance, I'll show former president Obama, with pictures of him. And there's another person, and yet another person, and hey look, yet another person. You could have literally thousands of faces in a library, but I'll keep it demo level at three people. Then I'll input a picture that the program has never seen before. This picture is of a person, a person who is in our library. Or it could be a picture with more than one person, or a picture where one of the people in the picture is part of our library. And the computer will “identify” the person, as in “I think this is Barack Obama, and my confidence is 99%.”
Before we get rolling, let's understand some basic theory first.
How Identification Works
In order to perform identification, you first need to create a Person group. This is your dataset of people among which recognition will be performed.
Within that Person Group, you add numerous images of people. The number of Persons has a subscription-level limit and a Person Group level limit. Free tier subscriptions have a limit of 1,000 persons per Person Group and 1,000 persons total per subscription. The S0-level tier subscriptions have these limits: 10,000 Persons per Person Group, 100M Persons total and 1M Person Groups per subscription. My demo will have three persons, so I think I can get by with the free tier. But think about it; 100 million persons. Imagine the power this puts in your hands.
Once you have created the Persons Group and the list of Persons, the next thing you do is add faces to each person. This is simply a matter of uploading pictures of each Person with a clear view of their faces. The pictures need to meet the following criteria:
- Each person has a maximum of 248 faces - that's 248 versions of the same person.
- The image format must be JPEG, PNG, GIF (the first frame), or BMP.
- The image file size should be larger than or equal to 1KB but no larger than 4MB.
- The detectable face size is between 36x36 to 4096x4096 pixels. The faces out of this range will not be detected.
- You can submit a picture with many faces, but you must specify the rectangle where the specific person of interest is. The rectangle specified by targetFace should contain exactly one face. Zero or multiple faces will be regarded as an error.
- Out of detectable range face size, large head-pose, or very large occlusions also result in fail to add a person's face.
Easy enough! I think I can find plenty of pictures of the former president.
Once you are finished managing persons and person faces, you train the model. Although this sounds about as bad as going to the gym, in this case, it's a REST call.
Finally, you submit an input image and the AI Gods tell us who this person is! Doesn't that sound easy? Let's get started!
I must mention that given the number of steps, it's not possible for me to show every line of code in this article. However, you can download and set up the finished code. The instructions can be found in the “set up the code” section of this article.
Set Up the Face API in Azure
Like many Cognitive Services' APIs, in order to use the Face API, you need to provision it for use in the Azure Portal. Go ahead and log in to the Azure portal, click on the “Create a resource” link, and choose to create a new instance of the Face API, as shown in Figure 1.

Among other things, you'll need to specify a pricing tier. For the purposes of this article, the F0 subscription-level free tier is fine.
Once you've created this resource, grab the endpoint address and the two keys. I chose to put mine into a file called config.ts, as can be seen in Listing 1.
Listing 1: My config.ts file
export let config = {
    face: {
        endPoint: "https://westus.api.cognitive.microsoft.com/face/v1.0",
        key1: "<removed>",
        key2: "<removed>"
    }
};
Authenticate to the Face API
Calls to the Face API are simple REST calls. They can be GET/POST/DELETE or any other such common HTTP verb. But the calls must be authenticated. To authenticate the call, you need to pass in a specific HTTP header called Ocp-Apim-Subscription-Key, and then pass in either of the two keys from Listing 1. You might wonder, why two keys? Well, the two keys are equivalent. You can pass either. The reason they provide two is for redundancy. If one key gets compromised, you can choose to use the other while the first one is regenerated.
I'm using a node package called request to make REST API calls. The code to provide the authentication header along with a default content type can be seen in Listing 2.
Listing 2: Providing the authentication header.
function getRequestOptions(): request.CoreOptions {
    return {
        headers: {"Content-Type": "application/octet-stream", "Ocp-Apim-Subscription-Key": config.face.key1}
    };
}
Face API Basics
Before I dive into the depths of identifying faces, let's first understand the capabilities of the Face API. As the name suggests, the Face API lets you work with faces, human faces. The focus of this article is recognizing people, but the Face API can do so much more.
Finding Similar Faces
As the name suggests, the Face API can accept an image with a face, or an image with multiple faces, and a single face specified as coordinates, and then given a set of faces, it returns a set of faces that looks the most similar to the target face.
Grouping Faces
Given a set of input faces, the Face API groups them into several groups based on similarity.
Detection
Detection, as the name suggests, detects human faces in an image. But it can do so much more. When you call the Detect method, you have a choice of requesting multiple details of the recognized faces. The more details you request, the longer the request takes. In your inputs to the detect method, you can pass in various optional request parameters.
returnFaceID: This is a unique face ID of the detected face created by the detection API. This expires 24 hours after a detection call; you'll see later in this article how this is useful against recognizing faces in multiple sets of Person Groups.returnFaceLandmarks: Face landmarks are a series of detailed points on a face, typically points of face components like the pupils, canthus, or nose. By default, there are 27 predefined landmark points that provide all of the details of a recognized face, including eyebrows, and all relevant positions to the nose, lips, and eyes.returnFaceAttributes: This is a comma-separated list of various attributes of the face you'd like to have returned. Supported face attributes include age, gender, headPose, smile, facialHair, glasses, emotion, hair, makeup, occlusion, accessories, blur, exposure, and noise. Yes, you can pass in an image, and the Face API will tell you if the person looks angry or not using the “emotion” attribute. You could write an interesting analysis program to prove that perhaps bald people are usually less angry than hairier people by using the “hair,emotion” face attributes.
Let's see a simple example of attribute detection in a passed-in image. As you can imagine, the call to the Face API is a simple REST call, as shown here:
const uri = config.face.endPoint + "/detect?" +querystring.stringify(params);
request.post(uri, requestOptions, (err, response, body) => {
    resolve(body);
});
The URI is quite straightforward. The magic is in the requestOptions variable.
I start by creating the basic request options with the authentication header and using the method shown in Listing 2, as follows:
const requestOptions = getRequestOptions();
Next, I craft up the params querystring. It's in this params variable that I specify what I'd like to have detected. I'll just specify everything; I want landmarks and I want all the attributes.
My params look like this:
const params = {
    "returnFaceId": "true",
    "returnFaceLandmarks": "true",
    "returnFaceAttributes": attributes
};
And the attributes variable includes all supported attributes, as shown here:
let attributes =
    "age,gender,headPose,smile," +
    "facialHair,glasses,emotion," +
    "hair,makeup,occlusion,accessories," +
    "blur,exposure,noise";
Next, I specify the contents of an image as the payload of my request. This is easily accomplished using the code shown here:
requestOptions.body = fileHelpers.readImage(__dirname + "/"+ fileName);
The code for the readImage method can be seen in Listing 5.
Now, it's just a matter of calling this method with an example image. This can be seen here:
faceHelpers.detectFaceWithAttributes('./input.jpg')
.then(results => {
    console.log(results);
});
The input image I am using can be seen a little further on, in Figure 5.
Running this code sends back a huge JSON object; after all, we did ask it to analyze quite a bit. At a high level, the JSON object is an array of objects. Why an array? Because there could be multiple faces in the same image. You can analyze up to 64 faces in one call and each face needs to be between 36x36 to 4096x4096 wide.
In each of the objects in the array, you'll find four properties:
faceID: a unique GUID that helps the Face API remember the given face for up to 24 hoursfaceRectangle: where in the picture the face appearsfaceLandmarks: the various landmarks detected on the facefaceAttributes: an object representing the various attributes analyzed
Of the four, faceID and rectangle are quite straightforward, so let me dive a bit into the landmarks and attributes.
Landmarks
Under landmarks, you'll see numerous properties, each with an x,y coordinate. The following properties are returned:
pupilLeft,pupilRight1noseTip,noseRootLeft,noseRootRight,noseLeftAlarTop,noseRightAlarTop,noseLeftAlarOutTipmouthLeft,mouthRighteyebrowLeftOuter,eyebrowLeftInner, and similar properties for the right eyebrow.eyeLeftOuter,eyeLeftTop,eyeLeftBottom, and similar properties for the right eye.upperLipTop,upperLipBottom,underLipTop,underLipBottom
As you can see, pretty much the whole face is broken down into landmarks; you can easily zero in on the entire face structure given these values. But wait, there's more, in attributes.
Attributes
Under attributes, you request all the attributes that the Face API detect method supports, and as you can imagine, you get a lot of information back. I encourage you to try this out for yourself, but meanwhile, let me show you some interesting returned properties.
Attributes lets you know if the person is smiling, and by how much:
"smile": 0.27,
It lets you know exactly how their head is positioned:
"headPose": {
    "pitch": 0.0,
    "roll": -5.8,
    "yaw": -18.1
},
It tells you the person's gender:
"gender": "male",
And their age:
"age": 53.9,
Whether or not they have facial hair and what kind is it:
"facialHair": {
    "moustache": 0.0,
    "beard": 0.1,
    "sideburns": 0.0
},
And if they are wearing glasses or not:
"glasses": "NoGlasses",
It even detects the person's emotion and gives it a 0-1 rating on eight different aspects of emotion:
"emotion": {
    "anger": 0.0,
    "contempt": 0.006,
    "disgust": 0.001,
    "fear": 0.0,
    "happiness": 0.27,
    "neutral": 0.724,
    "sadness": 0.0,
    "surprise": 0.0
},
I can see many uses for this. Imagine that when you unlock your significant other from the car trunk, it would be quite handy to have the emotion API help you out when you need it the most. (Just kidding!)
It also tells you the quality of the picture as blur, exposure, and noise:
"blur": {
    "blurLevel": "low",
    "value": 0.06
},
"exposure": {
    "exposureLevel": "goodExposure",
    "value": 0.66
},
"noise": {
    "noiseLevel": "low",
    "value": 0.0
},
It tells you if the person is wearing any make up:
"makeup": {
    "eyeMakeup": false,
    "lipMakeup": false
},
I, for one am thrilled that our ex-president looks good without make up on, or for that matter without any accessories, which means that there's just an empty array. Accessories include things like earrings, tattoos, and other ornaments.
"accessories": [],
If you're having a hard time recognizing the person via code, you can programmatically find out if the face is occluded:
"occlusion": {
    "foreheadOccluded": false,
    "eyeOccluded": false,
    "mouthOccluded": false
},
And finally, Cognitive Services provides you with an analysis of their hair. It returns a JSON object telling you on a scale of 0-1 how bald the person is. The former president is 0.05 bald, if you're interested. And it does an analysis on their hair color as an array of color and confidence, so Obama's hair is gray, with a confidence of 1.0, black with confidence of 0.28, etc.
A Practical Example
The real power of cognitive API is unlocked when you start combining many APIs. Imagine a natural language interactive robot. The kind you speak to and it responds back in a voice. It could look at your face and recognize who you are when you walk into a store. It could recognize your emotion in the way you look or speak. It can understand thousands of languages. And it can understand natural language with the help of LUIS. When it analyzes your face, it can know exactly what emotion you're exhibiting. If you look angry, it knows, and reacts accordingly. If you're happy, it perhaps tries to sell you more stuff.
With Cognitive Services, today, you can build a robot that will:
- Recognize you soon as you walk into the store
- Speak your language
- Talk to you in a natural language
- Tailor its help to exactly how you feel at the moment
Given how easy all of this is, I'm surprised we don't already have it. I'm sure that we will have all of it before the first commercial flying car.
For now, let's get back to the first part of this problem, which is recognizing you soon as you walk into the store.
Creating a Person Group
Creating a Person Group is a matter of issuing a PUT request to a URL that looks like this:
config.face.endPoint + '/persongroups/' + personGroupId
The personGroupId is simply a user-provided string. The valid characters include numbers, English letters in lower case, a hyphen ("-") and an underscore ("_"). The maximum length of the personGroupId is 64. Along with such a request, you need to include a request body with the following JSON object:
{'name': personGroupId}
The full code for creating the Person Group can be seen in Listing 3.
Listing 3: Create a Person Group
export function createPersonGroup(
    personGroupId: string): Promise<string> {
        const promise = new Promise<string>((resolve, reject) => {
            const requestOptions = getRequestOptions();
            requestOptions.headers['Content-Type'] = 'application/json';
            requestOptions.body = JSON.stringify({
                'name': personGroupId
            });

            request.put(
                config.face.endPoint +
                    '/persongroups/' + personGroupId,
                    requestOptions,
                    (err, response, body) => { if (err) { reject(false); }
                        else { resolve(personGroupId); }
                    }
            )
        });
        return promise;
    }
Create a Person
Once you've created a Person Group, the next step is to add Persons into that Person Group. This is a simple post request to the following endpoint:
config.face.endPoint + '/persongroups/' + personGroupId + '/persons'
Note that the request URL includes the personGroupId. This is how you tell the Face API which Person Group a Person belongs in. Also, you need to specify the name of the Person you're adding as a JSON object that looks like this:
{'name': personName}
The name is the display name of the target person. This can be up to 128 characters. You can also optionally send some user-provided data attached to the Person as a userData property on the input JSON object. You can find the full listing for the createPerson method in Listing 4.
Listing 4: Create a Person
export function createPerson(
    personGroupId: string, personName: string): Promise<string> {
        const promise = new Promise<string>((resolve, reject) => {
            const requestOptions = getRequestOptions();
            requestOptions.headers['Content-Type'] = 'application/json';
            requestOptions.body = JSON.stringify({ 'name': personName });

            request.post(
                config.face.endPoint + '/persongroups/'
                + personGroupId + '/persons',
                requestOptions,
                (err, response, body) => {
                    if (err) { reject(false); }
                    else { resolve(body); }
                }
            )
        });
        return promise;
    }
Add a Person Face
Adding a Person Face is, you guessed it, another REST call. This time it's a POST request to the following URL:
config.face.endPoint + '/persongroups/' +
    personGroupId + '/persons/' +
    personId + '/persistedFaces';
As you can see from the URL, you're posting to the /persistedFaces URL for the given person in the given person group. The next question is: How do you specify the actual file contents? There are two ways.
Either you can specify the content-type header to be application/json, and send the following JSON object in the body of the POST request:
{url:'url_to_the_image'}
Or you can specify the content-type header to be application/octet-stream and send the contents of the image. The method to read the contents of the image can be seen in Listing 5.
Listing 5: Read contents of the image
export function readImage(filePath: string) {
    const fileData = fs.readFileSync(filePath).toString("hex");
    const result = [];
    for (let i = 0; i < fileData.length; i += 2) {
        result.push(parseInt(fileData[i] + "" + fileData[i + 1], 16))
    }
    return new Buffer(result);
}
The code to issue a POST request is quite similar to Listing 3 and Listing 4, so I'll omit that here. You can find the full code for this article in the “Set up the code” section of this article**.**
Train the Model
Once you've created the Person Group, added Persons, and added Faces to the Persons, you need to train the model before you can start asking it to identify people. Training the Person Group is yet another REST call. You simply issue a POST request to the following URL:
config.face.endPoint + '/persongroups/' + personGroupId + '/train'
The important difference here is that the train operation is a long-running operation. You don't immediately get a success or failure response. Instead, you need to call a specific URL to check the status of the training. The URL is here:
config.face.endPoint + '/persongroups/' + personGroupId + '/training'
This request may take a long time to complete, so usually you call this endpoint every few seconds and check the return JSON object. The return JSON object has the following properties:
Status: With values notstarted, running, succeeded, or failedcreatedDateTime: A UTC time informing you of when the Person Group was createdlastActionDateTime: A UTC time informing you of the last time this Person Group was modified. This can benullif you've never trained the group.Message: If the training fails for any reason, you'll find the reason for the failure here. For success, this will be blank.
All there is left to do now is to call the /training URL in a loop, and when the status succeeds, ensure that you stop calling the loop. This is essential because you are under a rate limit, and you're paying for the calls you make. You don't want to call too often, and you don't want to call unnecessarily. The code for training the Person Group can be seen in Listing 6.
Listing 6: Train the Person Group
export function trainPersonGroup(
    personGroupId: string): Promise<boolean> {
        const promise = new Promise<boolean>((resolve, reject) => {
            const requestOptions = getRequestOptions();
            requestOptions.headers['Content-Type'] = 'application/json';
            request.post(
                config.face.endPoint + '/persongroups/' +
                personGroupId + '/train',
               requestOptions,
               (err, response, body) => {
                   if (err) { reject(false); }
                   else {
                       const interval = setInterval(() => {
                           request.get(
                               config.face.endPoint + '/persongroups/' +
                               personGroupId + '/training', requestOptions,
                               (err, response, body) => {
                                   if (JSON.parse(body).status) {
                                       clearInterval(interval);
                                       resolve(true);
                                   }
                                   else {
                                       console.log('Not trained:');
                                       console.log(body);
                                   }
                               }
                           )
                       }, 1000);
                   }
                }
            );
        });
        return promise;
    }
Create the Person Group
Congratulations! With your model complete, now you can send an input picture and have AI identify the Person.
For my example, I sent three pictures of three people. In Figure 2, are the three pictures of the first person I sent.

I called the appropriate method to create him as a Person in the Person Group called myfriends, and got the following output:
Created personId:
{
    "personId": "66ec4630-5369-4830-a20b-0f329d6eaf56"
} for person: Obama
Okay that's great! For the second candidate, I added my own pictures, as can be seen in Figure 3.

When I added myself as a Person into the Person Group, I got the following GUID as my identifier:
{"personId": "f530e1ee-a5b9-4a7b-9386-616b55525de6"}
Finally, I added Donald J. Trump as the third person to round up our stellar group of individuals. The specific pictures I added can be seen in Figure 4.

When I added the current president into the person group, I got the following GUID as my identifier:
{"personId": "507e5429-8513-40db-a282-ae3d33d165a4"}
Now that I've registered three persons with their faces, let's supply a sample image and run the identification logic.
Identify and Recognize the Person
The way recognition works is that first you have to identify the Person. If the last sentence didn't make any sense, here's what I mean. First you have to send the picture to the Face API and have the Face API detect a face in the picture. In doing so, the Face API returns a GUID of the face. This GUID is temporary in nature; it's only good for 48 hours. Remember, the Person IDs are permanent. The code to detect the face and return a Face ID can be seen in Listing 7.
Listing 7: Detect Face and return Face ID
export function detectFace(
    fileName: string): Promise<string> {
        const promise = new Promise<string>((resolve, reject) => {
            const requestOptions = getRequestOptions();
            requestOptions.body = fileHelpers.readImage(__dirname + "/" + fileName);
            const params = {
                "returnFaceId": "true",
                "returnFaceLandmarks": "false"
            };

            const uri = config.face.endPoint + "/detect?" + querystring.stringify(params);
            request.post(uri, requestOptions, (err, response, body) => {
                resolve(JSON.parse(body)[0].faceId);
            });
        });
        return promise;
    }
Once you have the Face ID, you can identify the person. You do so by issuing a POST request to the following URL:
config.face.endPoint + '/identify'
Also, you include the following body:
{
    "personGroupId": personGroupId,
    "faceIds": [faceId],
    "maxNumOfCandidatesReturned": 1,
    "confidenceThreshold": 0.5
}
Note that in the body, you specify the number of candidates you'd like to have in the result set, and the minimum confidence threshold the recognition should meet. Also, you pass in the Face ID that you got from Listing 7.
At this point, all you have to do now is to make the request to get the Face ID, and then another request to identify the Person. The code can be seen in Listing 8.
Listing 8: Identify a Person.
faceHelpers.detectFace('./input.jpg').then(
    faceId => {
        faceHelpers.identifyPerson(
            personGroupId, faceId).then(result => {
                console.log('Input recognized as: ' + result);
            });
    });
My input image was as shown in Figure 5.

The result I got can be seen below:
Input recognized as:
[{"faceId":
    "1990e7b2-490e-49fc-a0bd-c25c39eb7a7f",
    "candidates":[{
        "personId": "66ec4630-5369-4830-a20b-0f329d6eaf56",
        "confidence":0.77458
    }
]}]
If you match GUID 66ec4630-5369-4830-a20b-0f329d6eaf56 with the Person IDs above, you'll see that it's President Obama. I realize that he is a very famous person and our dataset was only three people, but this can scale to 100 million people.
Set Up the Code
This article had a lot of steps, and I wasn't able to show every single method in this article. However, you can get the full source code and set it up on your computer easily. Just follow the following steps:
Now, with the project open in Visual Studio Code, examine the index.ts.
You'll find code there, commented out as step #1, step #2, and step #3. To perform the steps of creating a Person Group, train the Person Group, and detect and identify a Person. Finally, do step #4 to delete the Person Group when you are done.
You can uncomment the relevant portions, hit F5 to perform the necessary steps one by one, and then check the debug log.
Conclusion
What's the value of being able to send in a picture, and have the computer recognize who it is in a matter of seconds, across 100 million people?
Imagine a stadium, where at the entrance people read a sign. And by that sign is a small camera, comparing every person with possible terrorists?
Or, what if you walk into a store, and a camera there instantly recognizes you and sends you discount codes on your phone that you must use in the next 20 minutes at that store.
Or perhaps something more mundane: You walk into the room, the computer recognizes you, and automatically sets the lights and music per your preference.
The possibilities are endless, and this is just a single capability of the Microsoft Cognitive Services. I hope to talk about those among other things, in future articles.
Until then, happy coding!
