


JavaScript has a lot of momentum these days. It seems you can’t get very far in a software development discussion without hearing about node.js. If you are wondering what all the fuss is about, and why you should care, you’re in the right place.
The tag line for node is “Evented I/O for V8 JavaScript” with a goal of “[providing] an easy way to build scalable network programs.” If the tag line seems a bit cryptic, all you really need to know is that V8 is the extremely fast JavaScript engine maintained by Google that is used in their Chrome web browser, and “evented I/O” means that I/O in node is completely nonblocking. Like a web browser, node has a built-in event loop that runs continually in the background. When writing code, you subscribe to events using callback functions and node sleeps until something happens that it needs to process. If that sounds familiar, it should. It’s the same way you’d handle, let’s say, a click event using jQuery.
In this article, I’m going to explore node and progress through the basic concepts needed to develop with it. By the end of the article not only will you have a functioning chat server, you’ll understand enough to take the sample code and enhance it on your own. I hope you’ll be pleasantly surprised at how easy it is.
Installation
With node.js, the world is pretty clearly divided. Its development is done completely in Linux or Mac OSX, and a massive majority of its community works in the same environments. There has been very little attention given to Windows until recently, and some versions of node were impossible to run. Luckily, while doing the work for this section of the article, I found a relatively simple solution to running node on Windows that is unobtrusive and just works. There are some slight differences that you will have to contend with when running node on Windows, but I will address them when they are needed. The following subsections give installation instructions.
Windows
In Windows, use the following steps to install node:
Please note that every time you open a new PowerShell prompt to use node, you will need to execute the shell.cmd file as outlined in step 5.
OSX
In OSX, use the following steps to install node:
Type the following command and make sure you get matching output:
> node -v
v0.4.1
There are some alternate ways to install node.js both on Windows and OSX. You can see them on the node.js wiki https://github.com/joyent/node/wiki/Installation.
First Example
Let’s take a look at a simple node.js program. Open your favorite IDE or text editor and create a file called flyingMonkeys.js, and then type in the code from the following code snippet and save the file:
// Simple console logging.
// It works the same way it would in a web browser
console.log('Look! Flying monkeys!');
To run programs in node, you’ll go back to your trusty command-line tool and type the following command: (note: if you have installed node using the Windows instructions I provided above, make sure that you have executed ./shell.cmd):
> node flyingMonkeys.js
Look! Flying monkeys!
Hooray! OK, now that the ubiquitous “Hello, world!” app is out of the way, let’s look at a comparison of the behavior between node and the browser.
Web Browser vs. node.js
In a web browser environment, there is a global object named window, which is available to JavaScript on the page as well as JavaScript in external files. I’m going to take a look at an example illustrating variable scope. To start off, let’s create a file named external.js and type the following code into it:
// declaring variable without the var keyword
// makes it global in JavaScript
externalWithoutVar = 'without var';

// declaring a variable with the var keyword
// outside of a function declaration adds it
// to the window object in the browser.
var externalWithVar = 'with var';
All you’re doing here is declaring two variables. One declaration will use the var keyword and the other will not. If this seems pretty useless, bear with me, it will all make sense shortly.
Next, let’s create an HTML file named globals.html. The HTML can be anything you’d like as long as there is a script tag containing the following JavaScript. There’s a working example shown in Listing 1 that you can use if you don’t want to make up your own:
var onThisPage = 'this page';

// 'without var'
console.log(window.externalWithoutVar);

// 'with var'
console.log(window.externalWithVar);

// 'this page'
console.log(window.onThisPage);

// 'this page'
console.log(onThisPage);
Now open globals.html in your web browser and you should see the following console output:
without var
with var
this page
this page
When files are loaded by the browser, variables declared outside of a function scope are added to the window object. If you’re not careful with how you declare your variables you end up with a large amount of them attached to the window object. This is what is known as “polluting the global namespace” and should be avoided.
In node.js, instead of window, the global object is aptly named global. This object, like window in the browser, is available in all your JavaScript files. To illustrate the differences between the two environments, you’re going to make the node equivalent of globals.html. Create a file named globals.js in the same directory as the *external.*js file and type the following code:
require('./external');

var inThisFile = 'this file';

// 'without var'
console.log(global.externalWithoutVar);

// undefined
console.log(global.externalWithVar);

// undefined
console.log(global.inThisFile);

// 'this file'
console.log(inThisFile);
Before you run this code, take a quick look. As you can see with all the console logging, you’ve merely substituted global for window. You can also see the require function, which imports the file external.js. I’m going to sidestep further discussion of the require function for now, but I’ll get back to it, I promise. For now, run the example. You should see:
> node globals.js
without var
undefined
undefined
this file
OK, so there is a difference. The variables that were declared with the var keyword are undefined on global. Why did this happen? It’s because in node, every file is loaded as a module. I’ll explain the module concept further in a bit, but for this example, what you need to know is that any variable declared with the var keyword cannot be directly accessed outside of that module.
Declaring a variable without the var keyword in JavaScript automatically makes it global, so you get the behavior you’d expect from externalWithoutVar. You can also see that the externalWithVar and inThisFile variables are not defined in the global scope, and that inThisFile can be referenced locally.
Declaring a variable without the var keyword in JavaScript automatically makes it global.
Even for this very simple example, there’s something that I find very cool. You’re using the exact same external.js file for both examples. That type of thing is not going to happen in most circumstances (yet). The exciting part is that, eventually, it will.
Built-in Modules and Asynchronous Programming
OK, enough with the introductory material, it’s time to look at something useful. In this section, you’re going to take some big strides. You’re going to learn how to reference built-in modules, how to load a file, and how to respond to an HTTP request. You’ll be introduced to the two main ways node.js handles asynchronous operations by using a direct callback and an instance of events.EventEmitter. By the end of this section, you’ll know 80% of the coding concepts you’ll need in order to be a successful node JavaScript programmer.
Up until this point, I have not covered any of the asynchronous aspects of programming with node.js. The built-in node modules mainly use one of two mechanisms for dealing with asynchronous programming. The first method is using a direct callback. This is used when you want to directly request the result of an operation. The second common method is using an object that is an instance of the built-in events.EventEmitter object. You use an instance of EventEmitter when something will potentially happen multiple times and you want to be notified whenever it does.
Modules
As I said earlier, every file in node.js is loaded as a module. In addition to the variable scoping discussed previously, being a module also means that every file has access to a specific set of properties and functions. Modules in node implement the CommonJS module specification, which defines the presence of a require function and a couple of other objects I’ll discuss later.
You first saw the require function in the globals example. There, you were importing one of your own files. In this section, you’re going to use the require function to import a couple of different built-in node modules. To do this, you’re going to call the require function with a module name, which will then load that module and return it. Here are two lines of code you could use to load the built-in HTTP and file system modules:
var http = require('http');
var fs = require('fs');
There’s something interesting about the require function. It’s one of the few built-in node I/O functions that only has a synchronous version. This is acceptable because node only loads a module from disk the first time it is requested. After that, the module is cached, and all remaining access to it is from memory. This means that you’ll pay a bit of overhead up front, but during run time you won’t have to worry about being delayed by any blocking.
The File System Module and Direct Callbacks
You just saw how to import node’s built-in file system module, and now you’re going to use it to read a file and log the file’s contents to the console. You’ll do this using a direct callback, and in the process learn about node’s error handling convention.
First, create a text file and put a line of text in it. I used a file called flyingMonkeys.txt containing the text “Look! Flying monkeys!” In the same directory, create a JavaScript file with the following code, I named mine fsDirectCallback.js:
var fs = require('fs');

var logFileContents = function(fileName) {
  fs.readFile(fileName, function(err, file) {
    if(err) {
      console.log('There was an error.');
    } else {
      console.log(file.toString());
    }
  });
};
// 'Look! Flying monkeys!'
logFileContents(__dirname + '/flyingMonkeys.txt');
// 'There was an error.'
logFileContents('does not exist');
Let’s examine the code you’ve created. After you load the file system module, you define a function named logFileContents that has a file name as its only argument. Inside logFileContents, you call the fs.readFile function with the file name that was passed into logFileContents as the first argument, and then provide an anonymous direct callback function as the second argument.
Even though the callback function may look a bit strange, it follows the established convention in node. Callback functions always have an error object as their first argument and the result of the call as the second argument. If the operation completes successfully, the error object will be null. Because of this, inside the callback function, you need to check to see if the error object exists. In the case of an error, you’re going to log a message to the console. In the case of a successful read of the file, you’re going to log the contents of the file to the console.
Callback functions always have an error object as their first argument and the result of the call as the second argument.
Notice that in the case of a successful file read, you called the toString function on the file object. When you call the fs.readFile function the way you did, the file object is an instance of Buffer. This is because the fs.readFile function takes an alternate file encoding argument, which you did not provide. The Buffer object is used by node to handle binary data, and to convert from a Buffer to a string, you need to call the toString function of the Buffer object.
The value of the __dirname property is the path to the directory that contains the module.
To finish off the code sample, you call the logFileContents method with two different file names. The first file is the one you created earlier. The value of the __dirname property is the path to the directory that contains the module. You use it in this instance to make sure that you have the correct full path to the flyingMonkeys.txt file. This function call will result in the contents of flyingMonkeys.txt being logged to the console. The second file will not exist. Therefore, the error object will not be null and you’ll end up logging the error message to the console. Let’s run the sample and make sure you get the results you expect:
> node fsDirectCallback.js
There was an error.
Look! Flying monkeys!
Everything looks good… err what? Didn’t the code start opening the flyingMonkeys.txt file before it started opening the file that didn’t exist? Remember, these operations are executed asynchronously; the order in which they will finish isn’t guaranteed. It turns out that in this case, while the file is loading in the background, the error occurs and you end up reporting the error first. This is something that you’ll have to keep in mind when programming in node. Now that you’ve seen how direct callbacks work, let’s take a look at an EventEmitter.
Remember, these operations are executed asynchronously; the order in which they will finish isn’t guaranteed.
The HTTP Module and EventEmitter
At this point, I’m feeling a bit like I’ve sold you a bill of goods. You’ve been doing a bunch of JavaScript and have yet to do anything “webby.” Let’s make up for that now by creating a web server to serve up your new favorite phrase. Node.js is designed for building web frameworks, so there is already a built-in web server. To create a web server, you’re going to use the createServer function of the HTTP module. For now, that’s enough talk. Let’s look at the code. I created a file named httpEventEmitter.js with the following code:
var http = require('http'),
    server = http.createServer();

server.on('request', function(req, res) {
  // Handler functions receive http.ServerRequest
  // and http.ServerResponse objects as arguments
  res.writeHead(200, {
    'Content-Type': 'text/plain'
  });
  res.write('Look! Flying monkeys!');
  res.end();
});

// Start the http server on port 8000
server.listen(8000);
You can see the importing of the HTTP module and creation of the web server at the beginning of the code. The interesting part is what comes next. Since the web server is an instance of events.EventEmitter, it will accept listeners to its events through the on function. One of the events the web server will emit is the request event.
Since the web server is an instance of events.EventEmitter, it will accept listeners to its events through the on function.
To be notified of every request, call the server.on function with the event name, request, and a callback function that has a request object and a response object as its arguments. Be aware that unlike direct callback functions, there is not a convention for callbacks subscribing to EventEmitter events. You will have to check the documentation for each event. For the request event, when the callback is invoked, the arguments will be instances of http.ServerRequest and http.ServerResponse respectively.
The code inside the callback was a little scary to me at first. I was only vaguely familiar with HTTP response codes and headers. The sum total of my experience with them was the 404-File Not Found pages and 500-Server Error pages. This was when it really hit home to me that node was an environment to build web frameworks and I was going to have to look around if I wanted to be more productive.
I figured a little additional knowledge wasn’t going to kill me, so I sucked it up and dove in. I’ll share that knowledge with you by quickly going over what’s happening in the callback. When an HTTP server responds to a request, it provides an HTTP response code. 200 is the code for OK, and is used when there’s a successful request. The server also must add an HTTP header, which indicates the type of content it is returning. In this case that’s plain text, indicated by the value text/plain.
The server is going to respond to every HTTP request with the same phrase. This is the part I was most familiar with from my previous work. You write to the response object until all your content has been returned. Finally, you end the response to let the browser know that the server won’t be sending any more data. The code ends up being a bit verbose, but it’s not so bad, right?
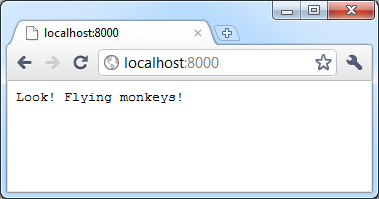
Now that you know what’s going to happen on every request, all that’s left is to start up the server. The listen function starts the server and you pass it the port number you want it to listen on. Let’s run it and see what happens:
> node httpOnly.js
Hey look, something new. The programs you’ve run previously have exited immediately after writing results to the console. Here you have a program that is just sitting there, seemingly doing nothing. What exactly is happening here? Once the http.Server object starts listening on a port, it goes to sleep until there’s an incoming HTTP request. When the request comes in, the server handles the request and goes back to sleep until the next request comes in.
How about you wake up your lazy server process and make it do some work? Open your favorite web browser and navigate to http://localhost:8000/. You should see something similar to Figure 1.
The Node Package Manager, npm
If node.js was only about dealing with raw HTTP request and response objects, it would be little more than a novelty. But node has an extremely robust third-party module ecosystem that is growing at an unbelievable pace. When you installed node earlier, you also installed something called npm. The Node Package Manager is the de facto way of including external modules in your code, and it’s time to learn a bit more about it.
The philosophy behind node is to keep the core libraries small and focused to encourage extension by outside packages.
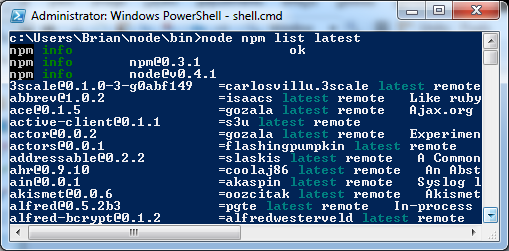
The philosophy behind node is to keep the core libraries small and focused to encourage extension by outside packages. Npm is a command-line utility for installing those packages on your system. Before getting a couple of packages, you should peruse the menu and see what’s out there. If you want to see the latest version of all registered node packages, you can run the command:
> npm list latest
If you are on Windows, and have installed node the way I described in the installation section, you’re going to have to do things a bit differently. You’re going to have to navigate your command line to your node install’s bin directory and instead of the above command, you’ll have to run npm directly through node, like this:
> node npm list latest
This should result in the output similar to Figure 2. Going forward, I am going to show npm commands without the node prefix because that’s the usual way of using it. Please substitute the additional node syntax if you need to.
It’s time to take npm out for a spin and get a couple of packages you’ll need in the next section. Connect is a server middleware library that provides a friendlier way to deal with HTTP requests. It’s similar to Rack in Ruby and OWIN in .NET. You’ll use it to simplify the way you serve web pages. Socket.io is a brilliant library that abstracts the different possible transports for long running communication between the web browser and the server. You are going to lean heavily on socket.io.
With npm, you can specify the version of the package that you want to install, or you can leave the version out and it will just install the latest.
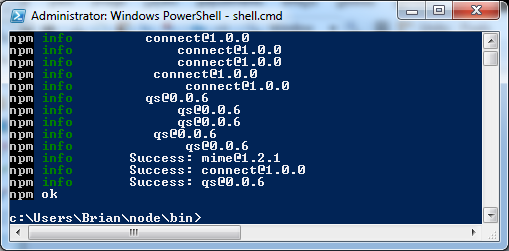
Let’s get these installed. With npm, you can specify the version of the package that you want to install, or you can leave the version out and it will just install the latest. Because node moves so fast, new versions of these two packages will almost certainly have been released by the time this article is published, so you should install the versions I used to create this article to avoid potential incompatibilities. First, connect version 1.0.0:
> npm install <a href="mailto://connect@v1.0.0">connect@v1.0.0</a>
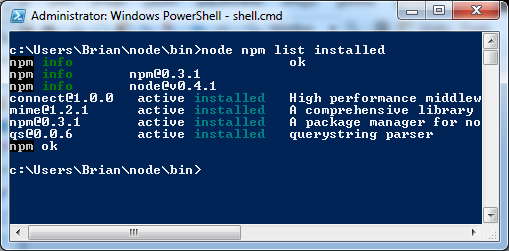
If successful, the output should look a bit like Figure 3. To make sure connect has installed properly, you can run the list command with the installed tag:
> npm list installed
You should see something similar to Figure 4. Assuming you’ve only been following along with this article, you’re going to see 4 modules installed. Npm is installed by default, and you just installed connect, but what’s with the other two? Modules can have dependencies on other modules. When you request a module using npm it will install all that module’s dependencies before it installs that module. This ensures the module you want will work correctly. Let’s finish up and get socket.io installed:
> npm install <a href="mailto://socket.io@v0.6.15">socket.io@v0.6.15</a>
Npm is really handy and powerful. I recommend looking through the list of latest modules and trying out anything that catches your eye. Check back often, new modules are being added every day. If you get stuck, you can see some of the other commands with:
> npm help
Next you’ll finally get to the moment that has been the cause of all this buildup. I’ve almost forgotten what it was.
Didn’t I Promise You a Chat Server?
Indeed, that was the ultimate goal of this article. Here’s where you’re going to make that a reality. In the last section, you installed two third-party modules with npm. Now let’s use them in some code.
Serving Static Files With Connect
Creating an HTTP server with the connect module is slightly different than using the built-in HTTP module. After importing the connect module, use the connect.createServer function to create the server instance. You’re going to call the createServer function with the middleware modules that you want your server to use. It will accept multiple middleware modules as parameters, and when an HTTP request is received, connect will call them in the order they are passed in. Here’s an example:
var connect = require('connect');

// Creating a connect server with
// two middleware modules. The logger
// module will always be called first.
var server = connect.createServer(
  connect.logger(),
  connect.static(__dirname)
);

server.listen(8000);
The connect.Server is an instance of http.Server so it has the same functions. You’re passing the connect.static middleware module the directory that contains the connectServer.js file, so connect will look for files in that directory. I created a file called connectServer.js with the above code, and then added an HTML file called flyingMonkeys.html in the same directory using the following HTML:
<!DOCTYPE html>
<html lang="en">
<head>
  <meta charset="utf-8">
  <title>Flying Monkeys</title>
</head>
<body>
  <h1>Look! Flying monkeys!</h1>
</body>
</html>
Let’s make sure that your connect static file server works by executing the following command:
> node connectServer.js
Now navigate your web browser to http://localhost:8000/flyingMonkeys.html. If you used the HTML from above, you should see something that looks like Figure 5. Now that you have your static file server working, let’s add in some code to handle chat connections.
Web Sockets With socket.io.Listener
The socket.io module uses WebSockets to keep long connections between a web browser and a web server alive. A great thing about socket.io is that if the web browser does not support WebSockets, socket.io will keep trying different protocols until it finds one that the browser supports. To create a socket.io.Listener, you need to pass an instance of http.Server to the socket.io.listen function. Then, since the socket.io.Listener object is an instance of EventEmitter, you’re going to have to subscribe to events to make anything happen. Unfortunately, you have to serve some type of HTML to connect to socket.io, so you’re going to look at a code snippet that will not run, but will illustrate what you do when you want to be notified that a client has connected to your socket server:
var http = require('http'),
    io = require('socket.io');

var server = http.createServer();
var socketListener = io.listen(server);

socketListener.on('connection', function(client) {
  socketListener.broadcast('someone connected');
});

server.listen(8000);
In this sample, you’re listening for the connection event of the socket.io.Listener. This event is emitted every time a new client connects to the socket server. When this happens, you’ll call the broadcast function of socketListener, which will send the same message to all currently connected clients. Even though it’s not being used, I included the client parameter in the callback function because it will be passed a socket.io.Client object, which is itself an instance of EventEmitter.
There are two parts to the socket.io module. I’ve discussed the server module, but there’s also a script that can be used in the browser. You can include it in your web pages with the following line of HTML:
<script src="socket.io/<a href="http://socket.io.js">socket.io.js</a>"></script>
When socket.io listens to an instance of http.Server it will intercept any request to socket.io/socket.io.js and return its client script file. To use a socket on the client, you need to create an instance of io.Socket and pass it the host you want to connect to. You should not include the port number. You can then connect to the server using the socket’s connect function. Similarly to the server, you can listen for a message using the on function and you can send a message using the socket’s send function. You can see how this would work in the following code snippet:
var socket = new io.Socket('localhost');

socket.on('message', function(message) {
  console.log(message);
});

socket.connect();
socket.send('hi!');
Fitting the Pieces Together
Now that you know how the two major pieces work, I’ll go over the functionality that you’ll want your chat client to handle. I’ll keep it simple and allow chatting between connected users and a polite notification when a user has been disconnected. This implies two different types of message. There’s a simple chat message, and what is more accurately described as a system message. It’s important to differentiate because these messages are going to be displayed differently.
Earlier, you saw that whenever a new client is connected, socketListener emits the connection event. Your callback then gets passed the newly created socket.io.Client object. To create the behavior you’re looking for, you want to listen for that client sending a message and the client disconnecting. You’re also going to need a way to keep track of each client. Luckily, all socket.io.Client objects have a sessionId property that uniquely identifies them as long as they remain connected.
When a user sends a message, you’re going to notify all other users that this message was sent. The socket.io.Client object has a broadcast function that will perform this for you. To display a chat message to other users, you’re going to need to know the message text, the type of the message, and who sent it. There is a code snippet below that shows an implementation:
client.on('message', function(message) {
  client.broadcast({
    messageType: 'chat',
    nick: client.sessionId,
    text: message
  });
});
Now that you’re able to send chat messages back and forth, let’s make sure that you’re not sending them to an empty room. When one user disconnects, all the remaining users need to be notified that this has happened. To send a message to all users, use the socketListener object’s broadcast function. This time, you only need the type of message and the message text. Again, here’s a code snippet with an implementation:
client.on('disconnect', function() {
  socketListener.broadcast({
    messageType: 'system',
    text: client.sessionId + ' was disconnected.'
  });
});
Now that I’ve gone over the specifics, let’s create the full server. You can copy the code from Listing 2, which I’ve named server.js. As you can see from the code, you’re also going to need a directory named public in the same directory as the server.js file to hold an HTML page and an external JavaScript file needed to run the chat program in the browser. Create files based on Listing 3 and Listing 4. I named mine chat.html and chatClient.js respectively. (Unfortunately, a discussion of the client code is outside the scope of the article. Feel free to send email to me with any questions.) It’s the moment of truth, fire up the chat server using the following command:
> node server.js
xxxxxxx - socket.io ready - accepting connections
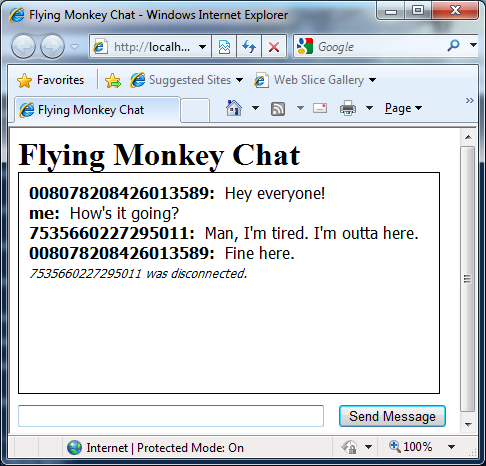
Now, navigate your web browser of choice to http://localhost:8000/chat.html. Do it again; you’re simulating chat, after all. Feel free to experiment by exchanging messages between the two windows. If you want to test the disconnect message, refresh one of the browser windows. It should look something like Figure 6 and Figure 7.
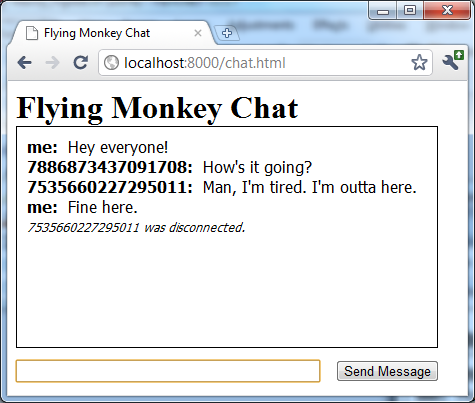
I don’t know about you, but as cool as this is, I think a couple of improvements are in order. After all, who wants to chat with a big number? I’d also like to know when someone joins the chat. Let’s see how to fix this up.
Nicknames and Connections
Improving the chat server functionality shouldn’t be difficult, but a lot of logic is starting to accumulate inside of the server.js file. It would be better if the logic for the chat room was extracted into its own file to keep things clean and maintainable. There’s a bit of a problem, though. You haven’t learned how to create a module yet. Let’s rectify that.
Your Very Own Module
So far, you’ve been consuming modules that have been created by other people, but you haven’t yet created your own. All your require statements have been in the form of:
var connect = require('connect');
In reality, the require function accepts the path to a file. In the case of npm and the built-in modules, you only have to supply the name because node has default paths that it searches in when only a name is provided. To include your own file, you must supply its path relative to the file that contains the require function call. A sample should clear this up. Let’s say you had a file named finalServer.js and a module file in the same directory named chatRoom.js. To import the chatRoom module into your finalServer module, you’d use:
var room = require('./chatRoom');
When importing your own modules, you must have a “./” or “../” prefix, and you do not include the file extension. Also of note, the require function works differently than the file system module in that it does not use the current working directory as the starting point for its searching. One more note before you finish up with modules. There is a way to include your own modules by name, which involves a directory named node_modules, but it’s beyond the scope of the article.
Now that you know how to import your module, let’s learn how you make functions and properties available outside of it. Remember earlier, I showed that variables defined in a node module are only available inside of that module. You could make them global, but that might result in your coworkers smacking you around. To stay safe, let’s find a better way. Every module in node has a module property that has information about the module when it gets loaded. For your purposes, you’re going to focus on the exports property of the module object. Any property you add to this exports property is then available to consumers of your module. The following code is what it will look like:
var sayHi = function() {
  console.log('hi');
};

// sayHi is now available to
// consumers of this module.
module.exports.sayHi = sayHi;
You’ve learned how to import your own module and make its functionality available to consumers. The only thing left is to get back to your chat room example and modify your chat server to use it.
Chat Room and Final Server Implementations
Your chat room module is going to need to handle four different cases. You were already handling two of them previously, but you’re going to delegate that functionality to the chatRoom module. If you want to get better context for some of the following code samples, you can see the full implementation in Listing 5. Now let’s start with chat messages.
The chatRoom module should process messages from users in the room. The code to handle chatting is very similar to the code you used before, but this time, you have the additional functionality of changing nicknames. A user should be able to do this by typing the following command into a chat window:
/nick Joe
I’ll have you take an extremely naïve approach and assume that if a message does not start with “/nick” then it’s a chat. If it does, then you should modify the nickname and return a system message. Here’s what it looks like:
var processMessage = function(sessionId, message) {
  if(message.indexOf('/nick') === 0) {
    return changeNick(sessionId, message);
  }
  return {
    messageType: 'chat',
    nick: clients[sessionId],
    text: message
  };
};
In addition to the raw message, pass the sessionId to the processMessage function to identify the user that is submitting the message. Also, it isn’t shown here, but the chatRoom module in Listing 5 has a clients object, which holds key/value pairs where the key is a user’s sessionId and the value is the user’s nickname.
Next, I’ll have you tackle the case where a user disconnects from your chat room. In this case, you’re going to want to delete the user from your clients object and return the same system message as earlier:
var removeUser = function(sessionId) {
  var nick = clients[sessionId];
  delete clients[sessionId];
  return {
    messageType: 'system',
    text: nick + ' was disconnected.'
  };
};
And finally, to be notified when a new user joins your chat room, you’re going to need to add the user to your clients object. Then, so you don’t have to see that hideous sessionId, you’re going to give each user a default nickname and return a system message indicating that a new user has connected:
var addUser = function(sessionId) {
  var userName = 'User ' + userCount;
  clients[sessionId] = userName;
  userCount++;
  return {
    messageType: 'system',
    text: userName + ' has connected.'
  };
};
You’re also going to need to modify the section of finalServer.js using the code from Listing 6. The relevant section is where you use your new chatRoom module. Other than adding the functionality for a user joining the chat room, all you’ve really done here is replace the anonymous functions that were in Listing 2 with calls to your new module:
socketServer.on('connection', function(client) {
  var sessionId = client.sessionId,
      addedUserMessage = room.addUser(sessionId);

  client.on('message', function(message) {
    var pMsg = room.processMessage(sessionId, message);
    client.broadcast(pMsg);
  });
  client.on('disconnect', function() {
    var ruMsg = room.removeUser(sessionId);
    socketServer.broadcast(ruMsg);
  });

  client.broadcast(addedUserMessage);
});
As I said earlier, the final code for your chat server is in Listing 5, which I’ve called chatRoom.js, and Listing 6, which I’ve called finalServer.js. If you create them in the same directory that you created the server.js file from the first version of the chat server, you can reuse the chat.html and chatClient.js files from Listing 3 and Listing 4. Otherwise, you’ll have to create a directory named public and add those files to it. You can run finalServer.js using the following command:
> node finalServer.js
xxxxxxx - socket.io ready - accepting connections
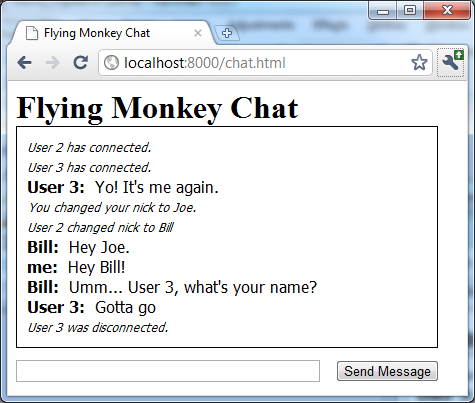
Once again, feel free to play around. Open a couple of browser windows, and look for the message when a user connects. Change your nickname, chat, and have some fun. It will look like Figure 8 and Figure 9.

Wrapping Up and Final Thoughts
This has been quite a ride, and if you’ve stuck around this long, I hope you’ve been able to learn something. I would like to give some caution about using the code samples from this article as anything other than a learning tool. With any web technology, there are a lot of security implications to consider.
As of the writing of this article, node.js is still changing very rapidly. It incremented versions twice before I finished. Innovative modules pop up all the time. The great thing about doing something different is that people are freed to rethink the way they’ve traditionally solved problems. Node.js is being used in production on many web sites and it holds up well. It’s definitely something to keep an eye on.
Listing 1: An HTML page which includes the JavaScript demonstrating the global scope in a web browser.
<!DOCTYPE html>
<html lang="en">
<head>
  <meta charset="utf-8">
  <title>Globals</title>
</head>
<body>
<h1>Demonstrates Globals</h1>
<script src="external.js"></script>
<script>
  // IE fix: define console.log to alert
  window.console = window.console || {
    log: window.alert
  };

  var onThisPage = 'this page';

  // 'without var'
  console.log(window.externalWithoutVar);
  // 'with var'
  console.log(window.externalWithVar);
  // 'this page'
  console.log(window.onThisPage);
  // 'this page'
  console.log(onThisPage);
</script>
</body>
</html>
Listing 2: An implementation of a chat server using static middleware with socket.io connection handlers.
var connect = require('connect'),
    io = require('socket.io');

var server = connect.createServer(
  connect.static(__dirname + '/public')
);

var socketListener = io.listen(server);

socketListener.on('connection', function(client) {
  client.on('message', function(message) {
    client.broadcast({
      messageType: 'chat',
      nick: client.sessionId,
      text: message
    });
  });

  client.on('disconnect', function() {
    socketListener.broadcast({
      messageType: 'system',
      text: client.sessionId + ' was disconnected.'
    });
  });
});

server.listen(8000);
Listing 3: An HTML page used to let users connect to your chat server.
<!DOCTYPE html>
<html lang="en">
<head>
<meta charset="utf-8">
<title>Flying Monkey Chat</title>
<style>
div, h1, p {
margin:0;
padding:0;
}
#chatMessages {
border:solid 1px #000;
height:200px;
overflow:auto;
padding:10px;
width:400px;
}
#chatMessages .message {
font-family:Tahoma, Geneva, sans-serif;
line-height:20px;
}
#chatMessages .message.chat {
font-size:16px;
}
#chatMessages .message.system {
font-size:12px;
font-style:italic;
}
#chatMessages .message .nick {
font-weight:bold;
padding-right:10px;
}
form {
margin-top:10px;
}
#messageText {
margin-right:10px;
width:300px;
}
</style>
</head>
<body>
<h1>Flying Monkey Chat</h1>
<div id="chatMessages"></div>
<form>
<input id="messageText" type="text">
<input type="submit" value="Send Message">
</form>
<script
src="<a href="http://code.jquery.com/jquery-1.5.1.min.js">http://code.jquery.com/jquery-1.5.1.min.js</a>"
></script>
<script src="socket.io/<a href="http://socket.io.js">socket.io.js</a>"></script>
<script src="chatClient.js"></script>
</body>
</html>
Listing 4: An external client JavaScript file that can be used to run your chat client.
(function() {
  var socket = new io.Socket('localhost'),
      $chatMessages = $('#chatMessages'),
      $form = $('form'),
      $messageText = $('#messageText');

  var messageFactory = (function() {
    var that = {},
        $chatMessage = $('<p></p>').
          addClass('chat message'),
        $nick = $('<span></span>').
          addClass('nick'),
        $systemMessage = $('<p></p>').
          addClass('system message');

    var chat = function(message) {
      var $filledNick = $nick.clone().
            text(message.nick + ':');
      return $chatMessage.clone().
        append($filledNick).
        append(message.text);
    };

    var system = function(message) {
      return $systemMessage.clone().text(message.text);
    };

    that.chat = chat;
    that.system = system;

    return that;
  })();

  socket.on('message', function(message) {
    var handler = messageFactory[message.messageType];
    $chatMessages.append(handler(message));
  });

  $form.submit(function() {
    var message = $messageText.val(),
        nick;
    $messageText.val('');
    if(message.indexOf('/nick') === 0) {
      nick = message.replace('/nick ', '');
      $chatMessages.append(messageFactory.system({
        text: 'You changed your nick to ' + nick + '.'
      }));
    } else {
      $chatMessages.append(messageFactory.chat({
        nick: 'me',
        text: message
      }));
    }
    socket.send(message);
    return false;
  });

  socket.connect();
})();
Listing 5: The chatRoom module.
var clients = {},
    userCount = 1;

var addUser = function(sessionId) {
  var userName = 'User ' + userCount;
  clients[sessionId] = userName;
  userCount++;
  return {
    messageType: 'system',
    text: userName + ' has connected.'
  };
};

var changeNick = function(sessionId, nickMessage) {
  var originalNick = clients[sessionId],
      newNick = nickMessage.replace('/nick ', '');
  clients[sessionId] = newNick;
  return {
    messageType: 'system',
    text: originalNick + ' changed nick to ' + newNick
  };
};

var processMessage = function(sessionId, message) {
  if(message.indexOf('/nick') === 0) {
    return changeNick(sessionId, message);
  }
  return {
    messageType: 'chat',
    nick: clients[sessionId],
    text: message
  };
};

var removeUser = function(sessionId) {
  var nick = clients[sessionId];
  delete clients[sessionId];
  return {
    messageType: 'system',
    text: nick + ' was disconnected.'
  };
};


module.exports.addUser = addUser;
module.exports.processMessage = processMessage;
module.exports.removeUser = removeUser;
Listing 6: The final chat server implementation, referencing your chatRoom module.
var connect = require('connect'),
    io = require('socket.io'),
    room = require('./chatRoom');

var server = connect.createServer(
  connect.static(__dirname + '/public')
);

var socketServer = io.listen(server);

socketServer.on('connection', function(client) {
  var sessionId = client.sessionId,
      addedUserMessage = room.addUser(sessionId);

  client.on('message', function(message) {
    var procdMsg = room.processMessage(sessionId, message);
    client.broadcast(procdMsg);
  });

  client.on('disconnect', function() {
    var removedUserMessage = room.removeUser(sessionId);
    socketServer.broadcast(removedUserMessage);
  });

  client.broadcast(addedUserMessage);
});

server.listen(8000);
