


Have you ever wanted to implement search capabilities on your own Web site but didn’t want to implement the logic and deal with issues such as storage and indexing?
The Live Search team now offers two different ways to utilize Search on your site: using the Live Search Box or using the Windows Live Search API.
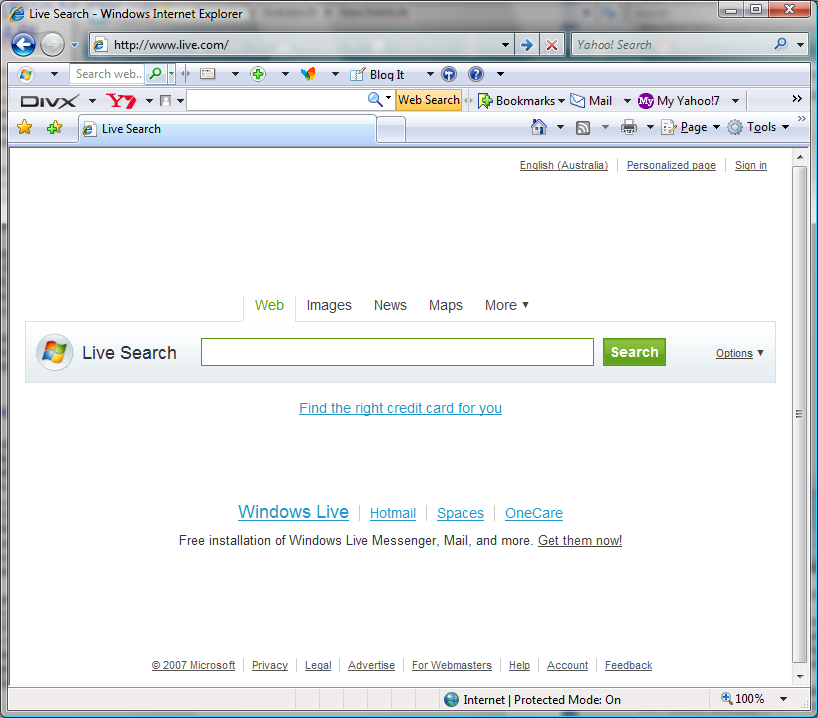
If you aren’t familiar with Live Search, it is located at http://www.live.com. Figure 1 shows the Live Search home page. In addition to a standard search service, Live Search offers searches in various categories such as images, news, maps, and more.
The Live Search Box allows a user to harness the power of Live Search without writing any code. It provides a fast, customizable search for any Web site. You can find details on how to get started with this option at http://search.live.com/siteowner. From this site, follow the wizard and copy the HTML code provided into your site.
The Live Search team now offers two different ways to utilize Search on your site: using the Live Search Box or Windows Live Search API.
This article focuses on the Live Search Web Service and how it allows developers to create applications that return results from the Live Search Engine.
Live Search Web Service
The Live Search Web Service is an Extensible Markup Language (XML) service with a Simple Object Access Protocol (SOAP) API that allows users to create a custom search engine that can query for Web results, images, news, phonebook listings, feeds, and meta tags. You should use this service when you are a developer who is comfortable consuming Web Services and you want more programmatic control over what you are searching for and how you want to display your results.
Checking the spelling of a user’s search criteria before performing a search is a great way to improve the usability of your system.
You can find the fully documented online SDK at http://msdn2.microsoft.com/en-us/library/bb251794.aspx. The documentation describes the requirements, class libraries for the Live Search Web Service, and the terms of use and contains sample code demonstrating use of the Live Search Web Service.
Before You Start
One of the benefits of using the Live Search Web Service is that the terms of use allow for up to 25,000 queries a day for use in both commercial and non-commercial sites at no cost. The full business terms are located at http://dev.live.com.
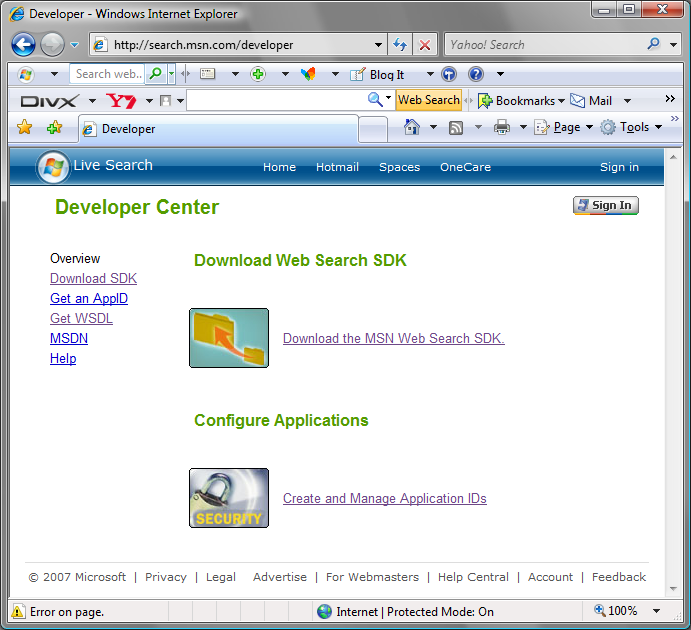
The first thing you require when using the API is an Application ID. You can register and manage your Live Search Application IDs at the Live Search Developer Center located at http://dev.live.com/search. Figure 2 shows the Developer Center home page.
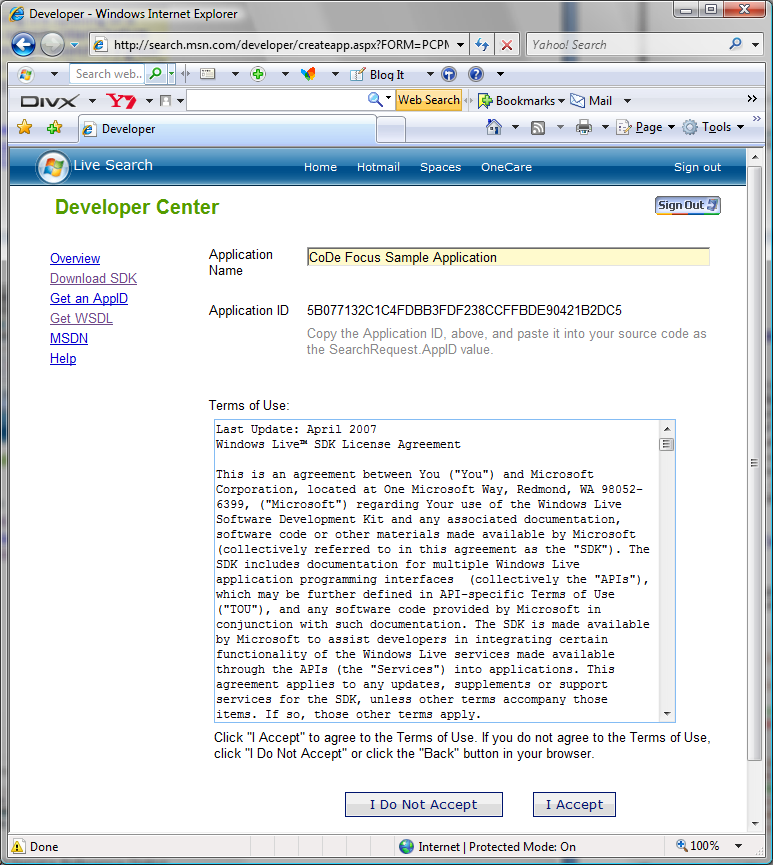
Once here, you may download the SDK or Create and Manage Application IDs. When creating a new Application ID, give your application a name and make note of the assigned Application ID as you will need to use it in your source code. Figure 3 shows the Get Application ID page.
Referencing the Web Service
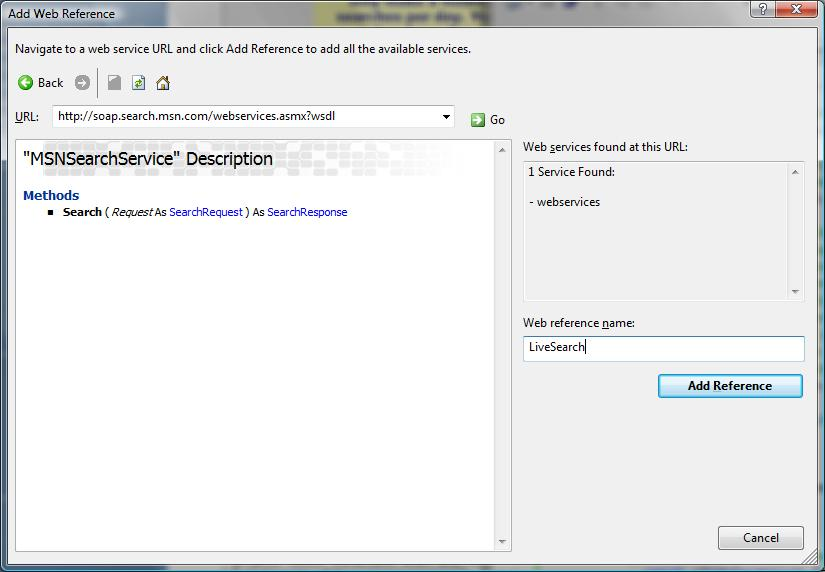
Once you have obtained your Application ID, you need to configure your application to consume the Live Search Web Service. In Visual Studio, add a Web Reference to the WSDL located at http://soap.search.msn.com/webservices.asmx?wsdl. Figure 4 shows the Add Web Reference dialog box with the Live Search Web Service. Once the application has located the Web Service, enter a name for the service and click Add Reference. For all code examples, I have used LiveSearch as the service name.
Creating a Basic Search
Now that you have added the Web Reference for the Live Search Web Service, you now have access to the Search method. The following code snippet demonstrates the code required to perform a basic search. Note: Insert the Application ID you created earlier when using this code snippet:
MSNSearchService serv = new MSNSearchService();
SearchRequest sRequest = new SearchRequest();
SourceRequest[] sr = new SourceRequest[1];
sr[0] = new LiveSearch.SourceRequest();
sr[0].Source = LiveSearch.SourceType.Web;
sr[0].ResultFields = ResultFieldMask.All;

sRequest.Query = "Live Search Articles";
sRequest.Flags = SearchFlags.None;
sRequest.Requests = sr;

// Replace with your own Application ID
sRequest.AppID = "XXXXXXXXXXXXXXXXXXXXXXXXXXXXX";
sRequest.CultureInfo = "en-US";
SearchResponse resp = serv.Search(sRequest);
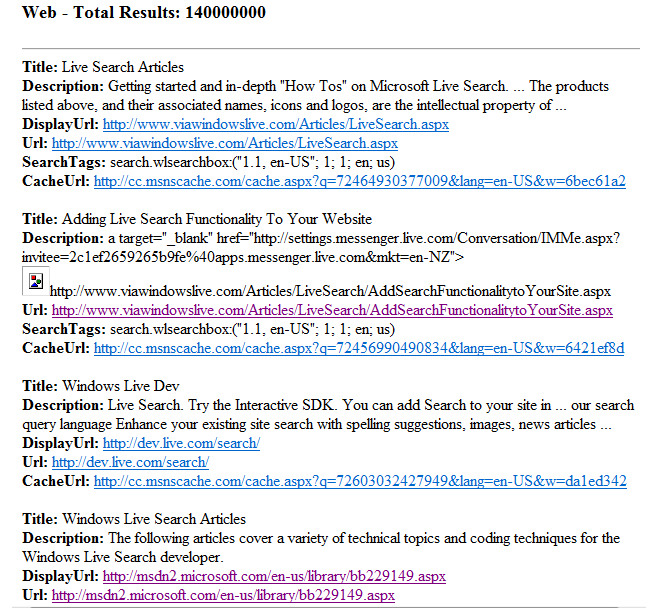
The basic search query returns the results shown in Figure 5. In this basic search, I searched the entire Internet for Web results that contained “Live Search Articles” and returned all result fields.
Results of a search are returned to a SourceResponse object. Depending on the type of search and the fields requested, the object will contain a variety of fields. The object contains an array of results. You should check each field for null before using to avoid unwanted exceptions. An example of how to access the results of a search is as follows:
SearchResponse resp = serv.Search(sRequest);
foreach (Result r in resp.Responses[0].Results)
{
  string title, description, url;

  title = (!String.IsNullOrEmpty(r.Title))
    ? r.Title : "";
  description =
    (!String.IsNullOrEmpty(r.Description))
    ? r.Description : "";
  url = (!String.IsNullOrEmpty(r.Url))
    ? r.Url : "";
}
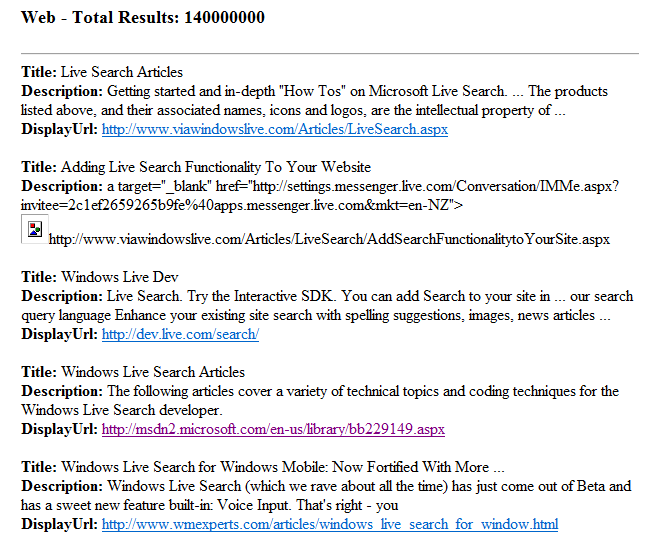
The API allows customization of the fields returned using the ResultFieldMask. If you only want to display the title, description, and displayurl, you would use the following code:
SourceRequest[] sr = new SourceRequest[1];
sr[0].ResultFields =
    ResultFieldMask.Description |
    ResultFieldMask.DisplayUrl |
    ResultFieldMask.Title;
You can see the change in the search results in Figure 6.
Limiting the Sites Search
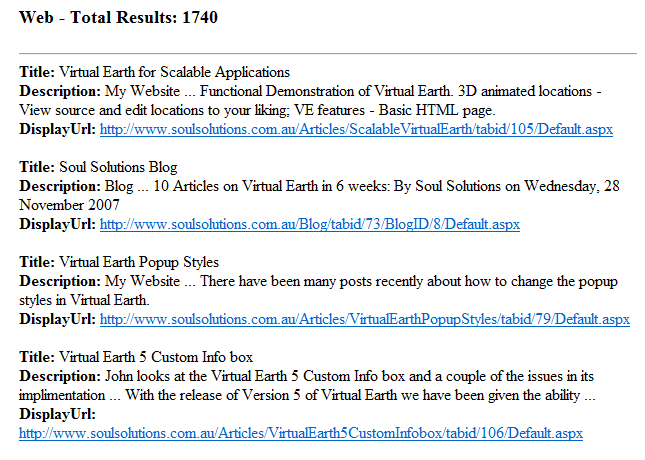
Up until now, you have been searching the Internet for results. The API allows the user to specify the sites the search is limited to. The following code searches for items about “Virtual Earth” on the http://www.soulsolutions.com.au site only:
SearchRequest sRequest = new SearchRequest();
sRequest.Query =
  "Virtual Earth site:<a href="http://www.soulsolutions.com.au">www.soulsolutions.com.au</a>";
You can see the results of this search in Figure 7.
Customizing Your Search
There are a number of ways to customize the search and results returned. This article looks at the following:
- Flags.
- Safesearch.
- Searching for images.
- Spelling suggestions.
- Implementing paged or limited result sets.
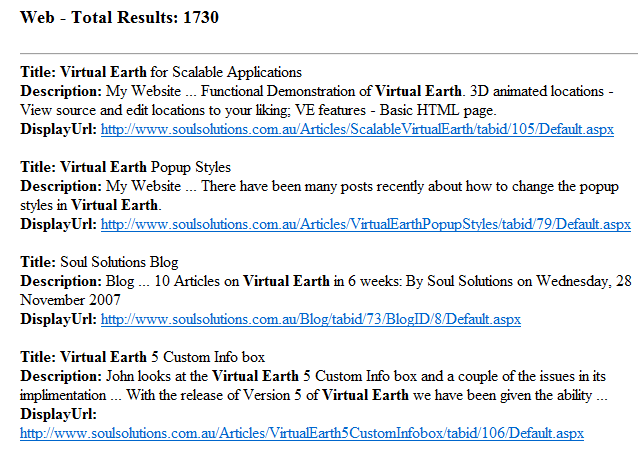
Flags
Setting flags on the search object allows further customization to a search query. Table 1 describes the full list of available flags.
In this article, I’ll look at the MarkQueryWords flag. You should use MarkQueryWords when you want to highlight query terms returned in the result set in bold. The following code snippet shows how you use this:
SearchRequest sRequest = new SearchRequest();
sRequest.Flags = SearchFlags.MarkQueryWords;
The change in the result set is shown in Figure 8.
Safesearch
For users who are concerned with the content that may be returned in results, the API allows users to filter out sexually explicit images and text from search results using the SafeSearchOptions object.
Use SafeSearchOptions.Moderate to filter out explicit images or SafeSearchOptions.Strict to filter both explicit images and text. You can see an example in the following code snippet:
SearchRequest sRequest = new SearchRequest();
sRequest.SafeSearch =
  SafeSearchOptions.Moderate;
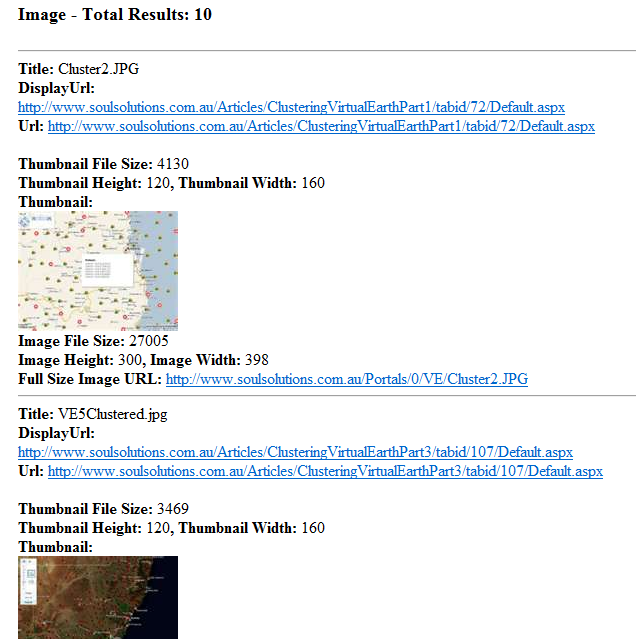
Searching for Images
The API also allows for the searching of images. Using the SourceType.Image in the Source Request returns full-size and thumbnail image information such as size, height, width, and URI. The following code snippet shows how to use the search source and result fields to return images:
SourceRequest[] sr = new SourceRequest[1];
sr[0].Source = LiveSearch.SourceType.Image;
sr[0].ResultFields =
    ResultFieldMask.Description |
    ResultFieldMask.Image |
    ResultFieldMask.Title;
You can see the results of the search in Figure 9. You will find the full list of valid SourceTypes in Table 2.
Spelling Suggestions
Users quite often misspell words in their search criteria. Checking the spelling of a user’s search criteria before performing a search is a great way to improve the usability of your system. The following code snippet shows how you can use the Spelling Source type to determine if the search criteria are spelled correctly:
SearchRequest sRequest = new SearchRequest();
SourceRequest[] sr = new SourceRequest[1];
sr[0].Source = LiveSearch.SourceType.Spelling;
sr[0].ResultFields = ResultFieldMask.All;

sRequest.Query = "vertual earth";
Implementing Paged or Limited Result Sets
Another great way to improve usability of your search solution is to limit the total number of records returned by your search or to show the results in a paged fashion. The API allows you to do both of these.
The following code snippet shows how to determine the total number of results available:
SearchResponse resp = serv.Search(sRequest);
int total = resp.Responses[0].Total;
To control the number of results returned by a search, you should set the Count property as per the following code snippet:
SourceRequest[] sr = new SourceRequest[1];
sr[0].Count = 10;
When implementing a data paging solution, you need to know what page (or what record number for the first record of the page) you wish to display and the total numbers of records that are in a page. The API allows users to specify an Offset property representing the record number to start retrieving results from. The following code snippet retrieves results starting at number 5 with a maximum list length of 5:
SourceRequest[] sr = new SourceRequest[1];
sr[0].Count = 5;
sr[0].Offset = 5;
Conclusion
This article has shown a few of the possibilities available for performing customized searches using the Live Search Web Service. While this article demonstrated the basics of a search solution, the possibilities are endless.
Table 1: The SearchFlags options and descriptions.
| SearchFlag | Description |
|---|---|
| DisableHostCollapsing | Disable the suppression of more than two results from the same top-level URL for this SearchRequest. You should use this when developers want to ensure all results are returned. |
| DisableSpellCorrectForSpecialWords | Live Search Engine will ignore special words that are used in query operators when checking spelling. |
| MarkQueryWords | Search terms (query words) are returned, enclosed in a pair of UTF-8 characters, for this SearchRequest. This is typically used to highlight query words. |
| None | No flags are applied for this SearchRequest. |
Table 2: The SourceType options and descriptions.
| SourceType | Description |
|---|---|
| Image | SourceRequest returns full-size and thumbnail image information including file size, height, width, and URI. |
| InlineAnswers | SourceRequest returns answer results. InlineAnswers types include Encarta, Finance, Weather, and Movie ShowTimes. This option is reserved for commercial use. |
| News | SourceRequest returns results from online news services. |
| Phonebook | SourceRequest returns from online White Pages and Yellow Pages entries. |
| QueryLocation | SourceRequest returns the location of a local query based on input e.g., “coffee 98052”, returns “coffee” in the title, “98052” in the description and the latitude and longitude of the geographic center of the ZIP code. This is limited to U.S. markets only. |
| Spelling | SourceRequest returns a spelling suggestion. |
| Web | SourceRequest returns Web page results. |
