


Web applications today do a number of things.
They could be a banking site, a content management system, or a news Web site. In spite of the diversity of Web applications available today, it almost always makes sense to break a Web page into smaller, reusable widgets that you can share in any other part of the site or even across sites.
This thinking has lead to reusable widgets such as the header and footer in your system, a huge third-party control vendor market, an emergence of portal Web sites such as my.yahoo.com or my.msn.com with functional widgets, and creation of products such as Plumtree and SharePoint Portal Server 2003.
You can create your own custom Web Parts by inheriting from the System.Web.UI.WebControls.WebParts.Webpart class
SharePoint Portal Server 2003 and other such products heralded a new wave of technologies that enabled the creation and customization of Web sites by merely point and click at run time. These products came with a reusable and extensible set of widgets that users could drop on the surface of the page, and customize them per their specific needs. Given such a reusable set of widgets, and the ability to define their placement, behavior, look and feel, and even communication between them, it thus becomes extremely easy to set up and maintain sophisticated and highly functional Web sites.
It is thus not a surprise that ASP.NET has built-in support for such a widget-based or Web Part infrastructure. Also, it should not come as a surprise that in the future, this Web Part infrastructure will probably gain importance both inside and outside of Microsoft.
In this article, I’ll examine the basics of the ASP.NET 2.0 Web Part infrastructure. In a future article, I will dive into further details of the ASP.NET 2.0 Web Part framework. But instead of looking at only “theory” and a “rehash of MSDN,” I will instead build a real production Web site. This Web site will serve as my Web site at www.winsmarts.com, which is also where you can download this article’s code.
But before I dive straight into writing code for the Web site, let me begin by discussing the basic components of the ASP.NET 2.0 Web Part infrastructure:
-
Web Part A Web Part is the reusable widget that the user can drop on to the surface of a Web page, customize it, and define communication with other Web Parts that may exist on the same page. A good way to think of a Web Part is that it is a server control on steroids that fits into the Web Part framework. As you will see further in this article, you can create your own custom Web Parts by inheriting from the <a href="http://System.Web.UI">System.Web.UI</a>.WebControls.WebParts.Webpart class. You can also masquerade a user control or server control as a Web Part by encapsulating it in a GenericWebPart class. But by doing so, you get limited customization by implementing the <a href="http://System.Web.UI">System.Web.UI</a>.WebControls.WebParts.IWebPart interface, and at least out of the box, you cannot leverage the inter-Web part communication infrastructure that ASP.NET 2.0 gives you. -
WebPartManager The WebPartManager is a server control that ships with ASP.NET 2.0. This is the central policeman of the Web Part infrastructure. It manages all functionality, events, and customization of various Web Parts on a given page. There should only be a single WebPartManager on a Web page. You can run the WebPartManager in one of several display modes. Based upon the current mode of the WebPartManager, the various other “zones” on the page appear or disappear. But what are zones? Zones are areas on a Web page that hold Web Parts, or other controls that let you customize the Web Parts on a page. This will become clear as I show you how to create a small Web site using the ASP.NET 2.0 Web Part infrastructure. -
WebPartZone A WebPartZone defines an area or zone on the page that can host one or more Web Parts. Any Web Part inside a WebPartZone inherits the look and feel controlled by the WebPartZone. Also, any control that is not a Web Part can also live inside a WebPartZone. This is done by masquerading the control as a Web Part with the help of the GenericWebPart class. -
CatalogZone The CatalogZone holds a number of CatalogPart controls. CatalogPart controls hold a menu or catalog of Web Parts that you can add to a page for the user to choose from. There are three kinds of CatalogPart controls. -
EditorZone Most Web Parts need some degree of customization. For instance, a control that renders an RSS feed needs a public string property with the URL of the feed, and perhaps another integer property specifying the maximum number of news items to render. An HTML Content Web Part would need the HTML content specified, and maybe you would also want to specify the title for that Web Part, or maybe even its look and feel. The EditorZone hosts various EditorParts that allow the user to customize the various properties of any Web Part. ASP.NET 2.0 comes with a limited set of EditorParts or you can create your own by inheriting from the EditorPart class. -
ConnectionsZone When you have a number of Web Parts on a given page, it is reasonable to expect that some of these Web Parts may want to communicate with other Web Parts. For instance, a navigation Web Part may want to communicate with another Web Part to load the appropriate content. You can define this communication statically in a declarative form in the WebPartManager, or the end user can specify it dynamically by using a ConnectionsZone.
The Requirements
The best way to learn to swim is to dive right in, but it’s always nice to have a shallow pool and a lifeguard watching. Let us do exactly that. With a basic understanding of the various players involved in the ASP.NET 2.0 Web Part infrastructure, let me help you solidify your understanding by creating a Web site driven by the ASP.NET 2.0 Web Part infrastructure. At the end of this article, you will have a reusable Web Parts-based framework-similar to the one I use to set up my Web site at www.winsmarts.com.
The Web Part framework and the membership API work together to provide an extremely flexible architecture
I created the following list of requirements for my Web site:
A Bit about Design
This article by no means feigns to be the definitive authority on any software development methodology, but it still makes sense to have some forethought about design. Think of this as sticking your toe into the pool before you dive in, and you just want to make sure there are no sharks in the pool. Throughout this article, my theme will be “laziness” or doing the least to get the job done. In light of that theme, let me talk through the requirements again.
Regarding requirement No. 1 where I wish to have an area where I can discuss my latest books, articles, speaking engagements etc; that sounds like a perfect candidate for an RSS feed. RSS feeds are all over the place, especially on blogs, so it makes sense to stick with my theme of laziness and reuse my current blog. I have a blog at http://blah.winsmarts.com, so I could easily create a category over there and absorb that category’s RSS feed in www.winsmarts.com. To do that, I’ll write a custom Web Part that I can drop on the surface of my Web Form. On that custom Web Part, I will add a property called RssUrl, which would then render the specified RSS feed of that specific category from my blog on my site.
In requirement No. 2, I want to provide a contact form where users can enter their name, e-mail address, and send me a message directly from my Web site. I could write a Web Part to provide such a form. But this violates the first commandment of this article, “Thou shalt be lazy.” Even though I could write an ASP.NET server control, or a Web Part (which is very much like a server control) to satisfy this requirement, it is just much easier to do this as a user control instead. In a user control, you can set up the form’s look and feel and various required field and regular expression validators merely by a simple point-and-click operation. Thus this serves as a perfect excuse to demonstrate both my laziness and the extensibility of the ASP.NET 2.0 Web Part infrastructure. Thus I will implement this control as a user control, and use that user control as a Web Part.
For requirement No. 3 I want to provide a content editor Web Part. I will create a simple Web Part that has a public property called HtmlContent of type string. I can then edit the content inside a single-line textbox. As you will see further in this article, the ability to edit a public property of a Web Part is available to you pretty much out of the box by using the PropertyGridEditorPart. The PropertyGridEditorPart provides you a convenient mechanism to edit public properties of the Web Part decorated with the WebBrowsable (true) attribute. Yes, you could edit complex and fancy HTML in a single-line textbox, but you could also row a tiny canoe all the way to Japan or clean your floor with a toothbrush. These options feel to me like repairing a car engine from the exhaust pipe. Editing complex HTML in a single-line edit box is definitely not convenient.
I will at least provide a TextArea control or, even better, I’ll integrate a full-fledged Web-based HTML editor to provide rich HTML editing capability. Thus I can again demonstrate the extensibility of the ASP.NET 2.0 Web Part framework, by integrating the telerik r.a.d. editor (www.telerik.com).
Thus, in this article, I will show you how to write three Web Parts:
In addition to these Web Parts, I’ll show you how to write a simple framework to host Web Parts based on the ASP.NET 2.0 Web Part framework. Once you have such a framework ready, you can easily extend this system and add more features by simply writing more Web Parts.
I obviously want to provide access protection to my Web site. Thus I’ll also create a login page to enable the “editability” of the Web site. For anonymous users, however, the content appears as read only. To do this, I’ll leverage the ASP.NET 2.0 framework membership API. The Web Part framework and the membership API work together to provide an extremely flexible architecture. I will next set up the framework.
Setting Up the Web Part Framework
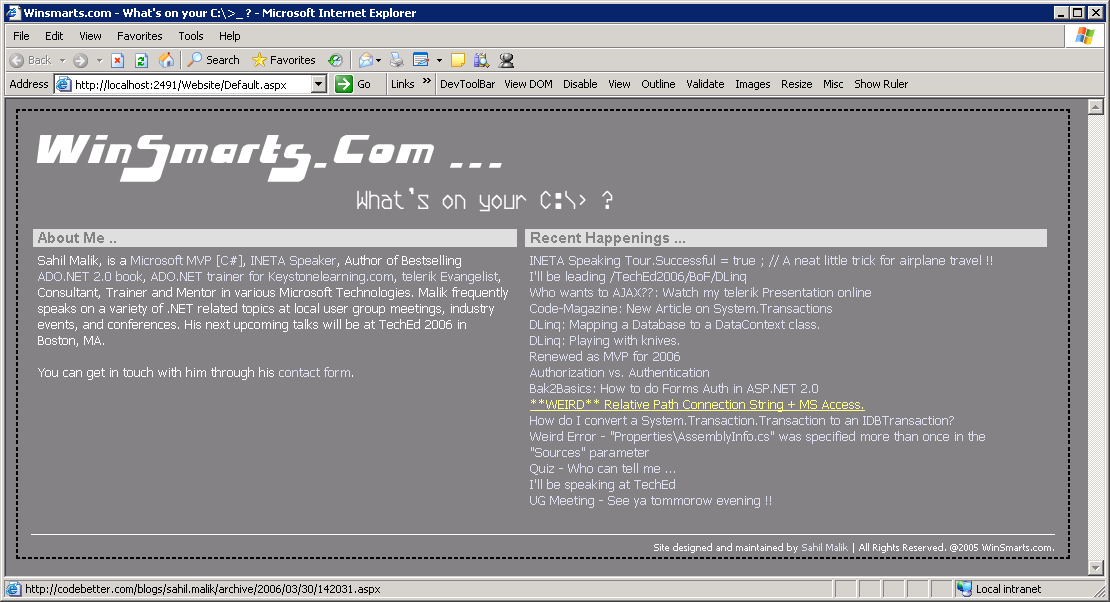
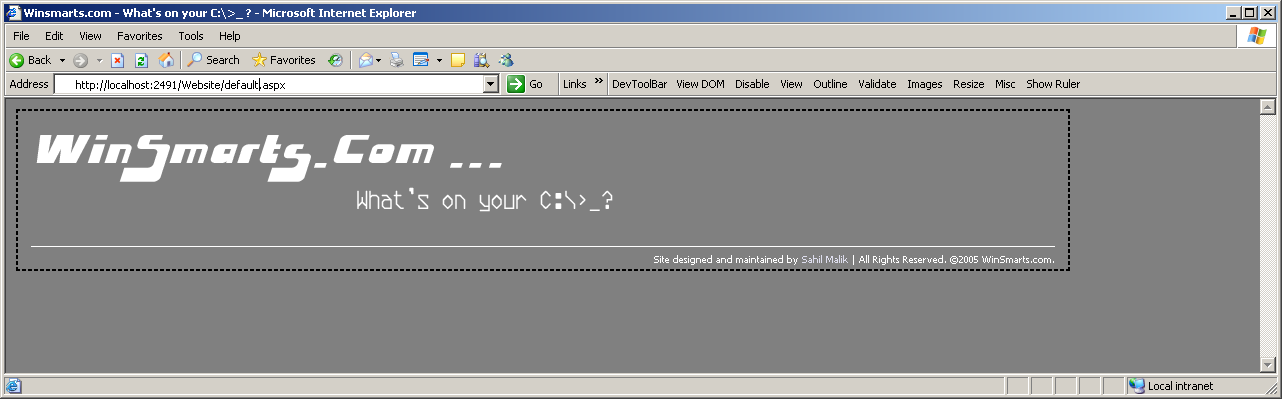
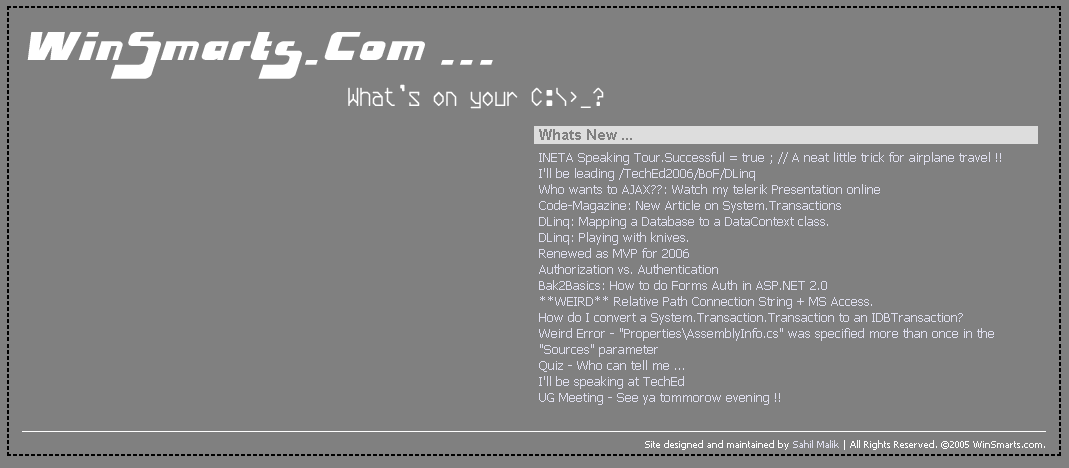
Figure 1 shows what the eventual site will look like. As you can see, this Web site has a default view for anonymous users, which presents the content, but does not allow the user to edit the content.
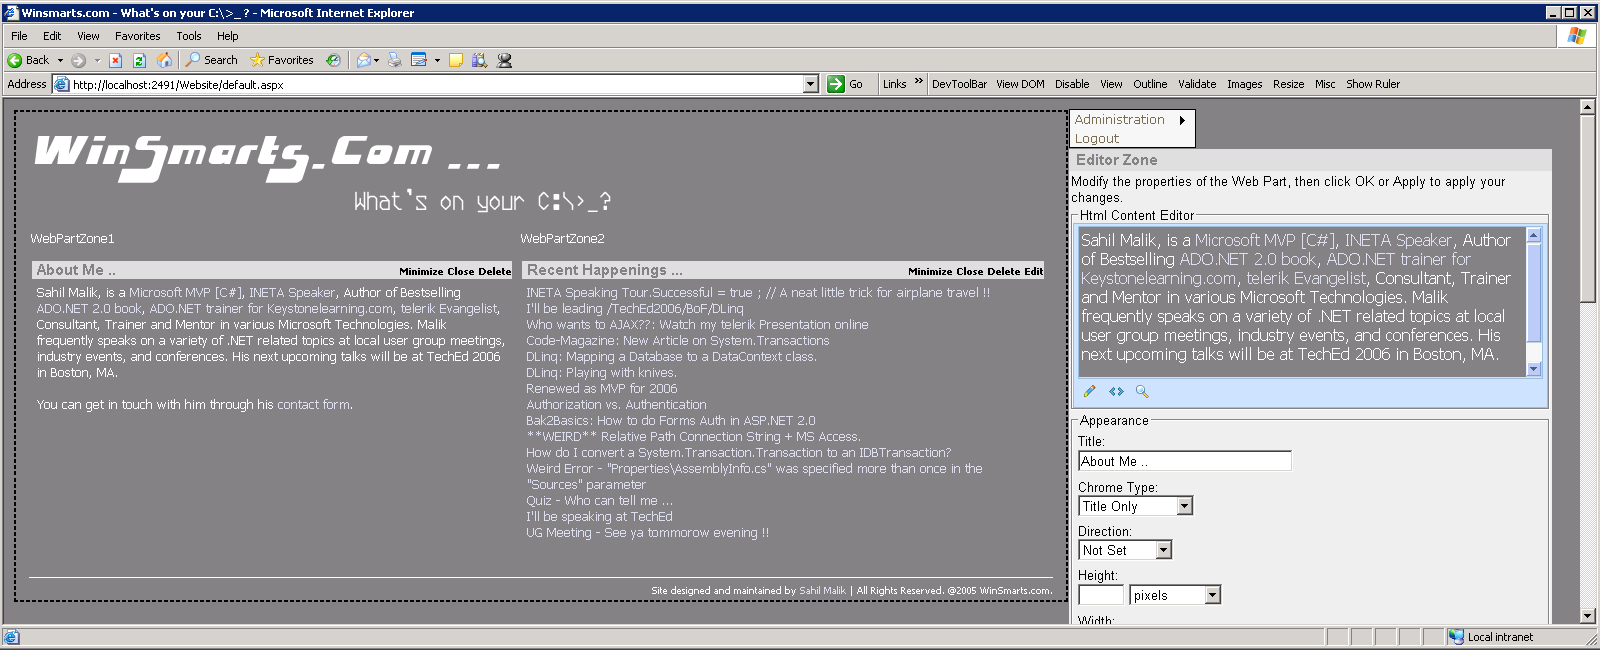
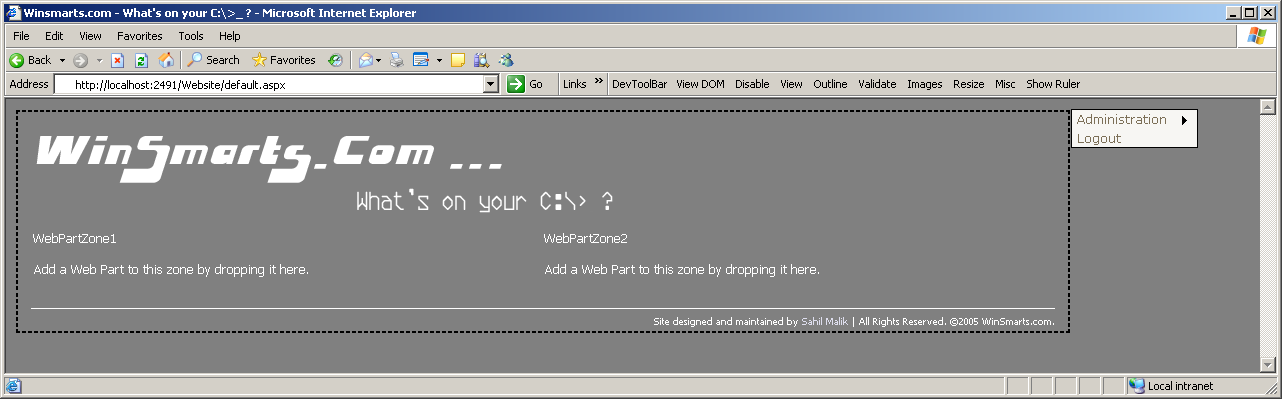
Also, as shown in Figure 2, once the user logs in to the Web site, they’ll see a pane on the right that allows them to perform administration tasks for the Web site. You can see a menu at the top and an “Editor Zone” that holds the telerik r.a.d. editor along with other editable properties. I’ll explain these in detail shortly.
To set up the common look and feel for the Web site, I’ll create a master page to define both the UI and some common logic for the entire Web site.
Setting Up the Master Page
A master page provides a common look and feel as well as some common logic for the Web site. Also, being good citizens of the Web community, you’ll use style sheets to control most of the look and feel and positioning for controls and graphics. You’ll follow these steps.
<asp:WebPartManager
ID="WebPartManager1"
runat="server">
    <Personalization
InitialScope="Shared" />
</asp:WebPartManager>
But the Edit, Catalog, and Connection DisplayModes cannot work unless you create complementary EditorZone, CatalogZone, and ConnectionZones on the page. Since communication between Web Parts is a whole other topic, let’s worry about ConnectionZones in another article. For now, you need to add an EditorZone and a CatalogZone on the master page (see Listing 4).
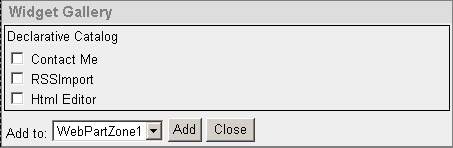
As you can see above, a StyleSheet class named AdminZone controls the positioning and look and feel. The Catalog defines a DeclarativeCatalogPart and inside the WebPartsTemplate is where you’ll add the three Web Parts that I’ll show you how to write. Once you do add the three Web Parts to the DeclarativeCatalogPart, the Catalog Zone will look similar to Figure 4.
Also, the EditorZone contains the four built-in editors that ASP.NET 2.0 supplies. Note the PropertyGridEditorPart, which gives you a convenient way to modify values of Web Parts properties that are decorated with the WebBrowsable=true attribute declaration.
By doing this much, you now have set up a common look and feel as well as a basic framework to host and edit your Web Parts in. You can find the full code including the various Web Parts for SiteMaster.master in Listing 5, and SiteMaster.Master.cs in Listing 6.
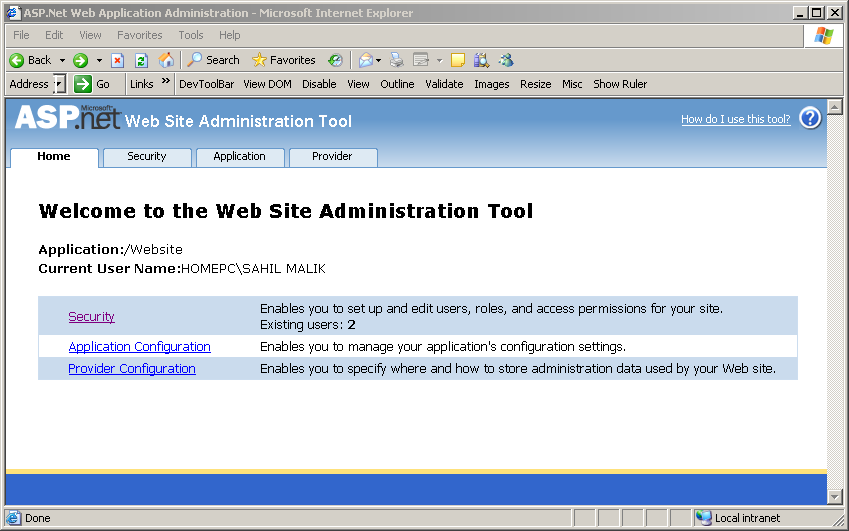
Next you need to tell the framework how to hook into authentication and authorization. You’ll leverage the membership and role provider, and allow users of the “Admin” role to view the “AdminZone” so they can administer the Web site. Let‘s do that next.
Hooking Into Authorization and Authentication
This is probably the simplest part of the entire Web site. You can easily set up authorization and authentication on this Web site by using simple ASP.NET 2.0 concepts. Follow these steps:
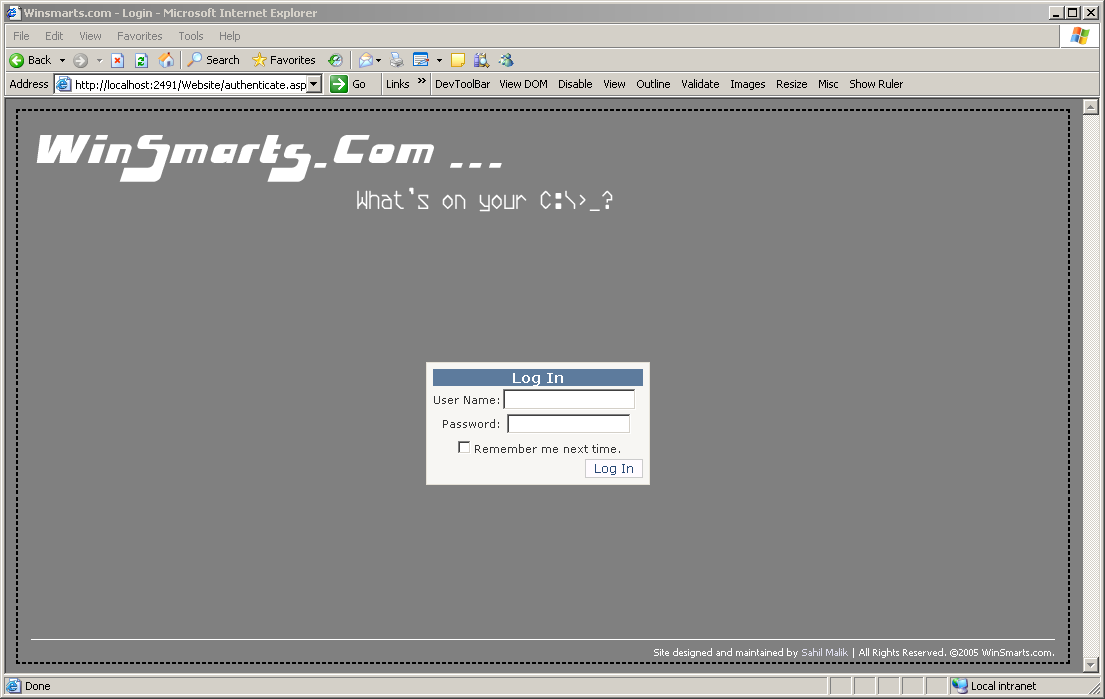
<authentication mode="Forms">
   <forms loginUrl =
       "~/authenticate.aspx"/>
</authentication>
<authorization>
   <allow users="?"/>
</authorization>
<webParts>
   <personalization>
      <authorization>
         <allow roles="Admin"
           verbs="enterSharedScope"/>
      </authorization>
   </personalization>
</webParts>
Adding Pages to the Web Site
With setup completed for the basic site framework and the authentication mechanism, next you need to add two ASPX pages to the Web site.
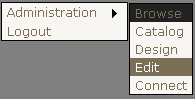
When you run the Web site, you should see a default.aspx, as shown in Figure 7. But when you go to “authenticate.aspx” and actually authenticate to the Web site, and choose the “Design” DisplayMode from the menu on the right, the page then looks as shown in Figure 8. Now if you wanted to add any Web Parts to the WebPartZone, those would have been available to add in the Catalog DisplayMode. Now I’ll show you how to write the Web Parts.
Writing the Web Parts
Let me quickly summarize what you’ve accomplished so far. You’ve set up the basic Web pages that will host your Web Parts. You saw that a master page will control their look and feel. You’ve hooked into the authentication mechanism to show/hide the administration menu in the master page. Finally, you added two ASPX pages that have WebPartZones defined on them. Now if you had Web Parts written, and added them to the CatalogZone, you could now add the Web Parts to your application, move them around, and edit them as necessary. So let’s go ahead and write the Web Parts.
Writing the RSSImport Web Part
For a class to be a Web Part, it needs to inherit from System.Web.UI.WebControls.WebParts.WebPart. Interestingly, the WebPart class also inherits indirectly from the System.Web.UI.WebControls.WebControl class. This means you can use what you’ve learned about writing server controls and apply that knowledge to writing Web Parts.
This Web Part, or put simply, a special kind of server control, needs to have a public property called RssUrl where I can specify the URL for my RSS feed. Given that URL, the Web Part should be able to absorb that RSS feed and render the results in a presentable form by overriding the RenderContents method. If you look at Listing 9, which shows the full code for this Web Part, you can see two custom classes called RssFeed, and RssItem. These classes load the RSS feed as an XmlDocument and present it in strongly-typed business objects. Since that code has nothing to do with ASP.NET 2.0 Web Parts as such, I won’t present it here but you can find it in the Winsmarts.RSSRender project that you can download as part of this article.
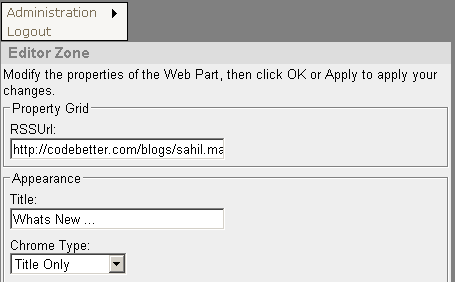
As you can see in Listing 9, the RSSUrl property is decorated with the WebBrowsable(true) attribute. This setting makes this property editable by the PropertyGridEditorPart control in the EditorZone as shown in Figure 11. Also, the PersonalizationScope is defined as Shared. This means that the personalization is at page level versus being at the user level.
With the project compiled as a DLL, go ahead and add a reference to the Web site project. Then go ahead and add a Register directive at the top of the SiteMaster.master master page, as shown below.
<%@ Register
 Assembly="Winsmarts.RSSRender"
 Namespace="Winsmarts.RSSRender"
TagPrefix="cc1" %>
Also, modify the DeclarativeCatalogPart as shown below.
<asp:DeclarativeCatalogPart
 ID="DeclarativeCatalogPart1"
runat="server">
    <WebPartsTemplate>
        <cc1:UIWebPart ID="UIWebPart1"
runat="server" Title="RSSImport"
Description="Import My Blog"
 />
    </WebPartsTemplate>
</asp:DeclarativeCatalogPart>
Run the Web site and browse to authenticate.aspx. Then login with the userid/password that is in the admin role. Using the administration menu, put the WebPartManager in the “Catalog” DisplayMode. The page would then look like as shown in Figure 9.
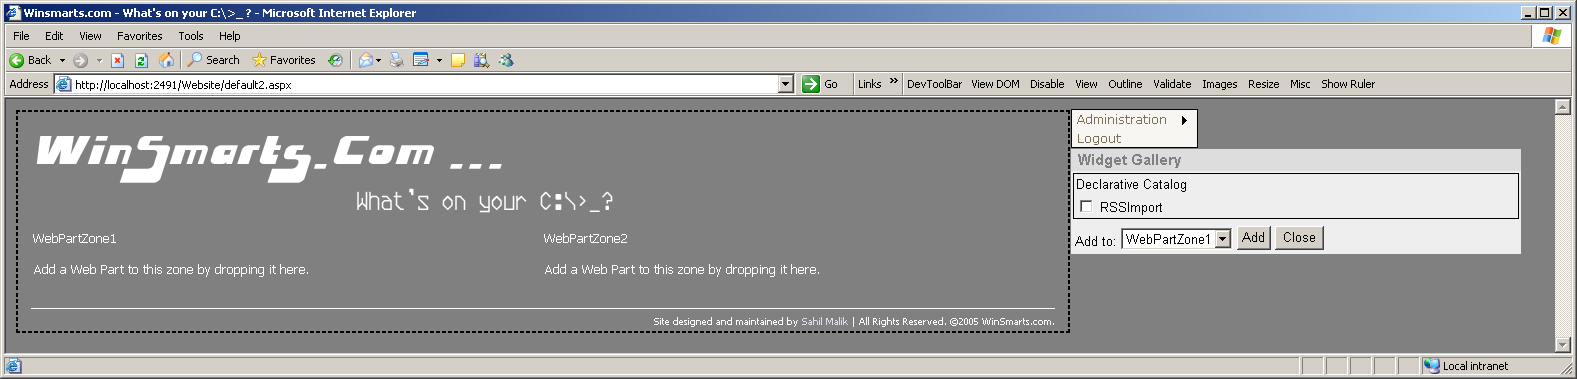
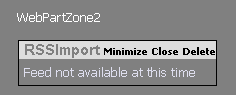
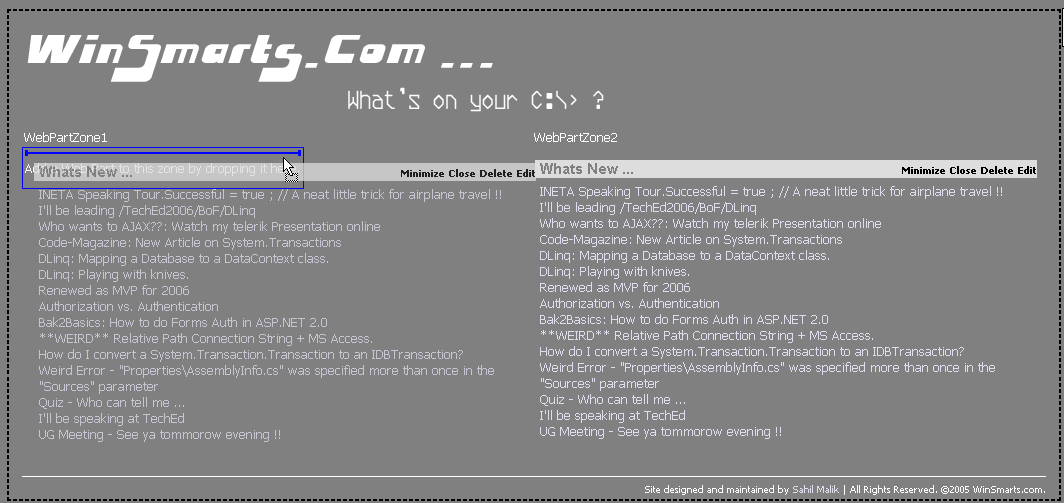
Add RSSImport to WebPartZone2 and you should see something like Figure 10. Now put the WebPartManager in Edit DisplayMode. Note that the Web Part itself now shows an Edit menu. Click Edit to show the EditorZone. You can perform a number of customizations to the Web Part, but as shown in Figure 11, you should specify an RSSUrl, a Title, and change the Chrome Type to “Title Only” then click OK at the bottom of the EditorZone. You will immediately notice that the RSSImport Web Part pulls in the RSS feed from my blog, and renders it inside the Web Part. Not only that, you can easily drag and drop this Web Part to an alternative WebPartZone as shown in Figure 12. For now, just leave the Web Part in WebPartZone2 and click the “Logout” menu item to view the page as an anonymous user would see it. Figure 13 shows the result.
Writing the Contact Me Web Part
I decided to write the Contact Me form as a user control rather than a server control. Since this article is not about writing user controls, I’ll skip the basics of writing a simple user control that shows a contact form. It is a rather simple user control and you’ll find the code in the “usercontrols” folder in the Web site project.
Using a user control as a Web Part requires almost no additional work. Simply add it to the DeclarativeCatalogPart.
<asp:DeclarativeCatalogPart
ID="DeclarativeCatalogPart1"
runat="server">
   <WebPartsTemplate>
       <uc1:ContactMe ID="ContactMe1"
        runat="server"
        Title="Contact Me"
        Description= "A simple form
        to get in touch with me." />
       <cc1:UIWebPart ID="UIWebPart1"
        runat="server"
        Title="RSSImport"
        Description="Import my Blog"/>
   </WebPartsTemplate>
</asp:DeclarativeCatalogPart>
The ASP.NET 2.0 Web Part framework wraps anything that is a control, but not a Web Part, inside a GenericWebPart class instance. You have the option of implementing the IWebPart interface and offer customization to some degree. But by using a GenericWebPart class you lose advanced features such as connections or communication between Web Parts.
Now using a mechanism similar to the first Web Part, you can easily add and customize this Web Part to the contact.aspx form, which has only a single WebPartZone.
Writing the ContentEditor Web Part
This Web Part will allow the administrator to present any static HTML content. As with the RSSRender Web Part, you could easily setup such a Web Part by creating a public property called HtmlContent, then simply write out the value of HtmlContent in the overridden RenderContents method.
You could also decorate the HtmlContent property with the WebBrowsable(true) attribute. This will give you a tiny textbox to edit your fancy HTML. While that will work, it is hardly a good user experience. So the trick is to be able to create a custom editor for this Web Part, and somehow hook the EditorPart to the Web Part.
The custom EditorPart is nothing but a class that inherits from System.Web.UI.WebControls.WebParts.EditorPart.
In this example, you’ll leverage the telerik r.a.d. editor to provide the user with a full-fledged Web-based HTML editor. You can create an instance of the telerik r.a.d. editor by overriding the CreateChildControls method as shown in Listing 10.
The EditorPart class comes with two abstract methods that you must override.
-
ApplyChanges is responsible for getting the Web Part being edited right now using the WebPartToEdit property, and applying the values the user specified to the Web Part. Here is the implementation of the ApplyChanges method.
public override bool ApplyChanges()
{
  EnsureChildControls();
  UIWebPart part =
    WebPartToEdit as UIWebPart;
  if (part != null)
  {
    part.HtmlContent =
      htmlContentTxt.Html;
  }
  else
  {
    return false;
  }
  return true;
}
-
SyncChanges is responsible for getting the current state of values from the Web Part being edited, and applying those to the EditorPart. The implementation for SyncChanges for this EditorPart is shown below.
public override void SyncChanges()
{
  EnsureChildControls();
  UIWebPart part =
    WebPartToEdit as UIWebPart;
  if (part != null)
  {
    htmlContentTxt.Html =
      part.HtmlContent;
  }
}
Connecting the Web Part to the EditorPart
With the EditorPart written, you need to tell the Web Part to use a certain editor by implementing the IWebEditable interface on the Web Part itself.
The IWebEditable interface requires you to implement a method and a property.
-
CreateEditorParts returns an EditorPartCollection. This is where you would instantiate the EditorPart, stuff it in a strongly-typed collection, and simply return it. This tells the framework to use the EditorParts specified in this collection in order to edit this Web Part. Here is the implementation for CreateEditorParts for this Web Part.
EditorPartCollection
   IWebEditable.CreateEditorParts()
{
  List<EditorPart> editors =
    new List<EditorPart>();
  editors.Add(new HtmlEditor());
  return new
    EditorPartCollection(editors);
}
-
WebBrowsableObject returns an object, which is simply a reference of a Web Part, user control, or server control that will be edited by the EditorWebPartCollection sent back by the CreateEditorParts method. You can implement WebBrowsableObject as shown below.
object IWebEditable.WebBrowsableObject
{
  get { return this; }
}
Using the Web Part and EditorPart
With the Web Part and EditorPart set up, go ahead and add them to the master page similar to the RSSRender Web Part. Now go ahead and run the Web site, login using authenticate.aspx, and browse to default.aspx. Switch the DisplayMode to “Catalog”, and add the Html Editor Web Part to WebPartZone1.
Next, switch the DisplayMode to “Edit” and add your custom HTML content and set various other properties as shown in Figure 2.
When you click OK and Logout, you will see the WinSmarts.com Web site as shown in Figure 1.
The Web site is now complete. Hooray.
But There Is More …
This article demonstrated the various concepts of the ASP.NET 2.0 Web Part infrastructure by creating the reusable framework that I used to create www.winsmarts.com. You can download the code for this entire article from the same Web site as well.
You’d think I’d say, “That’s all folks,” like a cartoon flick after such a long article. The Web Part infrastructure offers you a rich set of features that I scraped only the surface of in this article. This article took a slightly different approach by cutting out per-user customizability. However, I presented just one implementation of the Web Parts framework. I recommend that you experiment with this project by removing the “shared scopes” from this application and watch how the behavior of this application changes with multiple users.
Also, go ahead and click on the “Connect” display mode. Chances are, you’ll see a rude ugly exception as shown in Figure 14.
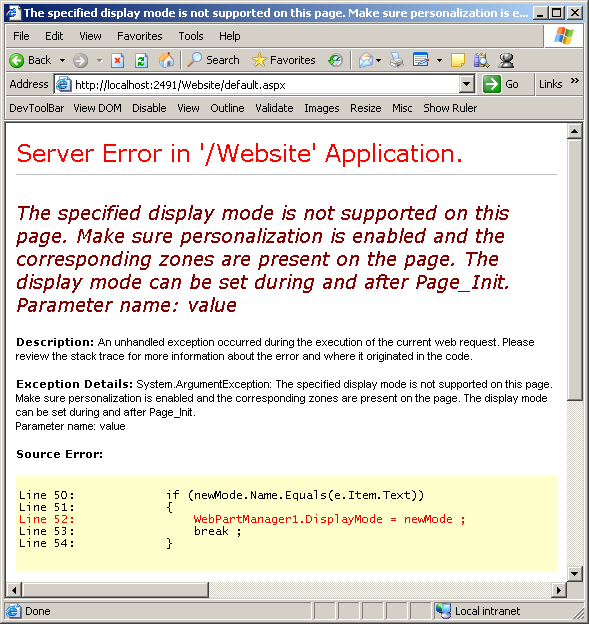
The exception does make sense. You didn’t add a ConnectionsZone to this Web page! Wouldn’t it be reasonable to expect that in any sophisticated application, you would expect to see one part of the page affect or communicate with other parts of the same Web Page?
In other words, you need a mechanism to establish communication between Web Parts.
In a future article I will explore deeper into the details of inter-Web Part communication. Also, since the ASP.NET 2.0 Web Part framework forms the basis of SharePoint Portal Server 2007, I will write a good treatise on Web Parts in SharePoint Portal Server 2007.
Listing 1: The Master page SiteMaster.master-anonymous user area
<div class="MainContent">
    <a id="A1" href="~/Default.aspx" runat="server">
        <img id="Img2" runat="server"
        src="images/winsmarts.gif" class="titleImage"
        alt="Winsmarts.com" />
    </a>
    <span class="WebPartZonesArea">
    <asp:ContentPlaceHolder ID="ContentPlaceHolder1"
      runat="server">
    </asp:ContentPlaceHolder>
    </span>
    <img id="Img1" runat="server"
      src="~/images/white.gif" class="bottomSeperator"
      alt="" />
    <div class="SmallFooterText">
      Site designed and maintained by
      <a href="contact.aspx">Sahil Malik</a> |
      All Rights Reserved. ©2005 WinSmarts.com.
     </div>
</div>
Listing 2: The Master page SiteMaster.master-setting up the admin menu
protected void Page_Load(object sender, EventArgs e)
{
    if (Page.User.IsInRole("admin") &&
         Page.User.Identity.IsAuthenticated)
    {
        WebPartMenu.Visible = true;
    }
    else
    {
        WebPartMenu.Visible = false;
    }

    if (!Page.IsPostBack)
    {
        MenuItem rootMenuItem =
         new MenuItem("Administration") ;
        rootMenuItem.Selectable = false;
        foreach (WebPartDisplayMode displayMode in
            WebPartManager1.DisplayModes)
        {
            rootMenuItem.ChildItems.Add(
             new MenuItem(displayMode.Name));
        }
        WebPartMenu.Items.Add(rootMenuItem);

        WebPartMenu.Items.Add(new MenuItem("Logout"));
    }
}
Listing 3: The Master page SiteMaster.master-responding to admin menu clicks
protected void WebPartMenu_MenuItemClick(
   object sender, MenuEventArgs e)
{
   if (e.Item.Text == "Logout")
   {
      FormsAuthentication.SignOut();
      WebPartMenu.Visible = false;
      WebPartManager1.DisplayMode =
        WebPartManager.BrowseDisplayMode;
   }

   foreach (WebPartDisplayMode newMode in
     WebPartManager1.DisplayModes)
   {
      if (newMode.Name.Equals(e.Item.Text))
      {
         WebPartManager1.DisplayMode = newMode ;
         break ;
      }
   }
}
Listing 4: The Master Page SiteMaster.master-the admin user area
<span class="AdminZone">
    <asp:CatalogZone ID="CatalogZone1" runat="server"
HeaderText="Widget Gallery"
HeaderCloseVerb-Visible="false"
Width="450px"
HeaderStyle-CssClass="AdminHeader">
        <ZoneTemplate>
            <asp:DeclarativeCatalogPart
ID="DeclarativeCatalogPart1" runat="server">
                <WebPartsTemplate>
                </WebPartsTemplate>
            </asp:DeclarativeCatalogPart>
        </ZoneTemplate>
    </asp:CatalogZone>
    <asp:EditorZone ID="EditorZone1" runat="server"
HeaderCloseVerb-Visible="false"
Width="450px"
HeaderStyle-CssClass="AdminHeader">
        <ZoneTemplate>
            <asp:PropertyGridEditorPart
ID="PropertyGridEditorPart1" runat="server" />
            <asp:AppearanceEditorPart
ID="AppearanceEditorPart1" runat="server" />
            <asp:BehaviorEditorPart
ID="BehaviorEditorPart1" runat="server" />
            <asp:LayoutEditorPart
ID="LayoutEditorPart1" runat="server" />
        </ZoneTemplate>
    </asp:EditorZone>
</span>
Listing 5: The Master page SiteMaster.master-full code listing
<%@ Master Language="C#" AutoEventWireup="true"
CodeFile="<a href="http://SiteMaster.master.cs">SiteMaster.master.cs</a>" Inherits="SiteMaster"%>
<%@ Register Assembly="Winsmarts.RSSRender"
Namespace="Winsmarts.RSSRender" TagPrefix="cc1" %>
<%@ Register Assembly="Winsmarts.ContentEditor"
Namespace="Winsmarts.ContentEditor" TagPrefix="cc2" %>
<%@ Register Src="usercontrols/ContactMe.ascx"
TagName="ContactMe" TagPrefix="uc1" %>
<!DOCTYPE html
PUBLIC "-//W3C//DTD XHTML 1.0 Transitional//EN"
"<a href="http://www.w3.org/TR/xhtml1/DTD/xhtml1-">http://www.w3.org/TR/xhtml1/DTD/xhtml1-</a>
transitional.dtd">
<html xmlns="<a href="http://www.w3.org/1999/xhtml">http://www.w3.org/1999/xhtml</a>">
<head runat="server">
<title>Winsmarts.com - What's on your C:\>_
?</title>
<link href="~/styles/styles.css" rel="stylesheet"
type="text/css" runat="server" />
</head>
<body>
<form id="form1" runat="server">
<asp:Menu ID="WebPartMenu" runat="server"
OnMenuItemClick="WebPartMenu_MenuItemClick"
CssClass="adminMenu" BackColor="#F7F6F3"
DynamicHorizontalOffset="2" Font-Names="Verdana"
Font-Size="12px" ForeColor="#7C6F57"
StaticSubMenuIndent="10px" BorderColor="#000000"
BorderStyle="Solid" BorderWidth="1px">
<StaticMenuItemStyle HorizontalPadding="5px"
VerticalPadding="2px"/>
<DynamicHoverStyle BackColor="#7C6F57"
ForeColor="White"/>
<DynamicMenuStyle BackColor="#F7F6F3"
BorderColor="#000000" BorderStyle="Solid"
BorderWidth="1px"/>
<StaticSelectedStyle BackColor="#222222"/>
<DynamicSelectedStyle BackColor="#222222"/>
<DynamicMenuItemStyle HorizontalPadding="5px"
VerticalPadding="2px"/>
<StaticHoverStyle BackColor="#7C6F57"
ForeColor="White" />
</asp:Menu>
<asp:WebPartManager ID="WebPartManager1"
runat="server">
<Personalization InitialScope="Shared" />
</asp:WebPartManager>
<div>
<div class="MainContent">
<a id="A1" href="~/Default.aspx"
runat="server">
<img id="Img2" runat="server"
src="images/winsmarts.gif"
class="titleImage"
alt="Winsmarts.com" />
</a>
<span class="WebPartZonesArea">
<asp:ContentPlaceHolder
ID="ContentPlaceHolder1"
runat="server">
</asp:ContentPlaceHolder>
</span>
<div class="SmallFooterText">
Site designed and maintained by
<a href="contact.aspx">
Sahil Malik</a> |
All Rights Reserved. ©2005
WinSmarts.com.
</div>
</div>
<span class="AdminZone">
<asp:CatalogZone ID="CatalogZone1"
runat="server" HeaderText="Widget Gallery"
HeaderCloseVerb-Visible="false" Width="450px"
HeaderStyle-CssClass="AdminHeader">
<ZoneTemplate>
<asp:DeclarativeCatalogPart
ID="DeclarativeCatalogPart1" runat="server">
<WebPartsTemplate>
<uc1:ContactMe
ID="ContactMe1" runat="server" Title="Contact Me"
Description="A Simple Form to get in touch with me." />
<cc1:UIWebPart
ID="UIWebPart1" runat="server" Title="RSSImport"
Description="Import My Blog" />
<cc2:UIWebPart
ID="UIWebPart2" runat="server" Title="Html Editor"
Description="A simple Html Content Editor" />
</WebPartsTemplate>
</asp:DeclarativeCatalogPart>
</ZoneTemplate>
</asp:CatalogZone>
<asp:EditorZone ID="EditorZone1"
runat="server" HeaderCloseVerb-Visible="false"
Width="450px" HeaderStyle-CssClass="AdminHeader">
<ZoneTemplate>
<asp:PropertyGridEditorPart
ID="PropertyGridEditorPart1" runat="server" />
<asp:AppearanceEditorPart
ID="AppearanceEditorPart1" runat="server" />
<asp:BehaviorEditorPart
ID="BehaviorEditorPart1" runat="server" />
<asp:LayoutEditorPart
ID="LayoutEditorPart1" runat="server" />
</ZoneTemplate>
</asp:EditorZone>
</span>
</div>
</form>
</body>
</html>
Listing 6: The Master page code behind-SiteMaster.master.cs
public partial class SiteMaster : <a href="http://System.Web.UI">System.Web.UI</a>.MasterPage
{
protected void Page_Load(object sender, EventArgs e)
{
if (Page.User.IsInRole("Admin") &&
Page.User.Identity.IsAuthenticated)
{
WebPartMenu.Visible = true;
}
else
{
WebPartMenu.Visible = false;
}
if (!Page.IsPostBack)
{
MenuItem rootMenuItem = new
MenuItem("Administration") ;
rootMenuItem.Selectable = false;
foreach (WebPartDisplayMode displayMode in
WebPartManager1.DisplayModes)
{
rootMenuItem.ChildItems.Add(new
MenuItem(displayMode.Name));
}
WebPartMenu.Items.Add(rootMenuItem);
WebPartMenu.Items.Add(new MenuItem("Logout"));
}
}
protected void WebPartMenu_MenuItemClick(
object sender, MenuEventArgs e)
{
if (e.Item.Text == "Logout")
{
FormsAuthentication.SignOut();
WebPartMenu.Visible = false;
WebPartManager1.DisplayMode =
WebPartManager.BrowseDisplayMode;
}
foreach (WebPartDisplayMode newMode in
WebPartManager1.DisplayModes)
{
if (newMode.Name.Equals(e.Item.Text))
{
WebPartManager1.DisplayMode = newMode ;
break ;
}
}
}
}
Listing 7: Default.aspx-putting the master page to use
<%@ Page Language="C#"
MasterPageFile="~/SiteMaster.master"
AutoEventWireup="true"
CodeFile="<a href="http://Default.aspx.cs">Default.aspx.cs</a>" Inherits="_Default"
Title="Winsmarts.com - What's on your C:\>_ ?"
ValidateRequest="false" %>
<asp:Content ID="Content1"
ContentPlaceHolderID="ContentPlaceHolder1"
runat="Server">
<table border="0" width="1024px">
<tr>
<td width="512px" valign="top">
<asp:WebPartZone ID="WebPartZone1"
runat="server"
PartTitleStyle-CssClass="WebPartZoneTitle"
TitleBarVerbStyle-CssClass="webpartMenuCSS"
WebPartVerbRenderMode="titleBar">
</asp:WebPartZone>
</td>
<td width="512px" valign="top">
<asp:WebPartZone ID="WebPartZone2"
runat="server"
PartTitleStyle-CssClass="WebPartZoneTitle"
TitleBarVerbStyle-CssClass="webpartMenuCSS"
WebPartVerbRenderMode="titleBar">
</asp:WebPartZone>
</td>
</tr>
</table>
</asp:Content>
Listing 8: Contact.aspx-putting the master page to use
<%@ Page Language="C#"
MasterPageFile="~/SiteMaster.master"
AutoEventWireup="true"
CodeFile="<a href="http://Contact.aspx.cs">Contact.aspx.cs</a>" Inherits="Contact"
Title="Winsmarts.com - Contact Me." %>
<asp:Content ID="Content1"
ContentPlaceHolderID="ContentPlaceHolder1"
runat="Server">
<table border="0" width="800px">
<tr>
<td>
<asp:WebPartZone ID="WebPartZone1"
runat="server"
PartTitleStyle-CssClass="WebPartZoneTitle"
TitleBarVerbStyle-CssClass="webpartMenuCSS"
WebPartVerbRenderMode="titleBar">
</asp:WebPartZone>
</td>
</tr>
</table>
</asp:Content>
Listing 9: The RssRender Web Part
namespace Winsmarts.RSSRender
{
   public class UIWebPart : Web Part
   {
      private string rssUrl;

      [WebBrowsable(true)]
      [Personalizable(PersonalizationScope.Shared)]
      public string RSSUrl
      {
         get { return rssUrl; }
         set
         {
            rssUrl = value;
         }
      }

      protected override void
        RenderContents(
         <a href="http://System.Web.UI">System.Web.UI</a>.HtmlTextWriter writer)
      {
         RssFeed feed = new RssFeed(rssUrl);
         HyperLink newLink = new HyperLink();
         foreach (RssItem singleRssItem in feed)
         {
            newLink.Text = singleRssItem.Title;
            newLink.NavigateUrl =
              singleRssItem.Href;
            newLink.Target = "rssSite";
            newLink.RenderControl(writer);
            writer.WriteBreak();
         }
      }
   }
}
Listing 10: The CreateChildControls method in the custom EditorPart
protected override void CreateChildControls()
{
   htmlContentTxt = new RadEditor();
   htmlContentTxt.ToolsFile = "~/ToolsFile.xml";
   htmlContentTxt.BackColor =
     System.Drawing.Color.White;
   htmlContentTxt.EnableDocking = false;
   htmlContentTxt.ToolbarMode =
     EditorToolbarMode.ShowOnFocus;
   htmlContentTxt.ShowSubmitCancelButtons = false;
   htmlContentTxt.Modules.Clear();
   htmlContentTxt.Width = new Unit("475px");
   htmlContentTxt.Height = new Unit("150px");
   Controls.Add(htmlContentTxt);
}
Table 1: Display modes for the WebPartManager.
| Display Mode | Description |
|---|---|
| Browse | The default Display mode. It shows the user customized version of the site, or in this case as the anonymous user would see it. Besides being able to minimize or close individual WebParts, Browse shows the Web Parts in a read-only mode. |
| Design | Lets you visually drag and drop (in IE) the various Web Parts on the page currently. |
| Catalog | Dsplays a catalog of available Web Parts that you can add to the various WebPartZones. |
| Edit | Shows the EditorZone that allows the user to edit the various properties of the current Web Part being edited. |
| Connect | Allows you to connect various WebParts, and define communication between them. |
