


As developers are just getting used to ASP.NET MVC 2 and Visual Studio 2010, Microsoft has already planned and released a preview of the next version of ASP.NET. What started out as “just another option” for ASP.NET developers has become the programming style of choice for developers writing .NET applications for the web.
The ASP.NET MVC Landscape
Before thinking you are behind the technology curve in any way, remember that the current version of ASP.NET MVC is version 2. This is the version that shipped with Visual Studio 2010. It is built against .NET 3.5 SP1, so it works in Visual Studio 2008 SP1 as well. If you are building web applications right now, this is the version you should be using.
ASP.NET MVC 2 is built on top of ASP.NET 4, which is a very powerful web application runtime that works with IIS (Internet Information Services) and Windows Servers. Web Forms continues to be a part of the ASP.NET landscape, and it will be for some time. With ASP.NET 4, there is no need to choose between Web Forms and MVC. They work well together both with view engine integration as well as the addition of routing into the core of ASP.NET 4. Within the same application, some pages can be Web Form pages, and some can be MVC-based.
With that being said, there is much excitement in the industry over the simplicity that ASP.NET MVC brings to the table. The code-driven approach is also favored by many over the XML markup and template-driven approach to coding.
Agenda
In this article, I am going to lay out the plan for ASP.NET MVC 3 as disclosed by Microsoft. I will explain and demonstrate the features that are to come as well as give some guidance on how to think about each one.
Next, we will build a Guestbook application from scratch using ASP.NET MVC 3 Preview 1. We will apply the new features while building the application and you will be able to download the entire source and try it for yourself.
How to Get the Preview
On July 27, 2010, Microsoft released ASP.NET MVC 3 Preview 1. You can download it for yourself here: http://www.microsoft.com/downloads/details.aspx?displaylang=en&">http://www.microsoft.com/downloads/details.aspx?displaylang=en&;FamilyID=cb42f741-8fb1-4f43-a5fa-812096f8d1e8.
You should download the file, AspNetMVC3Setup.exe and execute it after you’ve verified that you already have Visual Studio 2010 installed. This build will not work if you only have Visual Studio 2008. When the final build is released at an unknown date, MVC 3 will also work with Visual Web Developer 2010.
MVC 3 is completely compatible with ASP.NET MVC 2 & Visual Studio 2010.
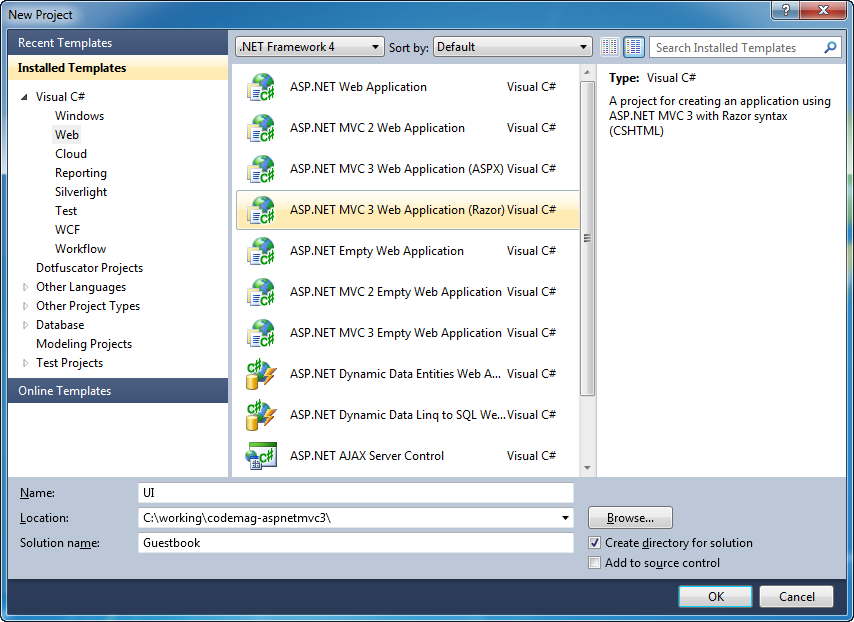
This build works fine beside ASP.NET MVC 1 and 2, and it also lives in harmony on workstations with Visual Studios 2008 and 2010 installed side-by-side. It does this by avoiding the GAC completely. The new System.Web.Mvc.dll assembly will reside in C:\Program Files (x86)\Microsoft ASP.NET\ASP.NET MVC 3\Assemblies\System.Web.Mvc.dll on 64-bit machines. After you have the preview installed, head on over to the New Project dialog box and notice the new entries for MVC 3 as shown in Figure 1.
Now that we understand how to get started with ASP.NET MVC 3 Preview 1, let’s go over the new features that are in the works. Keep in mind that the build available at this point is full of preview bits, so while the happy path works, there are bound to be holes and bugs.
MVC 3 Feature Overview
The features being added in version 3 are complimentary and compatible with previous versions. There are no revolutionary changes here. Table 1 shows a quick run-down of the features. You’ll see most of these as I walk you through building the guestbook application.
In this preview, JSON model binding and CommonServiceLocator support are not fully baked, but just knowing that they are in the works is encouraging.
JSON model binding will be automatic. That is, the same controller action can service http requests regardless what form the data comes in as.
When ASP.NET MVC 3 releases, it will take a dependency on the CommonServiceLocator project located at http://commonservicelocator.codeplex.com/">http://commonservicelocator.codeplex.com/. This library has been around since 2008 and it is the work of collaboration by many Inversion of Control container authors and Microsoft. It provides common functions for locating services based on the interface type. ASP.NET MVC is integrating this to provide easy factories for:
- Controllers
- Filters
- Views
- Model binders
- Value providers
- And more!
Now that we have seen what the plans look like, let’s build an application together.
Building a New ASP.NET MVC 3 Application
Let’s dive in and build our application. We’ll pause each step of the way and examine what is new.
Before discussing the feature set, let’s spin up a new ASP.NET MVC 3 application and take a look around. You have already seen the New Project dialog box in Figure 1. Figure 2 shows us what we see out of the box.
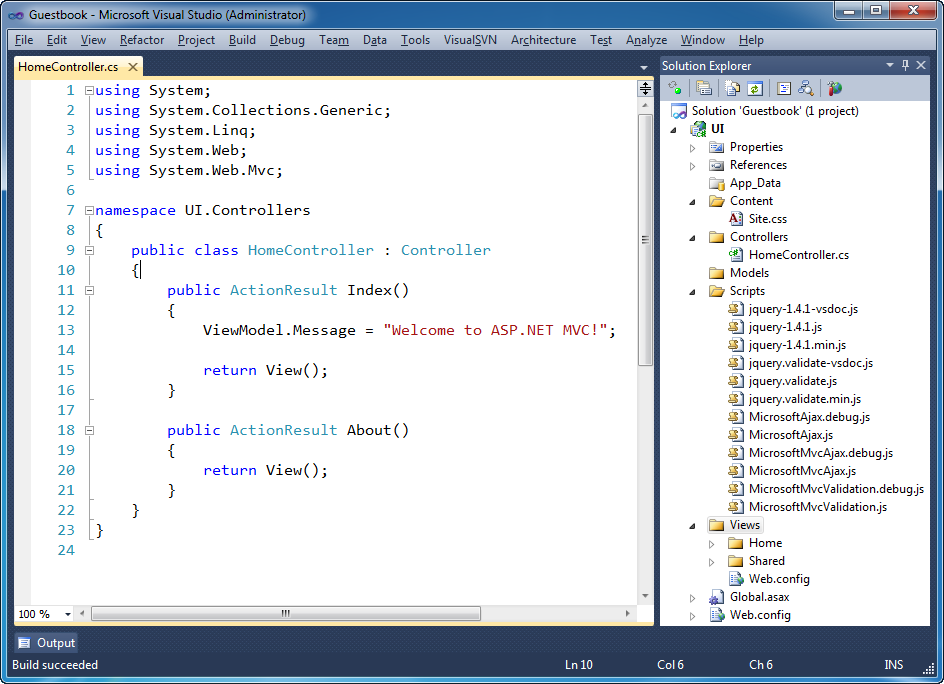
public class HomeController : Controller
{
    public ActionResult Index()
    {
        ViewModel.Message = "Welcome to AS. . .

        return View();
    }
    …
What used to be a view data dictionary is now a new dynamic property on the controller class. Using the capability of the DLR (Dynamic Language Runtime) built into Visual Studio 2010, the runtime on which IronPython and IronRuby run, ASP.NET MVC is now able to leverage the dynamic types that C# 4 supports. Just by setting a property on the ViewModel object, we can create and send a new piece of data to the view.
MVC 3 includes a new view engine dubbed “Razor” with a fairly minimal syntax.
On the view side you can see the new “Razor” syntax choice. The Razor view engine is in addition to the Web Forms view engine, not in replacement of it. The new default view is as follows.
@inherits System.Web.Mvc.WebViewPage

@{
    View.Title = "Home Page";
    LayoutPage = "~/Views/Shared/_Layout.cshtml";
}

<h2>@View.Message</h2>
<p>
    To learn more about ASP.NET MVC visit
    <a href="http://asp.net/mvc"
    title="ASP.NET MVC Website">
    http://asp.net/mvc</a>.
</p>
Notice the use of the @ (at symbol) in front of the code snippets. The dynamic property, View, is the method for accessing the dynamically-set view data.
With Preview 1, the Visual Studio 2010 tooling isn’t nearly ready to support the new syntax, so there is no IntelliSense or syntax coloring.
A new convention for master pages is also worth noting. The master page is no longer called a master page. Instead, it is called a layout, and is prefixed with an underscore (_). This naming and convention is used on other platforms, and as we see in Listing 1, _Layout.cshtml is very different from a master page.
As you saw in the New Project dialog box, you can start a new project using either supported view engine. That selection only affects the template you start out with. At any point in time, you can jump from one view engine to another and even leverage several within the same page by embedding a partial view from a sister view engine. We will see an example of exactly that when we list guestbook messages. Now let’s get into our application.
Guestbook Development
- Ability to post a message
- Ability to see all posted messages
- Ability to prevent duplicate messages
Now that we have our scope nailed down, let’s dive in with the first feature. We need to be able to post a message.
Posting a Message
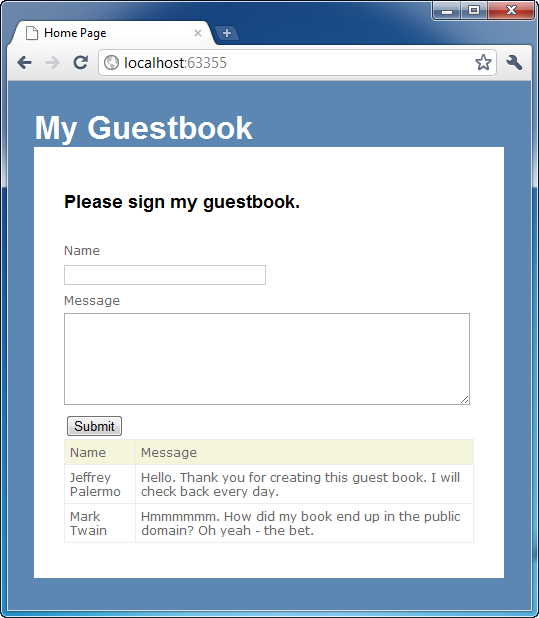
The first step in this is cleaning up the default project template so that we don’t have any unnecessary code that is irrelevant to our application. Then we will need to render a view that is ready for data entry. We are going for a view that looks like Figure 3.

We have modified the HomeController with the following Index action.
[HttpGet]
public ActionResult Index()
{
    ViewModel.Message =
        "Please sign my guestbook.";

    return View(new Entry());
}
This code puts a different message for display on the page and sends the view an empty Entry. We will make a strongly-typed view with the Razor view syntax using old and new features of ASP.NET MVC. First, let’s take a look at what our Entry class looks like.
public class Entry
{
    [Required]
    [StringLength(30, MinimumLength = 2)]
    public string Name { get; set; }

    [Required]
    [StringLength(140, MinimumLength = 2)]
    [DataType(DataType.MultilineText)]
    public string Message { get; set; }
}
Notice that we are using data annotations from .NET 4. These annotations have nothing to do with ASP.NET except that the MVC Framework layers on some view-generation capabilities if the view model carries them. In this class, we have specified that both properties are required, and they have some length restrictions. The Message property also has a more specific data type than just string.
Next, let’s look at the view to see how we render the entry screen using this class as the strongly-typed view model and the Razor syntax. In our code we see a file called Index.cshtml as shown in Figure 4.
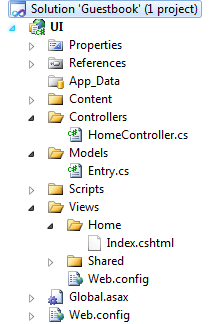
If we open Index.cshtml, we see that there isn’t any IDE (Integrated Development Environment) support, but it ends up being quite small. Listing 2 shows the full view. Notice how it is only 17 lines long, with several being blank lines. The relevant lines are shown here.
    <p>
    @Html.ValidationSummary(true, "Post failed.")
    </p>
    @using(Html.BeginForm()){
    @Html.EditorForModel()
    <input type="submit"
        name="Post" id="submitpost" />
    }
The custom code here is a mere four lines. Html.EditorForModel() is an old feature, but by using it, we leverage the integration with .NET 4 data annotations for validation purposes. You can also see that the Razor view engine know when to switch from C# mode back into HTML mode and back. Notice that the final closing brace (}) doesn’t require the @ symbol.
At this point, we have our screen rendered, and if we press the Submit button without entering anything, the data annotations kick into action as we see in Figure 5.
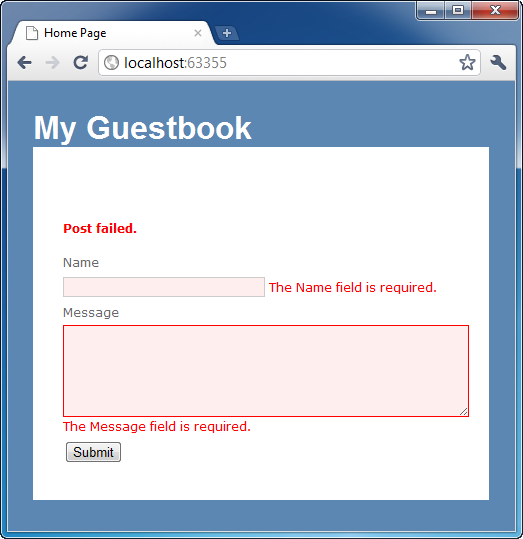
Don’t miss that the only reason the Message entry field is a textarea is because of the multi-line data annotation that we added onto the Entry class.
Next, let’s take a look at the controller action that accepts the post from this HTML form. Heading back over to the HomeController, the POST overload for the Index action has the validation code.
[HttpPost]
public ActionResult Index(Entry postedEntry)
{
    if (ModelState.IsValid)
    {
        //do the saving
        return RedirectToAction("index");
    }

    return View(postedEntry);
}
As with previous versions of ASP.NET MVC, the method arguments are bound automatically for us from the form, and model validation has already been run by the time this action method is invoked. All we have to do is check to see if the state of the model is valid according to our data annotations and any other type of validation we have set up. If so, we can save the guestbook entry and then redirect back to the main action. Our data persistence is not set up yet but our validation is functioning properly.
Now that we have the failure path, let’s save the entry and add the ability to view all entries.
Saving and Retrieving Entries
The first step to doing anything with data is to add a data access capability. To keep the project simple, I will not break up the solution into multiple projects, but it would be normal to do so. I will add a new interface to the project.
public interface IEntryRepository
{
    void Save(Entry entry);
    Entry[] GetAll();
}
With this interface, we can support all the necessary operations to run our application. We’ll add the other capabilities, and we will have a screen similar to the one in Figure 6.
As ASP.NET MVC 3 is fleshed out more, it will be easy to hook up an IoC container to enable the controller to require our data access interface, but for now, we will add an additional constructor to resolve the concrete class. I expect a future preview to make this feature very easy to hook up. The full controller code can be seen in Listing 3. The constructors are shown here.
private IEntryRepository _repository;

public HomeController(IEntryRepository repository)
{
    _repository = repository;
}

public HomeController() : this(new
EntryRepository()){}
When we hook up MVC 3 Service Location, we will be able to remove the need for the parameterless constructor and have the IoC container of choice resolve the concrete class for us. Brad Wilson has already published a tutorial and sample on this at http://bradwilson.typepad.com/blog/2010/07/service-location-pt1-introduction.html">http://bradwilson.typepad.com/blog/2010/07/service-location-pt1-introduction.html.
Now that we have some way to retrieve all the entries, we need to send them to the view. Adding a quick filter to the controller does that for us since we need the entries both on the GET request as well as the POST.
protected override void OnActionExecuted(
    ActionExecutedContext filterContext)
{
    Entry[] allEntries = _repository.GetAll();
    ViewModel.Entries = allEntries;
}
Using our repository and the dynamic property, ViewModel, we have added an array of Entry(s). At the bottom of our view, Index.cshtml, we can add a single line to pave the way to displaying the entries.
@Html.Partial("entries",
    (UI.Models.Entry[])View.Entries)
This uses the Razor syntax with the existing HTML helper. Because the existing helper requires an object type, we can’t pass in a generic expression directly, so we have cast it to a known type. Helpers that support dynamic types are probably needed before the final release to keep this ugly code from being necessary.
If we move over to our partial view, we see that we have designed it using the Web Forms view style. You can see the full view in Listing 4, but just to demonstrate that different view types can be mixed and matched, we use the good old DataGrid.
<script runat="server" language="C#">
    protected override void OnLoad(EventArgs e)
    {
        grid.DataSource = (Entry[])Model;
        grid.DataBind();
    }
</script>
<asp:DataGrid ID="grid" runat="server"
    GridLines="Horizontal"
    HeaderStyle-BackColor="Beige" />
We do have to cast the Model property to a known type. I considered using a strongly typed view here, but that mechanism doesn’t allow for polymorphism of enumerable types because of a type check. Perhaps this will change in the future.
Now that we have our guestbook entries showing up on the screen, let’s add our business rule.
Preventing Duplicates
A common business rule is ensuring against duplicates. Whether it be adding users to a system where the user name is unique or ensuring that no product codes are reused.
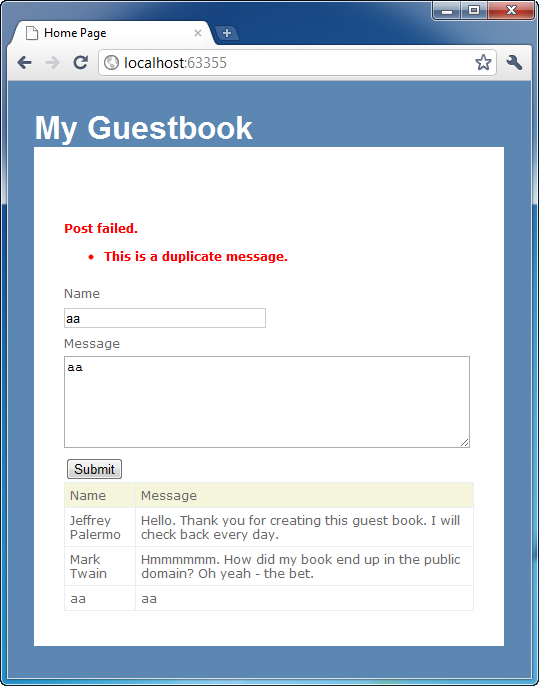
In our case, we don’t want our guestbook to be cluttered with duplicate entries, intentional or not. The goal is represented in Figure 7.
In order to accomplish this, we will use a new feature of ASP.NET MVC, IValidateObject integration. The definition of this interface is as follows.
namespace System.ComponentModel.DataAnnotations
{
    public interface IValidatableObject
    {
        IEnumerable<ValidationResult> Validate(
            ValidationContext validationContext);
    }
}
Notice that this is an existing interface from the DataAnnotations namespace. MVC 3 adds support for using this interface. When the model object implements this interface, the Validate method will be executed. You can implement this interface directly on the Entry class if you like, but in real applications, there never tends to be just one business rule, so we will use polymorphism to layer on the business rule mechanism to our Entry class. I have defined a class called EntryWithBusinessRules. You can see this in Listing 5. The meat of the logic is inside the Validate method here.
IEnumerable<Entry> matches = _repository.GetAll()
    .Where(entry => entry.Name.Equals(this.Name))
    .Where(entry =>
         entry.Message.Equals(this.Message));
if(matches.Count() > 0)
{
    yield return new ValidationResult(
        "This is a duplicate message.");
}

yield break;
To prevent duplicates, we needed the repository, so we will benefit in the future from the Service Location support here as well. Regardless if the implementation can be made more efficient, and it can, this code adds an error if a match is found. This message is floated all the way up through model state and into the ValidationSummary in our view.
You can imagine the scenarios afforded by this mechanism because it gives a powerful hook to even funnel validation out to an external rules engine.
The last enhancement we will make to the guestbook application is for operations and tuning support. We will add a global filter, another new capability of MVC 3, to write messages to the HTTP trace so that we can see timings of each step.
Adding the Trace Global Filter
The HTTP trace feature doesn’t get a lot of press in the ASP.NET MVC community. It probably has to do with the fact that there is little support for the feature out of the box. It has great support from a Web Form page since every control writes to the trace when executing. Natively, no part of the MVC framework writes to the trace.
When understanding where time is being spent in the processing of a web request, it is useful to know timings of each step so that when tuning we can concentrate on the area where the most time is being spent.
Once complete, we will be able to navigate to /trace.axd to see the view in Figure 8.

In order to accomplish this, we will write a class that implements all the filter interfaces. You can see this code in Listing 6. Each method does something similar to the following.
public void OnActionExecuted(
    ActionExecutedContext filterContext)
{
    filterContext.HttpContext.Trace.Write(
      "Action Executed",
      filterContext.ActionDescriptor.ActionName);
}
With this code in place, every action of every controller will be writing to the trace. The final step is how to apply it everywhere. This is where the global filters feature comes in. Within the Global.asax.cs file, we see a new method that is called from Application_Start(…).
public static void RegisterGlobalFilters(
    GlobalFilterCollection filters)
{
    filters.Add(new HandleErrorAttribute());
    filters.Add(new HttpTraceFilter());
}
The HandleErrorAttribute filter is there by default. We have added our new filter, HttpTraceFilter. Because we are registering it programmatically, another important change has occurred. We do not have to inherit from System.Attribute. Our filter is just a regular class that implements a few interfaces. We can control the construction of it here and even resolve it with the Service Location feature if we wish.
The full code for Global.asax.cs is shown in Listing 7. This is all it takes to use a global filter. None of our controller code is affected.
Enhanced Action Results
The last feature I’ll discuss are the new action result classes and features. You can see the new ones in Table 2.
We are now finished developing our guestbook application. You can follow along with the development of this application and download the full source at the following url: https://bitbucket.org/jeffreypalermo/20100908_aspnetmvc3preview1_codemagazine/get/e80fe5ec3080.zip.
Summary
This article introduced you to some of the features planned for ASP.NET MVC 3. You have seen how to download and install Preview 1 as well as how to create a new project based on Preview 1.
Some of the new features are very stable, while other features, such as the new Razor view engine, lack tooling support at this time.
We built a guestbook application together and used many of the new features while building it. You are free to download the code and use it for any purpose. Hopefully it will help you plan for a future upgrade to ASP.NET MVC 3. Happy coding!
