


In the next Visual Studio wave of products, Microsoft will distribute its world-class IDE freely via its VS 2008 Shell offerings.
In this article, I will give an overview of what the Shell is, what it contains, and how you can start leveraging it to start creating your own tools IDE.
The Visual Studio 2008 Shell is a new edition of Visual Studio offered to developers who wish to build their own development tools inside the Visual Studio IDE. Its target users are not the typical developers who would use the other editions of Visual Studio. The Shell’s target users are ISVs and other developers who wish to build their own tools IDEs, and in turn ship to their users and customers.
The key benefit of the Shell is that it allows anyone to quickly build their own tools environment, leveraging a proven and solid foundation of the Visual Studio IDE. By building on the Visual Studio Shell, you can significantly accelerate your development time by focusing on your core tools instead of building and maintaining the environment. In addition to the core IDE features such as menus/commands and tool window framework, the Shell also includes a rich set of component features that you may be able to take advantage of, including the Windows Forms designer and the WPF Designer. Your end-users will also benefit from the familiar user interface of Visual Studio in your tools environment.
A Word About Isolated versus Integrated Mode
Visual Studio 2008 Shell is actually offered as two “modes”: VS 2008 Shell (isolated mode) and VS 2008 Shell (integrated mode). These are, in fact, two separate binary downloads. While the Shell (isolated mode) is a brand-new offering, the Shell (integrated mode) is the new name for the Premier Partner Edition, which was offered in Visual Studio .NET 2003 and Visual Studio 2005. Both offerings share identical feature components.
You may have heard members of the VSX team use the term AppId (short for application identity) to talk about different instances of environments. Each AppId is uniquely identified by a stub .exe (the executable you run to start the environment) and a registry root that stores application configuration. For example, Standard and Professional editions are the same AppId. If you install Standard and Professional on to the same machine, you end up with a Visual Studio environment that contains features from both editions and you cannot start one without the other. On the other hand, Visual Basic Express and Visual C# Express are two different AppIds. If you have both installed, you can still launch them independently and their settings are isolated from each other.
If you use the Visual Studio Shell in the integrated mode, you are building on top of the same Visual Studio instance as the other Visual Studio editions (Standard, Pro, Team Architect, etc.). This means that your tools will merge into the same environment as the other editions of Visual Studio if they are also installed on the user’s machine (top of Figure 1).
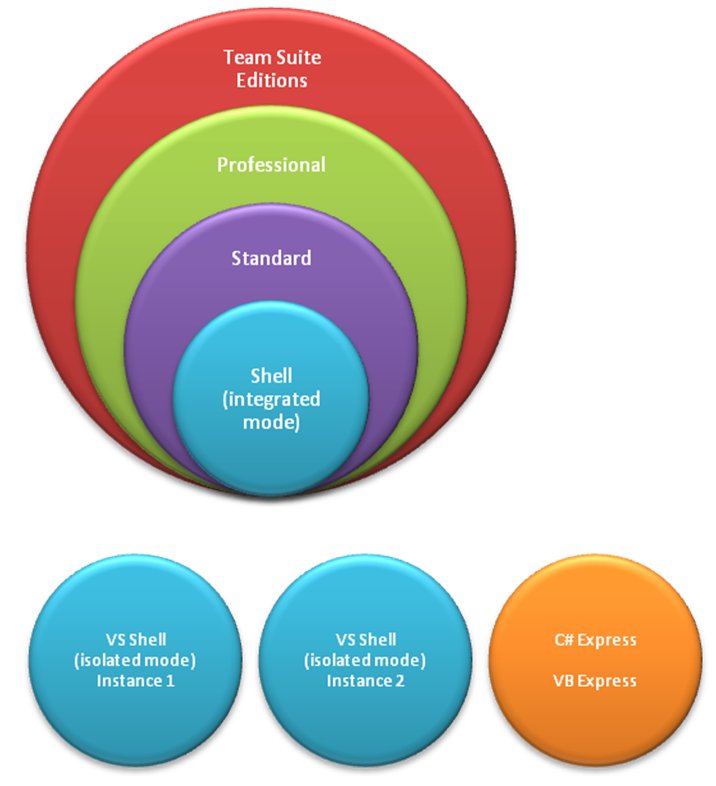
If you use the Visual Studio Shell in the isolated mode, you will actually create your own AppId. Your tools environment will be isolated with other Visual Studio AppIds as well as other environments that are built on the Visual Studio Shell (bottom of Figure 1). You will have your own stub .exe, your own custom branding, and registry isolation.
When should you use which? Each mode offers its own benefits and that will depend on your scenarios. Typically, if you are integrating your own language tools, you will benefit from the integrated mode because if your user also has other editions of Visual Studio (Standard and above) installed, they will benefit from mixed language development as well as the extra features offered by Visual Studio such as unit testing, code profiling, and static analysis. On the other hand, if you require your own custom branding in your tools IDE and you want to have it run in complete isolation with Visual Studio, the isolated mode would be the right fit for you.
The walkthrough section of this article focuses exclusively on the isolated Shell. The reason is that developing VSPackages for the integrated Shell is no different than the general VSPackage development for Visual Studio. You can find abundant resources on MSDN and elsewhere about general VSPackage development. Unless explicitly stated, I will simply use “Shell” to refer to it from this point onwards. I will go over the features and customization points contained in the Shell. I will also walk through how you can leverage this new product offering to help you build your own development tools environment.
What You Need to Download
The August 2007 CTP release of the Visual Studio 2008 SDK is the first release of the SDK that supports development for the VS Shell (isolated mode). Aside from Visual Studio itself, it is the only software package you need to download and install to start developing and testing your own Shell instance.
When you are ready to deploy and test the setup program of your Shell instance, you will need to download one of the redistributable packages, depending on which Shell mode you are targeting:
- Visual Studio 2008 Shell (isolated mode) Redistributable Package
- Visual Studio 2008 Shell (integrated mode) Redistributable Package
Table 1 summarizes purposes of the different software packages related to Visual Studio Extensibility. When we release these packages, you will find download links from the Visual Studio Extensibility Developer Center (http://msdn.com/vsx).
Walkthrough: Creating Your First Tools IDE on VS Shell (Isolated Mode)
In this walkthrough, I will show you how to create your own IDE based on the Shell (isolated mode), how to do basic customizations of it, and how to create a simple package for your new IDE that simply brings up a Tool Window. I will also briefly discuss how to deploy your VS Shell-based product.
Note that this article is written based on the Visual Studio 2008 SDK August CTP release. The August CTP is the first Visual Studio SDK that supports development on the isolated shell. Because our team ships new releases of the VS SDK quite frequently, it is quite likely that by the time this article is published, there will be a newer release of the VS SDK with an improved Shell development experience. So the details of the step-by-step instructions may become obsolete. If you run into trouble, you should go to the Visual Studio Extensibility Center for help (http://msdn.com/vsx).
Creating Your Own IDE
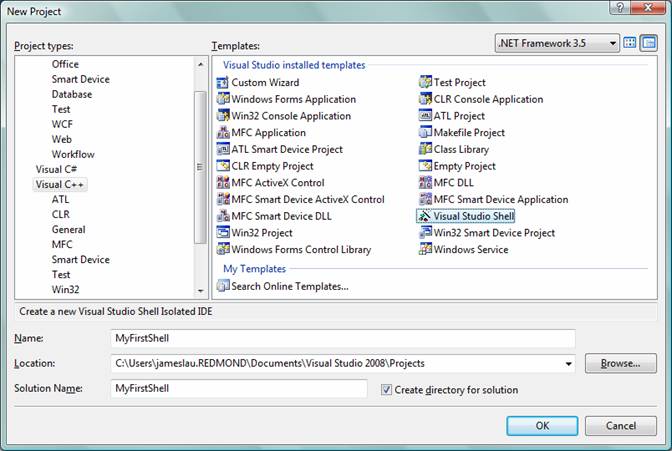
First you’ll create your own stub .exe for your IDE. Start Visual Studio as an administrator. If you are running Windows Vista, you will need to right-click on the Visual Studio 2008 program shortcut and choose Run as administrator. Future releases of the SDK may not require this, but this is required for the August CTP. In Visual Studio, click File > New Project…, and go to the Visual C++ node in the Project types pane and select Visual Studio Shell. Note that future VS SDK releases should have this template moved under the Extensibility node. Name your project MyFirstShell and click OK, as shown in Figure 2.
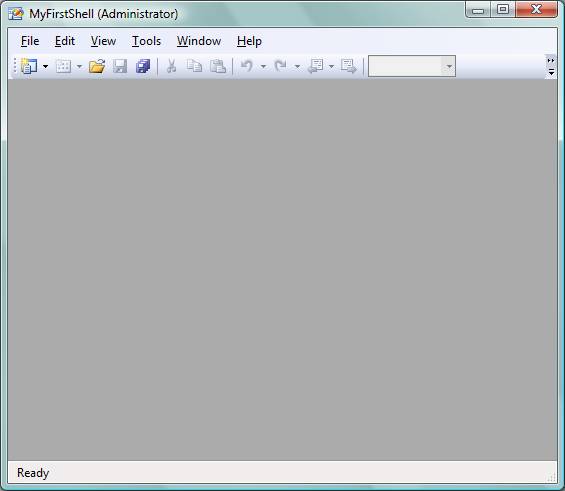
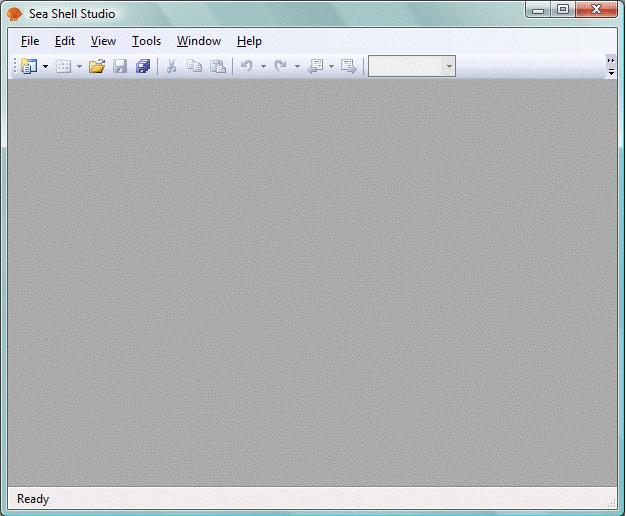
Visual Studio will generate a solution with two projects for you: MyFirstShell and MyFirstShellUI. Right after Visual Studio has generated the solution you can just hit F5 to start running your IDE. Of course, it has nothing right now, and it’s not very interesting, but it will run. Figure 3 shows your new un-customized IDE.
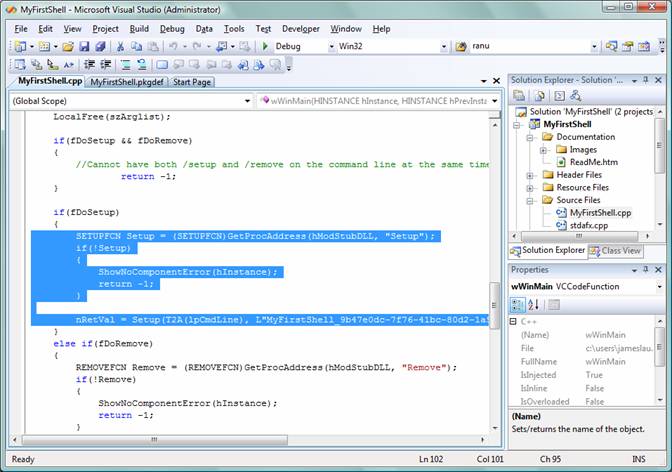
Your IDE may look plain right now, but a lot of things just happened. Visual Studio not only built your project, it also ran a tool called DependencyChecker.exe in a post-build step that checked to see if your IDE has been properly set up in the registry. Since this is the first time you are running the IDE, it called MyFirstShell /setup for you to do all the things that are necessary to set up the registry. But wait a minute, you haven’t written a single line of code, let alone handling /setup as an argument-what happened? The VS SDK ships a DLL called AppEnvStub.dll that exports three functions: Start, Remove and Setup, and Setup knows how to set up the registry information when called. The VS Shell template also created code for you to handle the /setup argument that calls into the Setup function exported by AppEnvStub.dll. You can see this (Figure 4) around line 100 of MyFirstShell.cpp.
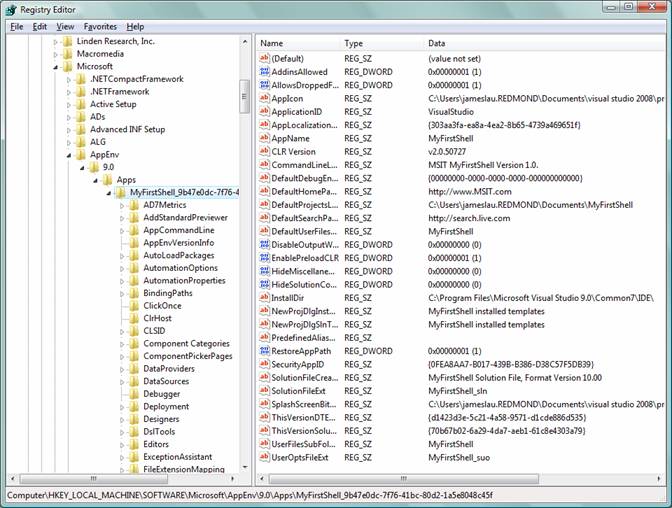
If you now open a registry editor and browse to HKEY_LOCAL_MACHINE\SOFTWARE\Microsoft\AppEnv\9.0\Apps\, you can see that you have just created a new key under this node (Figure 5). This is your IDE’s own registry hive that is isolated from Visual Studio or other IDEs that are built on the Shell. In effect, you have just created your own AppId.
Now that you have just created your own IDE, it’s time for you to do some customizations.
Customizing Your IDE
One of the key benefits of the VS Shell (isolated mode) is that it allows for custom branding and other types of customizations. I will now highlight some of the key files that you need to know about for customizing your IDE.
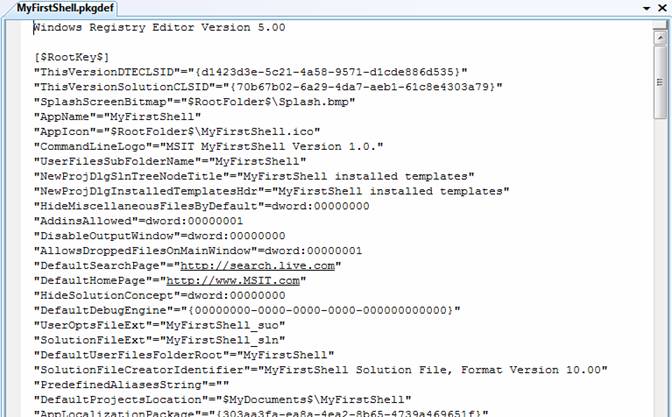
The primary file you need to know about is the MyFirstShell.pkgdef file under the MyFirstShell project. MyFirstShell.pkgdef contains all the key customization points for your IDE. Figure 6 shows a snippet of this file.
You can modify this file to customize things like splash screen, application title, application icon, and many other features in your IDE. I will not enumerate through all these customization points here. By the time you read this article, you should be able to find the final list from MSDN.
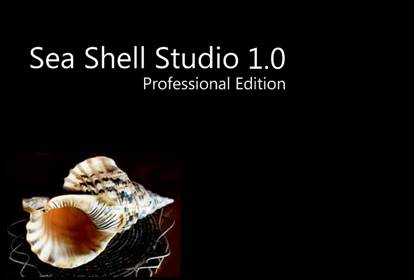
For this walkthrough, I will change the splash screen, application title, and application icon. This is very easy to do. For the splash screen, I simply replaced the default blank splash screen under My Documents\Visual Studio 2008\ Projects \ MyFirstShell \ MyFirstShell \ MyFirstShell \ with another bitmap that is 667x451 pixels (Figure 7).
You will then need to rebuild the MyFirstShell project inside Visual Studio. Once the rebuild is complete, you can open a Command Prompt, navigate to the directory where MyFirstShell.exe is output and run MyFirstShell /splash to see your new splash screen. Notice that Visual Studio overlays a small bitmap that says “Powered by Visual Studio” at the lower right corner of your splash screen (Figure 8). This is mandated by the license of Visual Studio Shell and this overlay must be shown on all IDEs built on the Shell.

Now to change the application title and the application icon, you simply change the “AppName” field in the MyFirstShell.pkgdef file and replace the MyFirstShell.ico in the “AppIcon” field with an icon of your choice. Just like what you did before, simply rebuild the project and run your IDE to see the change take effect (Figure 9).
Customizing Menus and Commands
Now that you have changed some key features of your IDE, you will probably want to customize some of the commands and menus. By default, your IDE contains a lot of the same menus and commands that Visual Studio contains. This is good because it provides you with a lot of the same features that exist in Visual Studio that you can reuse. However, you will most likely want to remove some of the menus because they do not apply to your IDE.
To accomplish that, you need to modify the MyFirstShellUI.vsct file in the MyFirstShellUI project, under the Resource Files folder. This file effectively contains a long list of #defines in XML that you can uncomment to exclude certain commands. It’s pretty easy to see how this works. For example, you can remove the entire Windows menu by uncommenting the following tag in the file:
<Define name="No_WindowCommands"/>
Save the file and clean the solution. Press Ctrl+F5 to rebuild the project and run your IDE. You should see that your IDE no longer has the Windows menu.
Note: The VS SDK August CTP has a bug where the post-build step doesn’t always detect, setup, and re-merge the menus properly. If the Windows menu still appears, continue on to the next section and you will see it disappear once you add a new package.
Removing a Default Package from Your IDE
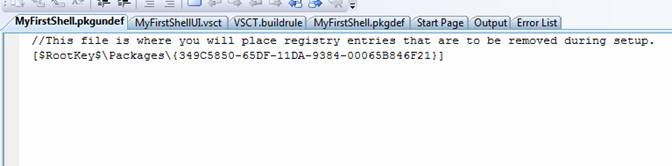
When you develop your own VS Shell-based IDE, you also have the ability to remove default registrations for any packages that you do not want to include in your IDE. This is done via the .pkgundef file.
Your Shell project contains a file called MyFirstShell.pkgundef and it is located in the same folder as MyFirstShell.pkgdef. You can use the .pkgundef file to unregister any packages that you don’t want to be registered for your IDE. The format you use in this file is the same as the MyFirstShell.pkgdef, but the effect of putting a registry key in it is that it will be removed.
For example, you can unregister the Web application project package by specifying the line in your .pkgundef file (Figure 10).
You will need to clean and rebuild your solution for this to take effect.
Adding a Package to Your IDE
Next, I will show you how you can add a VSPackage to your customized IDE. Creating a VSPackage for the isolated Shell is a little different than general VSPackage development because the VSPackage needs to be registered differently. Note that is the only difference; there is both source- and binary-level compatibility for VSPackages across Visual Studio and the Shell editions.
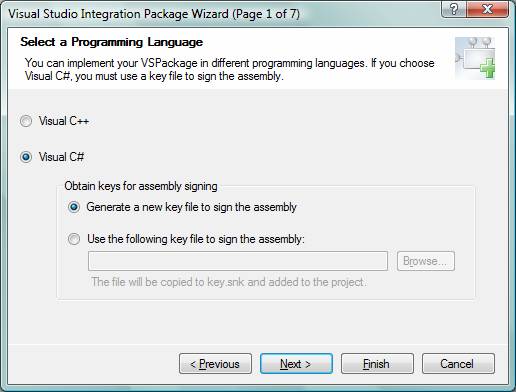
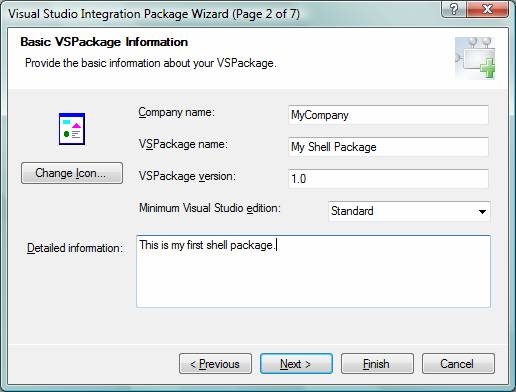
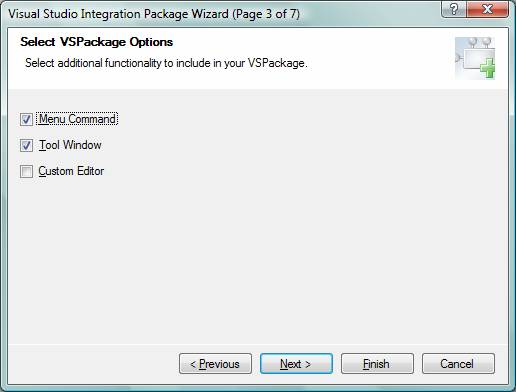
You can start by right-clicking on your solution and choose Add > New Project… In the New Project dialog box, choose Visual Studio Integration Package under the Other Project Types > Extensibility node. Rename your package to ShellPackage and click OK.
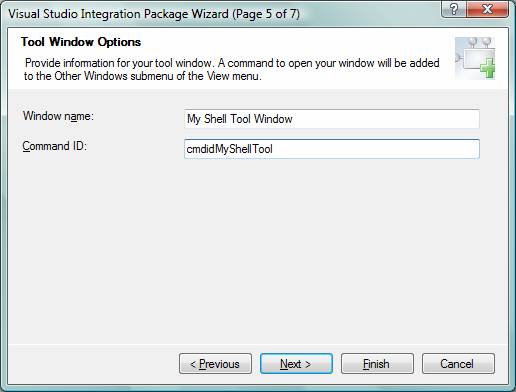
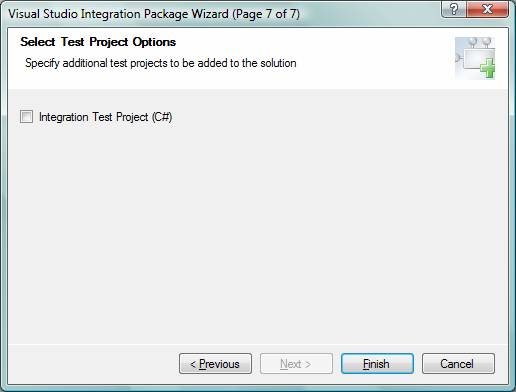
You can quickly run through the wizard to create your package. Make sure your inputs match Figures 11-16.

On the last page, click Finish. Now your solution should have the new package project added. You can immediately build this package by right-clicking on the project and choosing Build. The output is a perfectly valid package assembly that you can run inside Visual Studio. However, since you are now trying to load this package inside your IDE, you will need to take some additional steps.
A VSPackage that runs in a VS Shell-based IDE needs to have an associated .pkgdef file. This file essentially contains the registry information to properly register the package. The best way to create this file is to use the regpkg.exe tool that ships with the SDK. To support package development for the VS Shell, Microsoft added a new /pkgdeffile switch to this tool. You can use the regpkg.exe tool with this switch to generate the required .pkgdef file.
Open a command prompt and change to your VS SDK’s tools directory. On my machine, this is C:\Program Files\Microsoft Visual Studio 2008 SDK\ VisualStudioIntegration\Tools\Bin\. Then run the following (all on one line):
Regpkg.exe /pkgdeffile:<ShellPackageAssemblyDir>\
ShellPackage.pkgdef /codebase
<ShellPackageAssemblyPath>
Figure 17 shows the command running successfully on my machine.

Now, you need to copy both the assembly and the associated .pkgdef file into a special folder called PackagesToLoad in your IDE project. You should find the PackagesToLoad folder located in My Documents \Visual Studio 2008 \ Projects \ MyFirstShell \ Debug \ PackagesToLoad. Once you have copied the two files over, you can run MyFirstShell /setup in an administrator-elevated Command Prompt to register the package. You can start an administrator-elevated Command Prompt by right-clicking on the Command Prompt shortcut and choosing Run as administrator(Figure 18).
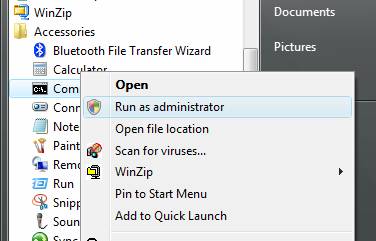
The command will return immediately from the command prompt, but your process is still running to perform the setup. You can use Task Manager to make sure MyFirstShell.exe is finished running before moving on. Once it has completed running, you can run it again without the /setup switch to launch the IDE. You will now see your command from your newly added VSPackage added under the Tools menu (Figure 19).

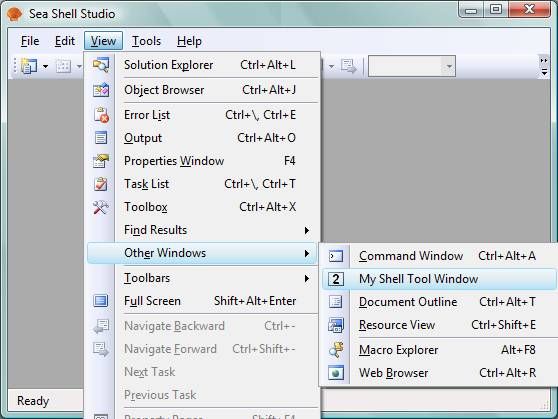
You will also find the command to start your newly added Tool Window under View > Other Windows(Figure 20).
Deploying Your IDE
To deploy your IDE, you will need to create your own Setup program that chains the VS 2008 Shell (isolated mode) Redistributable Package. The redistributable package contains all binaries of Visual Studio that makes up the Shell, as well as the .NET Framework 3.5, which is a pre-requisite. The redistributable is shipped as a single self-extracting EXE that you can use with a number of deployment technologies such as InstallShield to include in your Setup program. At the time that I’m writing this article, Microsoft has not yet made the redistributable package available yet, but it will be available later in the year.
In order to deploy your VS Shell-based IDE on to the end user’s machine, you will need to obtain both a shell load key (SLK) and package load keys (PLKs) from the VSIP Members site (http://www.vsipmembers.com">http://www.vsipmembers.com). The IDE and packages will not load if these load keys are not included. Your VS Shell-based IDE works on your machine because the VS SDK installs a developer load key (DLK) that causes the load key check to be bypassed. Since your end user will not have the DLK installed, you will need to obtain the SLK and PLKs to make an actual deployment work. Microsoft is redesigning the site and the process for obtaining load keys as I’m writing this article, so I won’t go through the experience in detail. For now, you just need to be aware that you need to get these load keys when you are ready to deploy. You can view our Extensibility Developer Center (http://msdn.com/vsx) or search on MSDN for more information about obtaining SLKs and PLKs.
Final Comments
I hope this article has given you a good overview of the Visual Studio 2008 Shell. VS Shell development can often be complicated. The VSX team realizes this and we plan to make the development experience more seamless over the next several VS SDK releases. For example, we expect to allow developers to explicitly create VSPackages that target their own VS Shell-based IDE so that they don’t need to manually generate .pkgdef files.
I strongly encourage you to visit our Extensibility Center (http://msdn.com/vsx) frequently to get important updates about the Visual Studio Shell. You should also bookmark the VSX team blog at http://blogs.msdn.com/vsxteam">http://blogs.msdn.com/vsxteam for the latest. I have only scratched the surface with this article and you can expect more in-depth technical articles in the near future from us.
James Lau is the Lead Program Manager in the Visual Studio Ecosystem team at Microsoft. His team produces the Visual Studio SDK, and helps third-parties build great extensions for Visual Studio. Before joining the Ecosystem team, James was part of the Visual Studio IDE team where he designed and drove a number of IDE features. You can read his blog at http://blogs.msdn.com/jameslau/">http://blogs.msdn.com/jameslau/.
