


In my article in CODE Magazine's March/April 2015 issue (http://www.codemag.com/Article/1503041), I talked about the fundamentals of Azure AD. I also walked you through building a sample application talking to a WebAPI server-side component, also authored by you, and registered and authenticated by Azure AD. The interesting thing noted there is that Azure AD uses platform-agnostic protocols and well-accepted industry standards. This means that the same mechanism you used to write a Windows App can also be used to write an iOS app. Microsoft has gone a step further, and provided an iOS SDK for Office 365, currently for Objective-C only, that can help you write applications leveraging the new Office 365 APIs.
Meanwhile, Apple has introduced a new language called Swift. People have mixed feelings towards Objective-C; getting used to all those brackets and long function names can be quite a mind twist. But whatever your feelings are toward Objective-C, almost everyone feels that Swift is a modern language. I'd say that Swift has the finesse of C# and it can do 99% of what Objective-C did. In fact, I see very little reason to write new code in Objective-C today.
With that in mind, in this article, I will show you how to write a simple iOS App written in Swift and XCode targeting Office 365 APIs.
Registering Your Native App
The iOS app, whether Swift of Objective-C, is a native app. It's worth noting that all native apps, by definition, are multi-tenant. In other words, if I were to make this app available in the app store and someone in your organization downloads and tries to use it, it'll work. It registers itself in your organization's Azure AD (Active Directory). This may or may not be something your administrator wants, so as a tenant administrator, you have the ability to turn off this behavior that allows the app to self-register in your organization's Azure AD. This is commonly referred to as user consent versus admin consent, and I talk more about it in this article: http://blah.winsmarts.com/2015-1-Azure_AD_and_Office_365_APIs_-and-ndash_User_Consent_vs_Admin_Consent.aspx. (Editor's note: Sahil has removed blogs from this URL.) But let's go with the out-of-the-box settings and register the native app.
The question is: In which Azure AD should the app developer register the native app? The Azure AD you register your native app in should also have the Office 365 APIs available. Note that Office 365 APIs are just WebAPIs that Microsoft wrote for us. Sure, they own Azure AD, so they made it available for us in all Azure ADs connected to Office 365 tenancies.
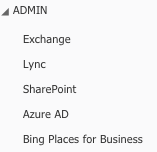
In order to register your native app inside the Azure AD connected to your Office 365 tenancy, start by visiting https://portal.office.com and log in as tenant administrator. Now, in the menu on the left-hand side, look for an option called Azure AD, as shown in Figure 1. It's worth noting that in this cloud-ready world, things are changing faster than I can type and CODE Magazine can print. This option used to be under the gear icon on the top right - who knows where they might move it in the future.
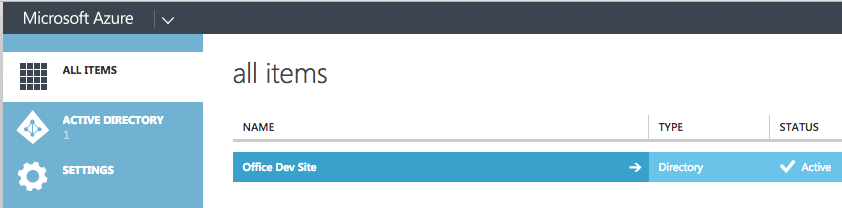
If this is the first time you've clicked on that link, you'll be taken through a simple set up wizard, after which you should see the Office 365 Azure AD administration page, as shown in Figure 2.
Click on Azure AD and look for a link called Applications at the very top. You may see some applications registered there, which are perhaps applications you have installed or developed using Visual Studio in the past. Add your custom native application in this list. The steps are identical to registering a WinForms app, as I covered more extensively in the March/April issue of CODE Magazine, but I'll repeat them here in brief.
- Click on the Add button, and in the dialog box that pops open, choose Add an application my organization is developing.
- Choose to make it a native client application and give it the name SwiftOffice365.
- Give it the redirect URI of http://something. This URI can be anything, as long as you can remember it. In some cases, such as in Windows store apps and where the iOS-invoked URIs matter to the functionality of your application, this URI needs to be a bit more specific. Those scenarios are not in scope of this article, so for now, let's just go with http://something and remember that you typed this here.
Once your app is registered in Azure AD, note down the settings, as shown in Figure 3.
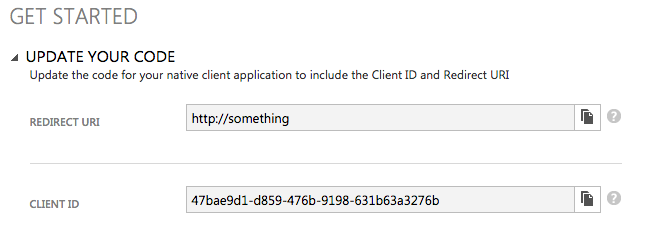
Right below the section shown in Figure 3, you'll see a link to Configure Access to Web APIs in other applications with a link saying Configure it now. Go ahead and click on it.
Here, you are greeted with a Web page that allows you to grant specific permissions to your native app. This may be Office 365 APIs or custom Web APIs written by you as I demonstrated in that March/April article. This is really amazing because a lot of functionality hasn't yet been made available in Office 365 APIs, but I can always write custom Web APIs that target the old app model, register them inside here, and make functionality available early to my end users. When Microsoft ships those APIs, I can simply update my app or the Web API, or both, as needed.
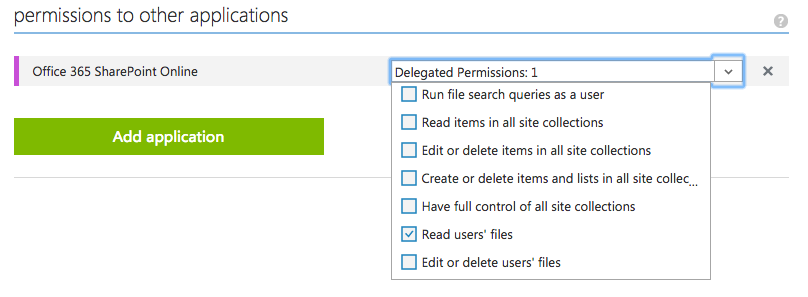
For now, I'm going to target OneDrive, a simple app that shows me a list of files available in my OneDrive. Set up the permissions, as shown in Figure 4.
Great! Now that the app is registered, let's write it!
Writing the iOS App
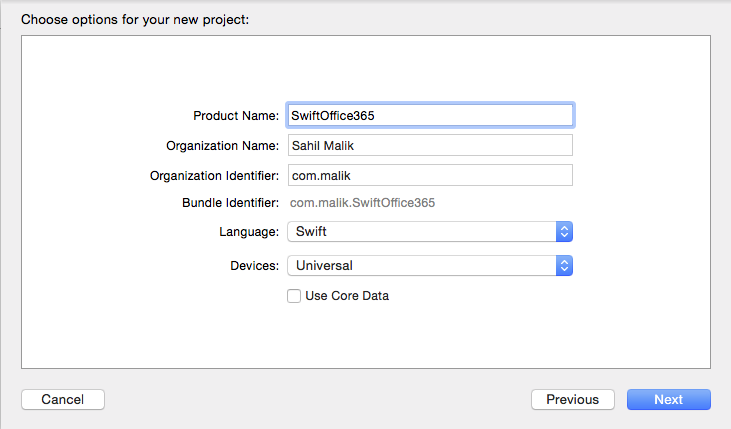
Start XCode and choose to create a new Single View Application under the iOS application templates. I use this template because it's the simplest template of all, and I can remove or add things as I desire.
Now call your app SwiftOffice365. Again, the name of the app doesn't have to be the same as what you registered in Azure AD, but do it just to keep things consistent.
Ensure that you choose the language Swift and to make this a universal app. Also ensure that Use Core Data is unchecked, as shown in Figure 5.
Your simple application should now be ready to run. Before you can move forward, you need to enable the application to use the Office 365 SDK. Microsoft has chosen to use CocoaPods as an easy delivery mechanism for Office 365 SDK. Think of it as NuGet for iOS. So let's start by setting up the application to use Office 365 SDK.
Set Up the Application to Use Office 365 SDK
Close XCode, and open terminal. First, you need to set up CocoaPods. You can do that by issuing the following command:
$ sudo gem install cocoapods
Next, CD to the directory where your SwiftOffice365 app is. In this directory, create a file by the name of podfile with the following contents:
pod 'ADALiOS', '~> 1.0.2'
pod 'Office365', '~>0.6.0'

target 'SwiftOffice365' do
end

target 'SwiftOffice365Tests' do
end
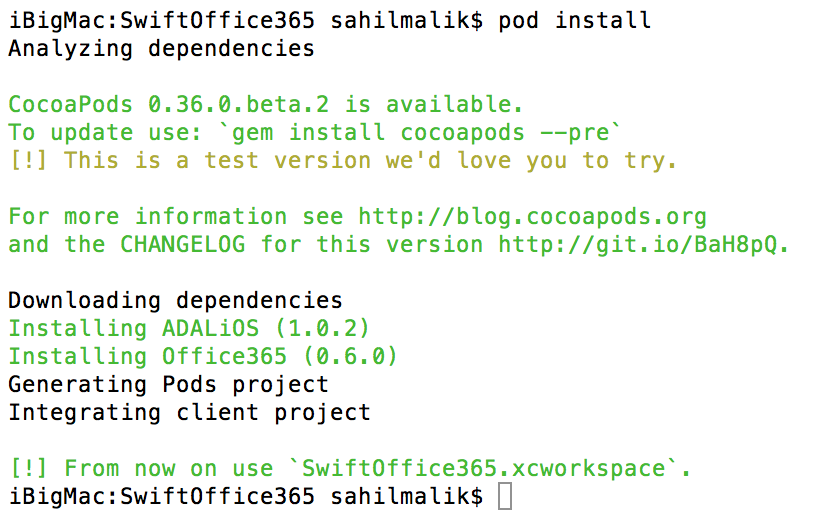
Save this file, and then run the following command at terminal:
pod install
You should see an output similar to that shown in Figure 6.
Also you now have a Pods directory and a xcworkspace project, as shown in Figure 7.
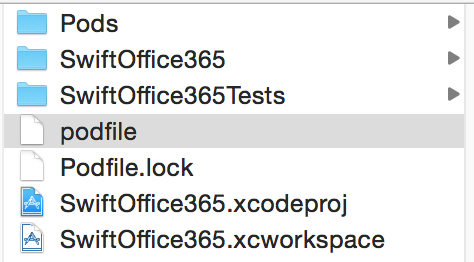
Double click on the xcworkspace file, which opens it in XCode.
Adding the Objective-C Bridge
Apple knows that no matter how cool Swift is, there's a lot of legacy code out there that's still useful and still using Objective-C. So they've given us a capability called Objective-C Bridge that allows Swift code to tap into Objective-C code. That's what you need to create next. In order to do that, right-click on your SwiftOffice365 project in the project navigator, and choose Add a New File. Choose to add an Objective-C File and name it whateveryouwant.m. It really doesn't matter what you name it, since, as you will see shortly, you're going to delete this file in about 15 seconds. As soon as you add this file, XCode asks you if you wish to configure an Objective-C bridging header, as shown in Figure 8.
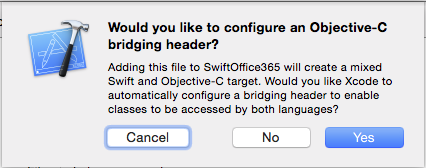
Click on Yes and verify that in your project navigator, you get two files added, as shown in Figure 9.
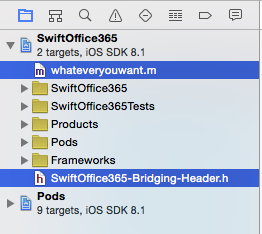
Now, delete the whateveryouwant.m file - you don't need it. Be careful not to delete the SwiftOffice365-Bridging-Header.h file; you'll need that to talk to Office 365 SDK. In that file, add the code shown below.
#import "ADAuthenticationContext.h"
#import "office365_odata_base/office365_odata_base.h"
#import <office365_files_sdk/office365_files_sdk.h>
As you can see, I'm now pretending to reference APIs just as I was writing this in Objective-C. This is really a header file. That's all it is. If you want to target any other Office 365 capabilities, simply target those header files.
The app is ready for some real functionality.
Writing the Functionality
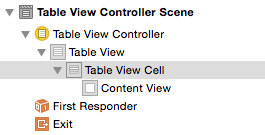
Now I wish to write the functionality that shows a list of the files in my OneDrive in a UITableViewController. You can do this by going to your main storyboard, and choosing to delete the View Controller. Instead of the simple UIViewController that XCode created for you, drop a Table View Controller. Under the attributes inspector, choose to make this the entry point of your application by checking the Is Initial View Controller checkbox. Next, look for the icon on the bottom left of your story board that exposes the Table View Controller Scene tree, and select the Table View Cell, as shown in Figure 10.
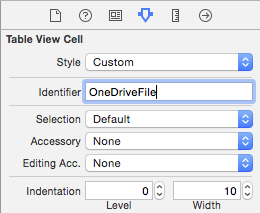
With the Table View Cell selected, go to the Attributes Inspector, and give it a reuse identifier of OneDriveFile, as shown in Figure 11.
The user interface is set up. Next, focus your attention on the code. Open the ViewController.swift file, and choose to rebase it as UITableViewController instead of UIViewController. You're doing this because you want this file to contain the logic for the table view controller you dropped. In a real application, you'd have deleted this file and added a new file with a more appropriate name.
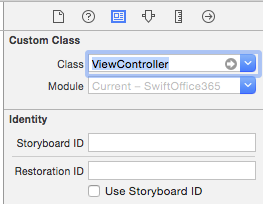
Back in your story board, select the Table View Controller, and under the Identity Inspector, choose to point the custom class for the Table View Controller to ViewController, as shown in Figure 12.
Now back in ViewController.swift, start by declaring the variables at the class level, as shown in Listing 1.
Listing 1: Variables declared in the class level
var resourceID : String = "https://winsmartsdev-my.sharepoint.com"
var authorityURL : String = "https://login.windows.net/winsmartsdev.onmicrosoft.com";
var clientID : String = "47bae9d1-d859-476b-9198-631b63a3276b"
var redirectURI : NSURL = NSURL(string: "http://something")!
var files: [MSSharePointItem] = []
The variables shown in Listing 1 are the constants you need to perform authentication against the Office 365 endpoints. Remember to update these constants to match your tenancy. Note that the clientID and redirectURI are specific to this app. They are the same values you got when you registered it in Azure AD. The resourceID and authorityURL are values you can extrapolate based on the URL that the user targets, and the files array is a variable intended to hold the list of files. You may wonder what happens if you distribute this app to the appstore. The answer is that you can hard-code the clientID and redirectURI. But for the resourceID and authorityURL, you'll have to calculate based on the tenancy that the user targets. To keep things simple, let's hold them as strings.
Next, since you're using UITableViewController, override the basic methods as shown in Listing 2.
Listing 2: The basic Table View Controller methods
override func tableView(tableView: UITableView,
  numberOfRowsInSection section: Int) -> Int {
    return self.files.count
}

override func tableView(tableView: UITableView,
    cellForRowAtIndexPath indexPath: NSIndexPath) -> UITableViewCell {
        var cell : UITableViewCell = tableView.dequeueReusableCellWithIdentifier(
           "OneDriveFile", forIndexPath:indexPath) as UITableViewCell
        var file: MSSharePointItem = self.files[indexPath.row]
            cell.textLabel?.text = file.name
        return cell
}
As you can see in Listing 2, the first function returns the number of files fetched, so the Table View Controller knows how many rows it's dealing with. The second function returns a row for the specific cell. This is how iOS keeps its memory in check as the user scrolls; it simply dequeues the cell and updates it based on what the user sees. So no matter how long the table view gets, it remains responsive and doesn't clog the memory of your device with unnecessary objects. What you're doing once you dequeue the cell is marking its text label with the name of the file. You can, of course, make this as fancy as you wish. Note that the cell identifier is the same identifier specified in Figure 11.
The viewDidLoad method is where you do most of the work, which is to authenticate, get an access token, and load the files. This method is shown in Listing 3.
Listing 3: The viewDidLoad method doing authentication
override func viewDidLoad() {
    super.viewDidLoad()

    var er : ADAuthenticationError? = nil
    var authContext:ADAuthenticationContext =
        ADAuthenticationContext(authority: authorityURL, error: &er)

    authContext.acquireTokenWithResource(
        resourceID, clientId: clientID, redirectUri: redirectURI) {
            (result: ADAuthenticationResult!) -> Void in
            if (result.accessToken != nil) {
                self.loadFilesUsingAccessToken(result.accessToken)
            }
    }
}
The viewDidLoad method is pretty much cookie-cutter, no matter what Office 365 API you're targeting. The end result is that if everything goes well, you get an access token as a result. The Azure ADAL for iOS abstracts the complexity of loading a Web view, performing the authentication, and managing token lifetimes, etc. For instance, if the end user is using a branded Office 365 log-on page, the above logic will still work. If the end user targets an ADFS endpoint, barring some really odd scenarios, the above logic should still work. The whole idea is that at the end of a successful authentication, you get an access token. And with that access token, you're able to do what you specified your app should do, as you saw in Figure 4. Of course, the end user also has to give their consent here, which will happen in Figure 14.
Now you have an access token, and you're at the meat of the logic. Usually, you'd target the discovery API and discover the functionality endpoint. To keep things simple and terse for the purposes of this article, I'll target the OneDrive endpoint directly. This can be seen in Listing 4.
Listing 4: The meat of the application's functionality
private func loadFilesUsingAccessToken(accessToken: String) {
    self.tableView.registerClass(UITableViewCell.self,
    forCellReuseIdentifier: "OneDriveFile")

    var resolver : MSODataDefaultDependencyResolver =
                                        MSODataDefaultDependencyResolver()
    var credentials : MSODataOAuthCredentials = MSODataOAuthCredentials()
    credentials.addToken(accessToken)

    var credentialsImpl : MSODataCredentialsImpl = MSODataCredentialsImpl()
    credentialsImpl.setCredentials(credentials)
    resolver.setCredentialsFactory(credentialsImpl)
    var client : MSSharePointClient = MSSharePointClient(
    url: "https://winsmartsdev-my.sharepoint.com/_api/v1.0/me";,
                                         dependencyResolver: resolver)

    var task : NSURLSessionTask = client.getfiles().read{(
        someObjects:[AnyObject]!, error:MSODataException!) -> Void in
        if (error == nil) {
            dispatch_async(dispatch_get_main_queue(), {
                self.files = someObjects as [MSSharePointItem]
                self.tableView.reloadData()
            })
        } else {
            println("Error: \(error)")
        }
    }
    task.resume()
}
As you see, I'm using a OneDrive-specific API to make a simple call to get a list of files in my OneDrive. Underneath, this is just a REST call, and I could have made the REST calls myself. But why bother when I have a simple method like client.getfiles()? This is the role the Office 365 SDK plays: it provides abstracted methods that bridge the complex REST (or any other) API with Azure AD. So now you know where Azure ADAL ends and Office 365 SDK starts. Once I receive the files back, I simply store them in self.files, which was the variable I declared at the class level.
Now you know where Azure ADAL ends and Office 365 SDK starts.
That's it! The app is done. Let's compile and run it.
Running the App
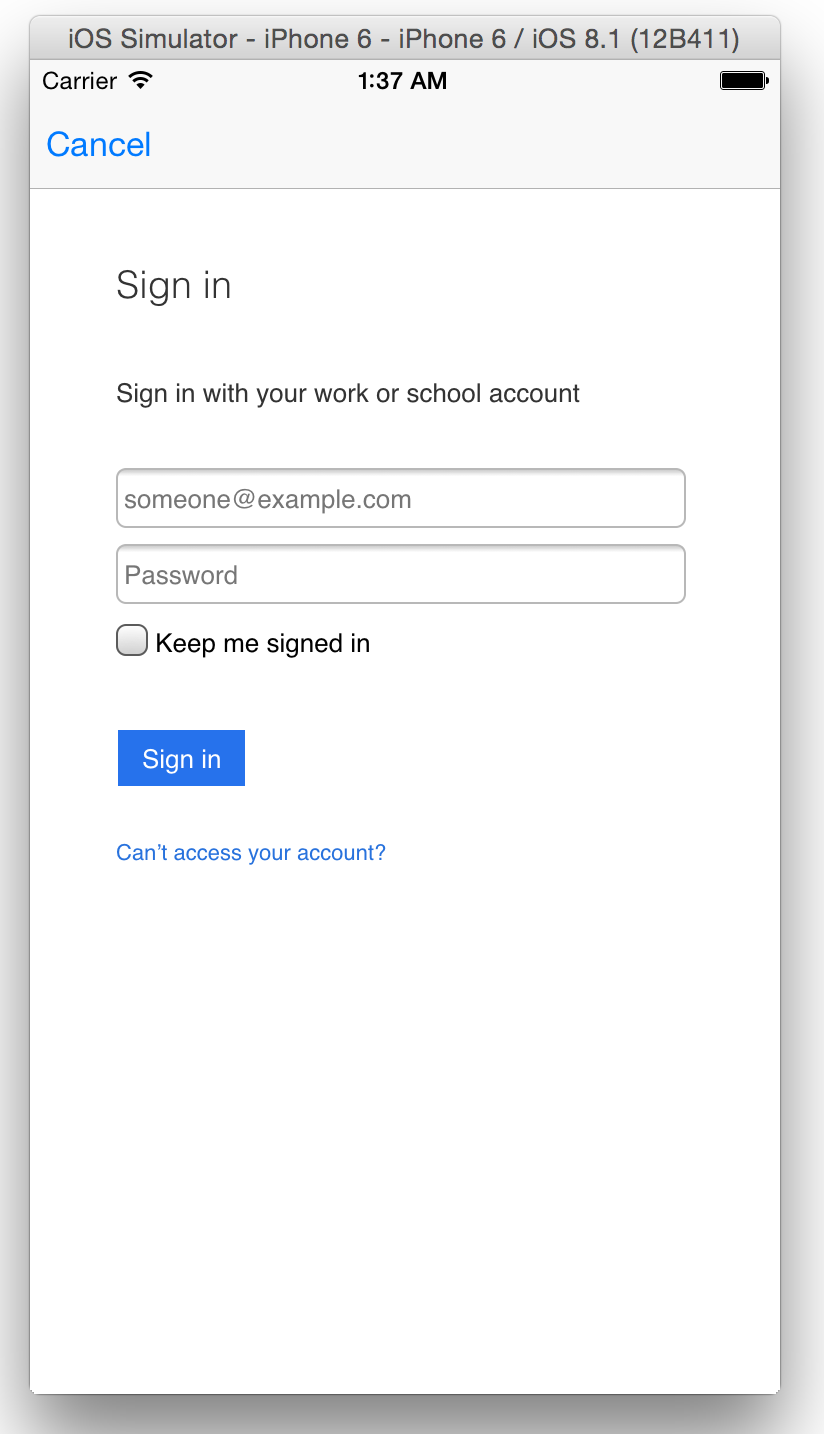
Assuming that you've done all the above steps properly, you should now be able to compile and run the app either on your iOS device or on the iOS simulator. I'll run things on the simulator. When you first launch the app, you'll see a login prompt, as shown in Figure 13. What has happened here is that the viewDidLoad method got called and ADAL for iOS prompted the user to authenticate. The user provides credentials, and the application can get an access token.
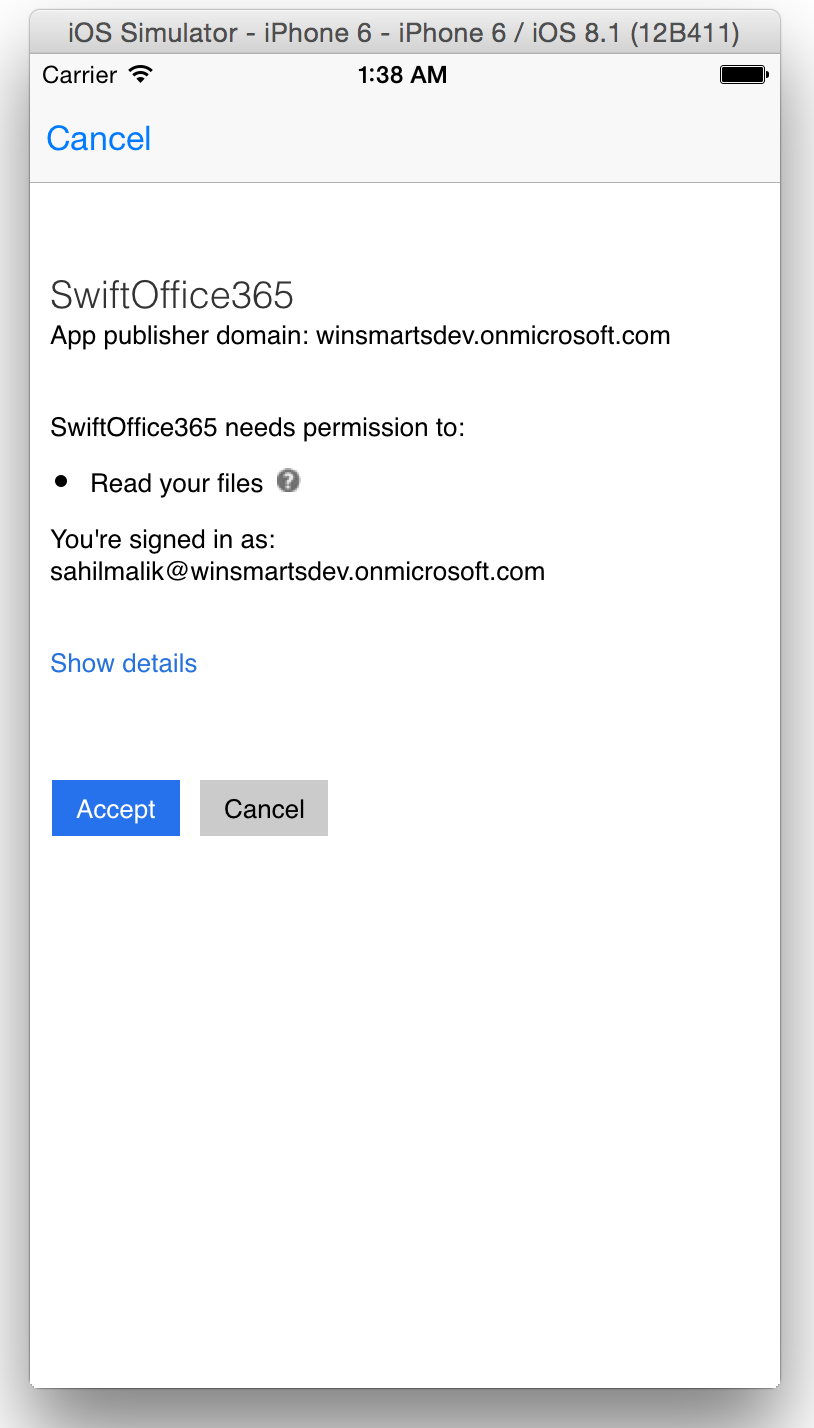
As soon as the application gets an access token, the user is prompted with a screen to grant consent to allow access to this app. This can be seen in Figure 14. This is the common consent framework in action.
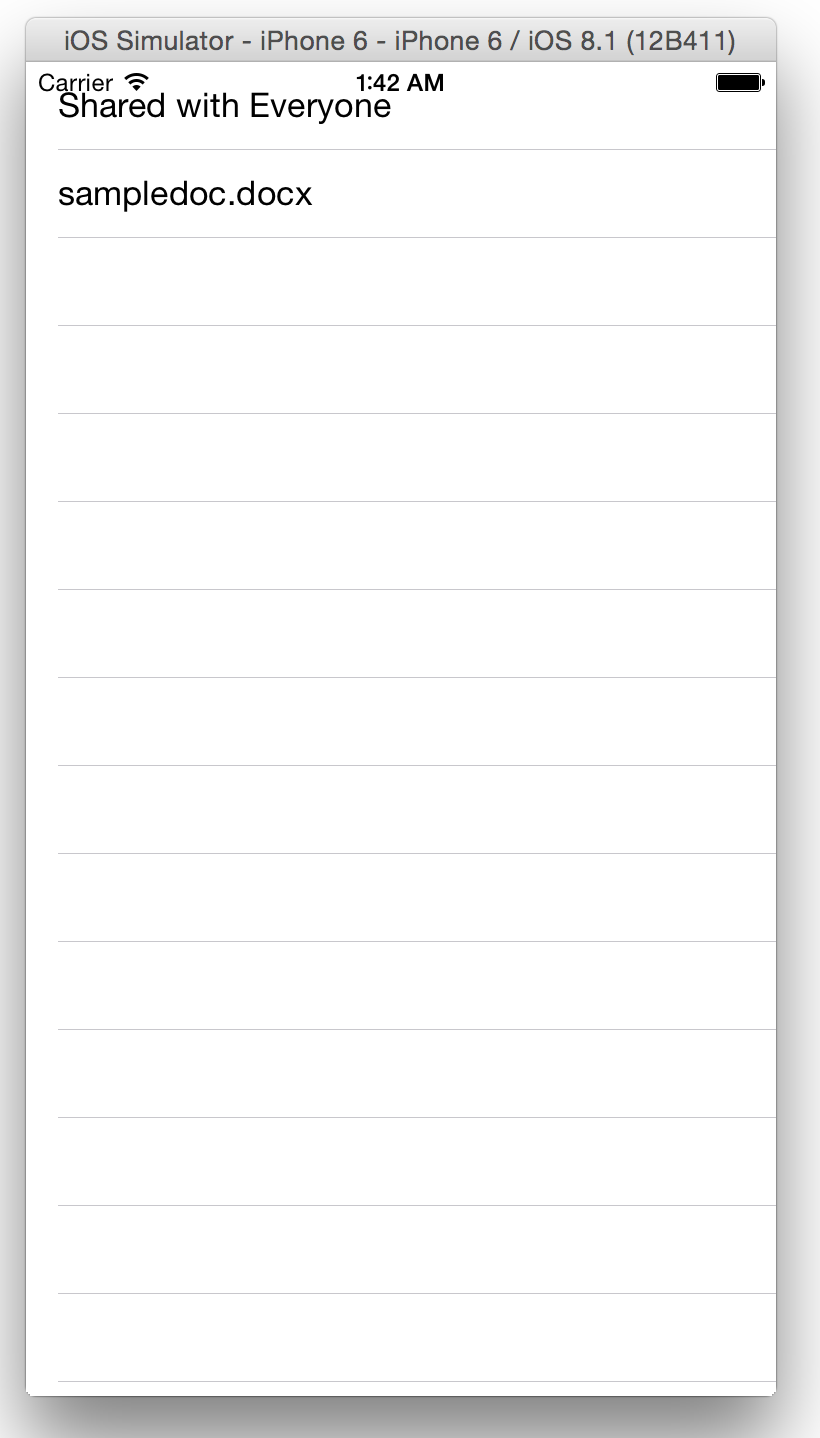
If you grant access, you'll then see a screen, like that shown in Figure 15, that has successfully queried your Office 365 OneDrive files, and is able to show them to you.
Summary
We're living during some very interesting times. Thirty years ago, the IT world was much smaller but it was multi-platform. From the 90s through the middle of the first decade of the 21st century, we were quite spoiled. Writing an application meant WinForms or Internet Explorer 6. We're not in that world any longer. The future is multi-platform, and Microsoft's new CEO is turning that ship around faster than I've ever witnessed. Microsoft has embraced other platforms openly. And you, as a developer, must do that as well.
In short, the future bodes a multi-platform cloud-ready world. It's going to be a big change for us techies to swallow, and an even bigger change for customers to swallow. But those who are able to stomach the change will thrive. And those who are not will become managers (joke!). I'm pretty clear about where I want to be; I intend to be a techie, with the best possible skills that I can humanly muster. It's not going to be easy, but I hope I can do it.
The paragraph above is a summarization to an opinion piece I wrote in September of 2013. Back then, when Ballmer was still CEO and being an iOS lover earned you sneers and jeers in the hardcore Microsoft crowd, I was sure that the future would be multi-platform. As a developer, if you wish to remain relevant, you'll have to be multi-platform, too. If you're interested in more opinion pieces specific to SharePoint and Office 365, you may find my dotnetrocks show at https://www.dotnetrocks.com/?show=1084 interesting as well.
This article is the first in my long journey of exploring how iOS can work with Office 365. There will be more.
Happy coding, my developer friends, and may the force be with you!
