


Communication is an essential part of our everyday lives and, as technology has progressed, the way we communicate has also evolved. With the advent and rise in popularity of emojis, for instance, communication has begun to expand beyond verbal and written forms Into something more visual. In fact, 92% of the online population uses some form of emoji (Emogi marketing report 2015, http://www.adweek.com/socialtimes/report-92-of-online-consumers-use-emoji-infographic/627521).
With the release of iOS 10, Apple has created a new medium for visual communication using something they call stickers. Stickers work similarly to emojis but carry with them additional functionality that result in a more interactive experience. In this article, you'll take a closer look at stickers, sticker packs, and the newly accessible iMessages App Store.
What are iOS Stickers?
With the introduction of stickers in iOS 10, users now have a new way to express themselves within their existing iMessage conversations. Stickers are static or animated images that can be tapped and sent in a conversation thread just like you would a normal emoji. However, stickers have additional functionality baked in. For instance, you can peel a sticker, resize or rotate it, and place it on top of or next to message bubbles in the conversation flow, within photos, or even other stickers. See Figure 1 for a sample conversation using stickers.
With the introduction of stickers in iOS 10, users can now peel a sticker, resize it, and place it on top of or next to iMessage conversation bubbles, photos, or even other stickers.
Sticker Packs
Alongside the announcement of stickers, Apple also introduced the dedicated iMessages App Store; your one-stop-shop for applications that run as extensions within the default iMessages application. Currently, two types of iMessage apps exist: Sticker Pack and custom.
A Sticker Pack application is a limited-functionality iMessage app that delivers a single grouping of stickers. A custom iMessage application removes the limits of the basic Sticker Pack template, giving you the ability to layer on additional functionality as you see fit (I'll cover this approach in more detail later in the article).
Figure 1 demonstrates what a Sticker Pack application looks like running on the device. Notice that the far-left screen depicts the listing of iMessage applications currently installed on your device. The middle screen displays what it looks like if you tap on an installed Sticker Pack application, and the far-right screen demonstrates a conversation using the stickers from the pack.
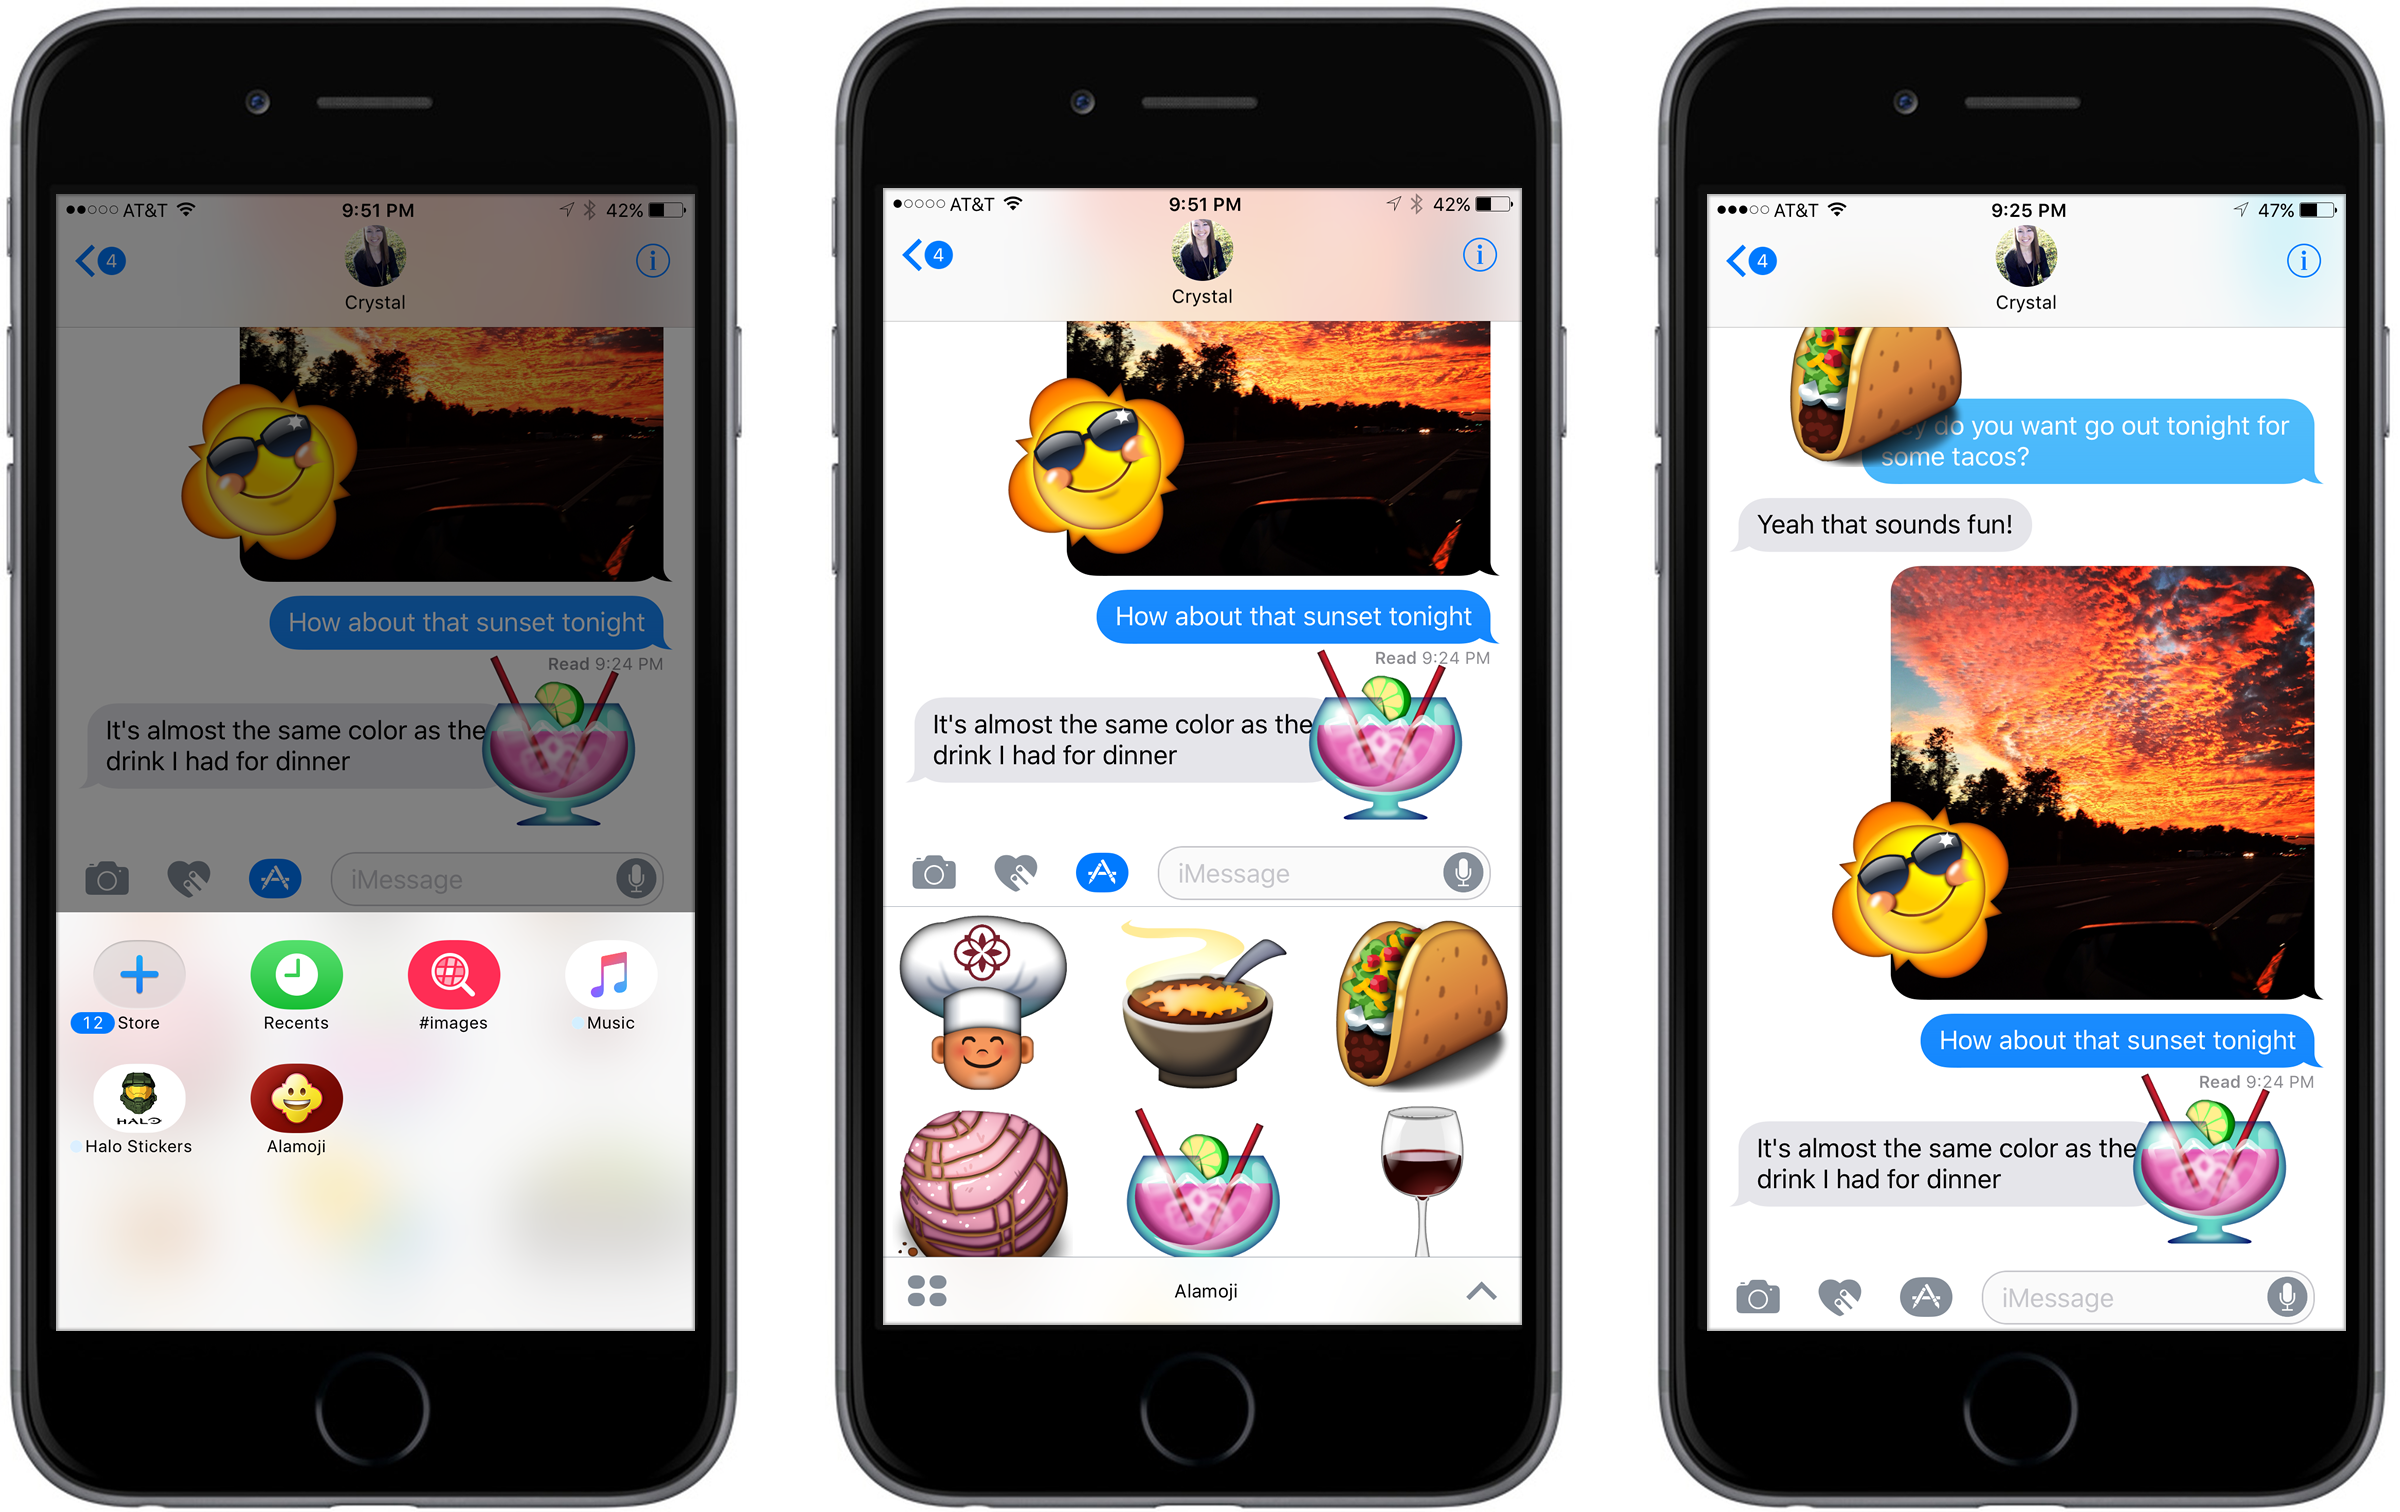
In order to use the stickers, users interact in one of two ways. If you tap on a sticker, it adds the sticker to the message entry field so that you can send it just as you would a normal emoji. However, if you tap and hold on a sticker, it peels off of the keyboard and allows you to manipulate it and place it at your desired location within the conversation window. Users within the conversation can tap and hold on a sticker to see details about it, including which iMessage app it originated from.
So Easy a Caveman Could Do It
Because Sticker Pack applications are a standard iMessage application type, XCode has a specialized template for building them. This template contains everything you need to construct and deploy a sticker pack to the iMessages App Store. In fact, to build one, you don't have to write a single line of code. The template contains all of the functionality, only needing you to add in your stickers and the application icons.
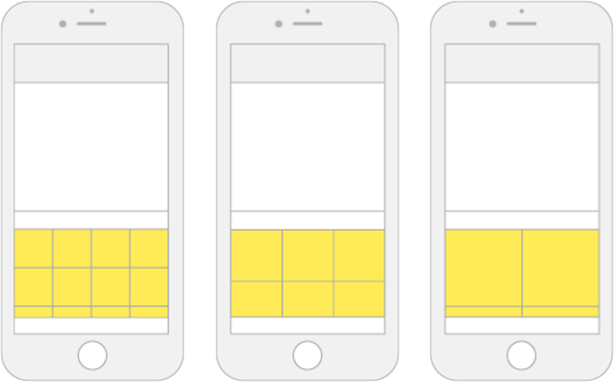
The only thing you really need in order to build a Sticker Pack application is the appropriately sized sticker assets. It's important to note that you're limited in the sizing options you have to choose from. You can choose one of three sizes, as defined next and also depicted in Figure 2.
- Small: 300px by 300px
- Regular: 408px x
- Large: 618px by 618px
In Figure 2, the right image depicts a small sticker size and how the Sticker Pack template formats them four to a row. The middle image demonstrates the formatting of a regular size sticker at three to a row, similar to the Sticker Pack application demonstrated in Figure 1. The right image shows a large size sticker at two to a row.
Apple also released a set of guidelines for creating the assets you use as stickers. Each sticker should adhere to these regulations:
- For static stickers, you must use of one of the following formats: PNG, APNG, GIF, JPG
- For animated stickers, you must use one of these formats: APNG or GIF
- A single sticker must not exceed 500KB
It's worth noting that Apple specifically recommends PNG and APNG formats and warns that PNGs saved in XCode uses a 24-bit palette by default, which could translate into larger-than-expected file sizes.
You also need to provide a set of various-sized application icons that will represent your application across the OS. As you might have noticed from the left screen in Figure 1, iMessage application icons are almost oval shaped. As a result, they have different size requirements and guidelines than a standard iOS application icon. You can find information relative to those sizes and the corresponding icon guidelines using the links provided in the sidebar of this article.
Making Your Own Sticker Pack
Now that you have a basic understanding of iOS 10 stickers, let's take a look at the process of setting up and populating your own sticker pack application using Xcode 8.2.1 on iOS 10.2. For the purposes of this demonstration, I'll assume that you have Xcode installed. If you need assistance installing or setting up the development IDE, check the sidebar for additional details.
Getting Started
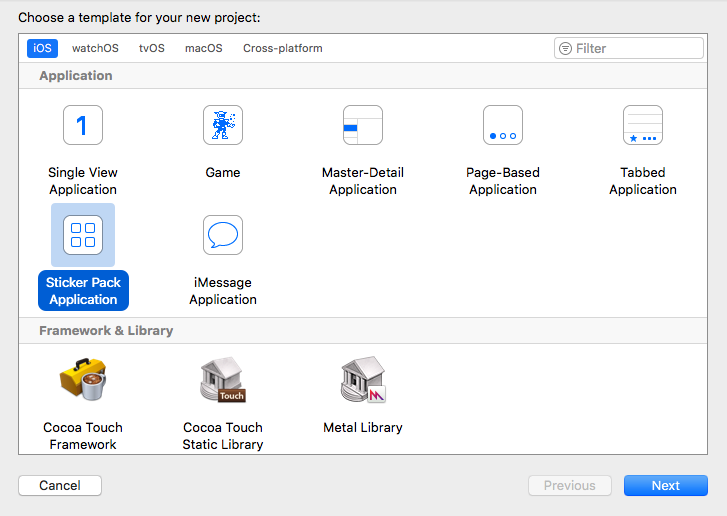
To start, open up Xcode and select “Create a new Xcode Project” from the Welcome modal. Once you make this selection, you see a new modal resembling the one shown in Figure 3. This modal lets you choose the starting point for the application type you want to build. Make sure that iOS is selected at the top of the modal, select Sticker Pack Application, and then click Next.
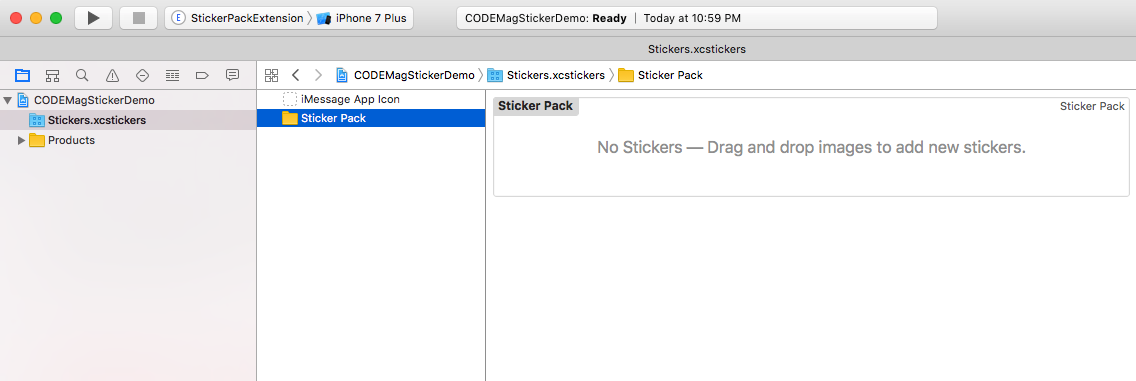
Once you've made your template selection, Xcode prompts you to enter an application name and choose a team for provisioning. Provisioning the application for submission to the App Store is by far the most difficult part of the process and requires a working knowledge of the same provisioning and certificate procedures used to submit full iOS applications. For more detailed instructions on provisioning your Sticker Pack, refer to the sidebar. Once you've filled in the appropriate details, click Next and choose a location to save the project. When you're finished, Xcode launches the template you just created. You'll notice that the project is bare. It contains a target and a single assets folder named Stickers.xcstickers, as shown in Figure 4.
Drop the stickers you want to power the application template into this assets folder. Once you've composed your images, made sure that the sizes are uniform and correct, and verified that the file types match the requirements, you can drag the lot of them into this folder. Once you've done that, Xcode arranges them in a grid format within the asset folder's Sticker Pack subfolder. You can drag the icons around to re-arrange the order in which they appear in the application.
You can tell the template what size of sticker to display using the attributes inspector on the right-hand panel within Xcode. Xcode can detect the size manually but it also has rescaling functionality built in by default. That means that if you upload a large-size icon but want to display it as a small sticker size, you can do that. However, it's recommended to provide the exact size that you wish to display, as scaling is an unnecessary hit on performance.
Once you add the application icons, set the size of your stickers, and arrange the sticker order to your liking, all you have to do is build it, test it, and deploy it.
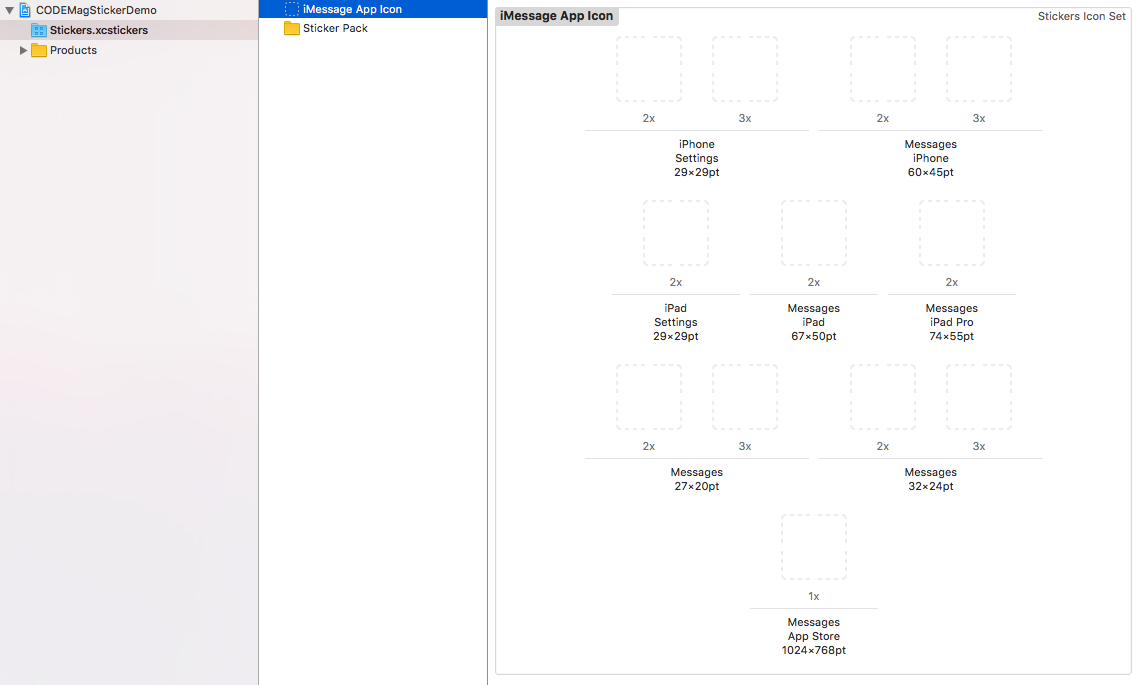
The last step is to add the application icons to the template. Within the Stickers.xcstickers asset folder, there's an iMessage App Icon section. If you select that, you'll see a list of sizes, as shown in Figure 5. You need to create the icons to the specifications detailed in the sidebar of this article, and then drag each one to its appropriate location in this panel. Once you add the application icons, set the size of your stickers, and arrange the sticker order to your liking, all you have to do is build it, test it, and deploy it.
Extending the Functionality
Although Sticker Pack Applications are simple to create, their functionality is rather limited. For instance, what if you want to have multiple categories of stickers, in-app purchases, or maybe the ability to edit a custom sticker? If you want to extend the capabilities of the default sticker application, you'll have to create a custom application using the default iMessage Application template in Xcode. This template gives you a special MSMessagesAppViewController object to serve as the entry point of the application, but that controller is a blank slate. You don't get any functionality baked in from the start because iMessage applications can be built to do any number of things and aren't limited to stickers. Therefore, building additional features requires the corresponding coding knowledge and background to do so.
Currently, you can build an iMessage App in either Objective-C or Swift. You can download Apple's official iMessage application sample at https://developer.apple.com/documentation/messages/icecreambuilder_building_an_imessage_extension.
Wrapping Up
Over the course of this brief article, you gained a basic understanding of what iOS 10 stickers are and how easily you can create your own sticker packs. If you're interested in a more complex look at stickers or iMessage applications in general, be sure to refer to the sidebars for this article for additional resources.
