


In my last two CODE Magazine articles, I outlined numerous interesting challenges that we deal with when writing JavaScript, and how TypeScript solves most of them. Certainly, a good programming language helps, but it's not a replacement for good development habits.
Historically, JavaScript has been intertwined with HTML. Yes, I know that these days we write enterprise class applications in JavaScript that have nothing to do with HTML, but the Web is where the roots of JavaScript are. As a result, unlike other languages, JavaScript lends itself to abuse. Nothing prevents someone from creating a JavaScript code snippet using string concatenation, and then run it on the fly, which is incredibly unmaintainable code.
In this article, I share three cardinal rules of working on any JavaScript project.
- Use tools, such as JSLint, along with good coding practices.
- Use design patterns, or frameworks, that encourage MVC, such as AngularJS.
- Use TDD.
JSLint
JSLint is a static code analysis tool used in software development for checking whether JavaScript source code complies with coding rules. JSLint takes a JavaScript code file or JSON data, and scans it. If it finds a problem, it highlights the problem area for you. What's cool about JSLint is that it goes much beyond the basic syntax of the language and scans your source code using established JavaScript best practices. Although JSLint isn't always 100% right, and neither will it catch 100% of your issues, it should be looked at as “another set of eyes,” helping you write consistent, bug free, maintainable and understandable JavaScript.
JSLint is very customizable. If there are things in your code that JSLint views as issues but you don't, you can put hints in your code as comments that JSLint will understand and stop nagging you about those specific issues.
By default, JSLint checks for the most common errors that JavaScript developers are prone to making. If you're writing plain JavaScript, which in some cases you still need to, you should definitely use JSLint to keep your code clean.
You can read more about JSLint and the sorts of checks it does here http://www.jslint.com/help.html.
MVC and AngularJS
It helps to be well organized. You could achieve the same functionality by putting all of your code in the global namespace, or in a single function. It wouldn't be very reliable and it wouldn't be very maintainable. MVC is an industry standard design pattern that allows you to structure your code nicely. And, since it's an industry standard design pattern, chances are that your friends who're developers will readily understand it as well.
Platforms such as iOS development insist on MVC so much that they've built all their foundation classes to use MVC. In fact, not to use MVC in Mac development is an effort, so you might as well use it.
On the Microsoft side of things, we've had well established design patterns all the way back to MFC (remember document view?). Even in the modern universal apps, we use a design pattern similar to MVC called MVVM.
Design patterns are good. Design patterns should be used. Unfortunately, JavaScript is incredibly flexible and doesn't enforce the usage of Design patterns. Contrary to other enterprise dev platforms, using MVC in JavaScript requires upfront thought and effort.
Design patterns are good. Design patterns should be used.
It's therefore no surprise that, over time, frameworks have emerged that require you think to think in MVC while coding JavaScript. One such framework is AngularJS. Okay let's be honest. AngularJS has pretty much been the de facto framework for the last year or so, which is a squirrel's lifetime in JavaScript, where things tend to be shorter-lived.
MVC can be described like this:
- A controller can send commands to the model to update the model's state (e.g., editing a document). It can also send commands to its associated view to change the view's presentation of the model (e.g., by scrolling through a document).
- A model stores data that's retrieved to the controller and displayed in the view. Whenever there's a change to the data, it's updated by the controller.
- A view requests information from the controller. The controller fetches it from the model and passes it to the view used to generate an output representation to the user.
This article is not a tutorial on AngularJS, although a basic understanding of AngularJS is necessary to understand the concepts presented below. In AngularJS, you begin by defining a module, which can be thought of as the entry point to your application. Inside the module, you have controllers, which are exactly what you'd think; they're the controllers in an MVC design pattern. The “M” or Model, is JavaScript data that you hang as properties on the controller. The controller usually has the logic to fetch and massage the model as necessary, and present whatever the view demands. The best part about AngularJS is that the view is merely embellished HTML. You can databind the model held by the controller to the view, which is HTML. And the specific rendering details are left to view specific concepts such as directives.
Additionally, not everything fits into the overhead of MVC. Sometimes you want code to be reusable across modules. Or sometimes you need a library of helper functions, etc. Those candidates are perfect for another Angular concept called services.
Now you have some high level concepts in AngularJS that require testability:
- Controllers, or rather specific controller methods, including:
- Simple controller methods
- Controller methods that depend on deferreds returned from services
- Controller methods that depend on external dependencies that you didn't write but that are part of the framework, such as $http
- Directives, because testing UI is incredibly difficult, yet Angular makes it easy for us.
- Service methods
Because AngularJS is a fairly mature framework by now, it lends itself very well to TDD for two reasons:
- AngularJS was designed with TDD in mind. Even the framework objects can be easily mocked. This means that you can test services such as
$httpand$qwithout complex server-side infrastructure. Invariably, testing is hampered by the complexity of testing and setup. The applications we're all writing these days have too many dependencies, if you get bogged down in setting up all those dependencies, you'll invariably end up not testing enough. A good test is what can be run in a developer's IDE or a continuous integration setting with almost no setup. - You might be asking why isn't he talking about ReactJS, the new kid on the block? Simply because it hasn't had enough street time yet. If it catches on, I'm sure that equivalent TDD patterns will emerge for that, as well. Angular is a bit more mature, and has a very rich testing framework called Jasmine.
TDD
The essence of TDD is writing tests for your code before or while you write your code. Although it may seem like a lot of extra work, the real payoff is when your project starts to scale. The problem is that the code you write is extremely interconnected. Yes, I know that through better architecture, you try to keep these interconnections clean, but as the project scales, the number of interconnections can increase exponentially. Not to mention that requirements change, which renders your architecture based on initial assumptions invalid.
You need confidence to change the code or refactor. If you had written tests for every bit of your code, as long as the tests produce the same output (i.e., the tests continue to pass), you can be confident that all those interdependent parts will continue to function as intended.
Sample Application
I need a sample guinea pig application to demonstrate my point. This simple app has:
- One Angular Module
- One controller
- One service
- One HTML view
The service has one method that calls an AJAX service using $http and returns a deferred. You need to write a test for this method.
The controller has two methods: one that returns a string and the other that calls the service method.
This very simple application allows me to demonstrate the various scenarios you'll need to write tests for.
Dev Environment Setup
The aim of a good development environment in this scenario is something that allows you to run your tests easily with a single key stroke. I'm going to use Visual Studio Code, and I'm going to write Gulp tasks to enable me to run tests easily. My testing framework of choice is Jasmine and my IDE of choice is Visual Studio Code. Although the code is written in TypeScript, I choose to write my tests using JavaScript. There are two reasons for this:
- The
.d.tsfiles for Jasmine aren't quite there yet. - When I wish to mock objects, all the support for that is in JavaScript.
I think that one day in the very near future, we'll be able to write these tests in TypeScript too, but for now, I went with JavaScript.
Anyway, the goal here is to have a setup so that:
- I can use Visual Studio Code
- I can author code in TypeScript and JavaScript, and TypeScript code continually compiles to JavaScript using the
watchmethod. - As I write tests and code, I want the tests to run continuously.
- I want all of this to work in Visual Studio Code.
Step #1 is to install Visual Studio Code from code.visualstudio.com.
Step #2 is to install nodejs from nodejs.org because I'll make use of some node packages to facilitate the Gulp tasks. Once the node is installed, open a terminal (on Mac) or command window (on Windows) and run the following commands to install various node packages. You may need to run these in administrator mode (Windows), or using sudo (Mac).
npm i -g typescript
npm install -g gulp
npm install gulp-typescript
npm install -g karma
Great! Next, set up a folder structure, as shown in Figure 1.
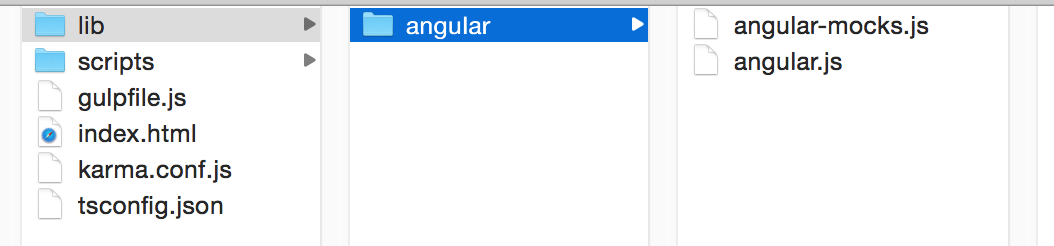
You may have already guessed that:
Index.htmlis the entry point for the app.- Lib contains standard
angular.jsandangular-mocks.jslibraries that you downloaded from the Internet. - I also created a
tsconfig.jsonfile for inputs to the typescript compiler. - I also created a
karma.conf.jsto provide inputs to karma for the tests. - The
gulpfile.jsdefines the Gulp tasks.
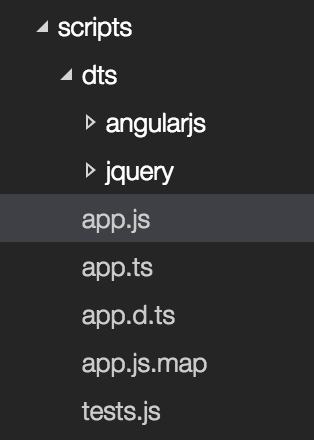
Now let's peek inside the scripts folder. This can be seen in Figure 2.

As can be seen, the code is kept inside two files:
- The
app.ts, which is the TypeScript file with the application code Tests.js, which will contain the tests
You'll also find a dts folder where I've placed definitely typed files for angular and jquery.
Now, in a real application, you probably want to follow some best practices, and separate out your angular code into multiple files based on responsibility and folders based on views. However, since my application is so simple, I'm avoiding that overhead.
Next, open your project folder in Visual Studio code, and add a .settings folder with a “tasks.json” file in it that identifies the tasks you'd like. Put the content shown in Listing 1 into the tasks.json file.
Listing 1: The tasks.json
{
    "version": "0.1.0",
    "command": "gulp",
    "isShellCommand": true,
    "args": [
        "--no-color"
    ],
    "tasks": [
        {
            "taskName": "build",
            "args": [],
            "isBuildCommand": true
        },
        {
            "taskName": "scripts",
            "args": [],
            "isBuildCommand": true
        },
        {
            "taskName": "test",
            "args": [],
            "isBuildCommand": true
        }
    ]
}
Great! Now to complement this tasks.json, first let's flesh out the scripts tasks. The purpose for this task is to continually watch the TypeScript code and compile it into JavaScript. This can be seen in Listing 2. Note that the watch functionality shown in Listing 2 depends on using the tsx.exe compiler from the command line. If you want watch it work in Gulp, write a Gulp task to do the watch for you.
Listing 2: The scripts task
var gulp = require('gulp');

var ts = require('gulp-typescript');
var tsProject = ts.createProject('tsconfig.json');

gulp.task('scripts', function () {
    var tsResult = tsProject.src().pipe(ts(tsProject));
    return tsResult.js.pipe();
});
This scripts task depends on tsconfig.json. In the tsconfig.json file, I've specified that I want commonjs JavaScript generated, and I want the TypeScript compiler to continuously watch and compile the code. This tsconfig.json can be seen in Listing 3.
Listing 3: The tsconfig.json
{
    "compilerOptions": {
        "module": "commonjs",
        "noImplicitAny": false,
        "removeComments": true,
        "preserveConstEnums": true,
        "declaration": true,
        "sourceMap": true,
        "watch":true
    }
}
Also, enter a task called test that will be responsible for running the tests. This can be seen in Listing 4.
Listing 4: The test task
var karma = require('gulp-karma');
gulp.task('test', function () {
    var testFiles = [
        'lib/angular/angular.js',
        'lib/angular/angular-mocks.js',
        'scripts/app.js',
        'scripts/tests.js'
    ];
    return gulp.src(testFiles)
        .pipe(karma({
            configFile: 'karma.conf.js',
            action: 'watch'
        }))
        .on('error', function (err) {
            throw err;
        });
});
To complement the Gulp task shown in Listing 4, edit your karma.conf.js file as shown in Listing 5. What you're doing in Listing 5 is identifying the test framework as ‘jasmine’, and I've set up the tests to run in the chrome browser on port 9876. Also, the tests will run continuously, so as I edit the files (either TypeScript or test), the tests will continually run and alert me of any inadvertent bugs that I might introduce.
Listing 5: karma.conf.js
module.exports = function (config) {
    config.set({
        basePath: '',
        frameworks: ['jasmine'],
        files: [
            'lib/angular/angular.js',
            'lib/angular/angular-mocks.js',
            'scripts/app.js',
            'scripts/tests.js'
        ],
        reporters: ['progress'],
        port: 9876,
        colors: true,
        logLevel: config.LOG_INFO,
        autoWatch: true,
        browsers: ['Chrome'],
        singleRun: false
    })
}
Finally, Visual Studio Code doesn't come with a built-in Web server. Thankfully, it's very easy to persuade nodejs to provide one for you, using a Gulp task. This can be seen as the final build task, as shown in Listing 6.
Listing 6: The build task, providing a Web server
gulp.task('build', function () {
    var http = require("http"),
        url = require("url"),
        path = require("path"),
        fs = require("fs"),
        port = 8888;

    http.createServer(function (request, response) {
        var uri = url.parse(request.url).pathname,
            filename = path.join(process.cwd(), uri);

    fs.exists(filename, function (exists) {
        if (!exists) {
            response.writeHead(404,
                { "Content-Type": "text/plain" });
            response.write("404 Not Found\n");
            response.end();
            return;
        }

        if (fs.statSync(filename).isDirectory())
        filename += '/index.html';

        fs.readFile(filename, "binary", function (err, file) {
            if (err) {
                response.writeHead(500,
                    { "Content-Type": "text/plain" });
                response.write(err + "\n");
                response.end();
                return;
            }
            response.writeHead(200);
            response.write(file, "binary");
            response.end();
        });
    });
  }).listen(parseInt(port, 10));

  console.log(
      "Static file server running at\n  => http://localhost:" + port);
});
Now you might be thinking, what build task? Build is supposed to run tests and compile the scripts. Well, yes! You finally add a default task, which runs the build task with dependencies on build, scripts, and test, as shown here:
gulp.task('default',
    ['build', 'scripts', 'test']);
At this point, your IDE is set up! Now if you write some code in TypeScript in the app.ts file, you should see app.js, app.d.ts, and app.js.map files created, as shown in Figure 3.
Writing the Application
I'm going to assume that you know AngularJS. And, as described above, the application consists of one module (myApp), with one controller (myCtrl), and with one service (myService). These three are described in the interfaces shown in Listing 7.
Listing 7: The application's structure
interface Window { myApp: angular.IModule };
interface myServiceType {
    methodThatReturnsDeferred(): angular.IPromise<string> };
interface myControllerScope extends angular.IScope {
    staticMethod(): string;
    asyncValue: string;
    asynchMethod(): void;
};
The value returned by staticMethod is displayed on the view. This method is incredibly simple and returns a basic string.
The asyncValue starts with “Not initialized” and is shown on the view. The view using the ng-init directive calls asynchMethod, which then calls myService.methodThatReturnsDeferred. The called myService.methodThatReturnsDeferred encapsulates a $http call and returns a deferred. The $http call returns a string called “intialized”, which is then passed back to asynchMethod, which sets it to asyncValue and is then displayed on the view.
I have a simple case, and I have a complex case. And this means that to get a good coverage of tests, I need to author three tests:
- A test that tests
myCtrl.staticMethod - A test that tests
myCtrl.asynchMethod, ensuring that it callsmyService.methodThatReturnsDeferred - A test that tests
myService.methodThatReturnsDeferred, ensuring that it makes aPOSTrequest with appropriate inputs, and returns a response with valueInitialized
Before you write the application, let's write these tests.
Setting the Controller's Test Harness
Before you can write the tests for the various methods in the controller, you need to set up the basic harness of the controller. This means that you need to have mock objects for:
- The scope service as it applies to this controller
- An instance of the controller itself
- A mock object representing the myService
You'll write a test to test the service method separately. That will ensure 100% coverage using the tests. Here you just need to make sure that the service method is called.
In order to know that the service method is called, you need to “spy” on that method. Jasmine allows you to create a mock object representing the myService service. When you create this mock object, you request to spy on the methodThatReturnsDeferred method.
Once you're able to create mock objects for both scope and myService, or, for that matter, any framework services, you can then create a controller instance and store it within the function scope.
All this can be seen in action in Listing 8.
Listing 8: The controller test harness
describe("myCtrl", function () {
    var scope
    var myController;
    var myServiceMock;

    beforeEach(module('myApp'));

    beforeEach(inject(
        function ($q) {
            myServiceMock = jasmine.createSpyObj('myServiceMock',
                ['methodThatReturnsDeferred']);
            myServiceMock.methodThatReturnsDeferred.and.returnValue(
                $q.when());
        }));

    beforeEach(inject(function ($rootScope, $controller) {
        scope = $rootScope.$new();
        myController = function () {
            return $controller('myCtrl', {
                '$scope': scope,
                myService: myServiceMock
            });
        };
    }));
    // actual tests come here
});
As is evident from Listing 8, you have three scope variables.
- myController that represents an instance of the controller, initialized with the mock objects
- scope that has been created using the injected
$rootScopeservice - myServiceMock object, that's a mock object, and is set up to spy on the
methodThatReturnsDeferredmethod.
Now, writing tests becomes rather easy.
Testing a Simple Controller Method
The simple controller method is perhaps the easiest to test. It can be seen in the code snippet below.
it("Should return static value", function () {
    var returnValue = scope.staticMethod();
    expect(returnValue).toBe('static value');
});
You can pretty much guess what the above code snippet is doing. It's calling the staticMethod on the controller's scope. And its return value should be ‘static value’. You can imagine that if this static method had more logic in it, or if it depended upon multiple property values, you could easily enhance this logic to handle more complex scenarios as well.
Testing a Controller that Depends on a Deferred Service
This is where things get more interesting. The idea here is that I have no interest in checking whether the $http call fails or succeeds, since that's the responsibility of the service, not the controller. The only thing the controller is responsible for is making sure that the service method is called.
That's all the controller method needs to do; it just needs to call the service method, and you need to test to make sure that the service method is called.
As you may recall from Listing 8, you had set up a myServiceMock object, where you were spying on the methodThatReturnsDeferred method. In other words, you can now know whether or not that method was called.
This means that you can now write a test around it, which can be seen in the snippet below:
it(
    "Should attempt to call the service deferred method",
    function () {
        scope.asynchMethod();
        expect(
            myServiceMock.methodThatReturnsDeferred)
            .toHaveBeenCalled();
    });
Testing a Service Method that Returns a Deferred
Now this is where things get interesting! You need to write tests for the service. Not only that, you need to write a test for a service method that makes an asynch call using a standard AngularJS service called $http. Just like the controller, first you need to author a test harness for the service, which can be seen in Listing 9.
Listing 9: The service test harness
describe("myService", function () {
    var myService;
    var httpBackend;
    beforeEach(module('myApp'));

    beforeEach(inject(function (_myService_, $httpBackend) {
        myService = _myService_;
        httpBackend = $httpBackend;
    }));

// tests come here
});
As you can see from Listing 9, you're creating an instance of myService, and you're creating an instance of $httpBackend. These instances are being passed by the testing framework. The convention is that for standard framework level services, there are mock objects already available that are simply injected to the method, such as $httpBackend. For custom services, you simply write the service name with preceding and succeeding underscores, such as _myService_ and the testing framework sends an instance of the service.
The $httpBackend is a service provided by Angular-mocks, and allows you to set up a fake backend. This means, in order to run tests, you don't need a server. You can write logic such as “for such POST payload, return the following return value”, and then let the service method act upon the return value. Once the service method has acted upon it, you can check to see if it produces the appropriate output, which pretty much defines the test. The test can be seen in Listing 10.
Listing 10: Testing the service method
it("should return Initialized",
    inject(function (myService, $httpBackend) {
        httpBackend.expectPOST('/').respond(200, 'Initialized');
        myService.methodThatReturnsDeferred().then(
            function (response) {
                expect(response).toEqual("Initialized");
            });
        httpBackend.flush();
    }));
As you can see from Listing 10, before you even run the test, you have set up the httpBackend object to expect a POST request to the root URL, with a blank payload. If you get such a request, it responds with an HTTP 200, with text value “Initialized.” Assuming that the methodThatReturnsDeferred sends such a request, it receives a response called Initialized. You can easily write this test without having to set up complicated test servers and environments behind the scenes.
Writing the Application
Once the tests are written and the TypeScript interfaces have been defined, writing the application becomes really simple. The final application code can be seen in Listing 11.
Listing 11: The final application code
/// <reference path="dts/angularjs/angular.d.ts" />
interface Window { myApp: angular.IModule };
interface myServiceType { methodThatReturnsDeferred():
    angular.IPromise<string> };
interface myControllerScope extends angular.IScope {
    staticMethod(): string;
    asyncValue: string;
    asynchMethod(): void;
};

(function() {
    var myApp = angular.module('myApp', []);

    myApp.controller('myCtrl', ['$scope', 'myService',
        function($scope: myControllerScope,
        myService: myServiceType) {
            $scope.staticMethod = function() {
                return "static value";
            };
            $scope.asyncValue = "Not initialized";
            $scope.asynchMethod = function() {
                myService.methodThatReturnsDeferred().then(
                    function(response) {
                        $scope.asyncValue = response;
                    });
            };
        }]);

        myApp.factory('myService', ['$http', '$q',
            function($http: angular.IHttpService,
                        $q: angular.IQService) {
            return {
                methodThatReturnsDeferred: function() {
                    var deferred = $q.defer();
                    $http.post('/', "samplepost").success(
                        function(response) {
                            deferred.resolve("Initialized");
                        });
                        return deferred.promise;
                }
            }
        }])
        window.myApp = myApp;
})();
Note that I'm making full use of TypeScript in Listing 11. TypeScript helped me define the structure of the application and therefore define the structure of the tests. Once the tests are written, I can easily leverage the same interfaces and classes to write rest of the application.
The last thing to do now is to make sure that the tests run, and that Visual Studio Code gives a convenient shortcut key to run the tests. On Macs, press SHIFT_COMMAND_T, and on Windows, press CTRL_SHIFT_T to run the tests.
You might note that a Chrome browser window pops open and the output window shows the test's output, as shown in Figure 4.

Also note that as you modify the .ts file or the tests.js file, the tests continue to run automatically. You can, of course, turn this behavior off by editing the karma.conf.js file. But now you have the basic harness ready to test your code very easily as the developers make changes to it. This can be very easily integrated into continuous test integration suites, such as karma.
Summary
Writing good JavaScript is hard, and requires a lot of self discipline. In this article and the previous two articles, I tried to demonstrate the most common mistakes that JavaScript developers make, and how to avoid them. I recommended using TypeScript in my previous article, and in this article, I showed how I use tests and TDD, along with TypeScript. Yes, you may argue that going through that route for the simple application I showed in this article was a bit of an overkill and it most certainly was! But the real benefits start showing up when the application gets more complex, more interconnected, and most of all, developed by more than one set of hands.
I hope you found these articles helpful. Until the next article, happy coding.
