


Unless you've been living under a rock, you've probably heard about Windows Phone 7. What you may not know is that there are two ways of developing applications and games for this device. Silverlight and XNA are your two choices and in this article, I cover the Games and XNA side of the house.
If you are brand new to game development, XNA or mobile device development, don't worry. This article will get you started and productive in no time.
Where Do I Get It?
The first step in getting started with XNA for Windows Phone development is to visit the developer site at http://developer.windowsphone.com and click the “Get the free tools” link.
Running the web installer puts a number of things on your system, including:
- Microsoft XNA Game Studio 4.0
- Microsoft XNA Game Studio 4.0 Windows Phone Extensions
- Microsoft XNA Framework Redistributable 4.0
- Windows Phone Emulator
- Windows Phone 7 Add-in for Visual Studio 2010
- Microsoft Windows Phone 7 Developer Resources
You also get Expression 4.0 and Silverlight 4.0, though those are not relevant to this article.
How Do I Use It?
If you've spent any time with previous versions of XNA up to this point, you're in luck. There isn't much difference between XNA 3.1 and XNA 4.0 other than the new stuff added for phone-specific projects.
Hopefully you grabbed the installer and ran it by now, so I'll just jump right in to your first project.
If you didn't already have Visual Studio 2010 installed, you do now. The web installer puts the Visual Studio 2010 Express Edition for Windows Phone on your system for you.
Once you have Visual Studio 2010 open (you can use ANY version of Visual Studio 2010 you like) go ahead and select XNA Game Studio 4.0 in the Installed Templates section and then select Windows Phone Game (4.0) as your project type, as seen in Figure 1.

Go ahead and leave the name alone and create your project.
Once your project has been created, the first thing you will see is the Game1.cs class. This is the meat of your game and where all the interesting things happen.
Regardless of what platform you are developing for (Windows, Xbox or Windows Phone) you will use the same basic concepts.
XNA Games follow a very simple pattern, as seen in Figure 2.
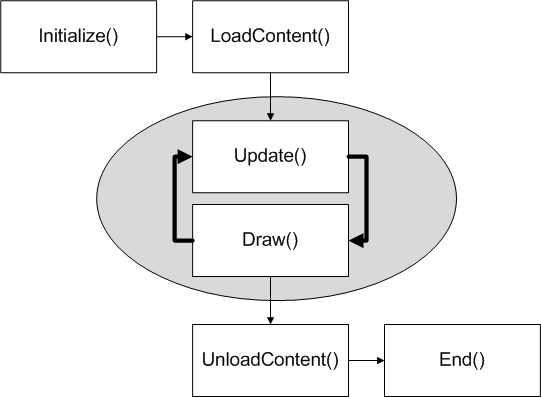
As you can see, there isn't a lot to it.
The Initialize() and LoadContent() methods are only called once per game and are used to query for any required services, load up content, etc.
Once you are in your game loop, you have two very important methods: Update() and Draw().
The Update() method is used to query for any player input along with processing any “world logic” like collision detection, artificial intelligence, weather, etc. Playing audio is also handled in this method.
The Draw() method is used to draw all the onscreen game objects, using the positional or other data that was manipulated in the Update() method.
Each pass through the game loop is called a frame. XNA games on Windows and Xbox 360 target 60 frames per second (fps), and Windows Phone games run at 30 fps.
If you take a look at the last line of the Game1() constructor, you will see this line:
TargetElapsedTime = TimeSpan.FromTicks(3333333);
This is what tells XNA to run your phone game at 30 frames per second (a tick is roughly 100 nanoseconds or one ten-millionth of a second.)
While you can adjust the value to make your game run slower, you can't just tweak it up to make your game run faster, so let's just leave it alone for now.
If you scan the rest of the Game1 class, you can see there isn't really anything else different from the previous template.
Take It for a Spin…
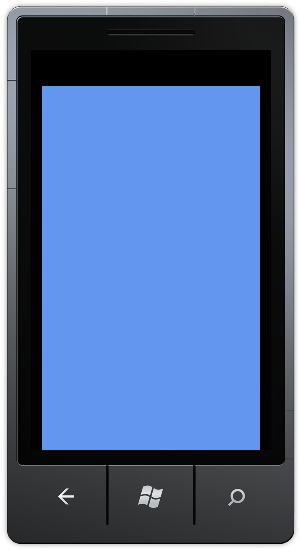
At this point, go ahead and run your game by hitting F5. This will do a quick build and will also launch the Windows Phone Emulator. After a few seconds, you should be looking at a nice cornflower blue screen in the emulator.
It doesn't do much, but that's ok. Click on the Back Button on the emulator to dismiss the game. Don't close the emulator though. You'll want to keep it running.
What's New in the Framework?
With Windows Phone 7 comes a lot of new functionality that traditional Windows developers (and even many existing XNA developers) haven't been exposed to, such as dealing with device orientation, the accelerometer sensor and multi-touch gesture input.
I will cover each of those in the following samples.
Device Orientation
Since you already have a project open, let's make it do something interesting. To get started, you will need to add a SpriteFont to the WindowsPhoneGame1Content project.
You do this by right-clicking on the name of the content project and selecting “Add”, “New Item” from the menu that pops up.
Next, select the SpriteFont and accept the default name. This adds the SpriteFont to your content project.
The SpriteFont will open by default when you add it, so take a quick look at it. As you can see, it's all XML. When you build your project, this file gets read and the font it points to (in this case it's “Segoe UI Mono”) will be converted into a spritesheet with an image for every character in the font, at the size you specified. This gets used later by your XNA game when you want to write text on screen. More on that in a bit.
For now, set the Size property to something a little more readable:
<Size>20</Size>
Now, save and close your SpriteFont file and go back to the Game1 class file. At the top of your Game1 class, just before the constructor, add the following class level variable:
SpriteFont font;
Next, go into the LoadContent() method and add this line, just after the TODO comment:
font = Content.Load<SpriteFont>("SpriteFont1");
This will load the spritesheet that was created at build time into memory so you can write on screen with it.
Finally, add this code to your Draw() method, just before the call to the base.Draw() method:
spriteBatch.Begin();
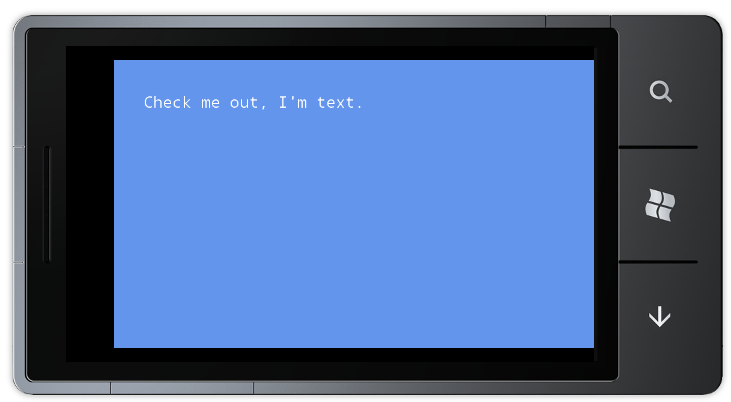
spriteBatch.DrawString(font,
"Check me out, I'm text!",
New Vector2(50, 50),
Color.White);
spriteBatch.End();
At this point, if you run your game again it should look like Figure 4.
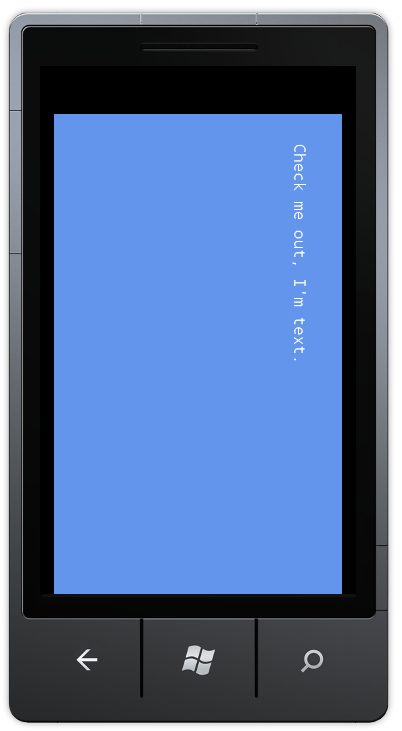
If you have a phone, rotate it in your hand to see all the different orientations. If you are using the phone emulator, click the rotation icons to the right of the emulator. With the phone (or emulator) in landscape orientation, it should look like Figure 5.
Still not terribly impressive, so add the following code to your Game1 class constructor:
graphics.SupportedOrientations =
    DisplayOrientation.Portrait |
    DisplayOrientation.LandscapeLeft |
    DisplayOrientation.LandscapeRight;
Now, build and run again. When you rotate your phone (or emulator) you will see the text is displayed properly regardless of phone orientation.
This may not seem like a big deal, but whenever your phone physically changes orientation, the GameWindow.OrientationChanged event gets raised and if you included the new orientation in the SupportedOrientations property then the graphics device is reset to support the new orientation.
Any time you need to check your current orientation, examining the CurrentOrientation property of the GameWindow class will return a value from the DisplayOrientation enumeration.
The GameWindow class is exposed as Window in your XNA game, so the code to check the CurrentOrientation property in your game would look something like the snippet below:
if (Window.CurrentOrientation ==
    DisplayOrientation.Portrait)
    { // do stuff }
As you can see, this has huge implications. Depending on the nature of the game (or app) you are building, the ability to rotate the phone to automatically get a different perspective could be very useful.
Accelerometer Sensor
Along with the ability to detect device orientation from a landscape or portrait perspective, there is also a built-in accelerometer sensor that can detect more precise movement and positioning.
To use this sensor, you will first need to add a project reference to the Microsoft.Devices.Sensors namespace.
With that out of the way, at the top of your Game1 class file, add the following using statement:
Using Microsoft.Devices.Sensors;
This will give you access to the Accelerometer classes, so go ahead and add the following class level variable:
Accelerometer accelerometer;
The Accelerometer exposes X, Y and Z properties that store acceleration for those directions. Add the following class level variables to hold these values:
double X;
double Y;
double Z;
You'll need to instantiate the Accelerometer class, so add this line to the Initialize() method of your Game1 class:
accelerometer = new Accelerometer();
At this point, you have an accelerometer object in memory, but it's not enough to do anything with it yet. You need to set up an event handler for the ReadingChanged event.
You will do this in the Initialize() method as well, right after the code you just added to instantiate the Accelerometer class:
accelerometer.ReadingChanged +=
   new EventHandler<AccelerometerReadingEventArgs>
      (AccelerometerReadingChanged);
With the event handler defined, Visual Studio should be showing you an error saying the AccelerometerReadingChanged() method doesn't exist yet. That's ok, because you are going to create it now. Add the following method to your Game1 class.
void AccelerometerReadingChanged(object sender, AccelerometerReadingEventArgs e)
{
    Deployment.Current.Dispatcher
        .BeginInvoke(() => NewReading(e));
}
The AccelerometerReadingChanged() method is called whenever the accelerometer sensor has new data. The event handler is called from a different thread than your main game thread, so you must use the Dispatcher class to invoke the NewReading() method in the game's main thread, passing in AccelerometerReadingEventArgs as a parameter.
Right now, Visual Studio doesn't know where to find the Deployment namespace, but that's an easy fix.
Add a reference to the System.Windows namespace.
Now add the following statement at the top of your Game1 class:
using System.Windows;
You still have an error at this point, since Visual Studio doesn't know what/where the NewReading() method is. Go ahead and add it next.
void NewReading(AccelerometerReadingEventArgs e)
{
    X = e.X;
    Y = e.Y;
    Z = e.Z;
}
In this method, you are taking the values returned and putting them in the variables you created earlier. You will write those values on screen shortly.
Most of the plumbing is out of the way at this point, so it's time to add some code to actually start and stop the accelerometer and display the returned values.
Modify the Initialize() method to include the following line:
accelerometer.Start();
For purposes of demonstrating the accelerometer, and how to acquire readings from it, you are doing something here you wouldn't normally do in your games. To minimize battery usage and maximize performance, only turn the accelerometer on during the part of the game when you specifically need to get readings, such as during the main game screen and leave it off otherwise.
Add the following line to your UnloadContent() method:
accelerometer.Stop();
The only thing left at this point is to display the coordinates on screen, so modify your Draw() method by adding the following lines of code just after the first spriteBatch.DrawString() call:
spriteBatch.DrawString(font,
                       "X: " + X.ToString("0.00"),
                       new Vector2(50, 75),
                       Color.White);

spriteBatch.DrawString(font,
                       "Y: " + Y.ToString("0.00"),
                       new Vector2(50, 100),
                       Color.White);

spriteBatch.DrawString(font,
                       "Z: " + Z.ToString("0.00"),
                       new Vector2(50, 125),
                       Color.White);
That's all there is to capturing data from the built in accelerometer. Go ahead and fire it up and wave your phone around and watch the values on the accelerometer change.
Multi-touch Gestures
XNA provides a set of common gestures which you can program against in your game. Where a simple touch often represents a selection or click event, gestures can represent more complex actions and are modeled after natural human movements.
The various gestures included in XNA can be found in the GestureType enumeration. In this section you will learn about the available gestures and how they are implemented in XNA.
Keeping the same project open, in your Game1 class, add these variables at the class level:
string message = "Do Something";
Vector2 messagePos = Vector2.Zero;
Color color = Color.Black;
These three lines will make more sense shortly once you get into the gesture handling code, so don't worry about them too much right now. You will be using them to display messages based on the gesture you perform.
Now it's time to add the list of enabled gestures. You are required to tell the TouchPanel what gestures your game will be using since none are enabled by default. Add this block of code to the Initialize() method, just before the base.Initialize() line:
TouchPanel.EnabledGestures = GestureType.Tap
               | GestureType.DoubleTap
               | GestureType.Hold
               | GestureType.HorizontalDrag
               | GestureType.VerticalDrag
               | GestureType.FreeDrag
               | GestureType.DragComplete
               | GestureType.Pinch
               | GestureType.PinchComplete
               | GestureType.Flick;
Before executing code to respond to specific gestures, you need to check to see if any touch gestures are actually available. Add the following block of code to the Update() method in your Game class. Make sure you put it before the base.Update() call.
if (TouchPanel.IsGestureAvailable)
{
    GestureSample gesture =
        TouchPanel.ReadGesture();
}
This may seem like an odd thing to check, since you aren't actually passing in a gesture, but this actually queries the TouchPanel and sets a property internally that indicates it is ready to read gestures. Without this check, any attempt to read gestures will throw an InvalidOperation exception and your game will fail to run.
Inside the if block, you read the TouchPanel and returned a populated GestureSample struct that contains data from a multi-touch gesture over a span of time.
It's worth noting that even though Windows Phone 7 supports a minimum of four simultaneous touch points, the included gestures system doesn't use or support more than two touch points at this time.
Immediately below the line that reads the TouchPanel, add the following switch statement to handle each of the returned gesture types.
switch (gesture.GestureType)
{

}
Tap
This is the most basic of the touch gestures and consists of a brief single touch on the screen. This is the equivalent of a click action in Windows.
To support the tap gesture, add the following block of code inside the switch statement:
case GestureType.Tap:
    message = "That was a Tap";
    color = Color.Red;
    break;
DoubleTap
To trigger this gesture, the user must tap the screen twice in quick succession. The DoubleTap gesture is always preceded by a Tap gesture at the same location. If the TimeSpan value between Taps is too long, the DoubleTap gesture will not be detected and a second Tap sample will be returned instead.
case GestureType.DoubleTap:
    message = "That was a Double Tap";
    color = Color.Orange;
    break;
Hold
This works similar to the single tap, except you touch the screen for approximately one second before releasing or moving your finger.
In a game, this gesture might be used to provide a context menu on a specific unit, as opposed to the tap gesture which would be used to select the unit. To support the hold gesture, add the following code block inside the switch block.
case GestureType.Hold:
    message = "That was a Hold";
    color = Color.Yellow;
    break;
HorizontalDrag
This gesture is a lot like the Tap gesture, except that you do not release your finger before moving it horizontally (left to right or right to left.)
Add the following code to support the HorizontalDrag gesture.
case GestureType.HorizontalDrag:
    message = "That was a Horizontal Drag";
    color = Color.Blue;
    break;
VerticalDrag
The VerticalDrag gesture performs in much the same way as the HorizontalDrag gesture, only using a vertical (top to bottom or bottom to top) motion.
Add this block of code to support the VerticalDrag gesture.
case GestureType.VerticalDrag:
    message = "That was a Vertical Drag";
    color = Color.Indigo;
    break;
In touch-enabled games, drag gestures are often used for moving units from one place to another, performing sliding adjustments, drawing lines and more.
FreeDrag
The FreeDrag gesture is performed by touching the screen and moving your finger in a free-form manner (such as drawing a circle.)
Add this block of code to support the FreeDrag gesture.
case GestureType.FreeDrag:
    message = "That was a Free Drag";
    color = Color.Green;
    break;
When coding support for the FreeDrag gesture in your game, consider carefully how you will use it and whether to also support the HorizontalDrag and VerticalDrag gestures. If the primary purpose is to allow drawing in your game, you can likely get by with only supporting the FreeDrag gesture.
DragComplete
Working in compliment to the three drag-based gestures, the DragComplete gesture is returned when any of the drag gestures are completed (by releasing the TouchLocation.) This GestureType is included solely to indicate completion of the drag gesture. No other position or delta data is provided for this sample type.
To receive notification of when any of the drag-based gestures have completed, add this block of code to the switch statement.
case GestureType.DragComplete:
    message = "Drag gesture complete";
    color = Color.Gold;
    break;
Flick
The Flick gesture is performed by touching the screen and making a quick swipe in any direction. There is no positional data returned from a Flick gesture, potentially making it of limited use for games, but you could use it to move the camera of your game, perhaps panning around on a large world map. Other uses include scrolling text up and down.
You can retrieve the velocity by reading the Delta property of the returned GestureSample and apply this as force to your calculations.
Add the following block of code to provide support for the Flick gesture.
case GestureType.Flick:
    message = "That was a Flick";
    color = Color.Violet;
    break;
Pinch
All of the gestures covered so far are single finger gestures, but the Pinch gesture requires two fingers both touching the screen and then moving toward or away from each other. Pinch is treated like a two finger drag internally and takes precedence over drag-based gestures while two fingers are down.
The Pinch gesture is typically used to zoom in or out and is accomplished by touching the screen with two fingers and sliding them apart to zoom in or bringing them together to zoom out. First person 3D games can use this gesture to alter the perspective of the player by moving the camera forward or backward in relation to the character. Other uses might be to zoom in to specific parts of a game board, especially in a tile placing game like Mahjongg or Scrabble.
To add support for the Pinch gesture, add the following block of code inside your switch statement:
case GestureType.Pinch:
    message = "That was a Pinch";
    color = Color.YellowGreen;
    break;
Unfortunately, if you don't have a Windows Phone 7 device or multi-touch capable development machine, you won't be able to test the Pinch gesture in this demo.
PinchComplete
Much like the drag-based gestures and their complimentary DragComplete gesture, Pinch has a similar gesture. The PinchComplete gesture does not return any position or delta data and is used only to signal completion of the Pinch gesture, regardless of the direction of the pinch.
case GestureType.PinchComplete:
    message = "Pinch gesture complete";
    color = Color.Silver;
    break;
This marks the end of the XNA provided gestures, and you have added them all to the sample, so now it's time to add the code that will enable you to see the results of your actions.
Add the following line of code inside the if statement, just after the closing bracket of the switch statement:
messagePos = gessture.Position;
The messagePos variable is used to store the current position of the gesture which will be used when drawing a message onscreen.
To see this in action, go into the Draw() routine and add the following line of code just before the call to spriteBatch.End():
spriteBatch.DrawString(font,
                       message,
                       messagePos,
                       color);
You're done! Hit F5 to run the code and try performing the gestures you defined above.
If you are using the emulator instead of an actual device some gestures may be a little more difficult to perform than others, especially the Flick and Pinch gestures.
What Else Is There?
There are a lot more features that can't really be covered in the scope of this article, such as the Microsoft Push Notifications Service which allows your game to send notifications to a phone from a cloud service.
If you are interested in learning more about XNA 4.0 and Windows Phone Development, I encourage you to visit the App Hub at http://create.msdn.com.
